

During the lockdown of the COVID-19 virus outbreak, I was working a lot from home. Specifically at the kitchen table. My posture at that table isn’t ideal for working so I decided to improve that by making a laptop stand.
Design
For my design, I started by looking online at wooden laptop stands. Just for inspiration and ideas. I didn’t want to buy one because I quickly found that making one is very easy. Here are some examples that looked interesting to me.
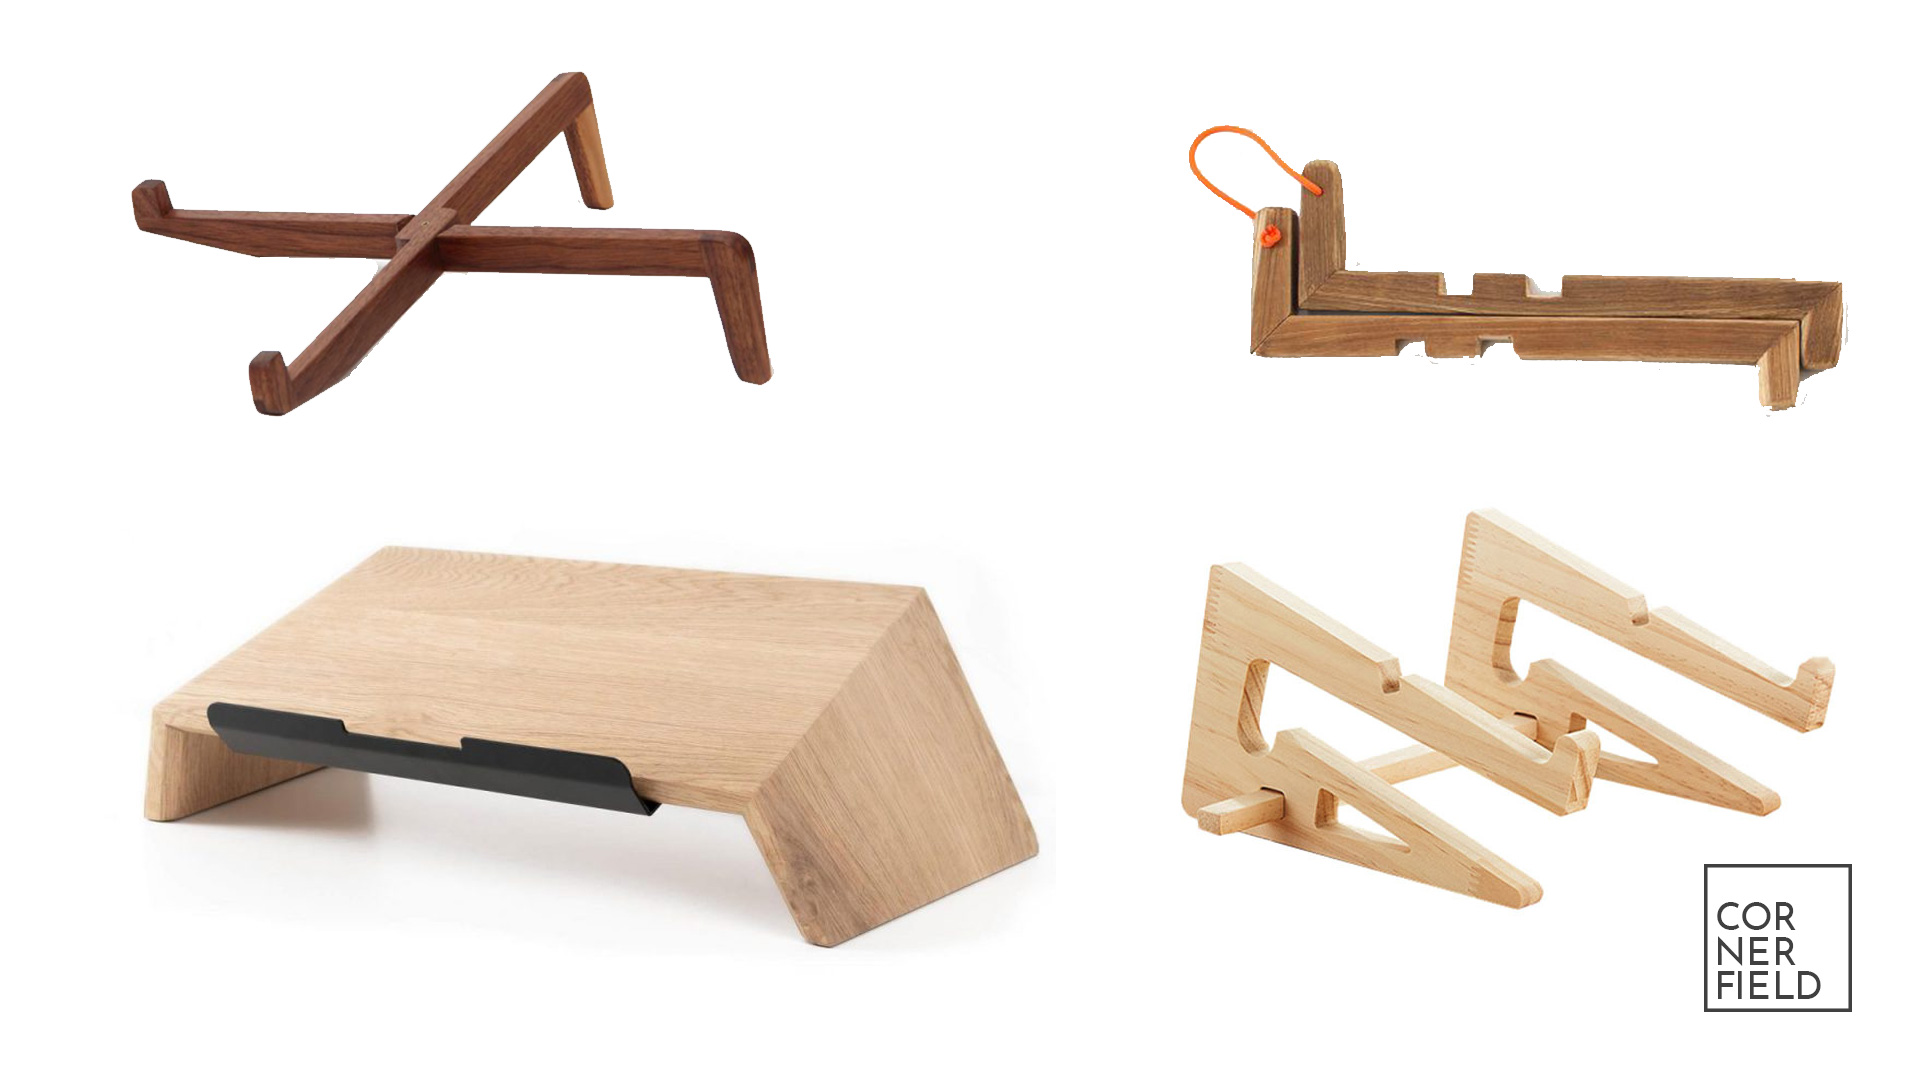
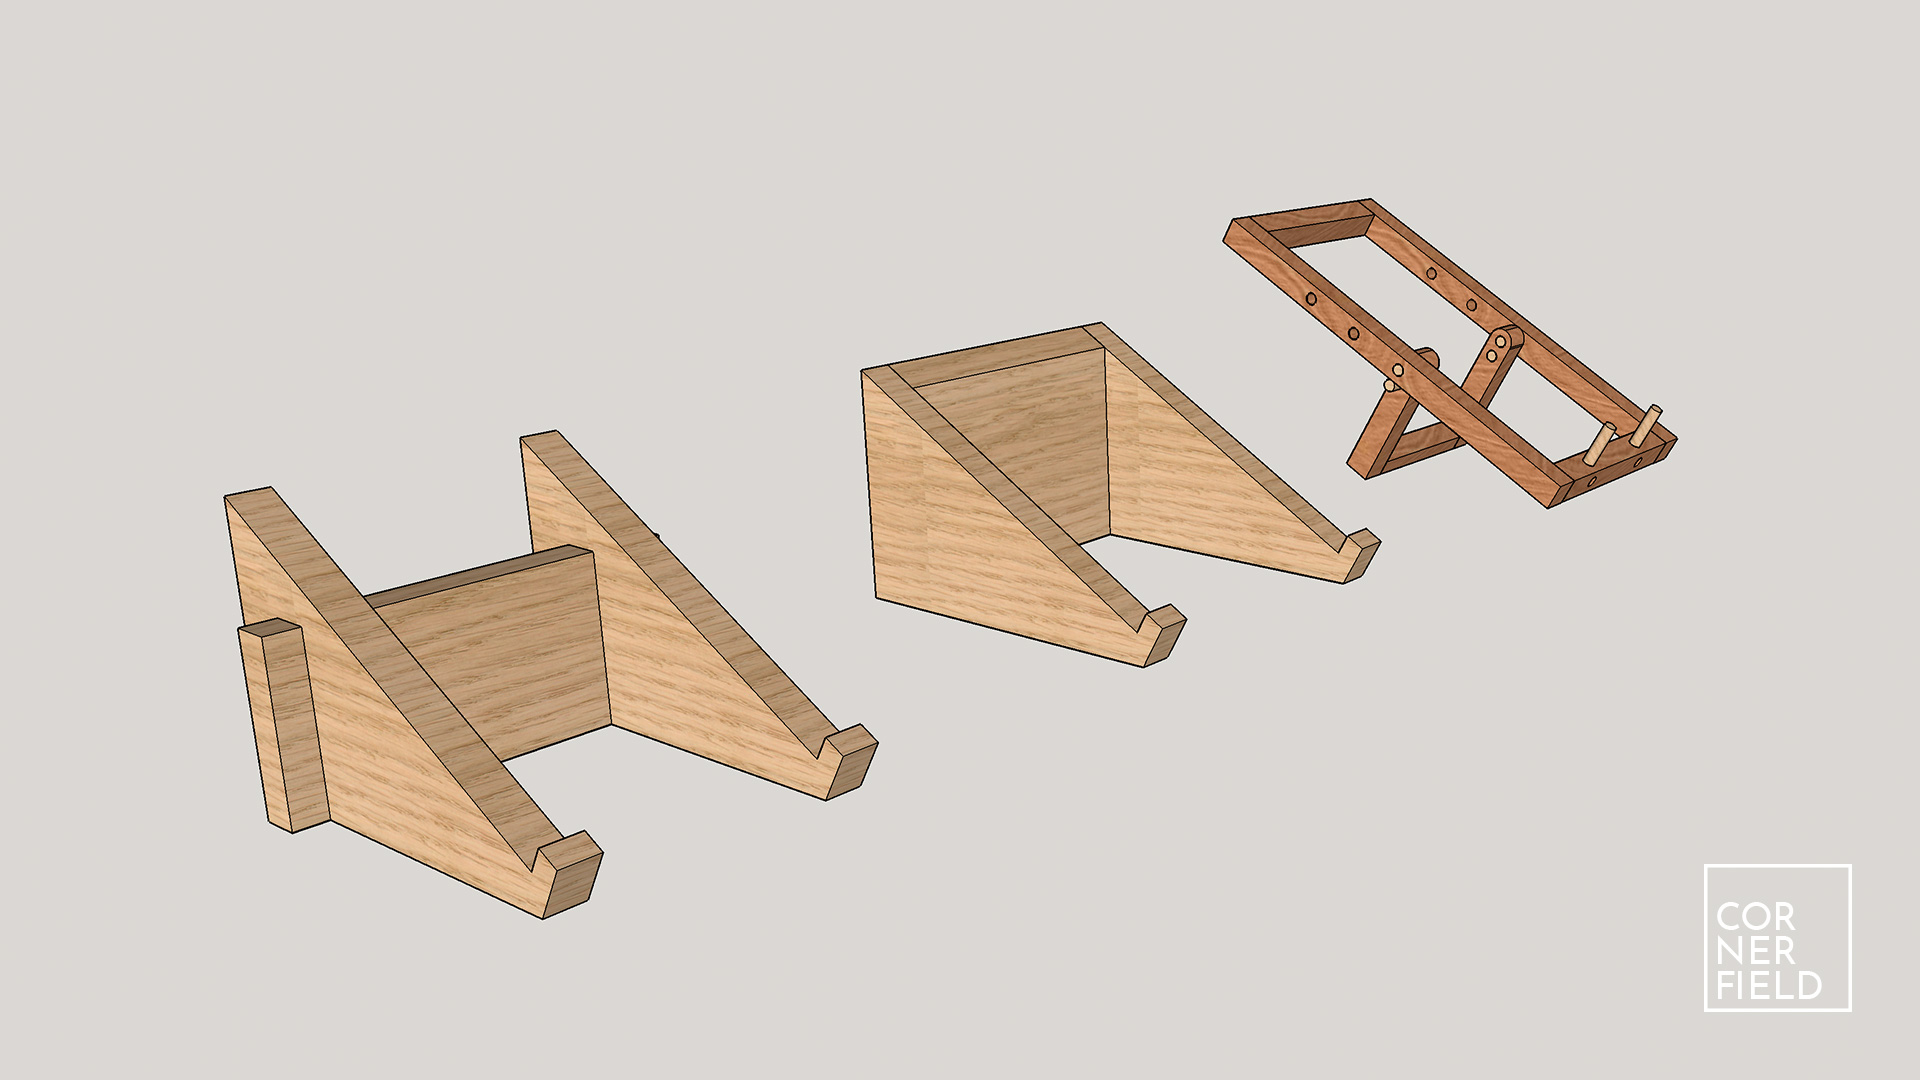
With those examples in mind, I started playing around with some scraps of wood. After making some prototype stands, I have 3 concepts I want to share. One is the fixed platform design, two is the platform that you can store and the third is a mobile version that is more versatile and portable.
Build
Since there are three different builds I’m splitting this up into three sections. Starting with the most simple one to the more complicated. Let’s get into it.
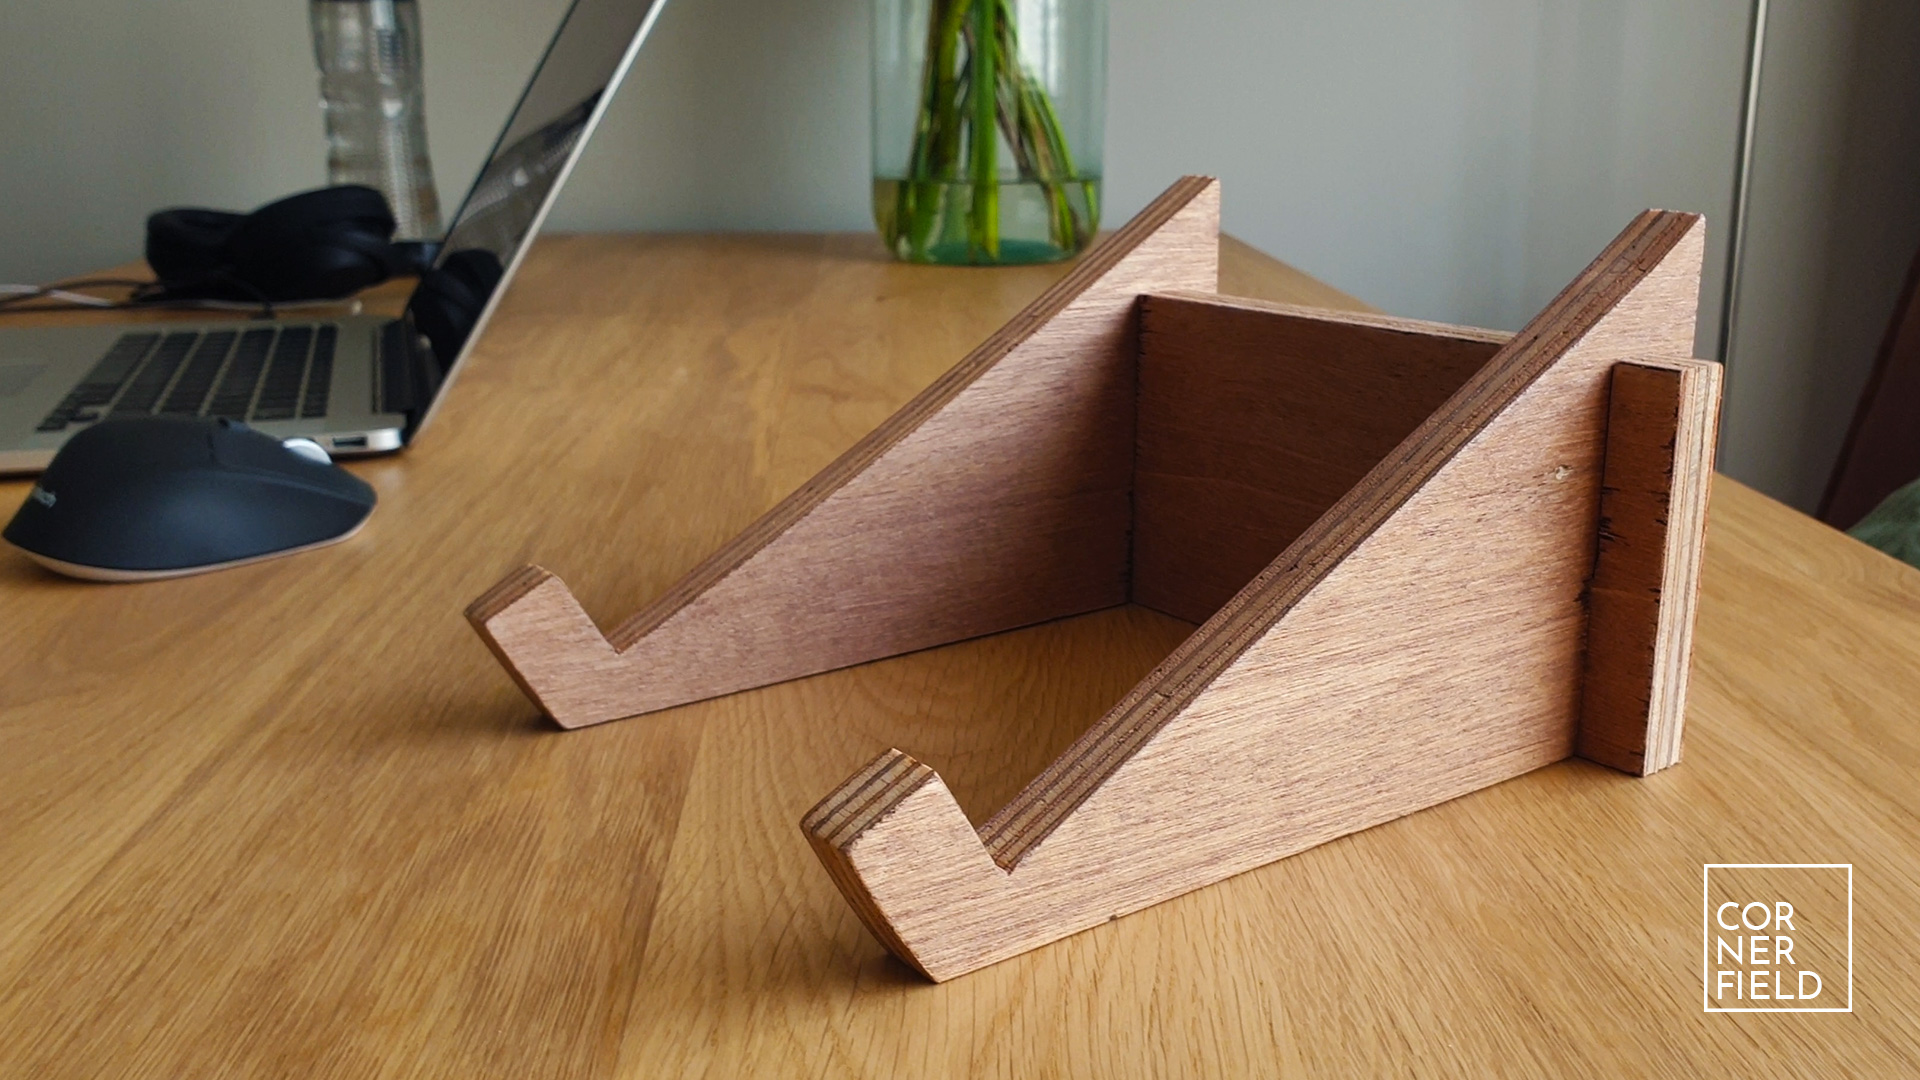
Fixed platform
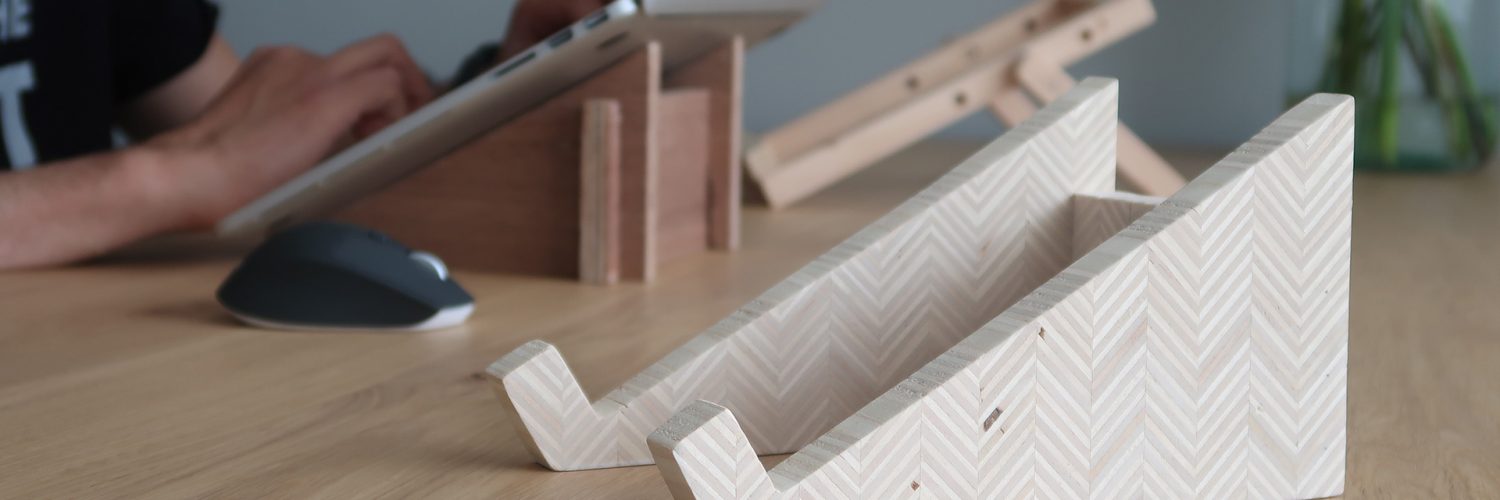
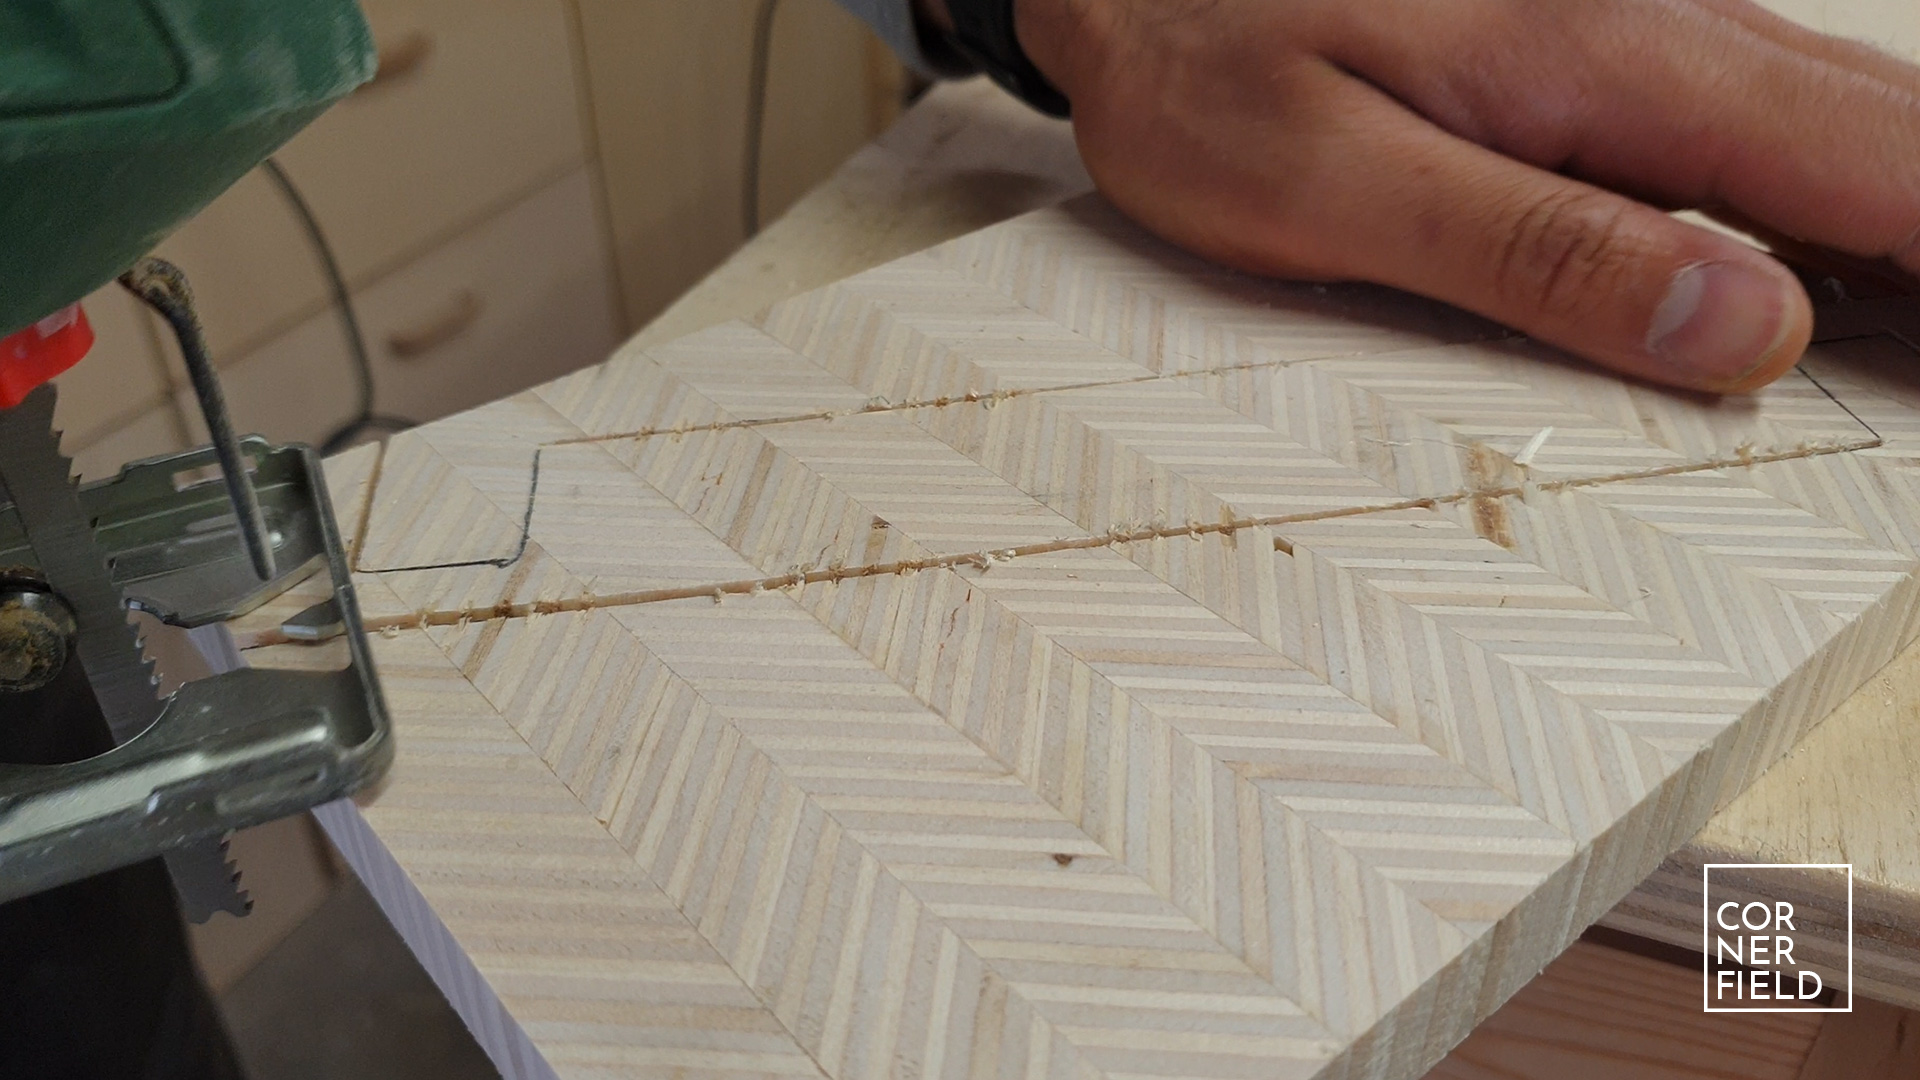
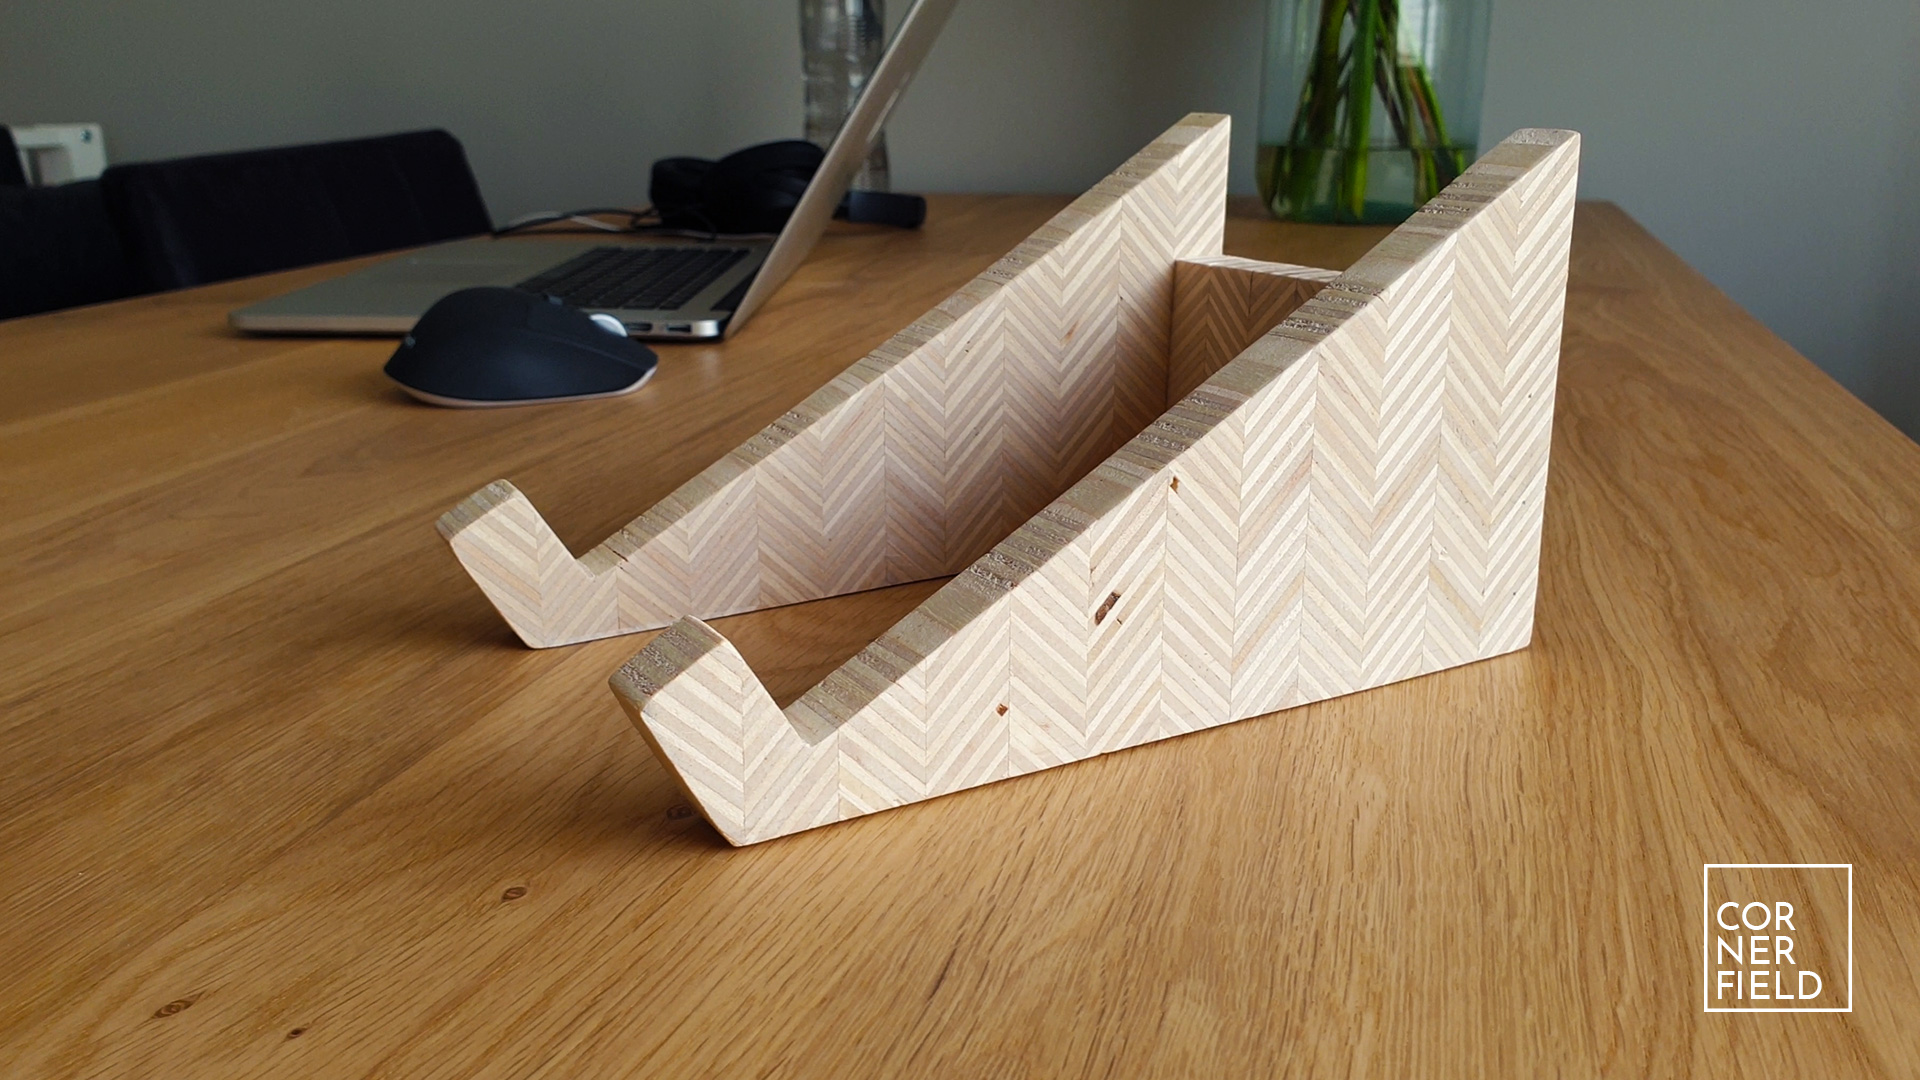
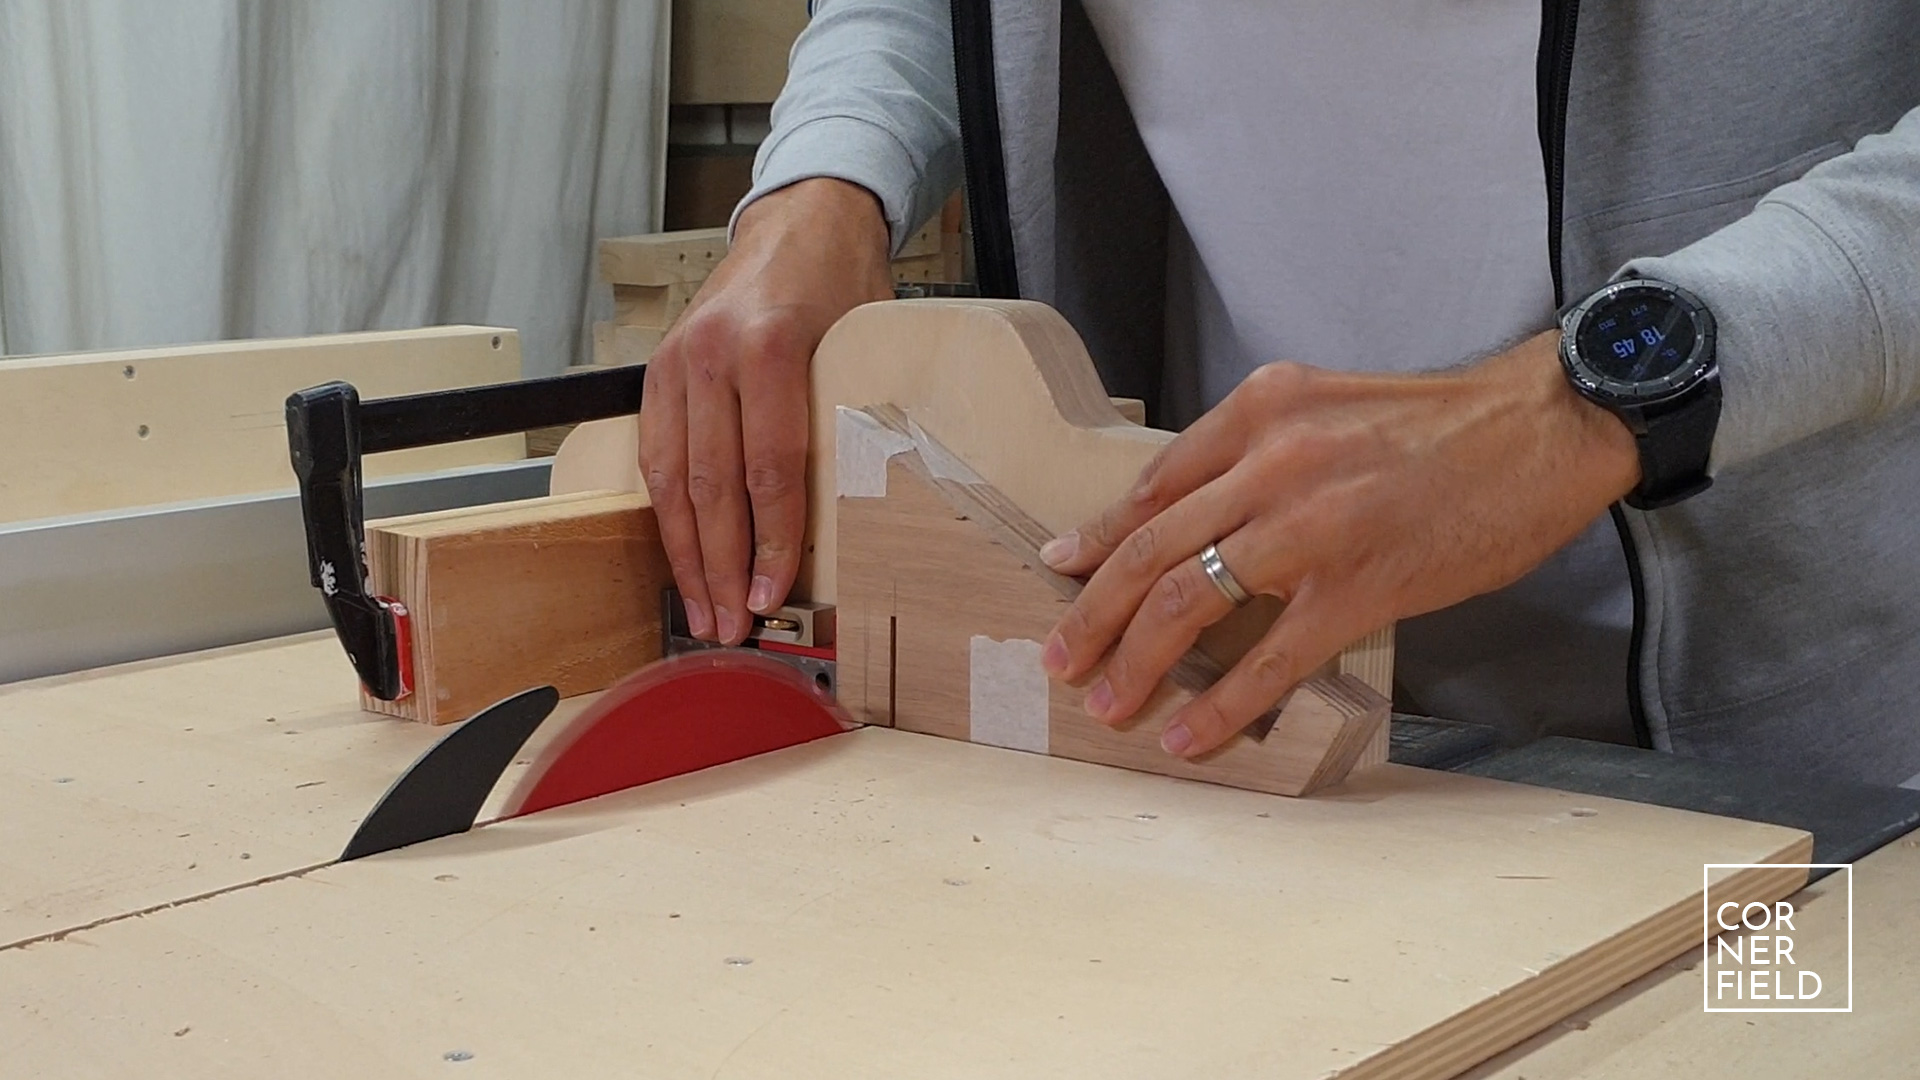
The first stand is the one that is fixed. You will need a board that is large enough to cut the two sides and back from. For the exact same design as mine, you will need a piece that is approximately 460mm by 250mm. The tools you need are a jigsaw, glue, clamps, sandpaper, and some finish. A table saw is great for accuracy but you can manage without. In my case, I first made some patterned plywood to use as my board. Simply because I think it looks cool and it’s fun to make.

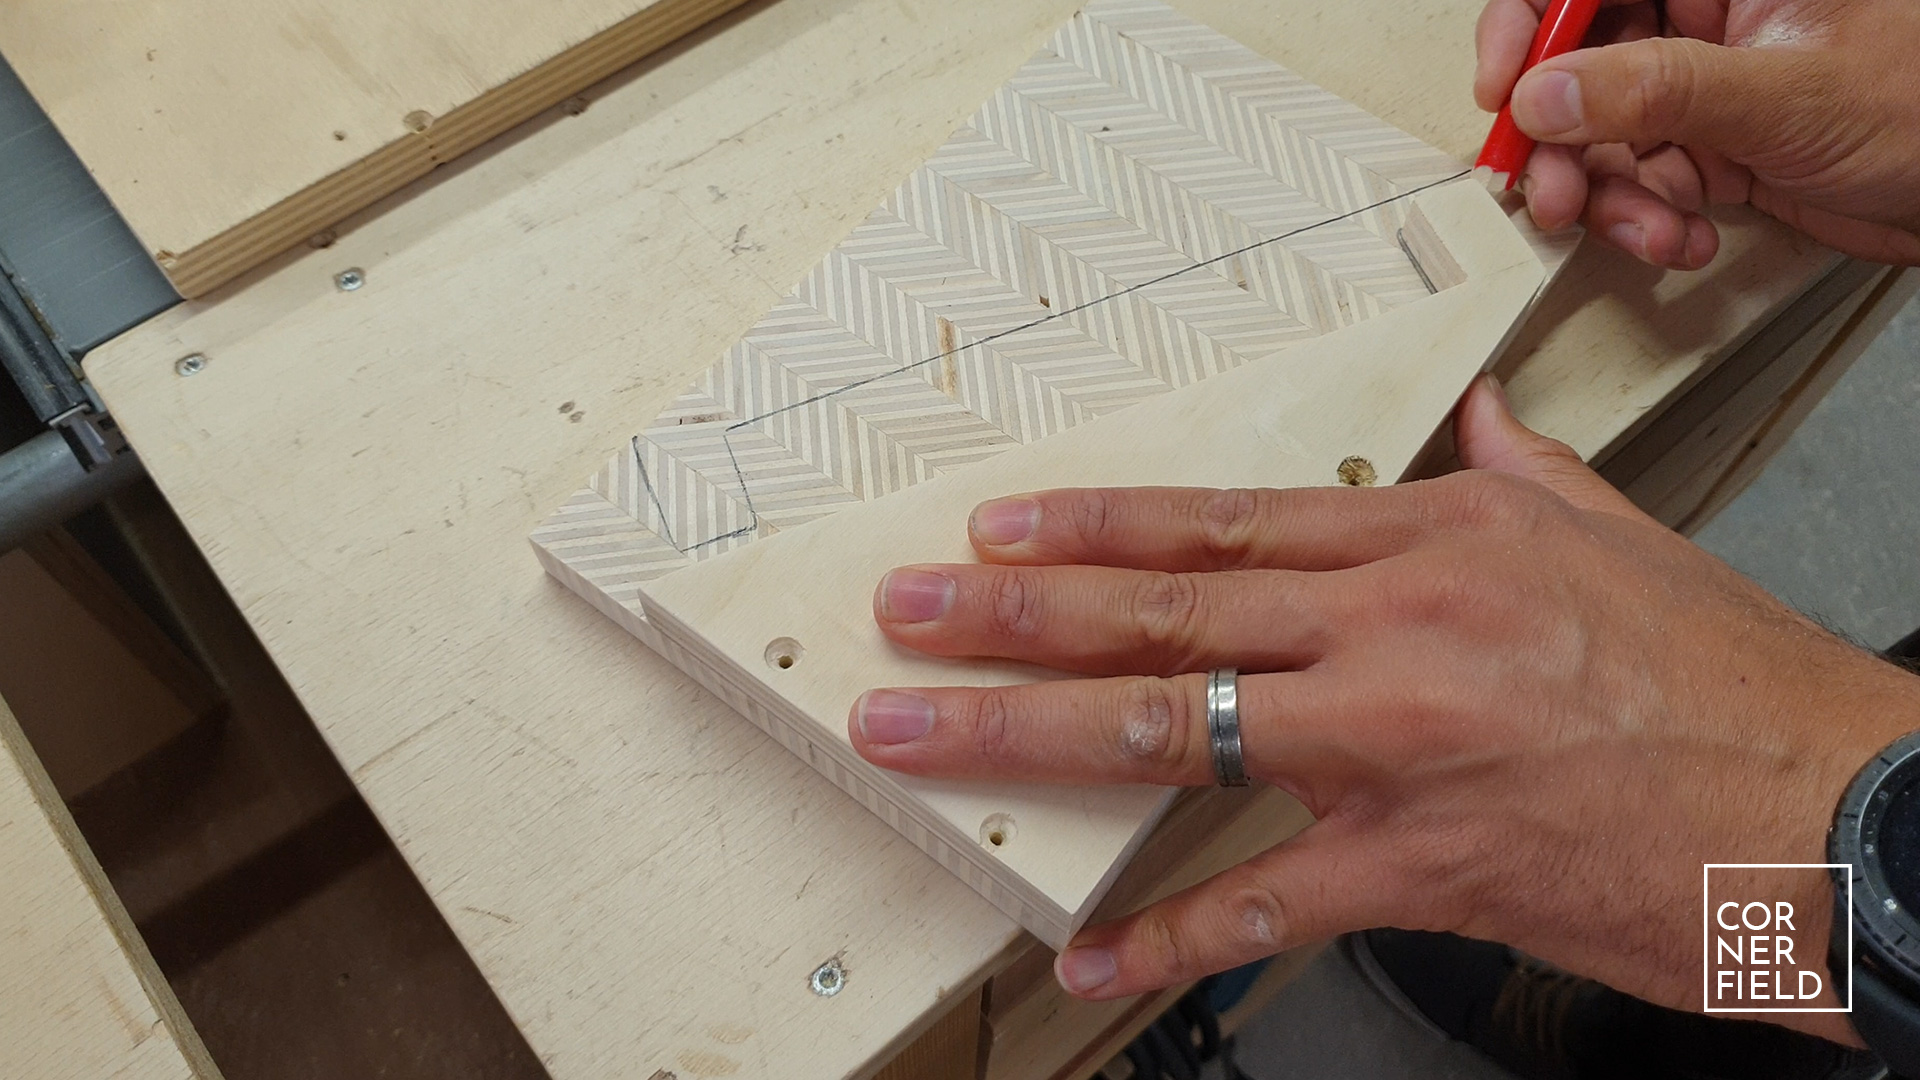
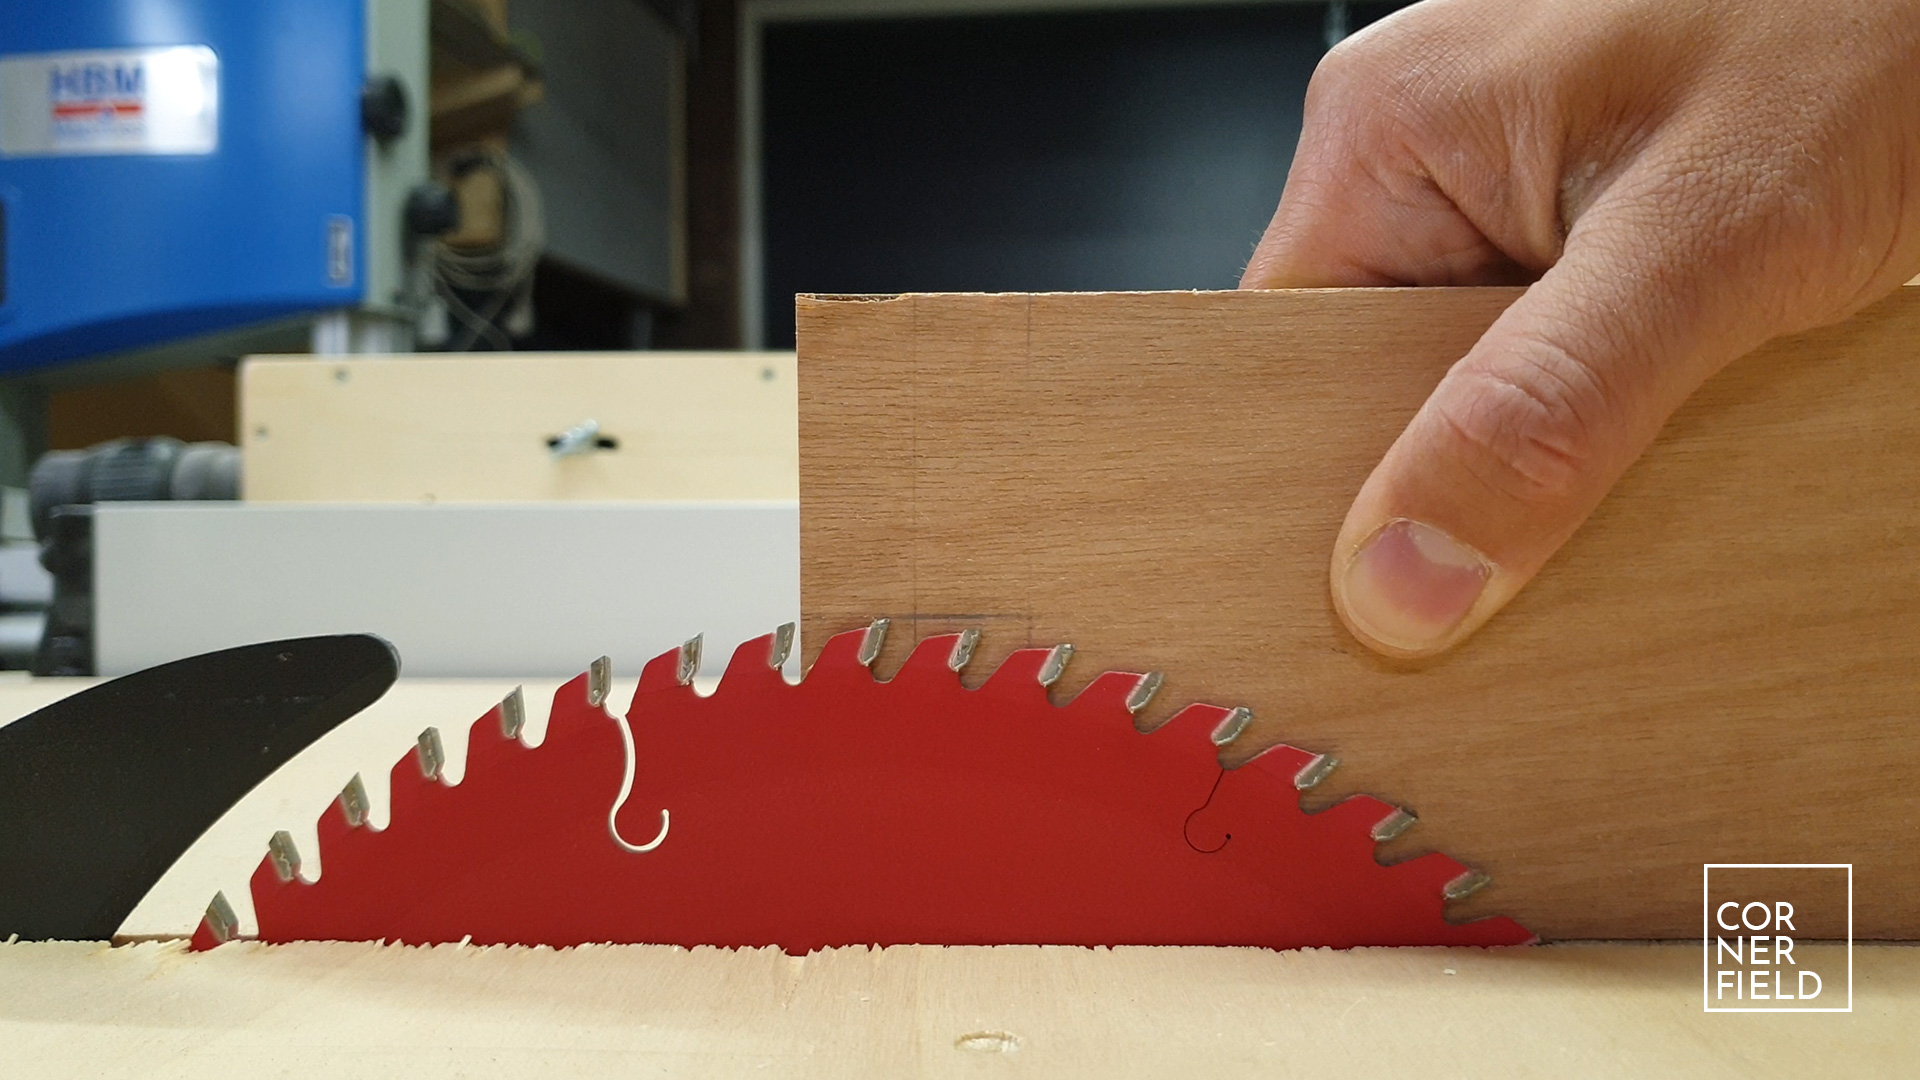
The first step is printing the shape and pasting it onto your board. I traced my prototype since this was already cut to the shape I wanted. Next, you use your jigsaw to cut out the shapes. Since a jigsaw isn’t very accurate we then tape the two pieces together and sand them simultaneously. This will make them end up the same size. With your sides now completed you can cut your back to size. Preferably on the table saw so it’s nice and straight. The width of this piece determines how far your sides are apart, so make sure to cut something that works with your laptop and needs.


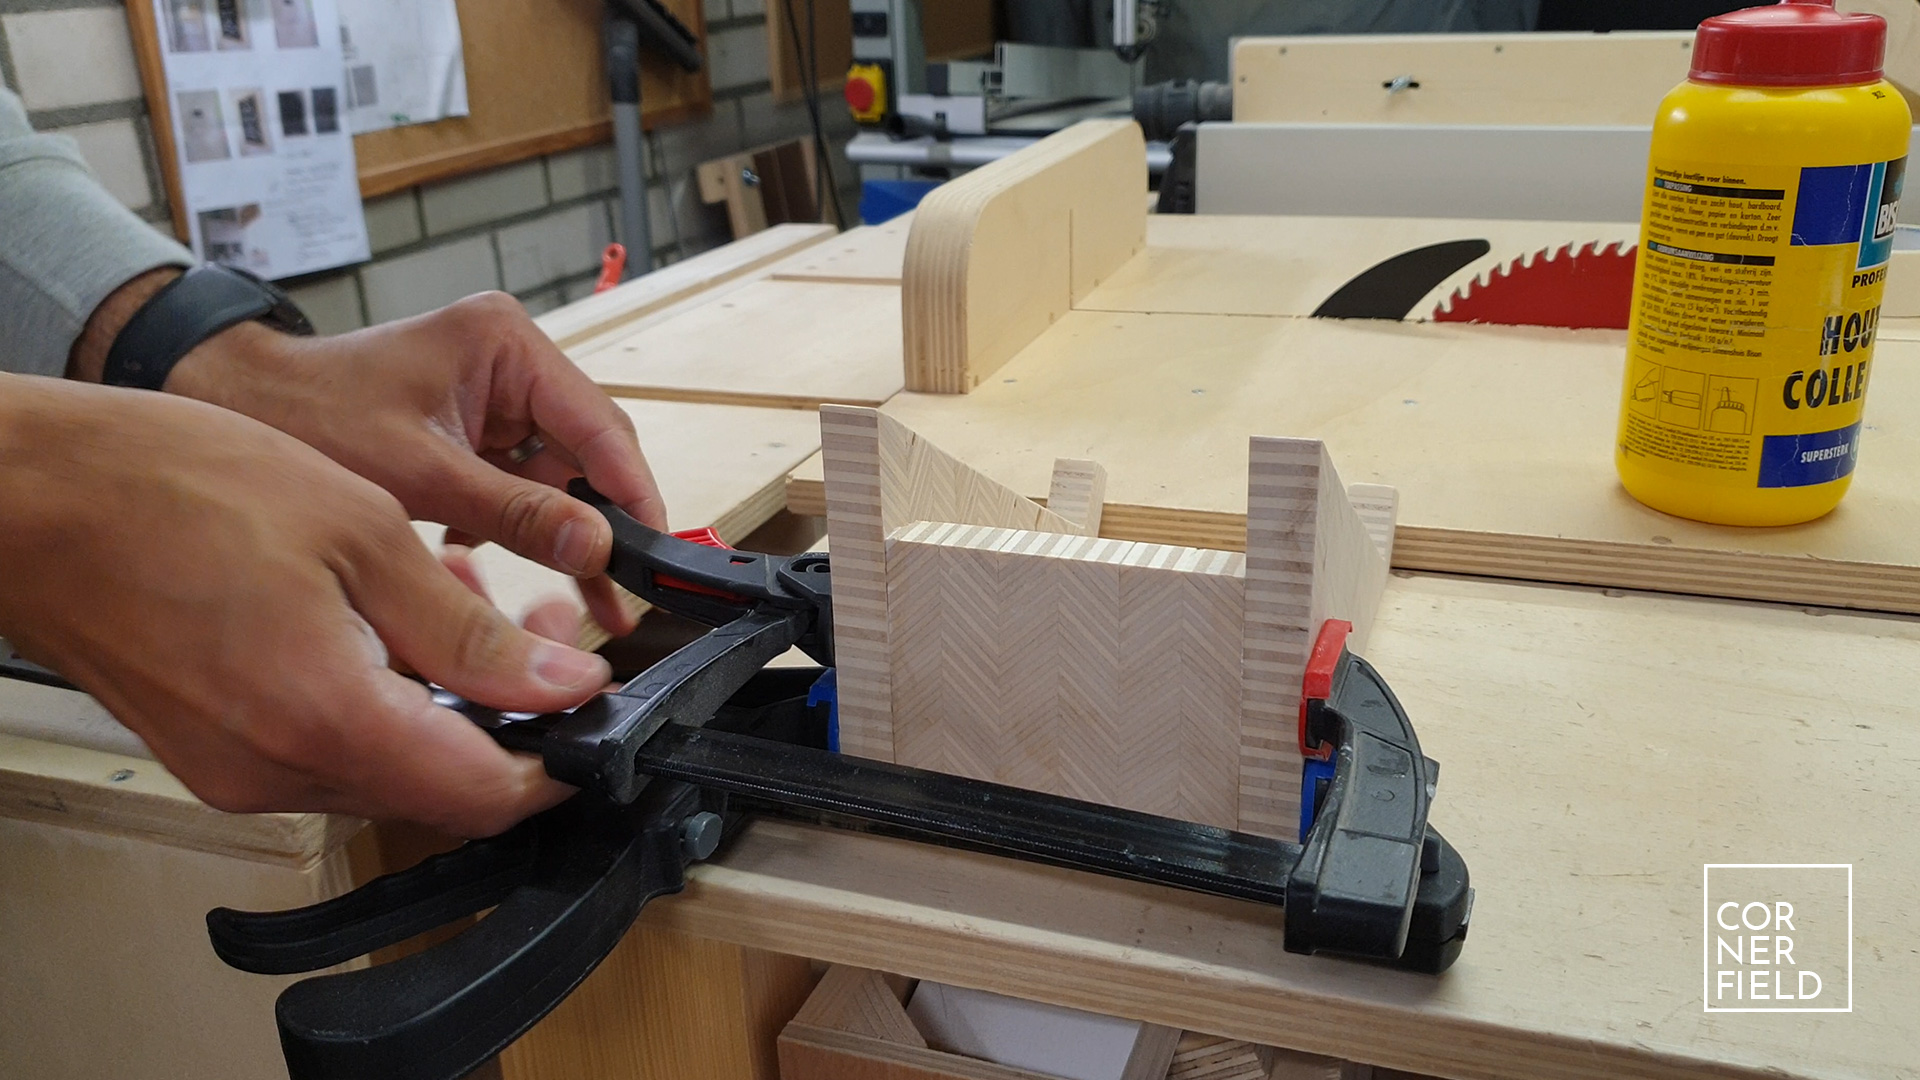
When your back is cut and sanded you can assemble the three pieces with glue and clamp everything together. Alternatively, you can use screws or any other joinery method. When the glue is dry it’s a matter of sanding and applying some finish. I have the exact shape available as a download in the Links & Download section below on both A4 and Letter.
Collapsable platform
The second laptop stand is very similar to the first. What’s different about it is the back and a few additional cuts. The piece you use for the back should be about 4 times the thickness of your wood wider. So in my case approximately 72mm, which I rounded off at 100mm to keep things simple. This extra width is used for cutting the slots into. To make these cuts you can use your jigsaw but if you’re not very careful chances are the slots will be too wide and the fit is loose. If you have one I would recommend using a table saw or band saw. In the end, the best tool is the one you have ;-).


I cut out the slots to about half the height of the back piece so when the pieces are assembled they feel nice and solid. To make the cuts precise I use my kerfmaker. It’s a tool used to make exact dados and grooves. If you look up ‘kerfmaker’ you can find out more on this tool. The specific tool I use is this. With the slots made you should be able to slide them into each other and have a completed stand. All it needs now a little sanding and finish.
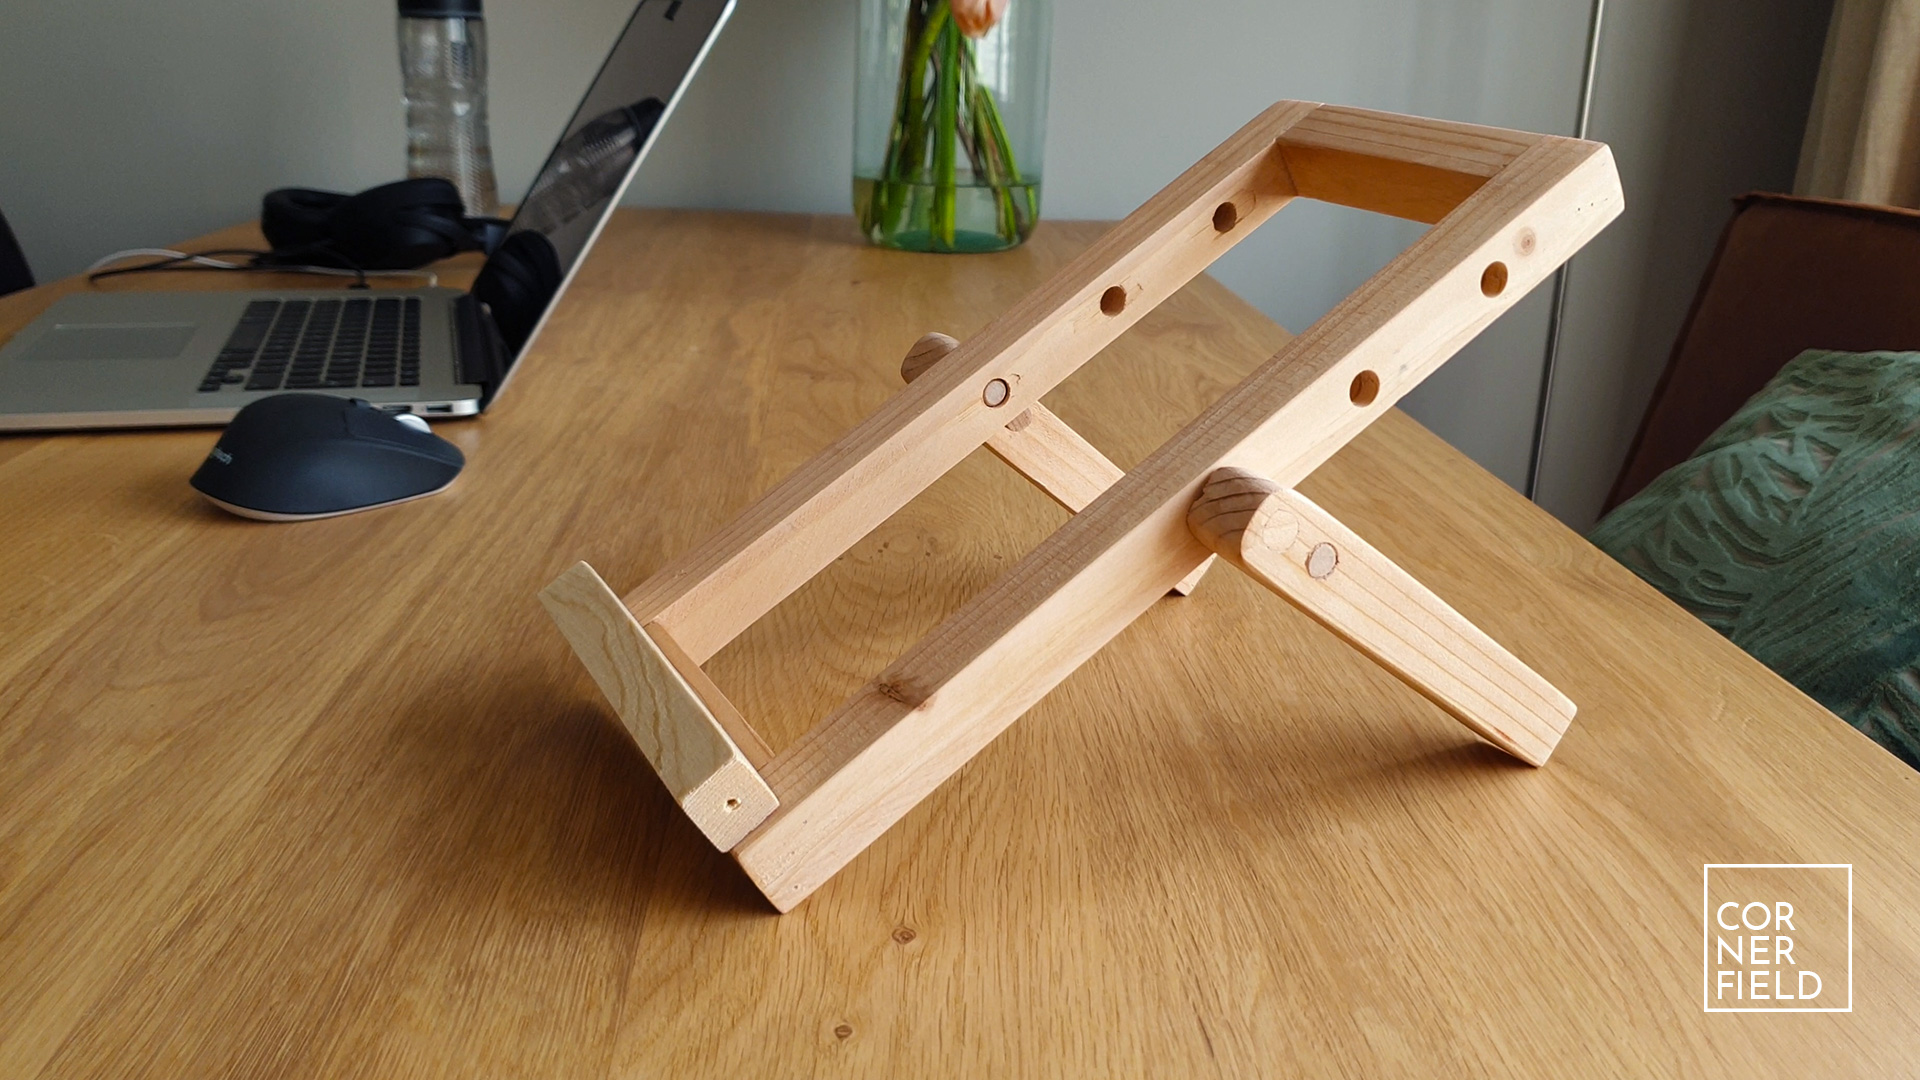
Foldable stand
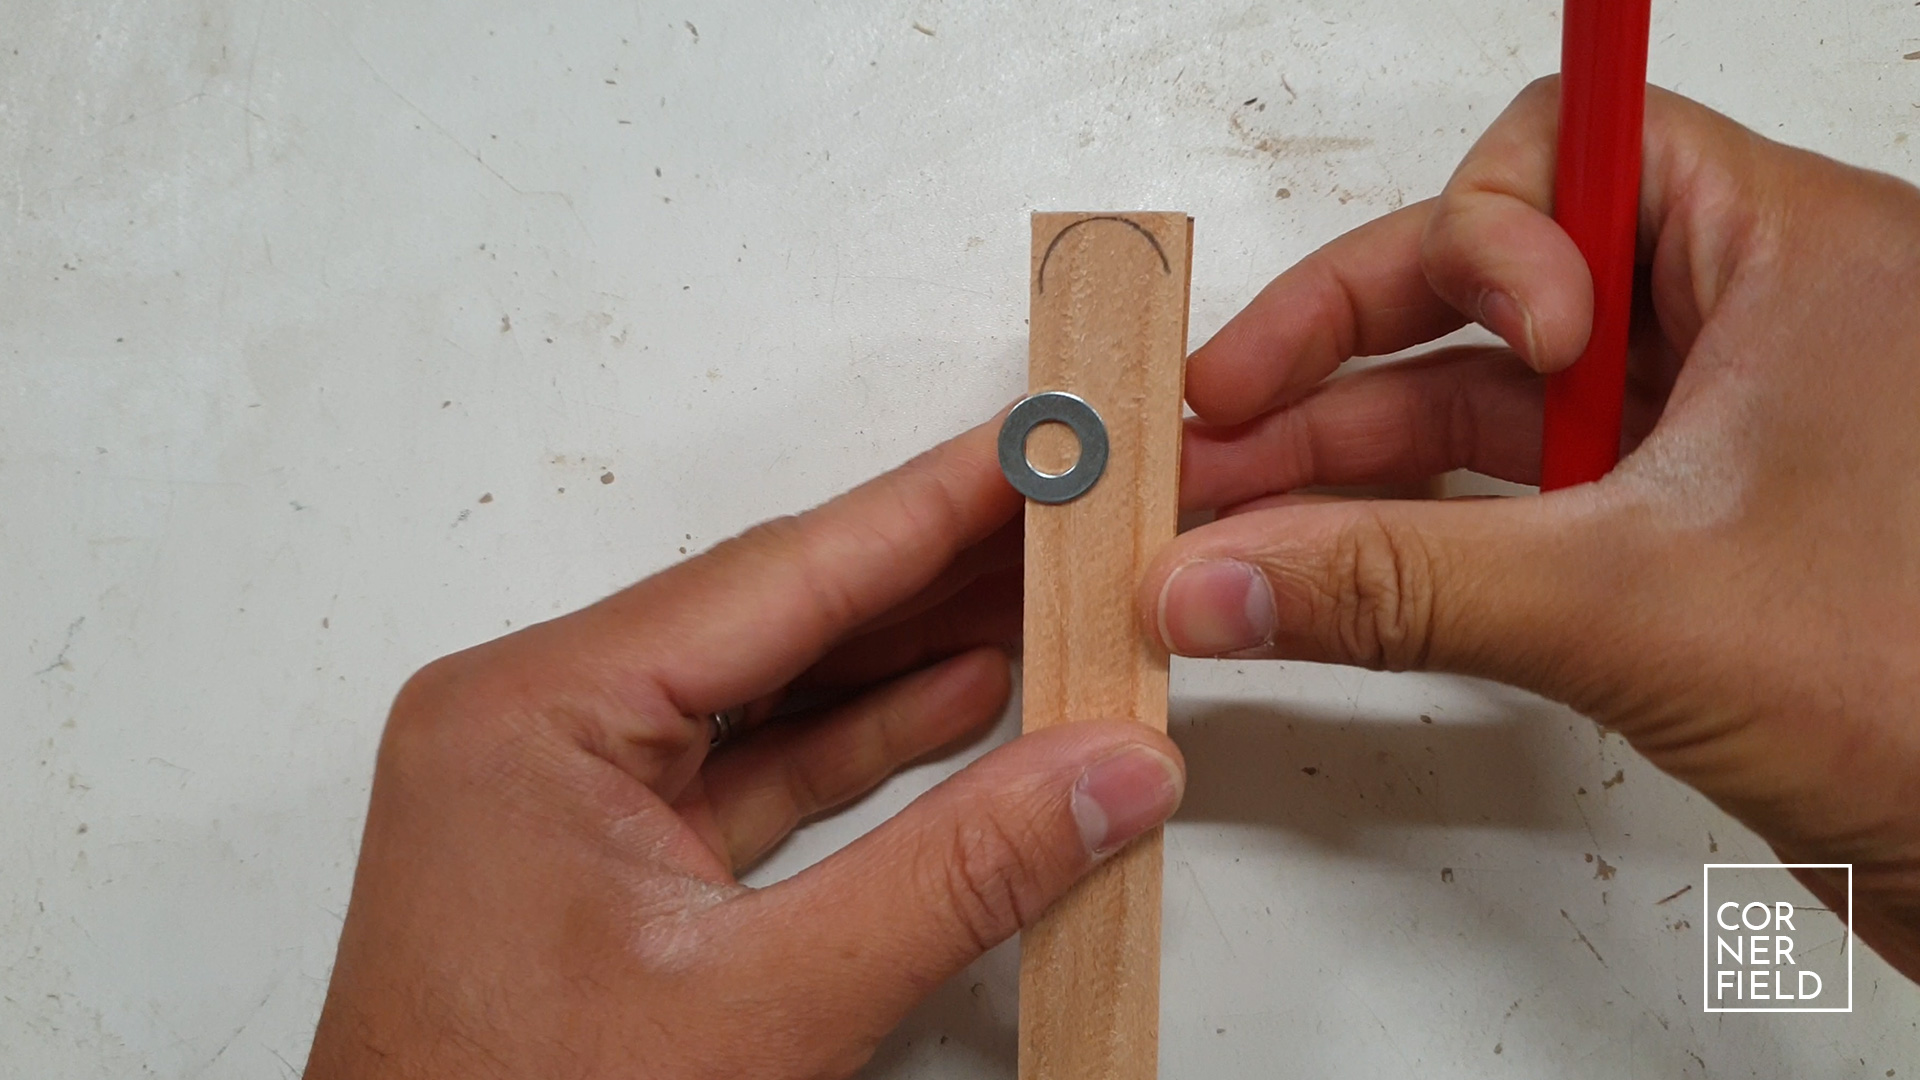
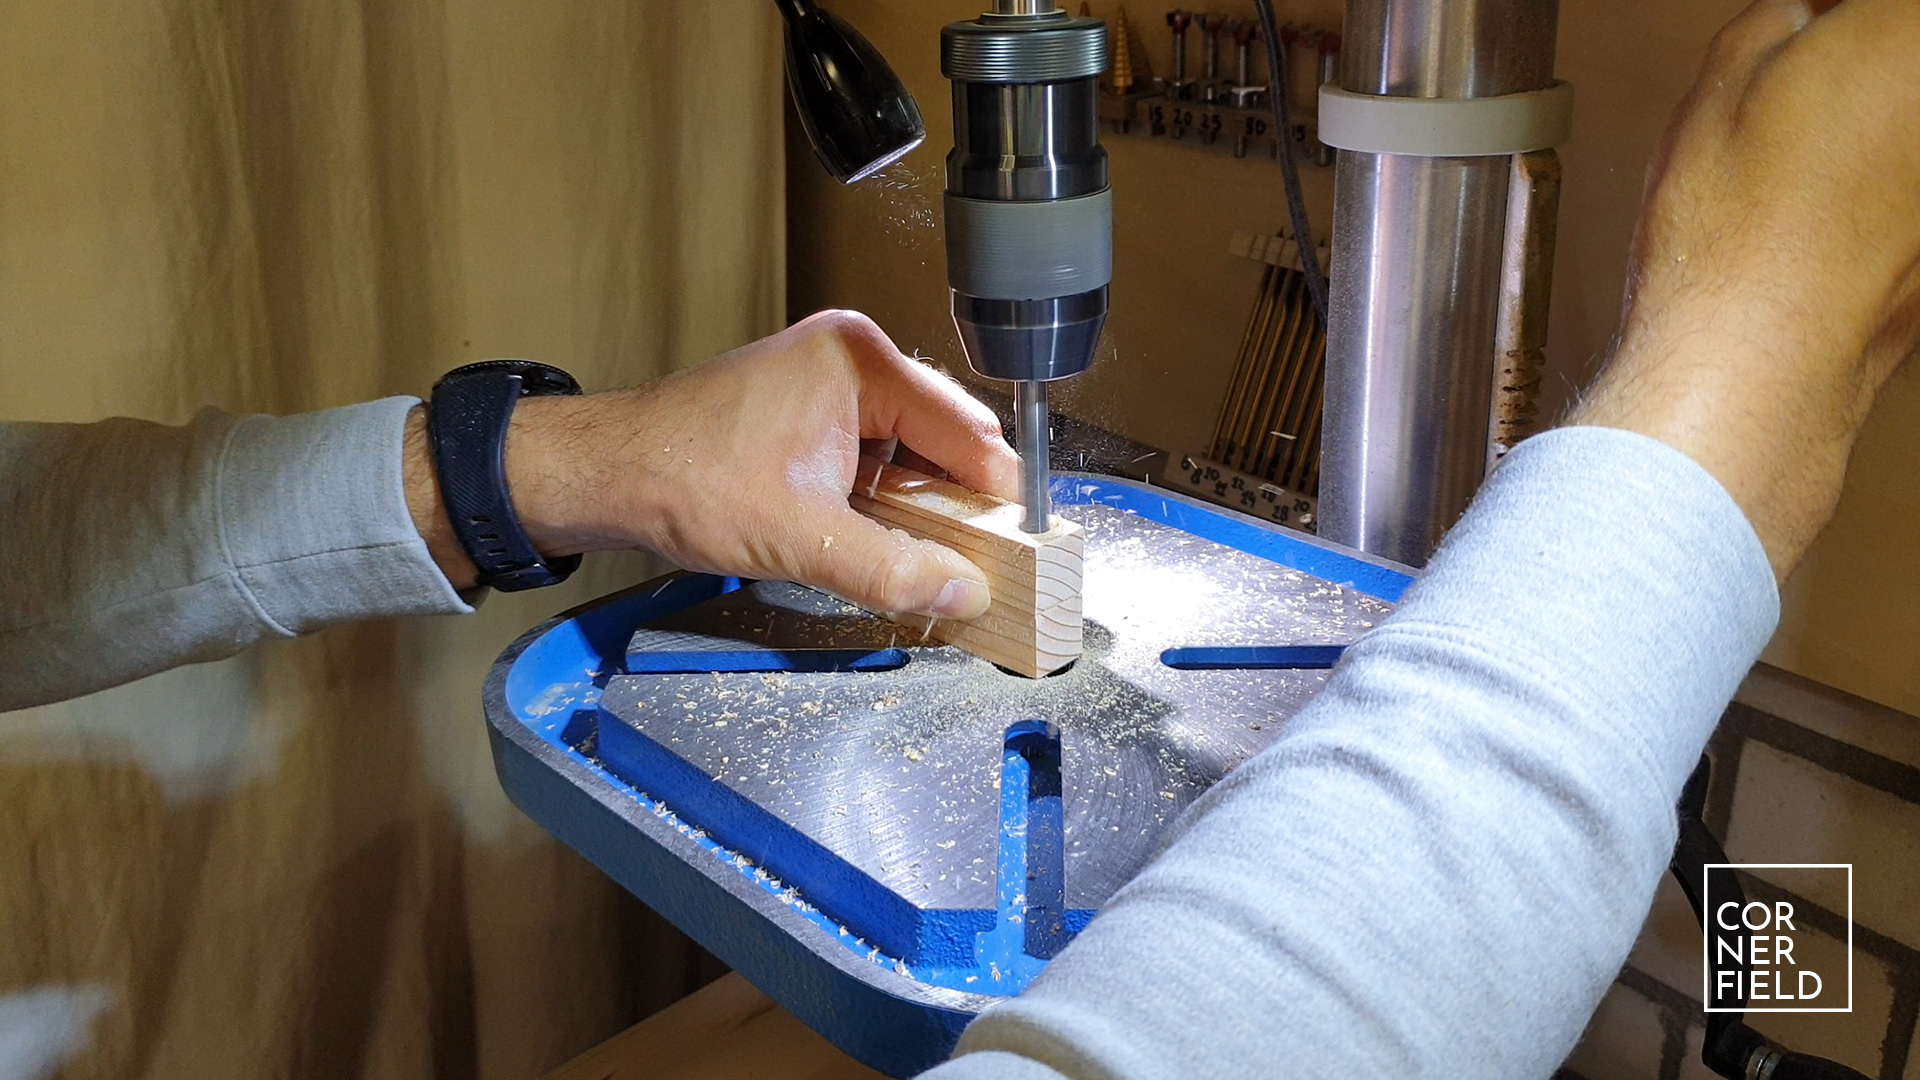
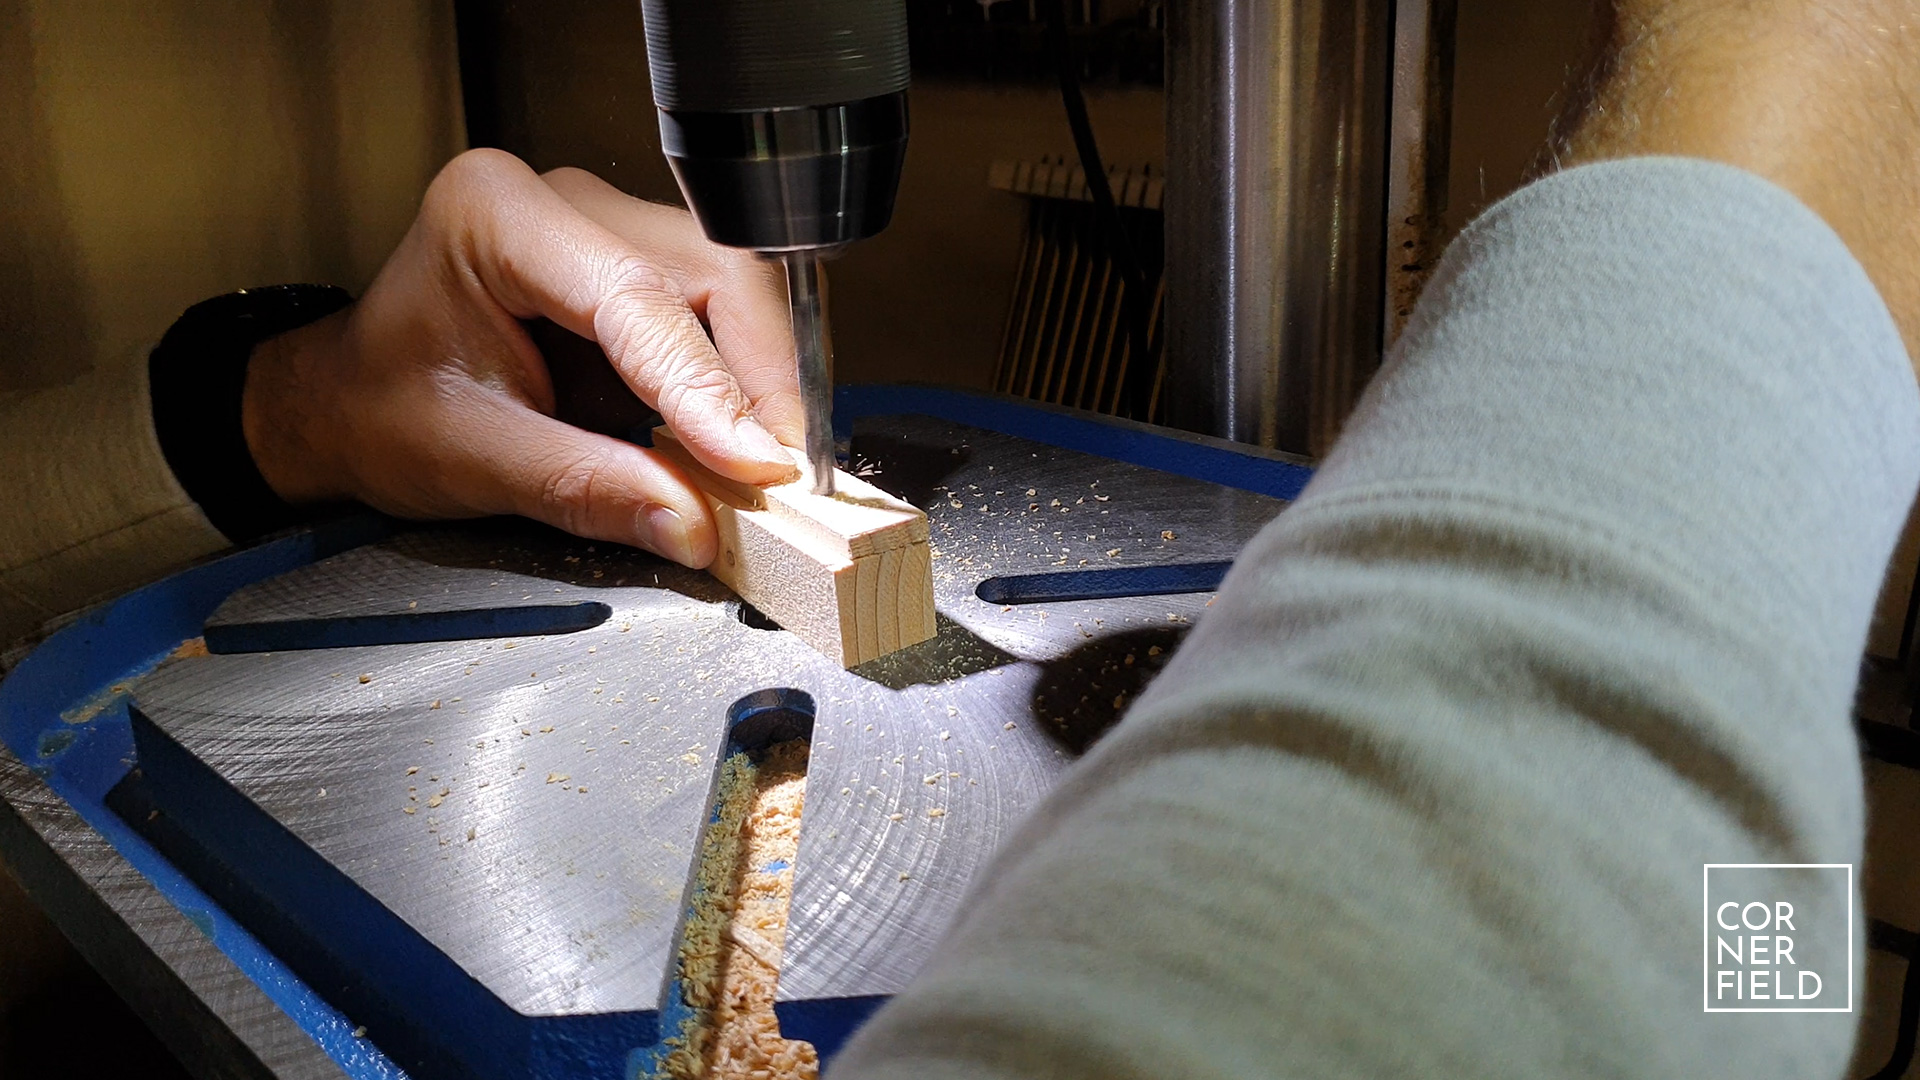
The last stand is very different from the other two. It allows for multiple angles and also stores away flat. The material you need is some square pieces of wood (approx. 20 x 20 mm), and some dowels 10 and 6mm in diameter. Additional tools for this build are a drill with a 6 and 10mm drill bit. If you have a drill press that is preferred to make sure the holes are parallel but you can make it work with a handheld drill. Just make sure you keep it as straight as possible. Or make my drill guide jig to help you with this. We start by cutting all the pieces. The sizes of the pieces depend on your needs (laptop size, length, etc.) so measure what you think you need first.


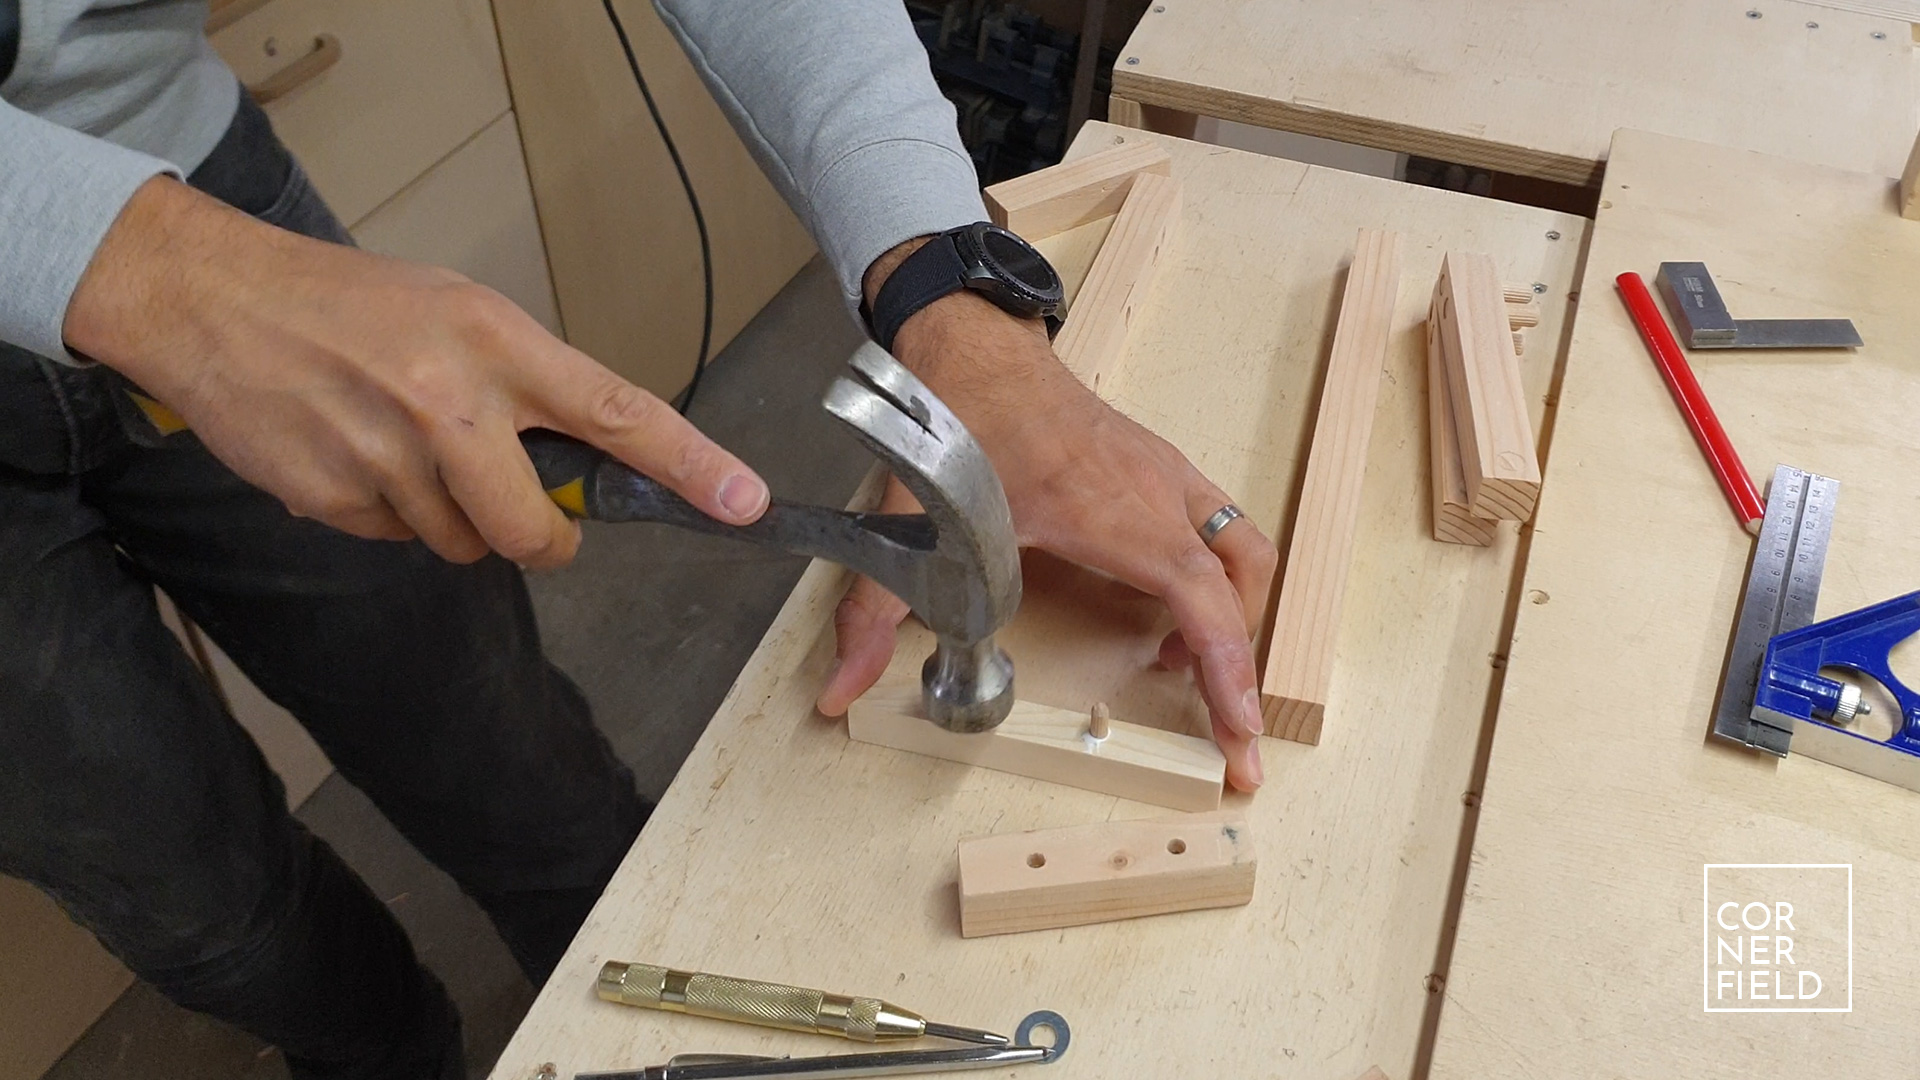
With all the pieces ready we start by drilling the holes in the sides of the frame. Tape them together and drill 3 (or as many as you like) holes. These will be used for the different angles we can set the stand at. Next are the legs. First, drill a hole in the top where it pivots. Then insert a dowel and put the leg on the frame. Now you can determine where the second hole needs to go to keep the leg from rotating around. You can also determine the placement by simply measuring off course. Now drill the second hole in the leg. When that is done you can remove the tape.

I glued my dowels in place but this means you can’t store the legs onto the frame. If you leave the lower dowel loose or drill two holes spaced the same distance as the dowels on the legs in the frame, you can. Something to consider.

The last part of this build is the front. Here we want to add something to stop the laptop from sliding off the frame. You can get creative here and use pretty much anything. I chose to make a few holes and insert a piece of wood on some dowels. By first making a drilling template for the holes of those dowels, I could replicate the holes on the top and side. This allows me to store the front away when I’m folding the stand away.
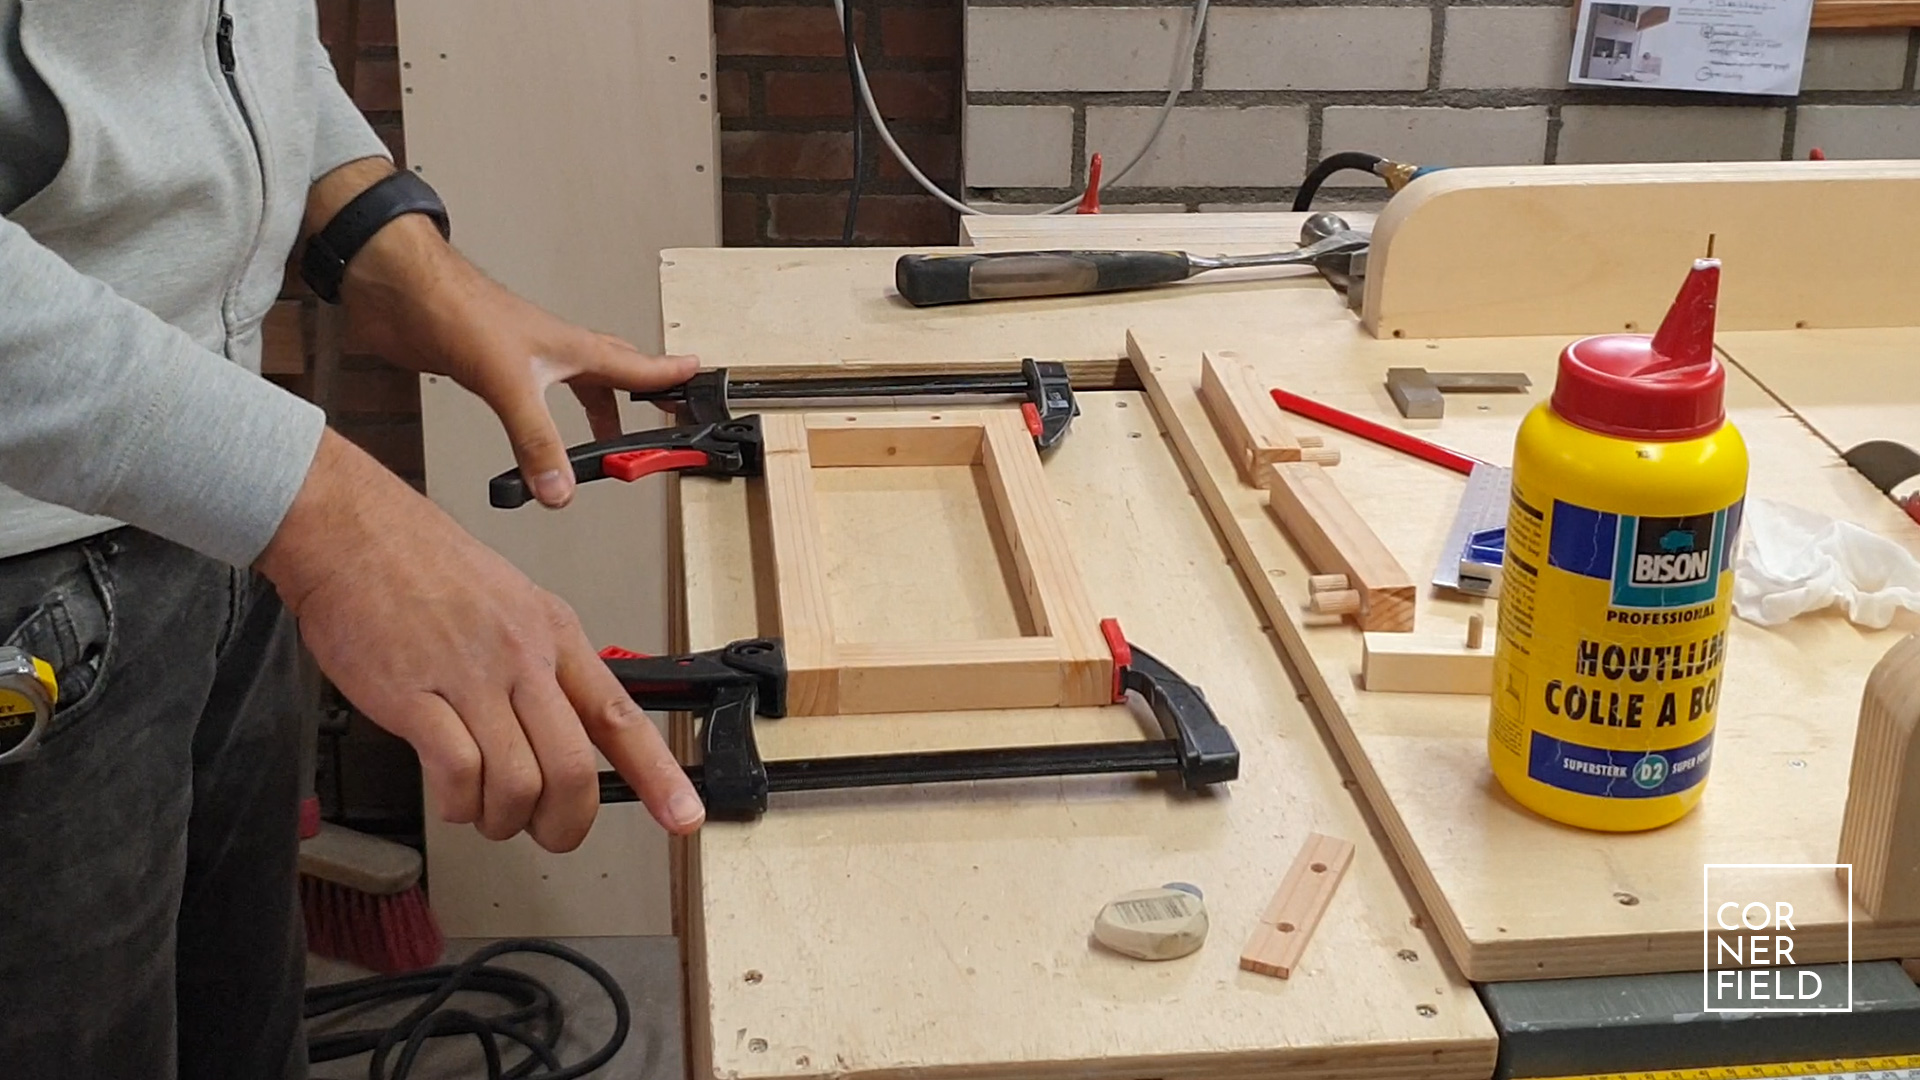
This completes all the required parts. You can now sand everything, apply some finish, and assemble.
Result
After making all three designs I came to the conclusion I like the fixed stand the best. It’s simple and does the job. I have no need to store it so why bother adding this feature. However, if you are storing it away often or move around a lot, the other two options can be interesting for you. In any case, I had fun building them and hopefully, this article is useful to you.


Links & Download
If you want to build something similar I’ve linked my 3D model and drawings of the shape below as a download.
SketchUp 3D-model
Shape A4
Shape Letter
Instagram 1 | 2 | 3
Hope this post has inspired you to make something!
And don’t forget to follow your excitement 
Ik ga je verstelbare variant proberen te maken! Als beginnend klusser is dit een hele handige guide. Bedankt!
Te gek! Heel veel plezier met het bouwen 🙂
Gracias muy clara información.