

This staircase handrail is about making something new, to look like it’s old. Let’s dive into it!
Design
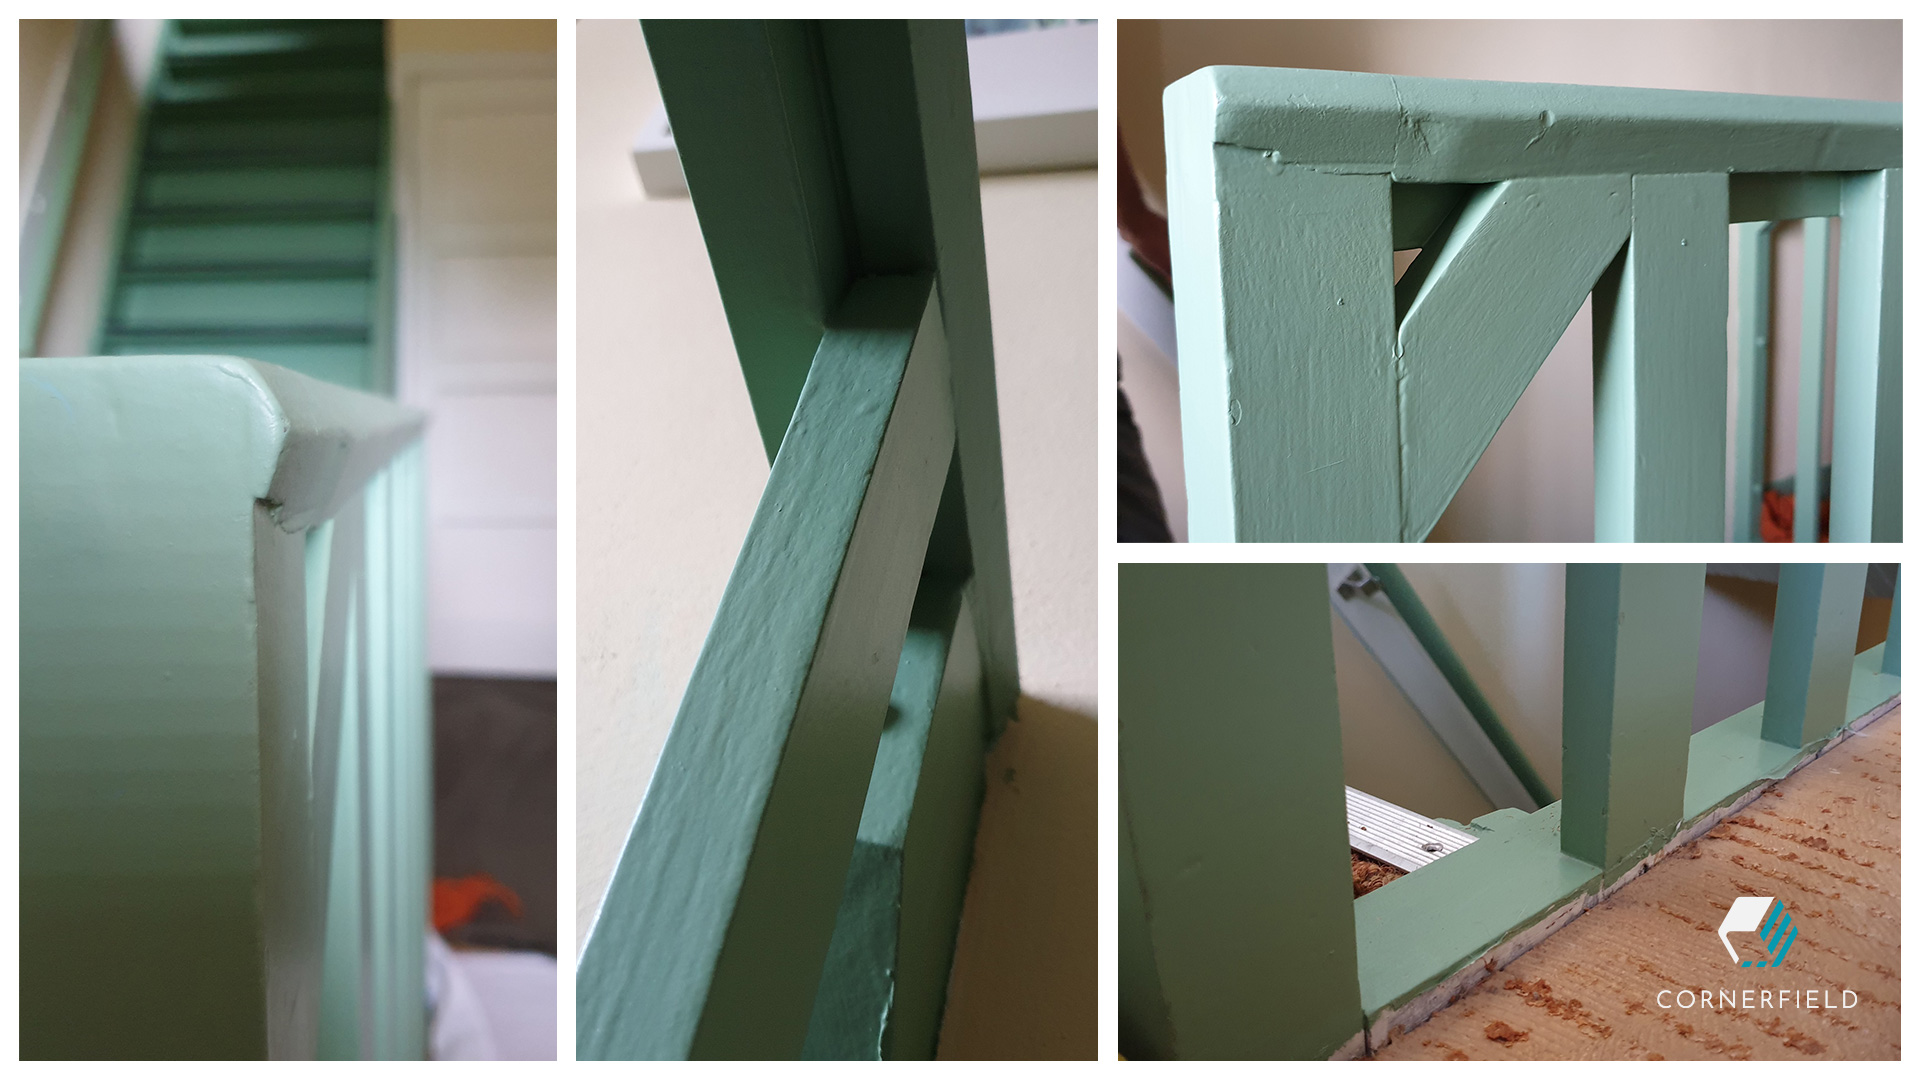
During the renovation of an old house, I was asked to make this staircase handrail based on an existing one. I started by taking pictures and measurements of all the details. Then I took that information and made a 3D model in SketchUp. When I was happy with the overall design I could make my materials list and get to work!

Build
Since the look of the staircase handrail had to be identical to the original I also had to use the same joinery. This made the construction of this project feel more like a puzzle than a woodworking project. But once I figured out how it went together it was smooth sailing. It all starts with making the parts.
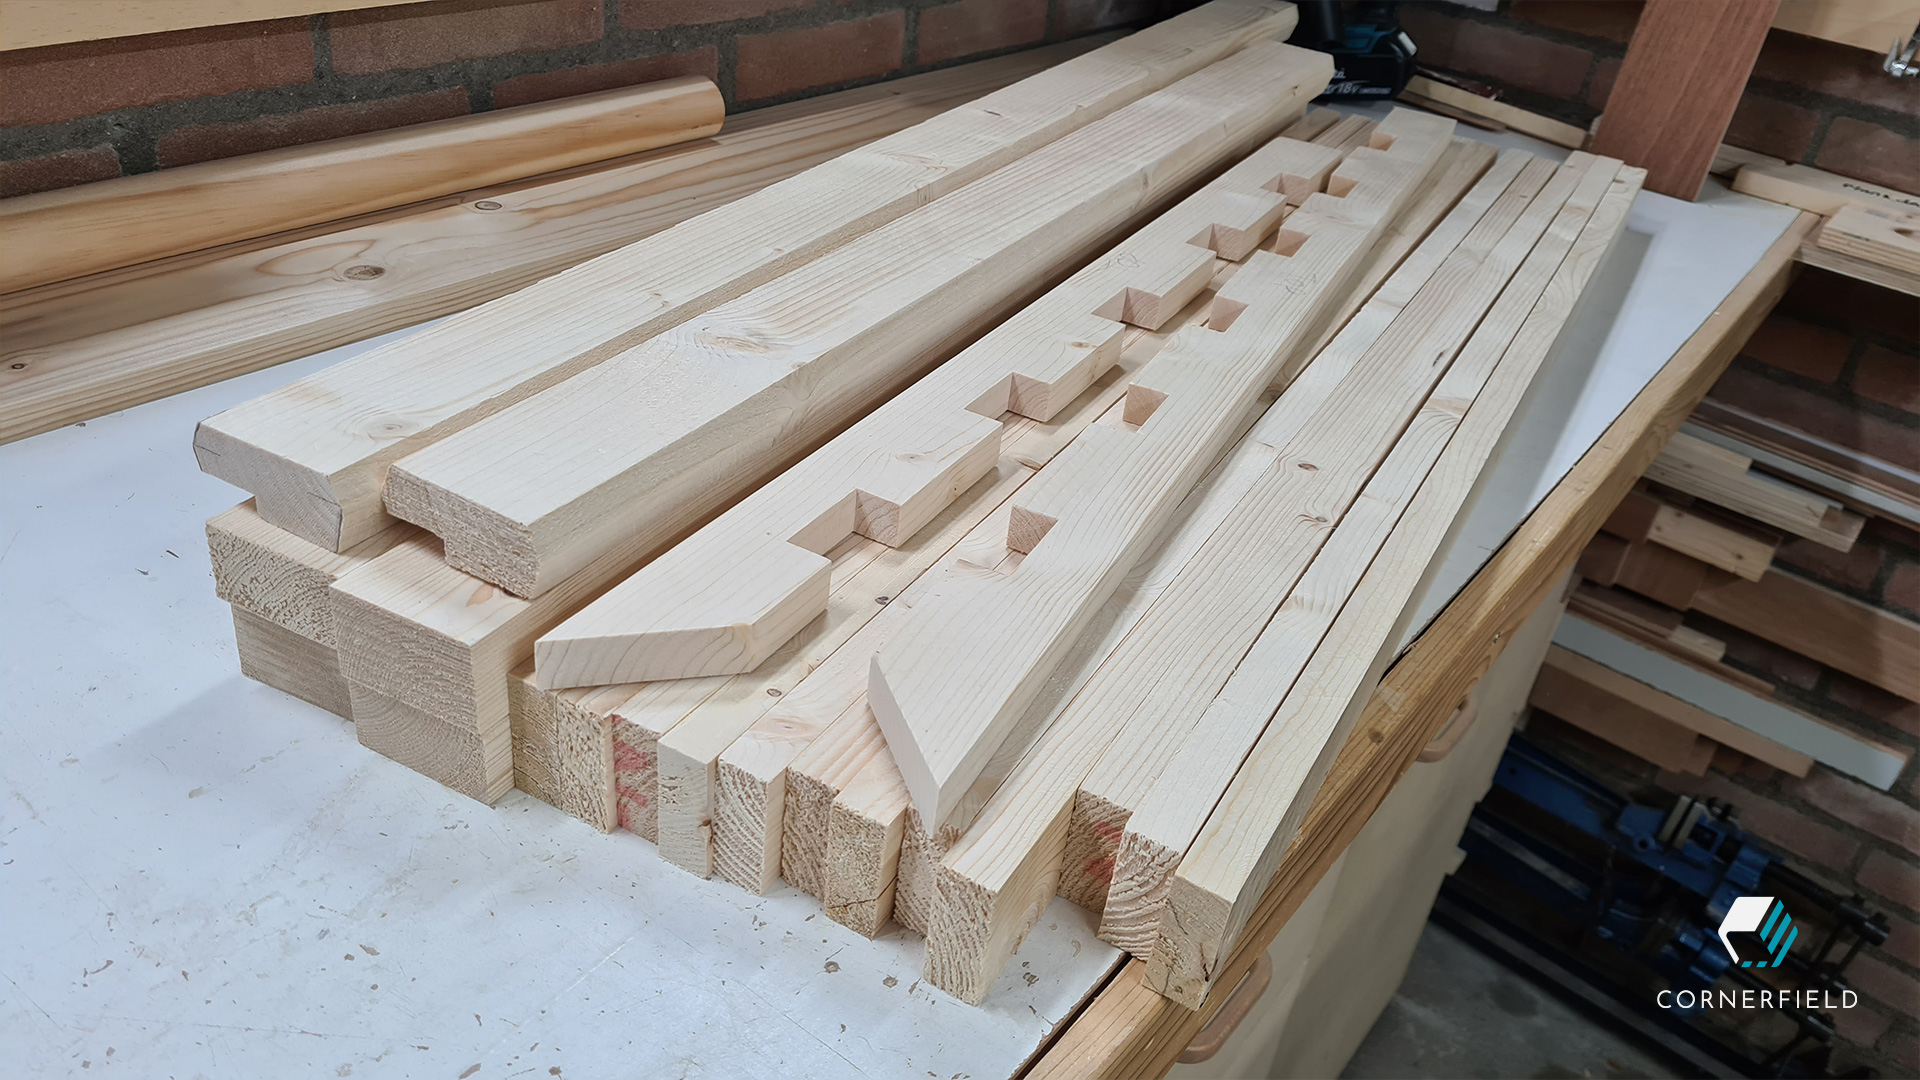
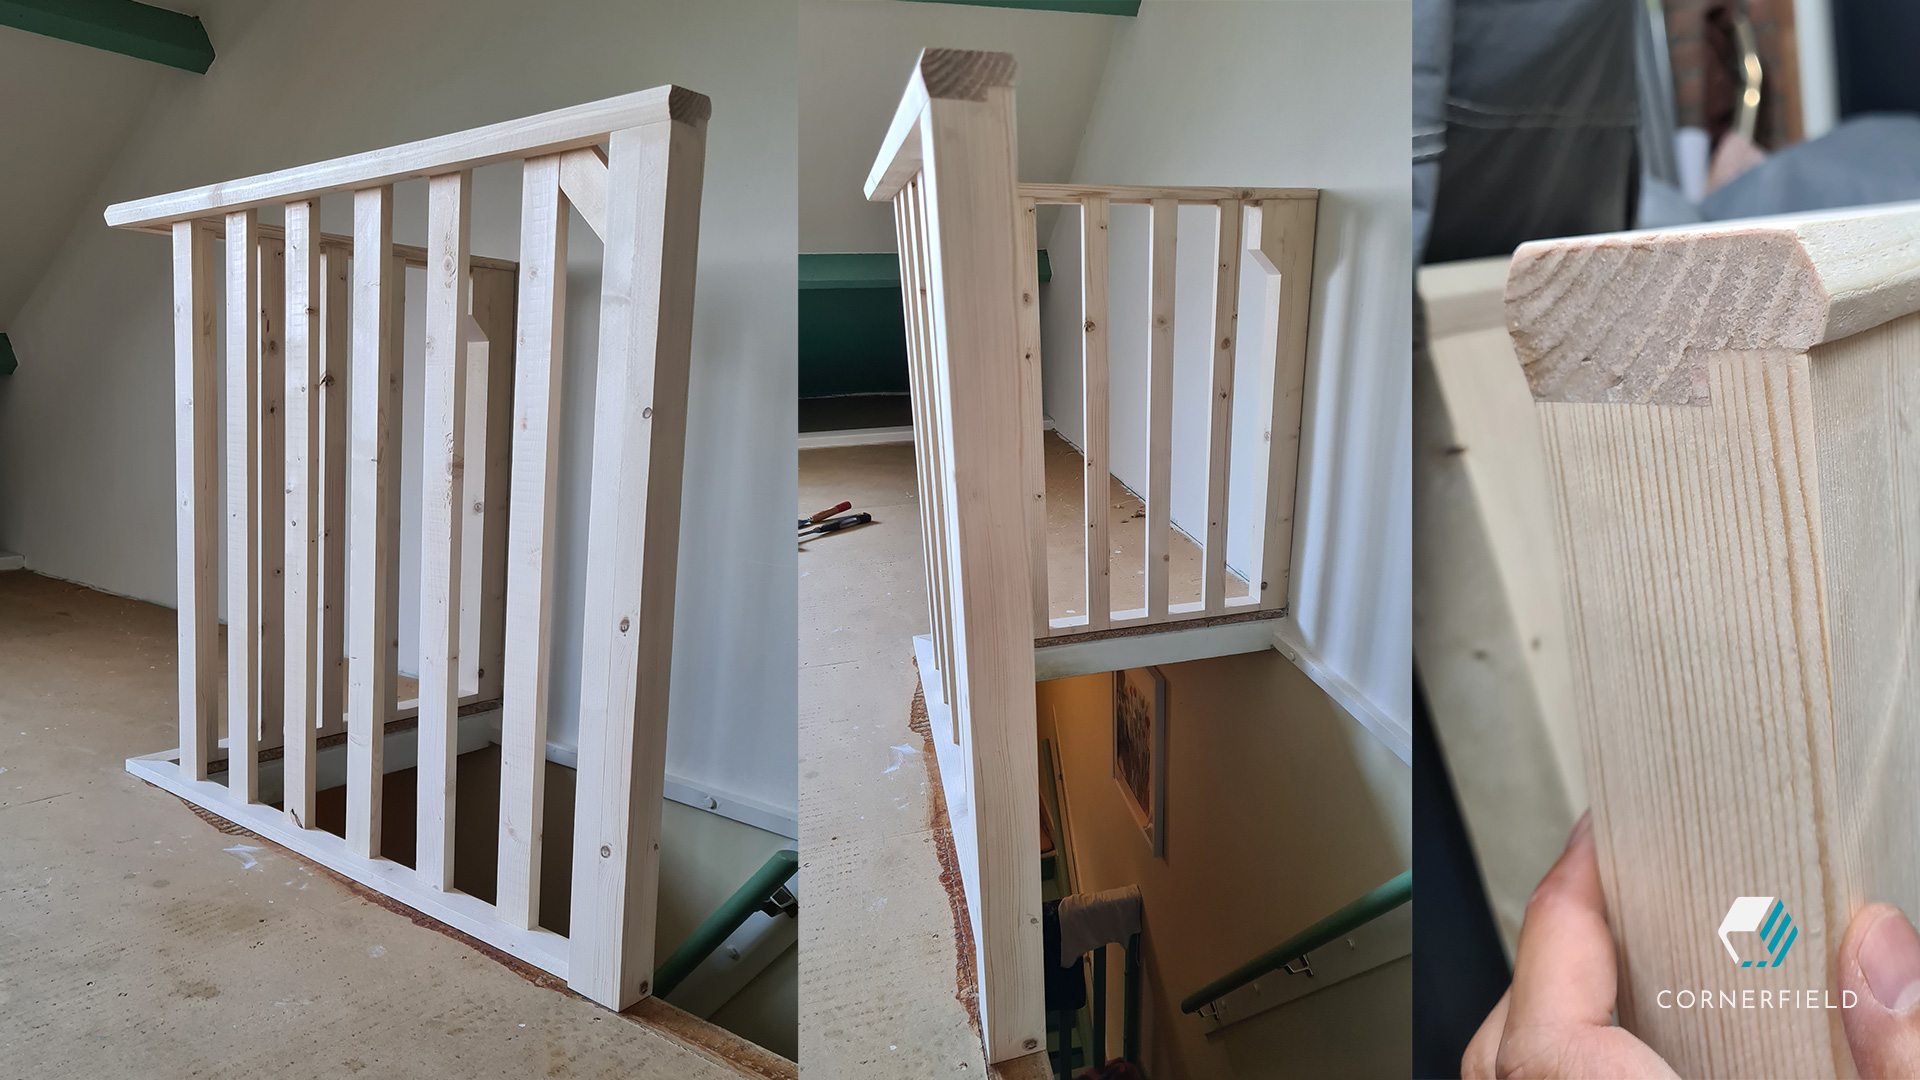
Parts
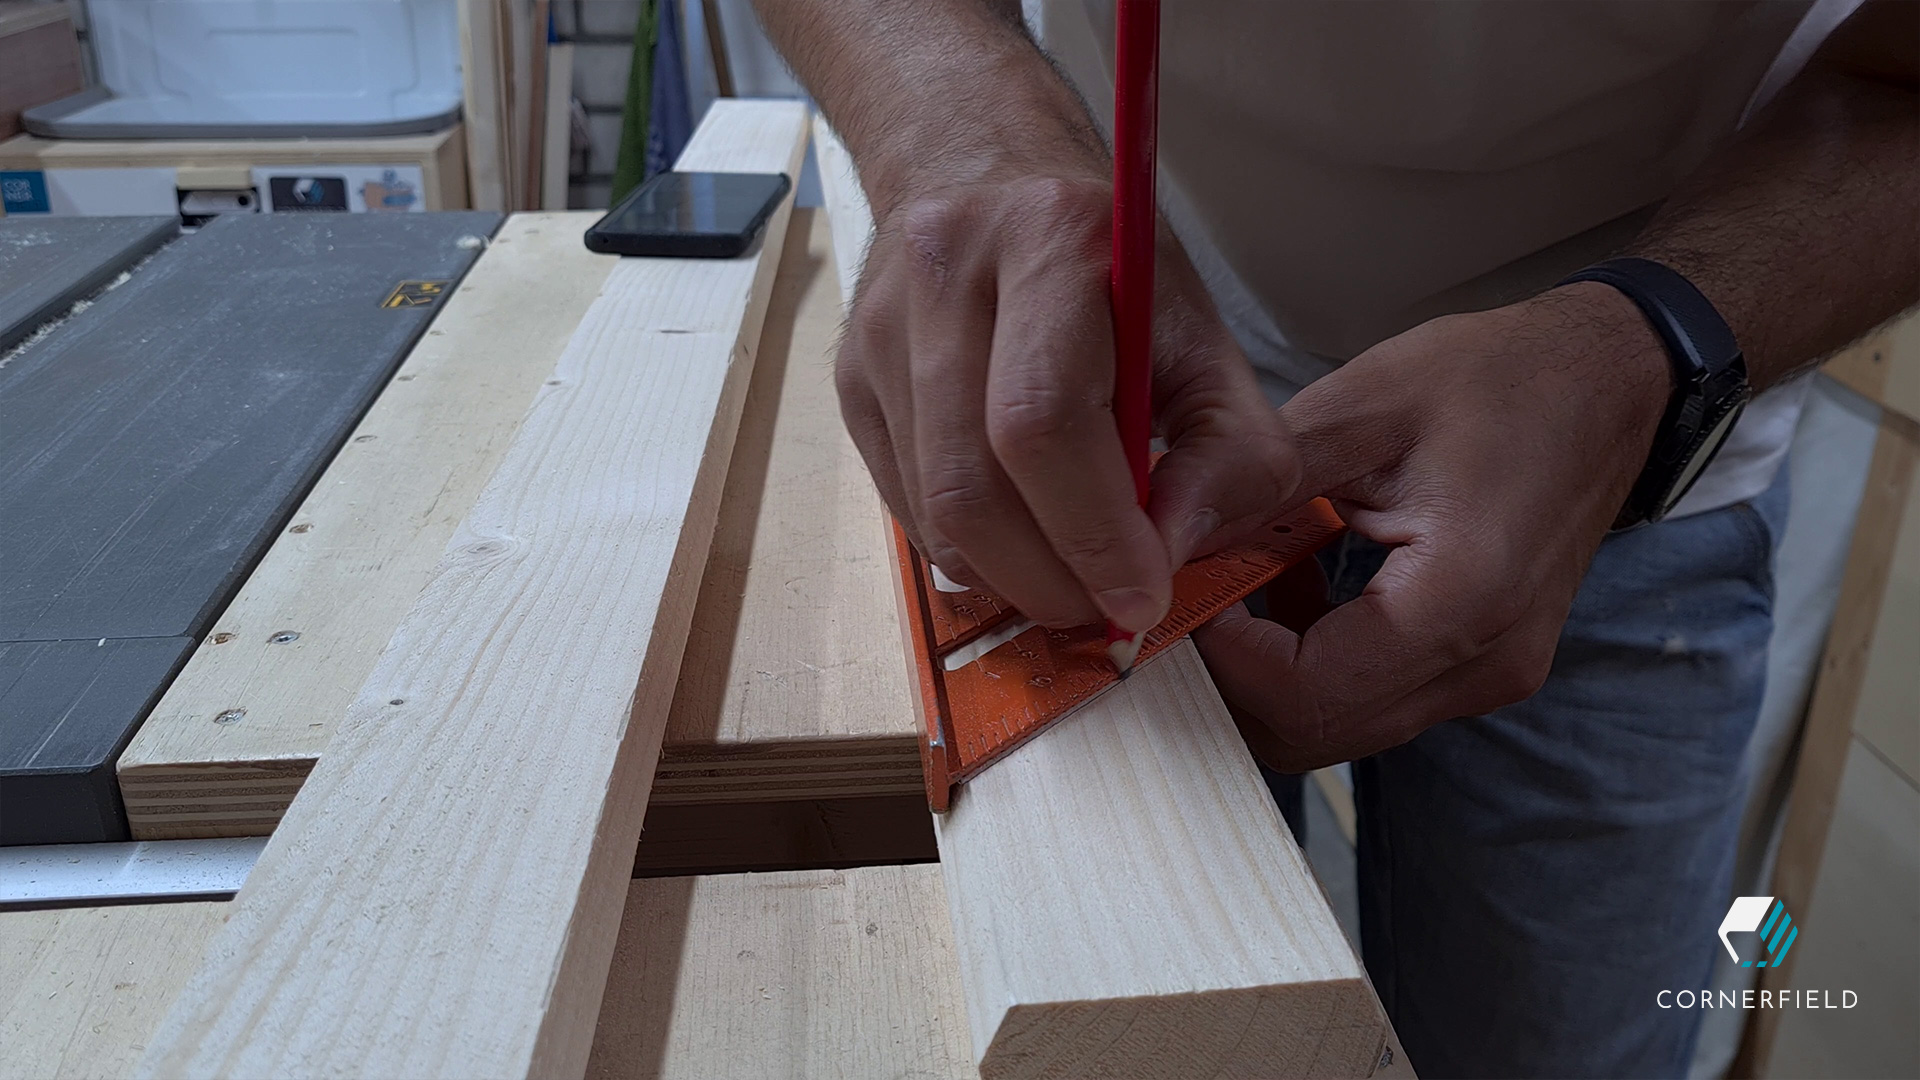
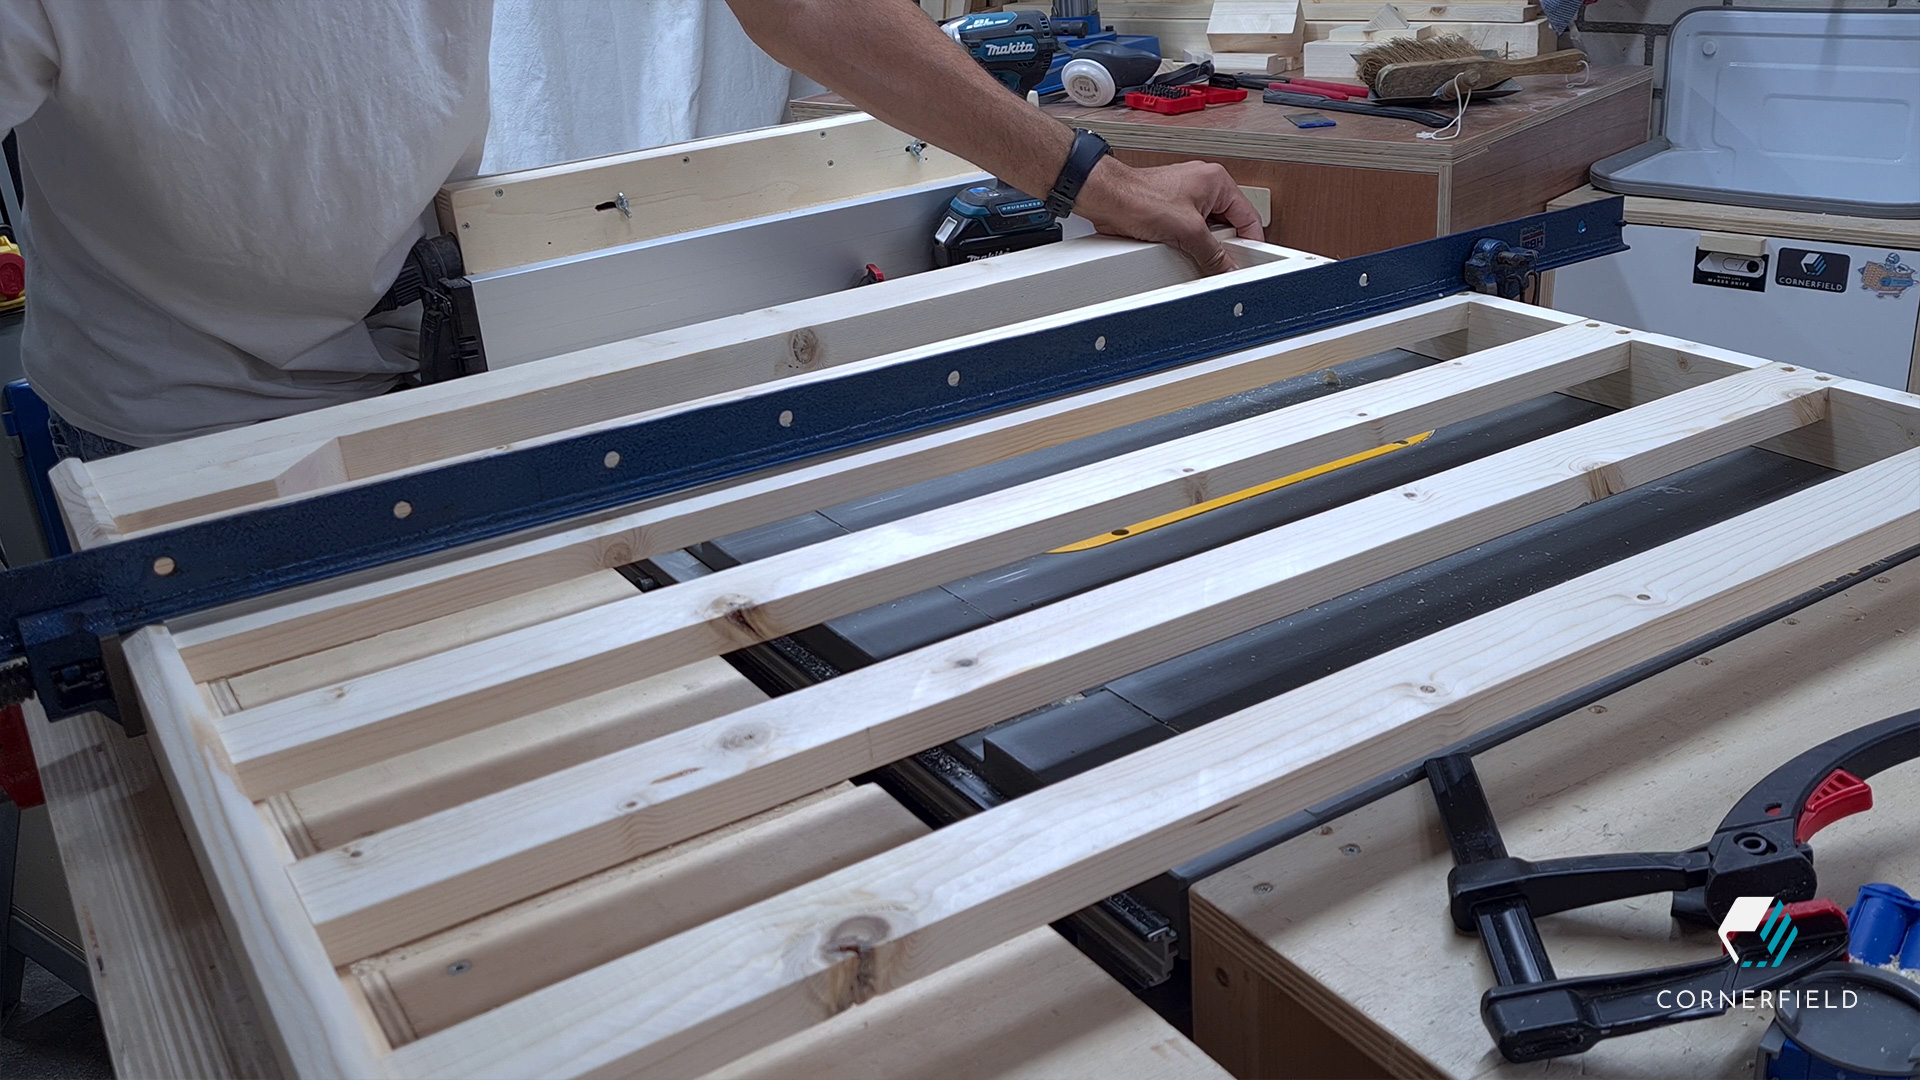
I started this project with rough construction lumber that I first cut to rough size. With that out of the way, I made slots in the bottom piece for the vertical pieces to go into. On the table saw, using my cross-cut sled this was an easy task. Once I had those cuts made, I cut a miter on one end of the piece; cutting it to length as well. Next, I worked on the top of the rail. This piece has two angled cuts, making it more comfortable to grab hold of. I figured out the angles I needed in SketchUp and used my model to measure and mark the piece. Once that was done I cut could copy the angle to my blad using a bevel gauge.
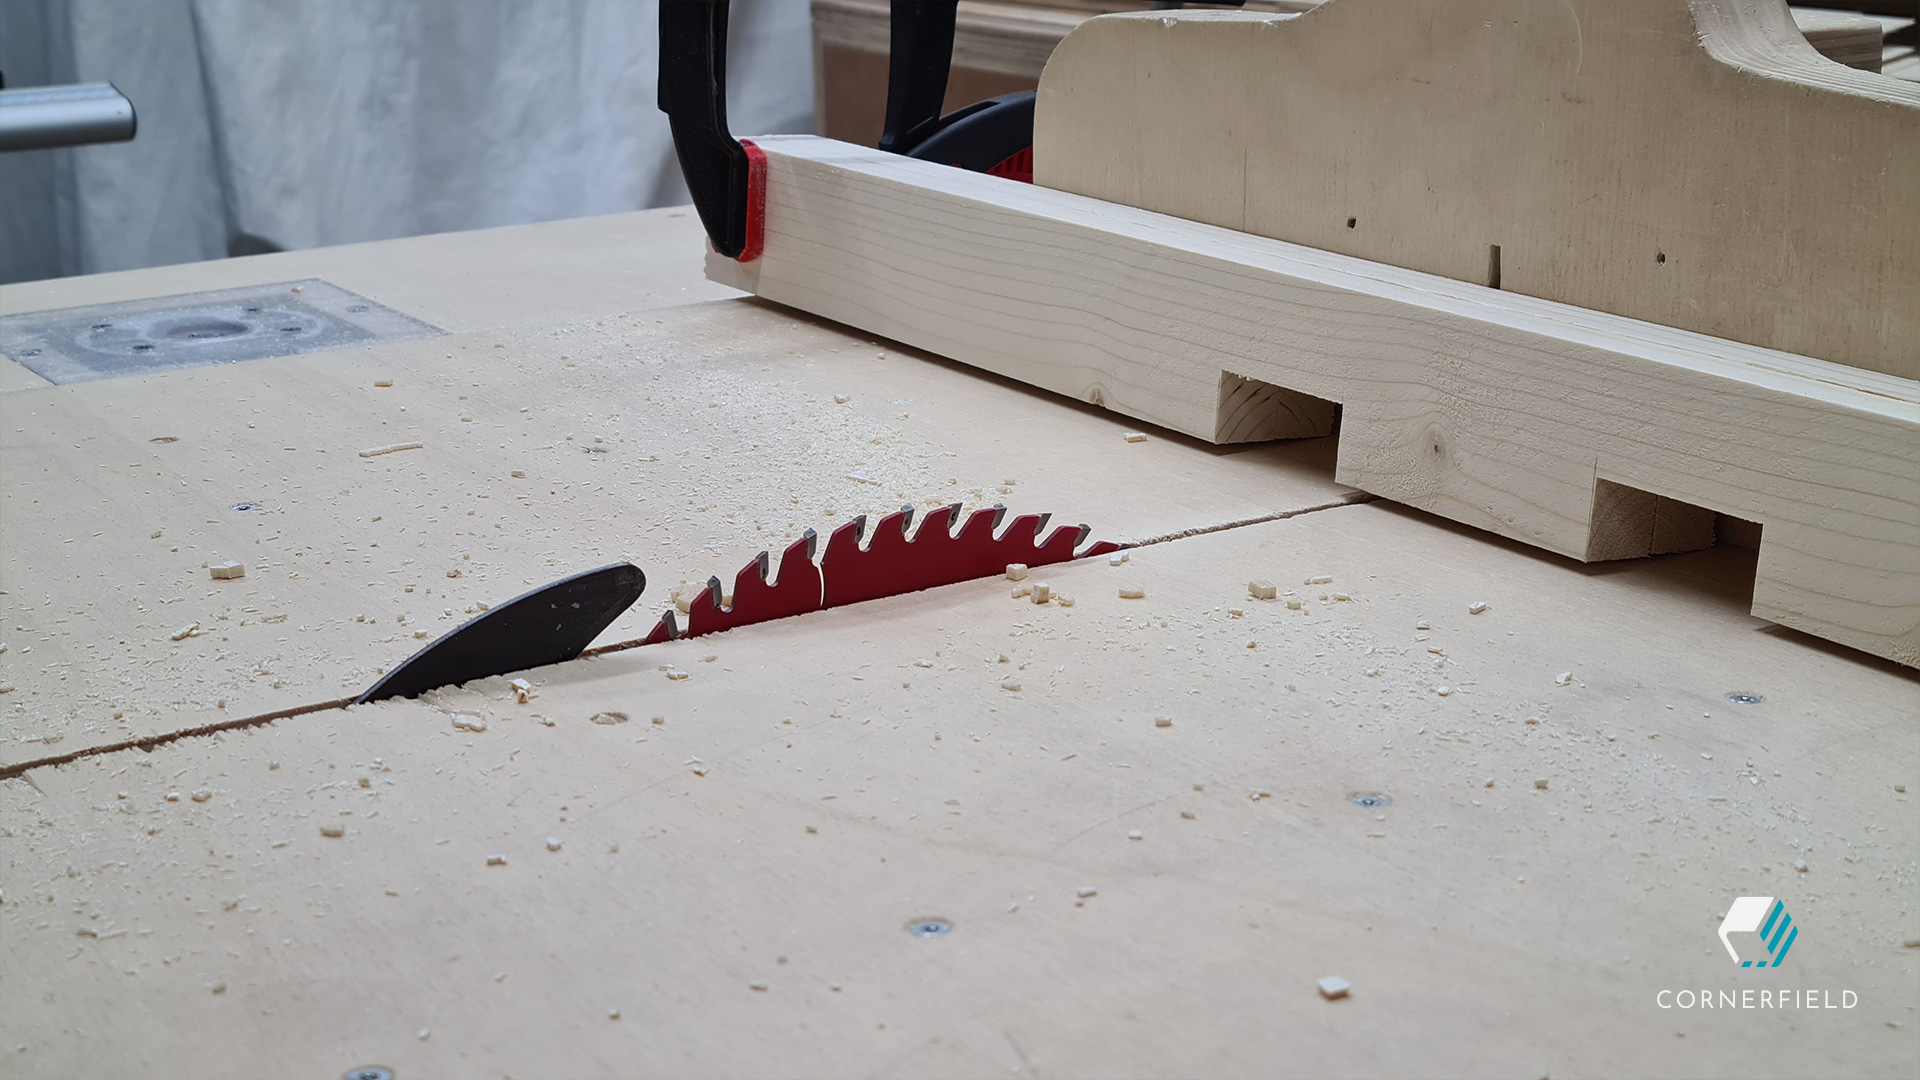


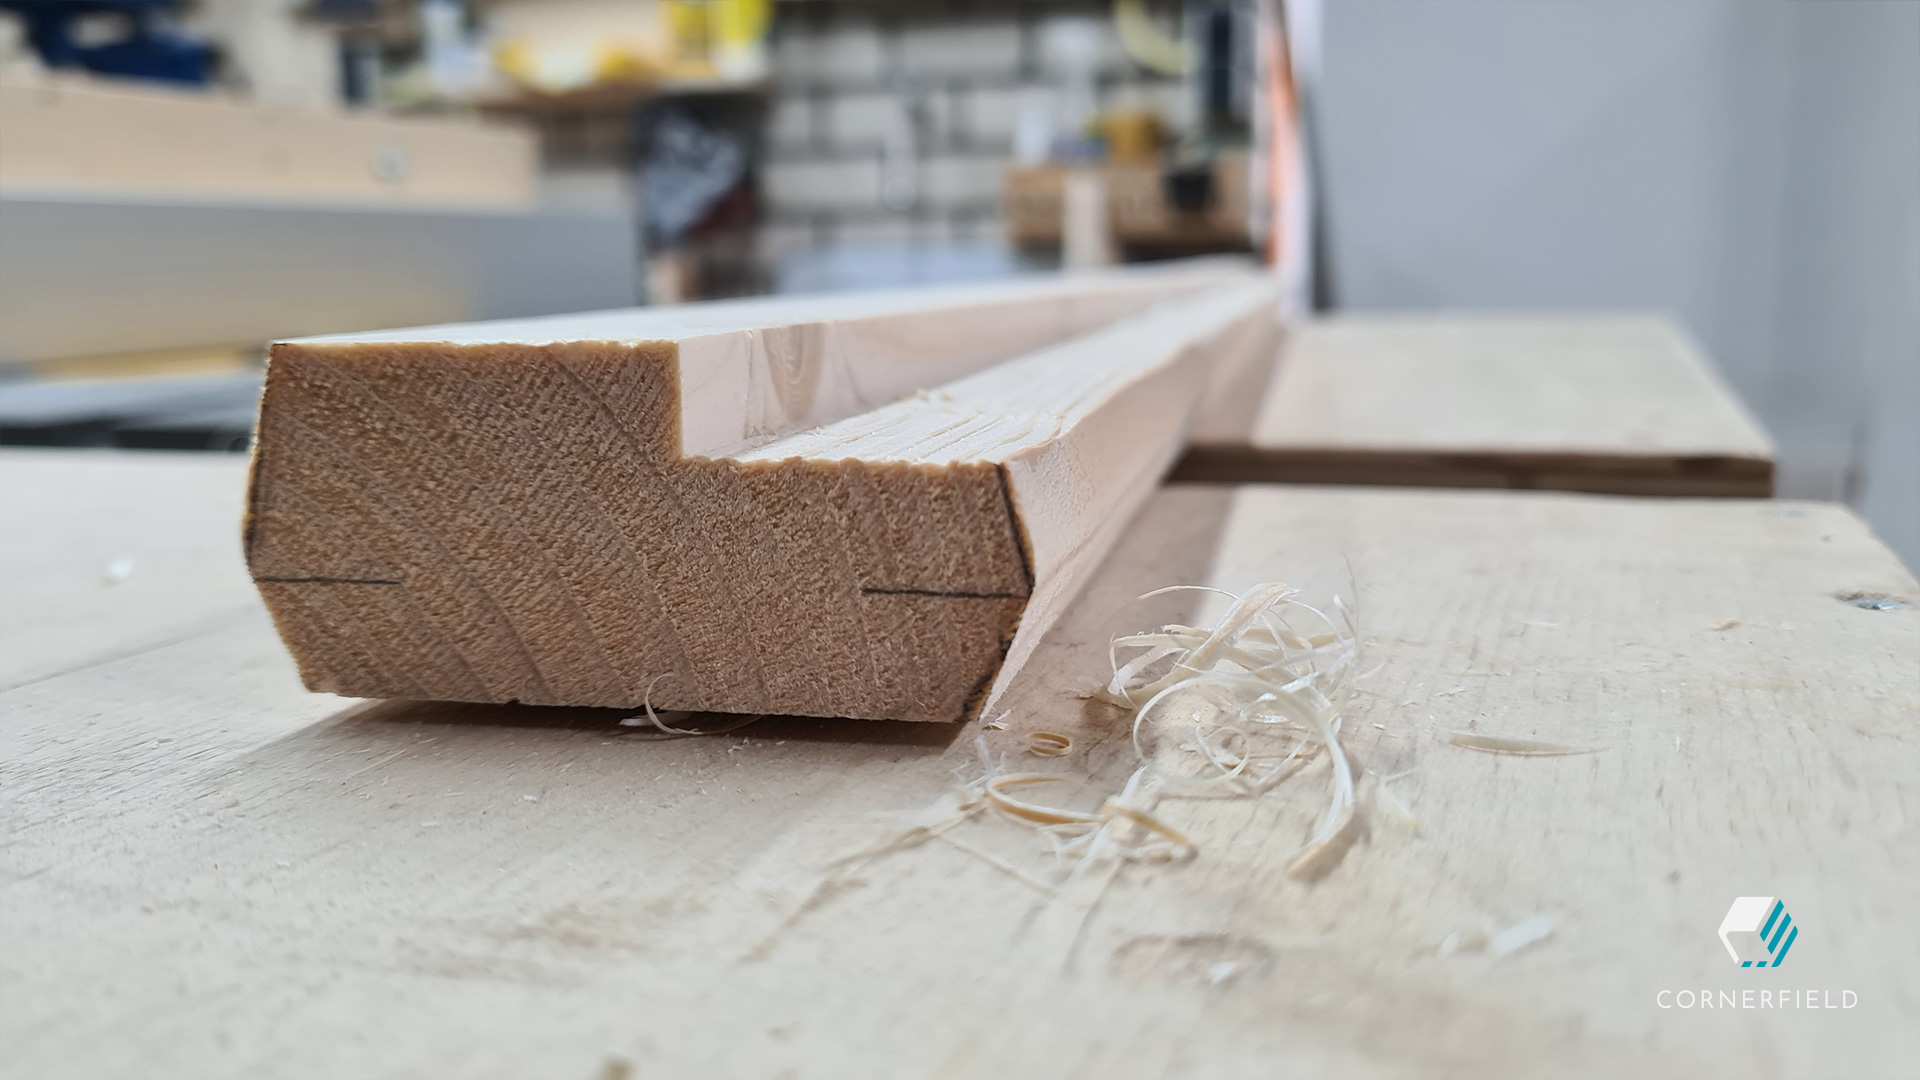
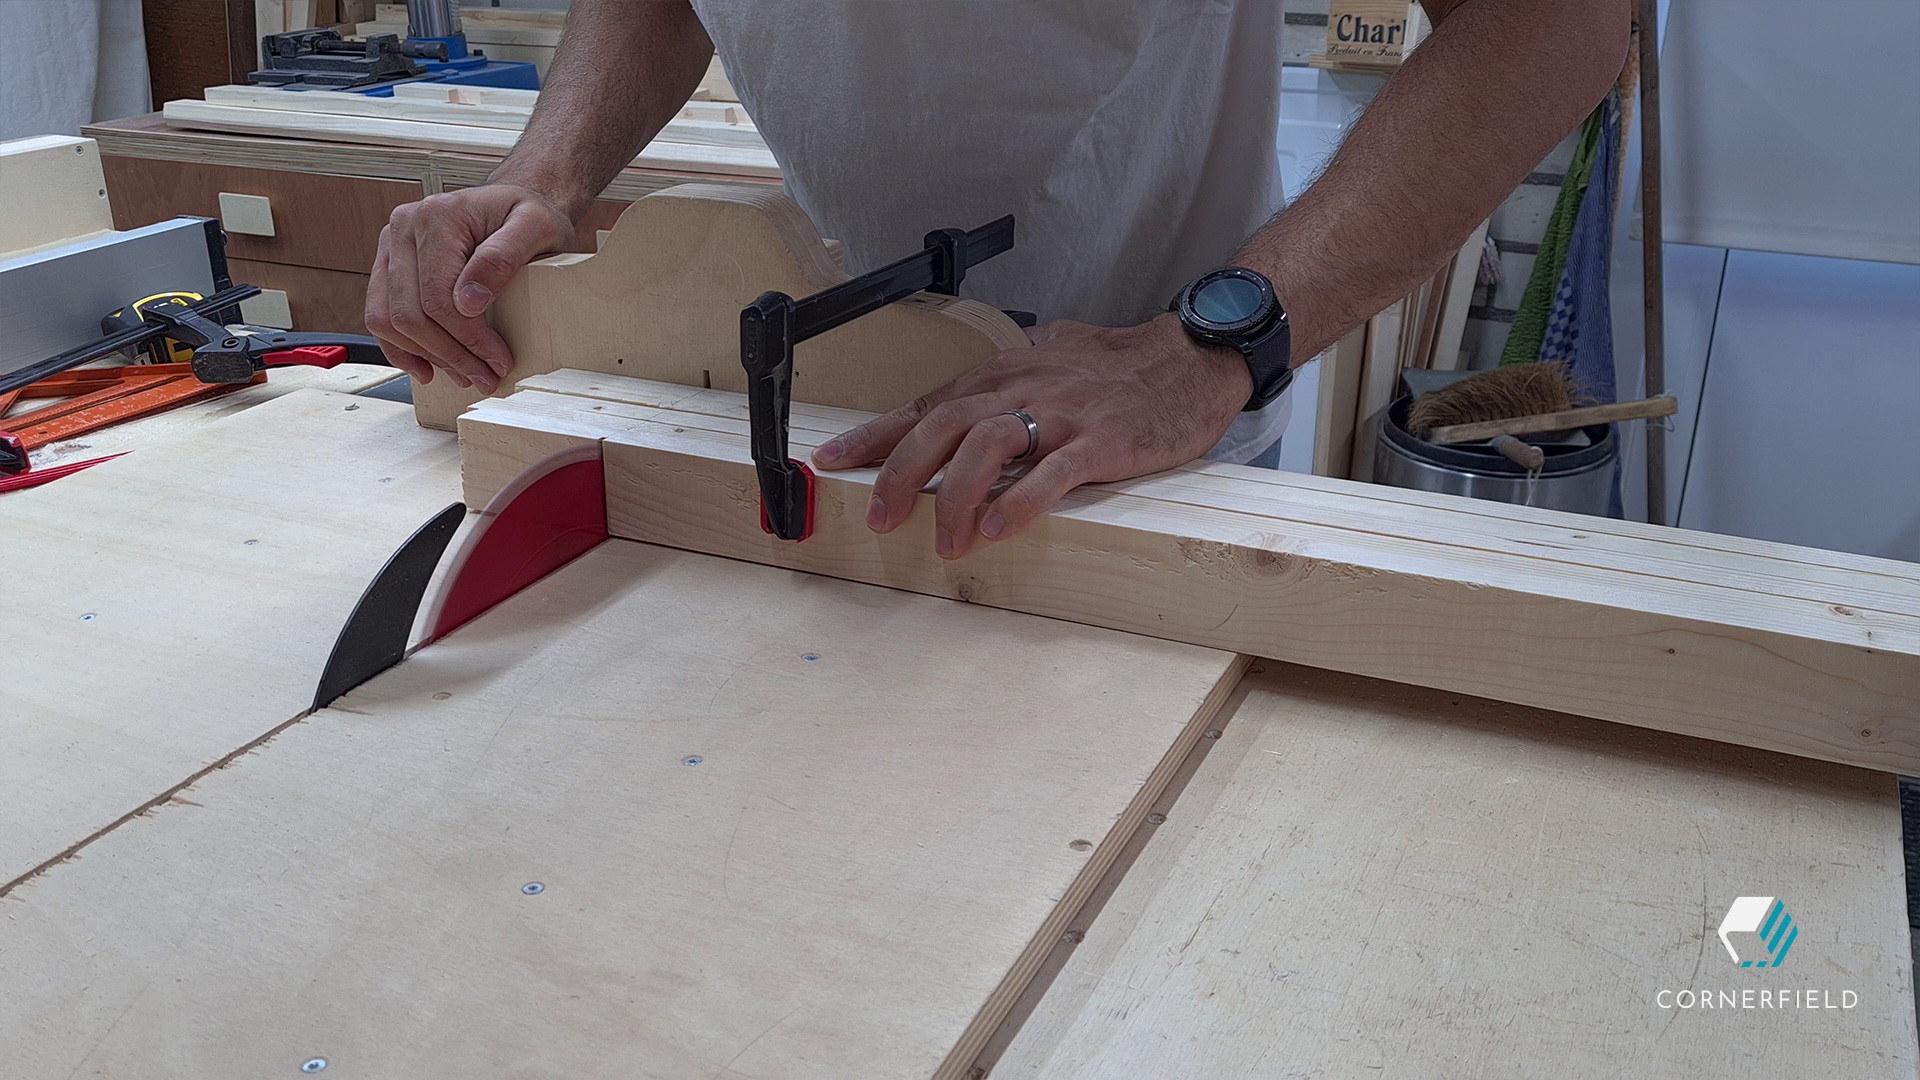
To join the top to the corner post and to support the vertical pieces, it also needs a rabbet on the bottom. I achieved that by running the piece through my table saw in multiple passes. Gradually moving my fence until I completely cut away the material. I cleaned the cut with a chisel and sandpaper. Then it was on to the vertical pieces and the corner posts. These are cut to the final length simultaneously to prevent a height difference.
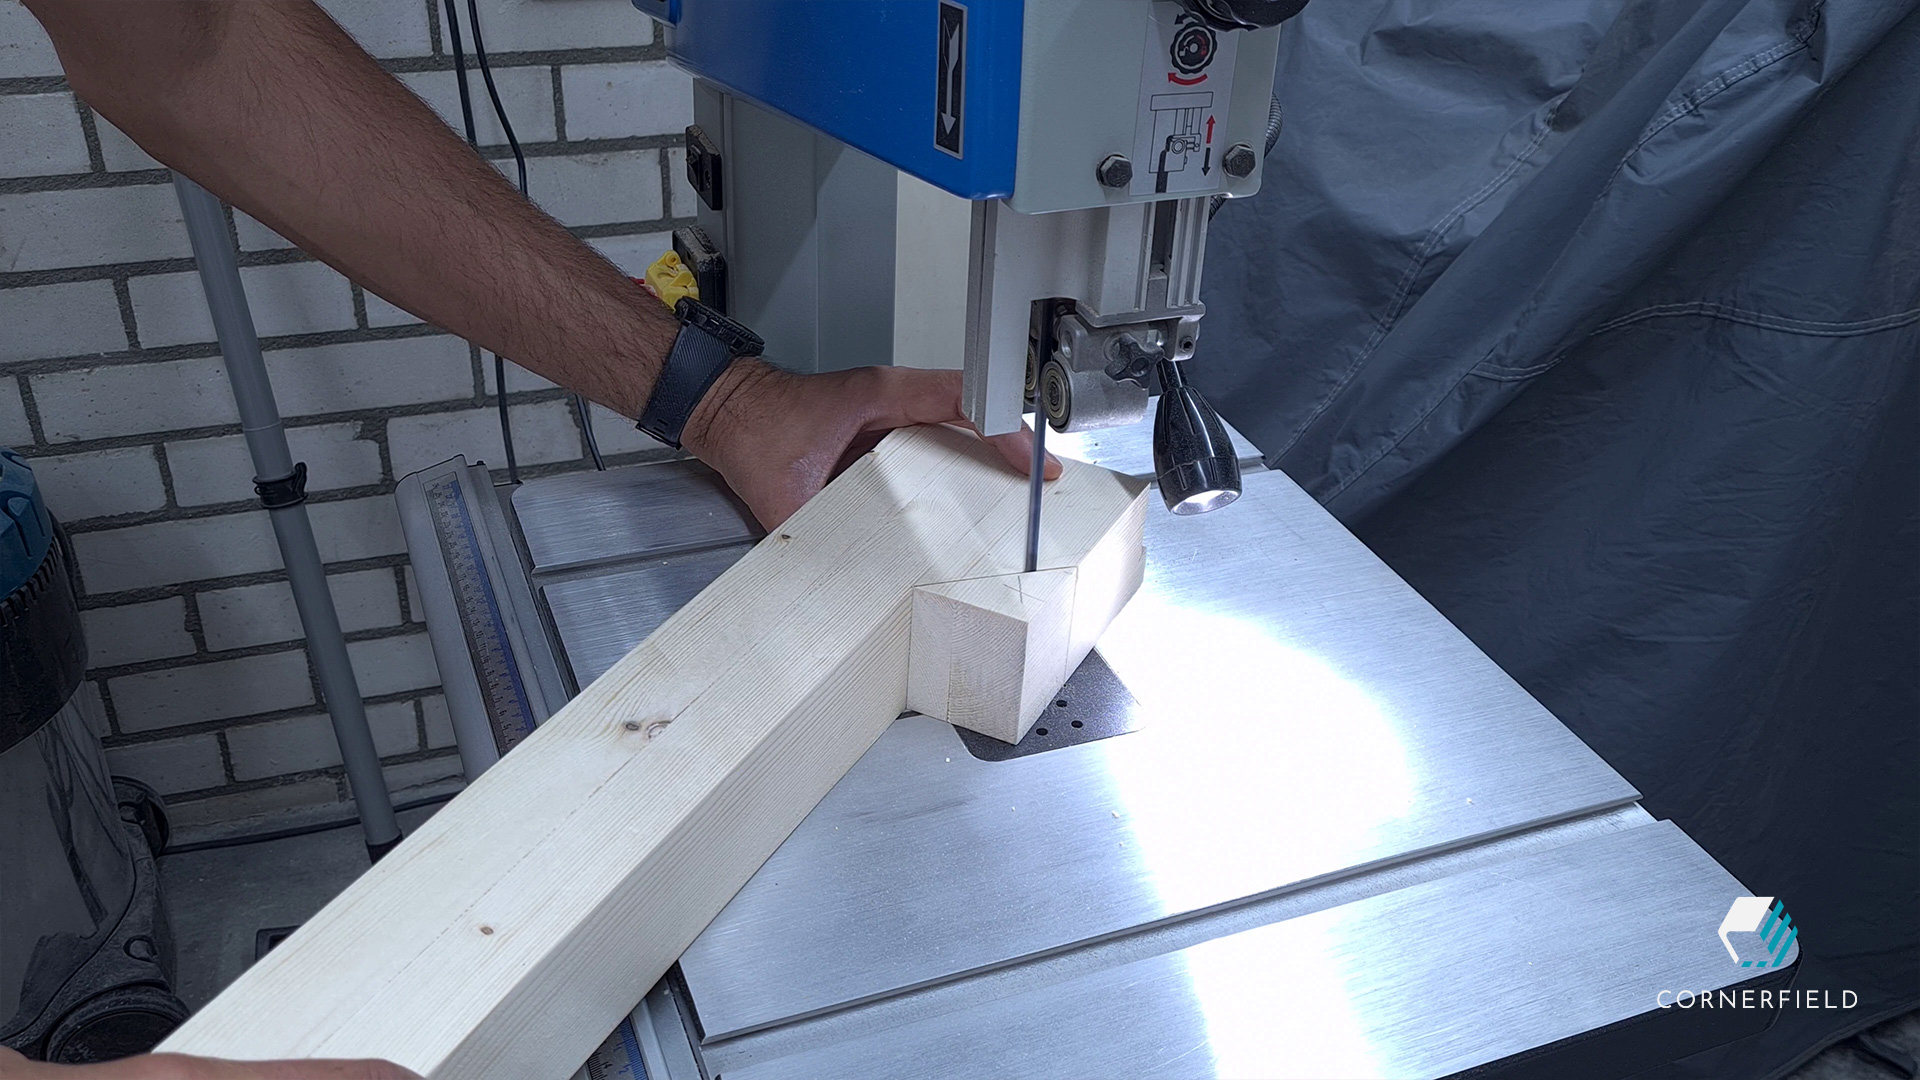
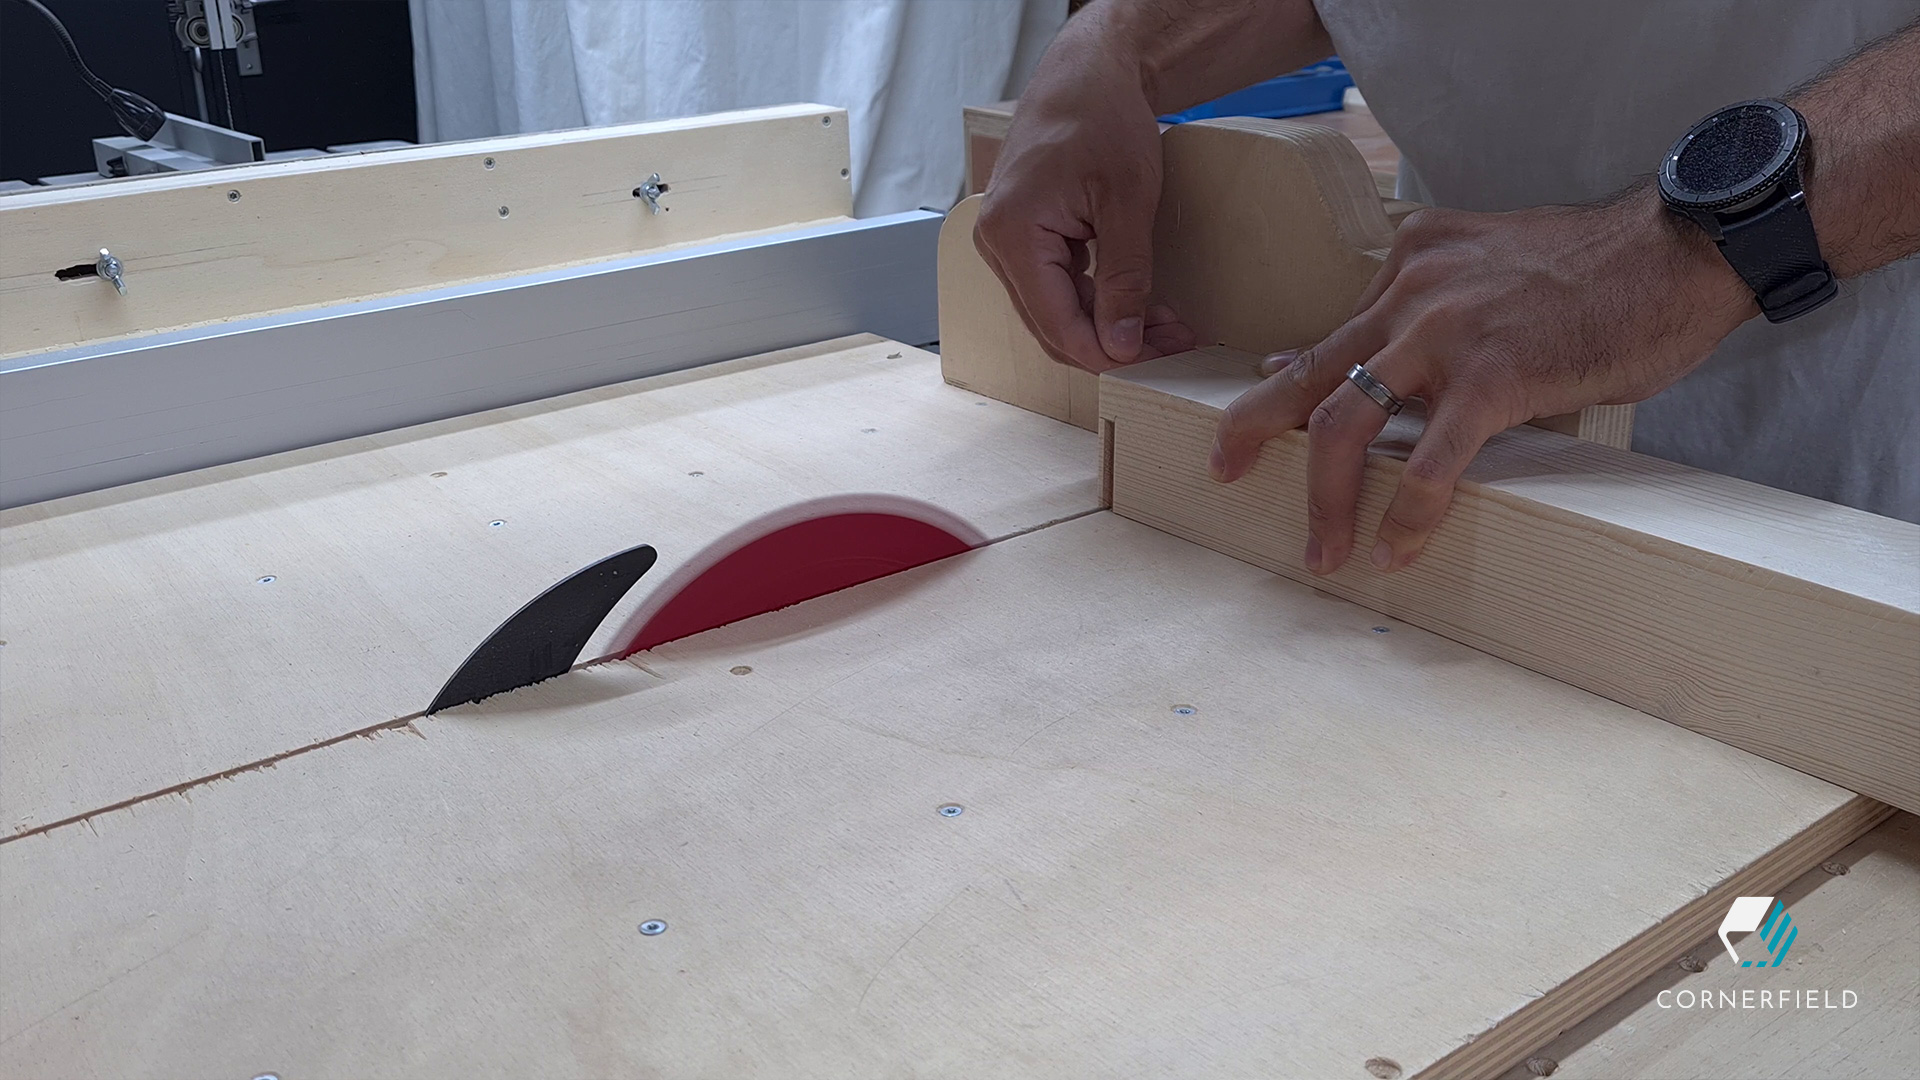
On one corner post, the top is thicker and is cut back at an angle. Instead of making one thick post I only glue on the piece that creates the angle and cut the waste off on the bandsaw. The last cuts before assembly are rabbets on the top of the posts to hold the top part of the staircase handrail. I cut those using my cross-cut sled and the table saw but since they are shallow a pull saw would have worked also.
Assembly
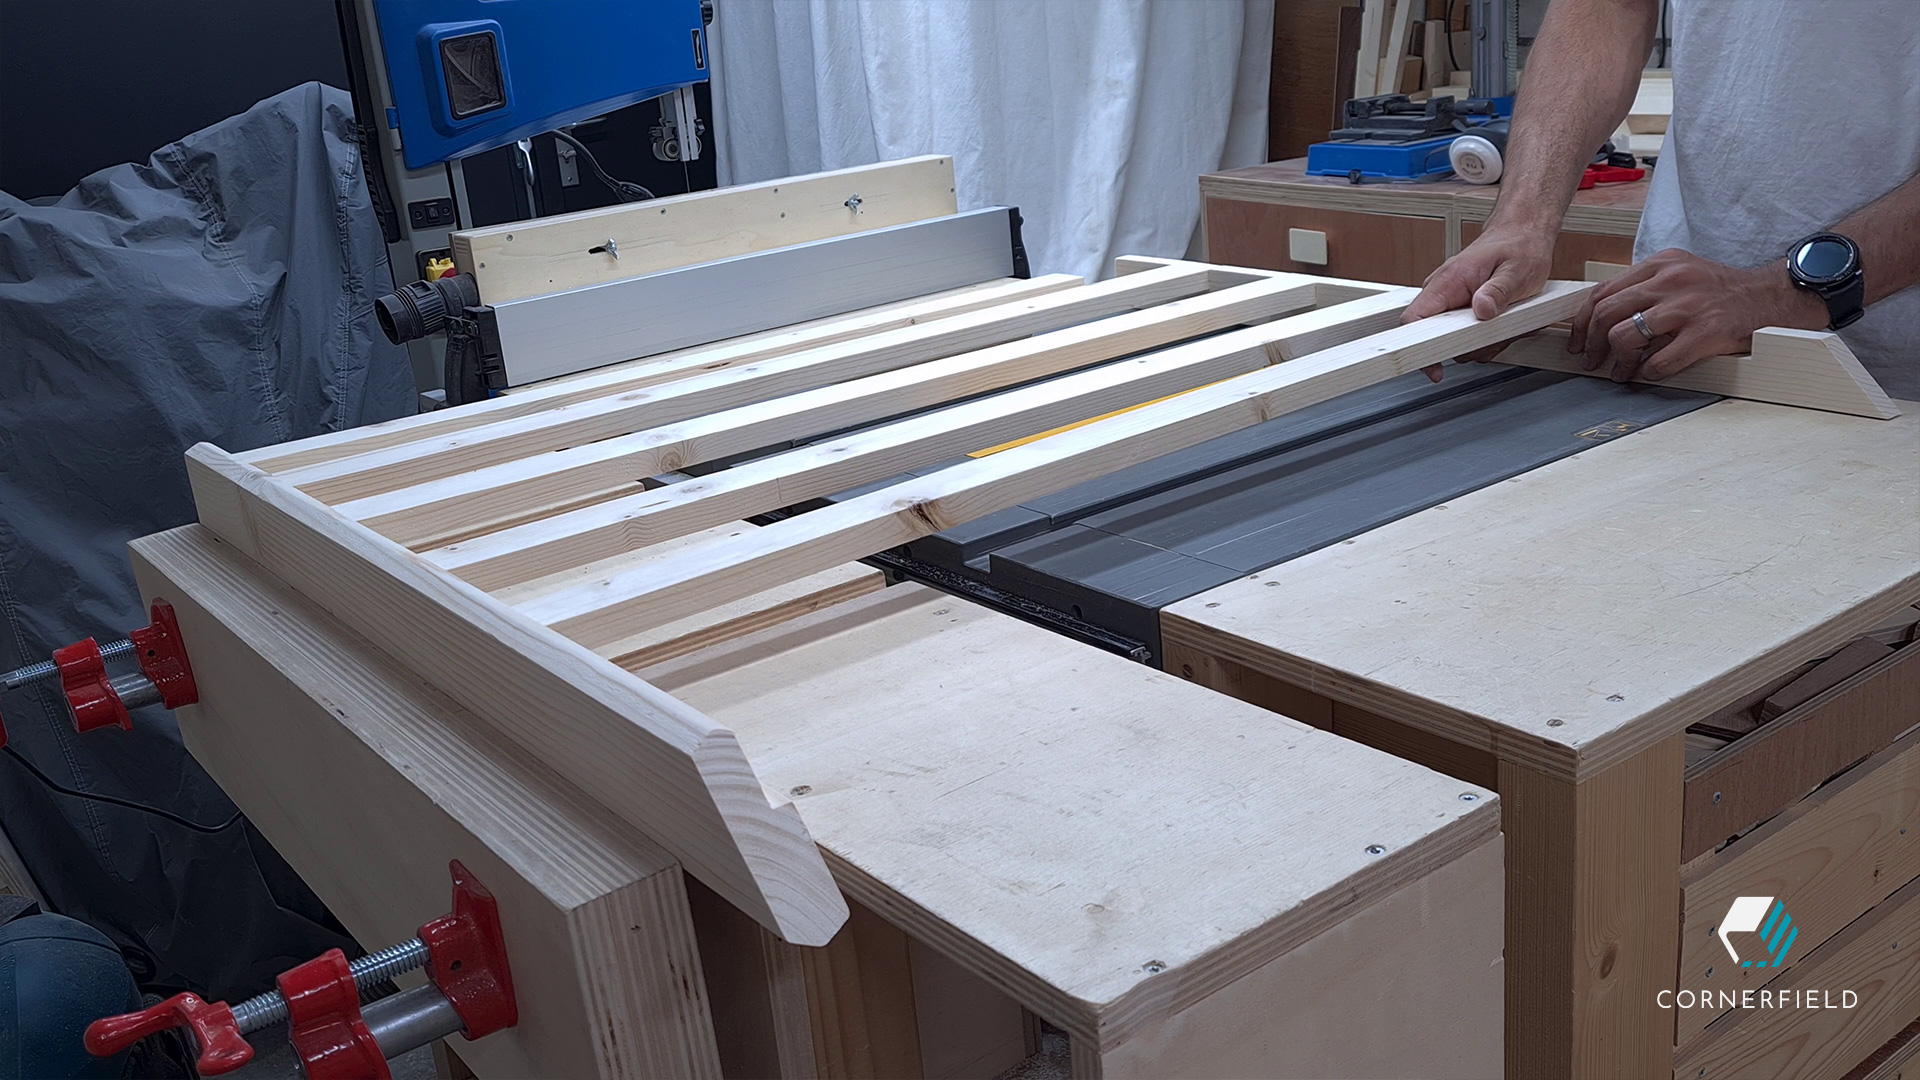
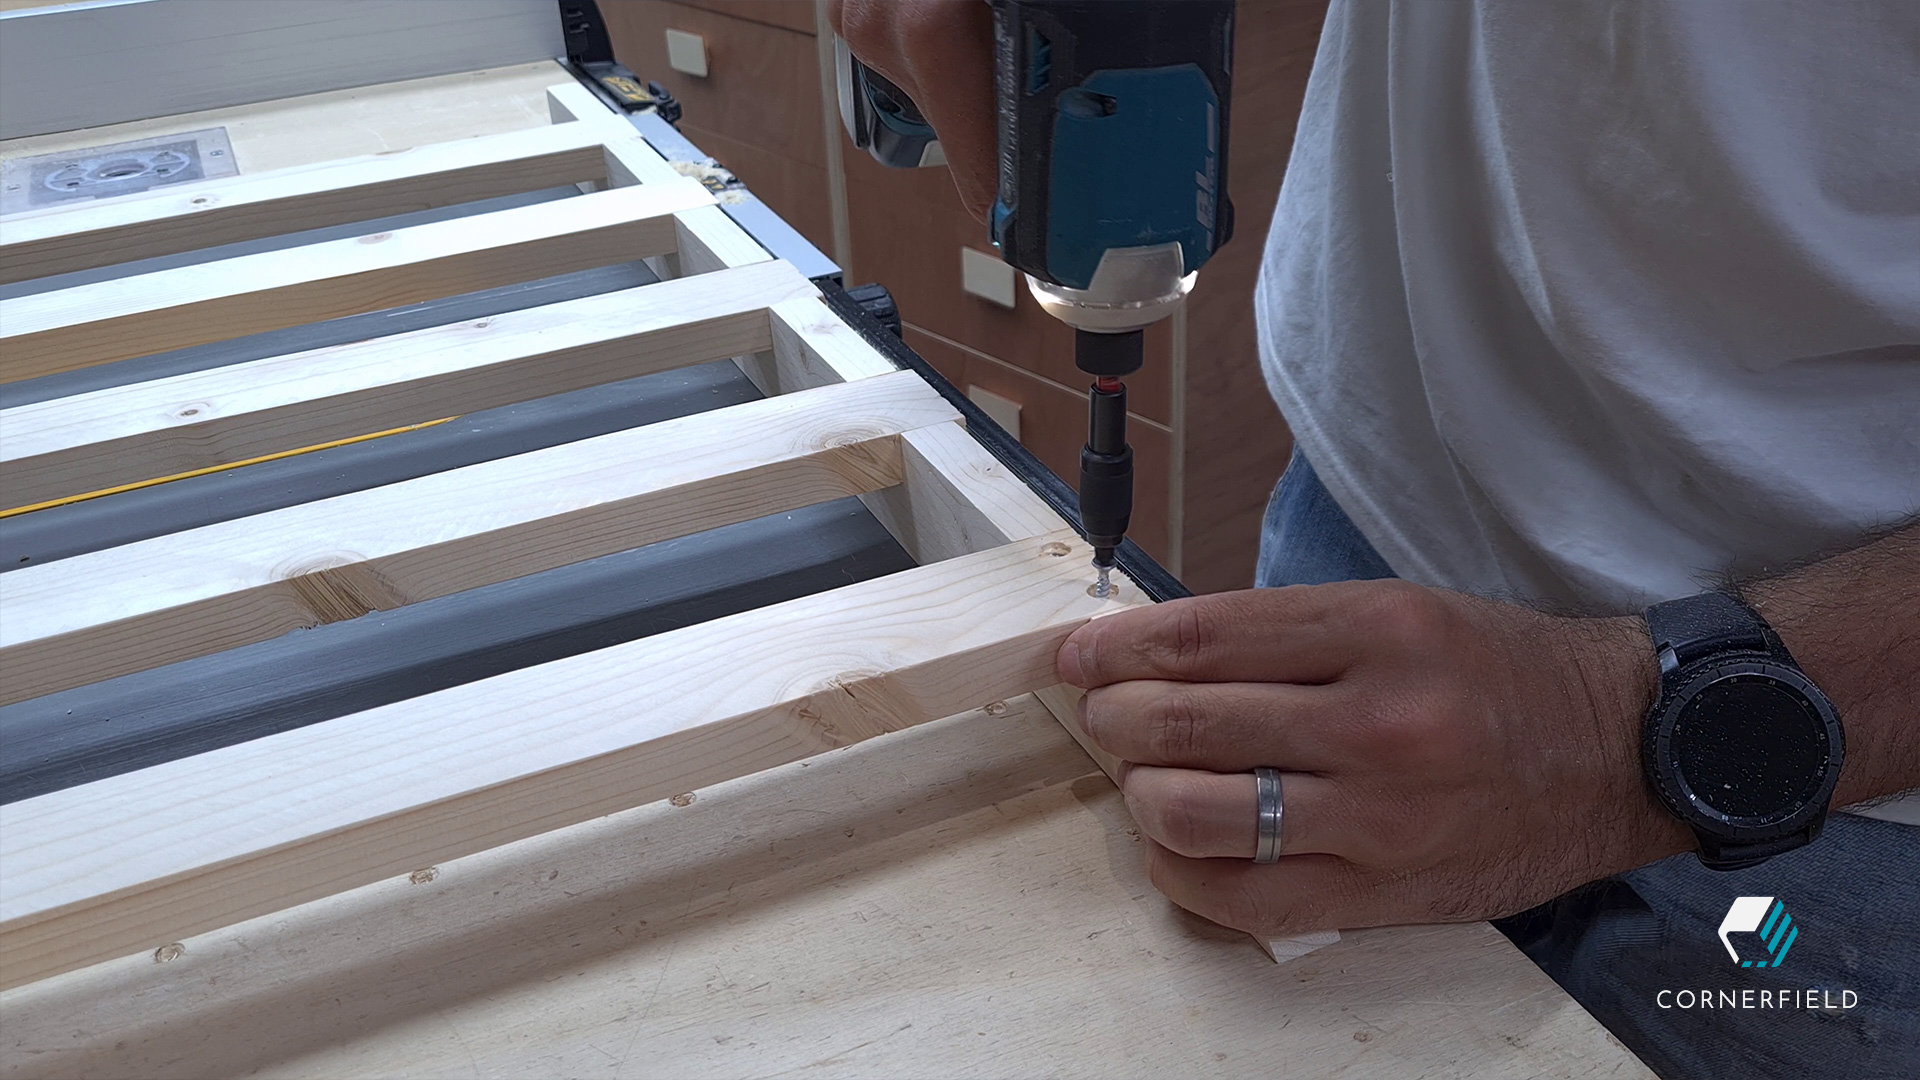
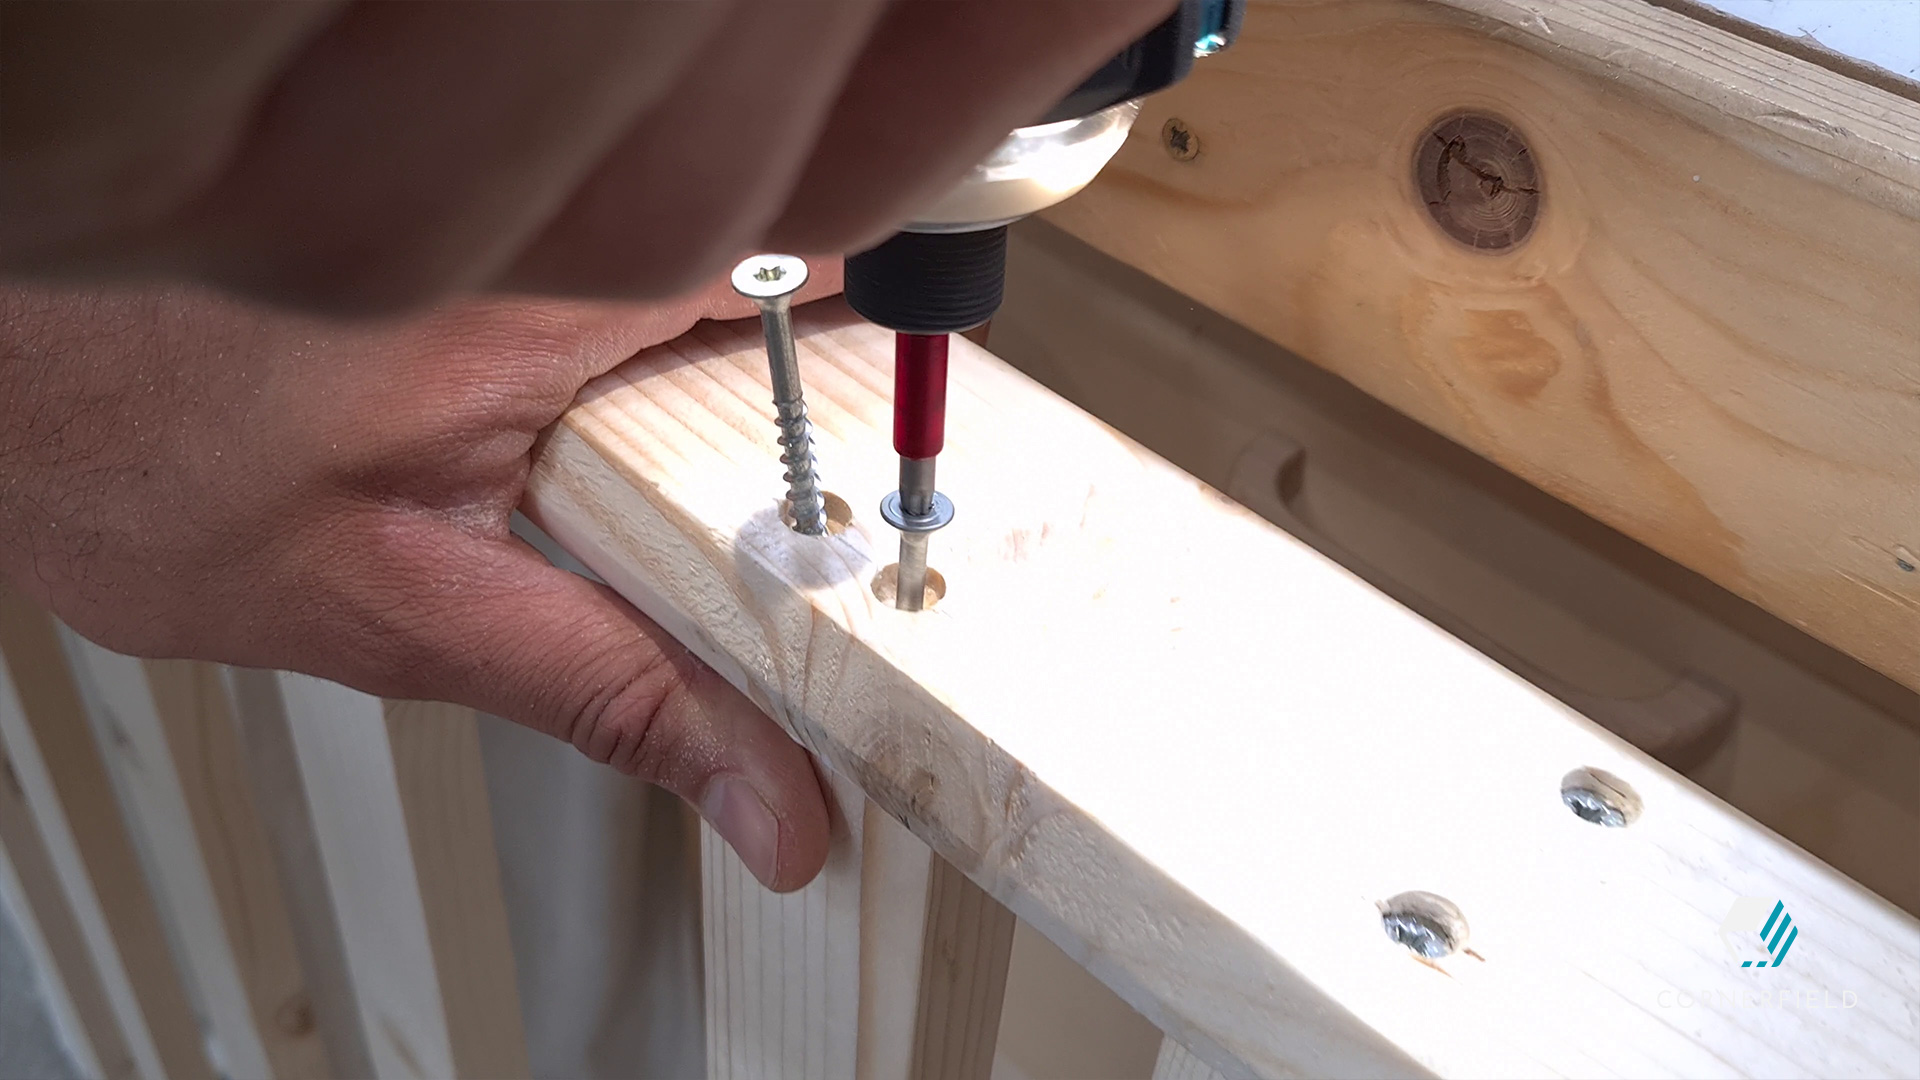
Now that all the parts are ready for assembly I sand everything up to 180 grit. You could go higher than that but for this application, it would have been a bit overkill since it will be painted anyway. I start by putting the vertical pieces in the bottom piece. I put glue in the slots, pre-drill and countersink screws. All the screw holes later get plugged with plugs I cut on the drill press. Next, I fasten the corner post to the top rail. The rabbet that’s cut on both pieces makes it easy to align the two pieces. However, fastening them was a little difficult because I initially tried to do this with only glue and clamps. You can imagine the pieces didn’t want to stay put. On my second attempt (off-camera), I chose to use screws and plugs the holes later. That went a lot better.
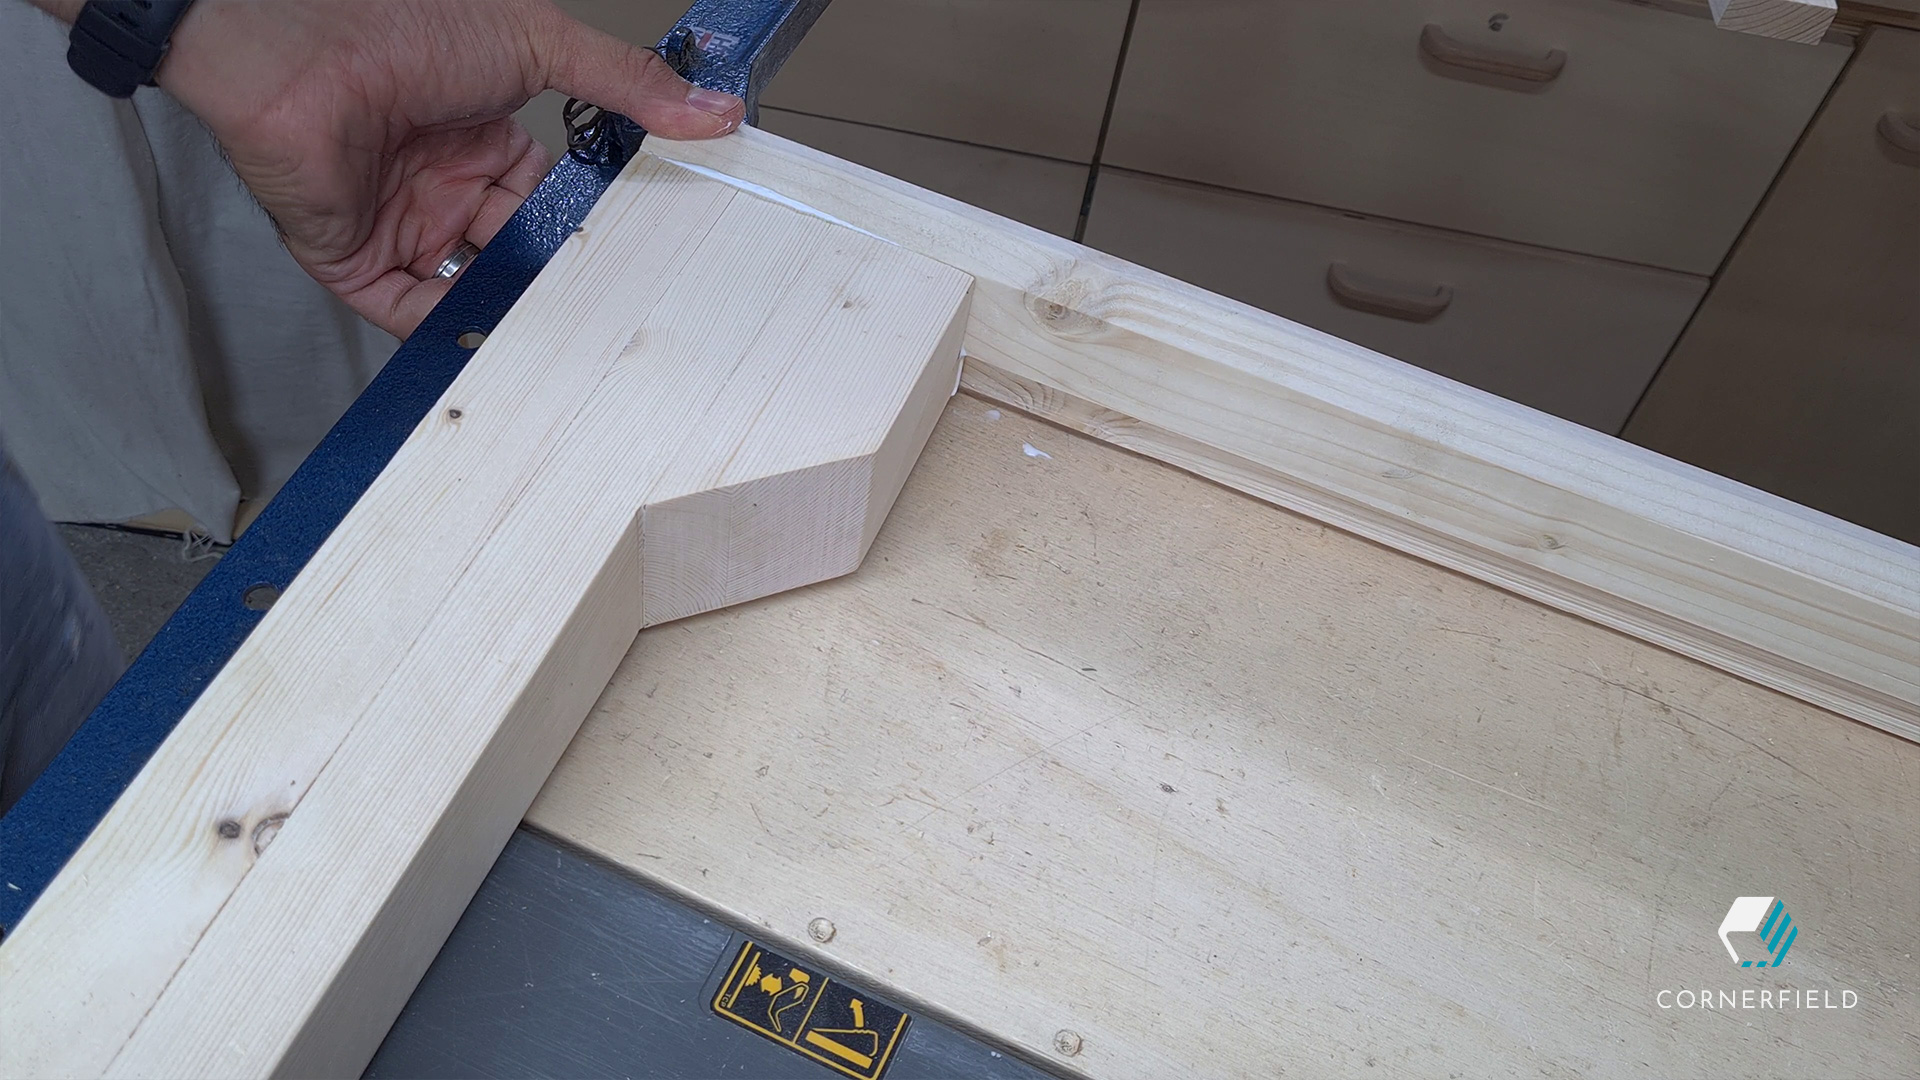
Now that I have two sections, I could fasten these two together. The post gets attached to the bottom strip using pocket screws from below. The vertical pieces get screws from the top, through the rail and plugged later. Before fastening them I made sure to mark the position where it was at a 90-degree angle and parallel with the bottom slot.

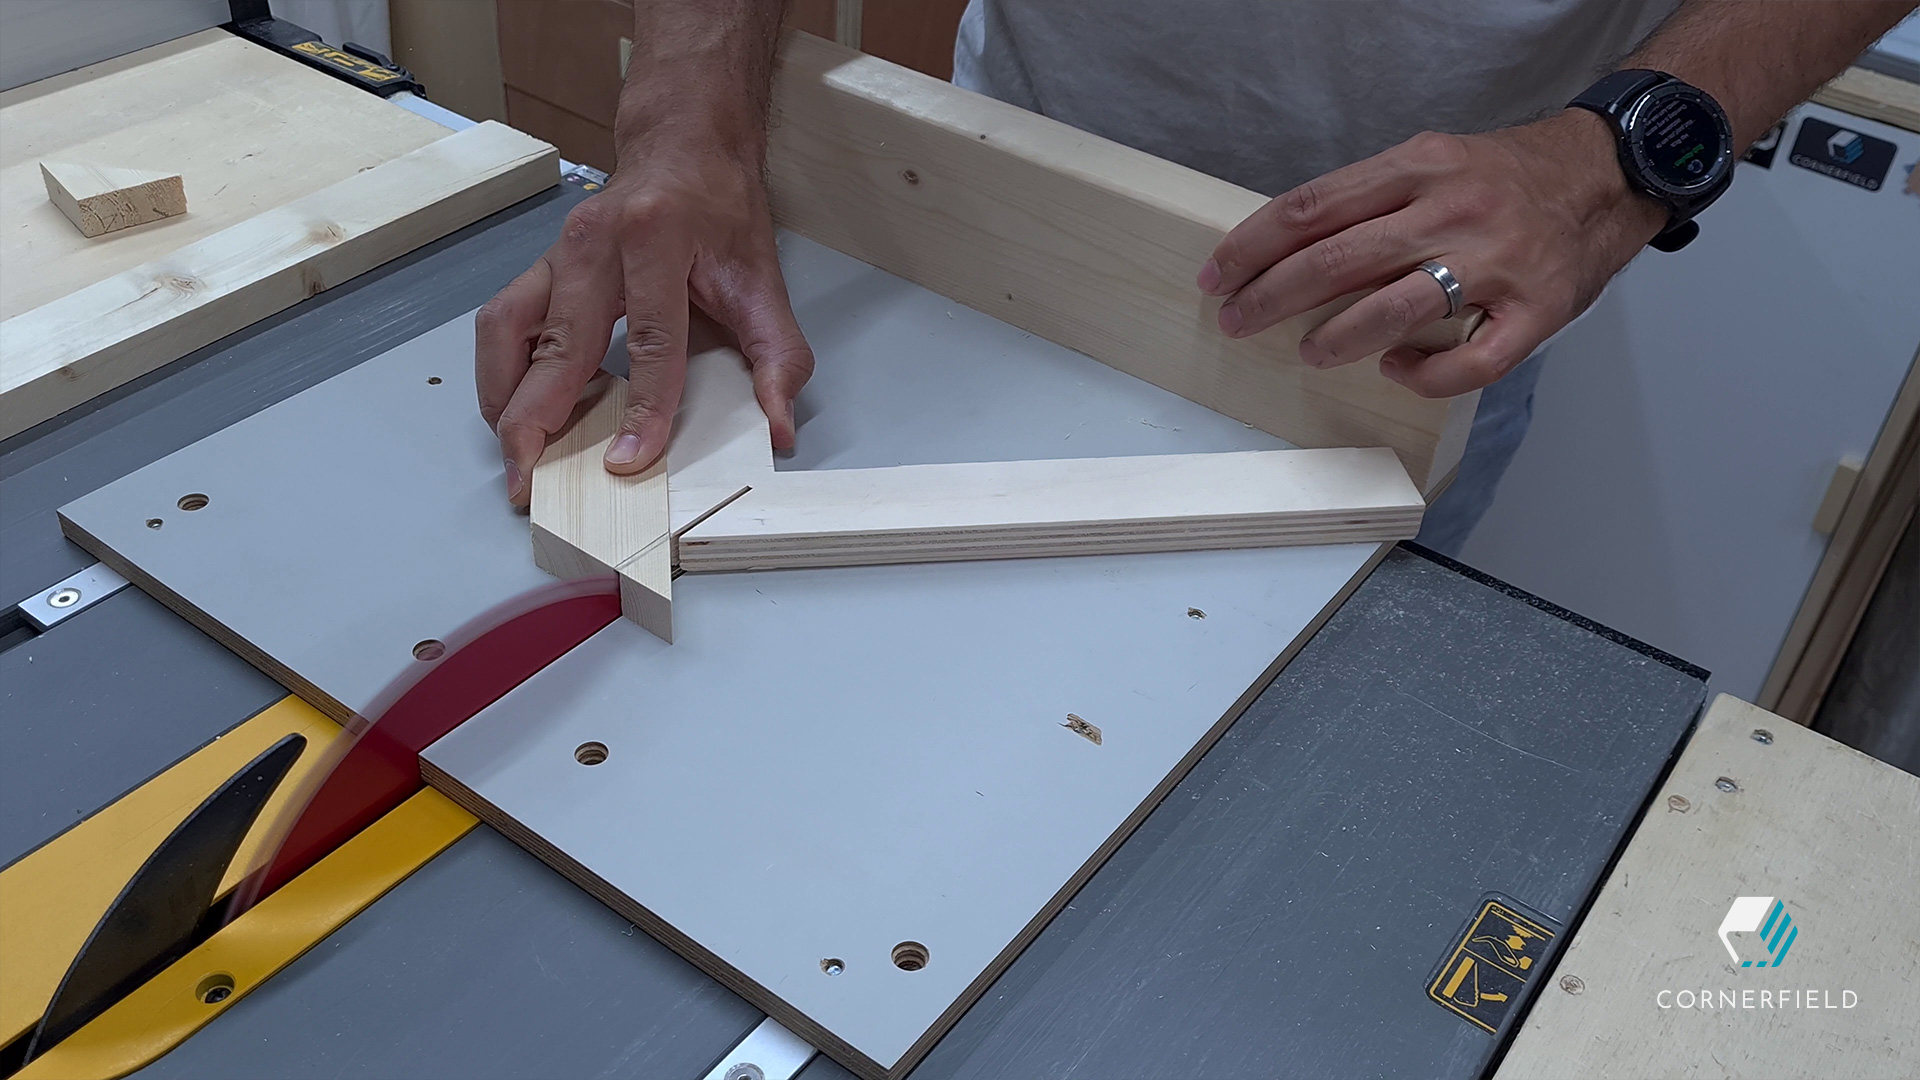
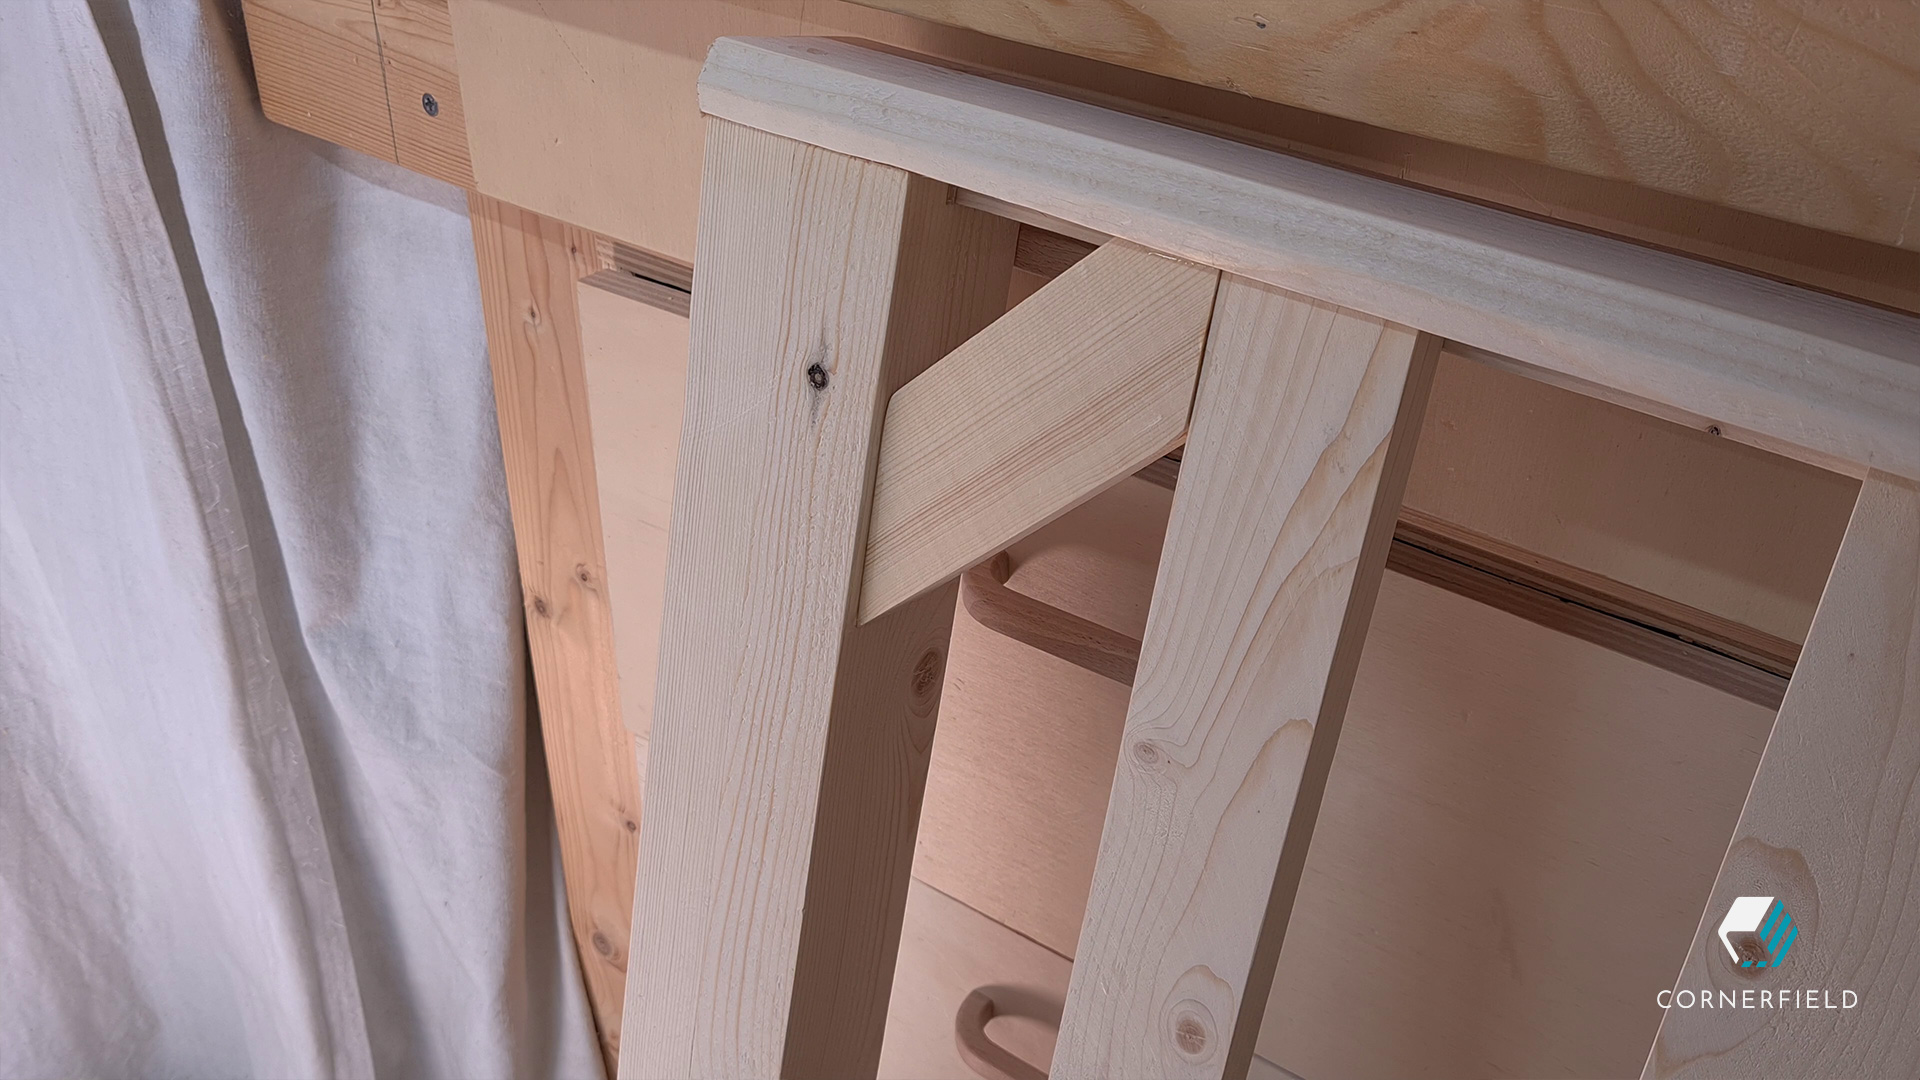
For one section of the two that I made, there is a small mitered piece that needs to be added next to the post. I cut that on my miter sled and glued it into place with some CA glue.
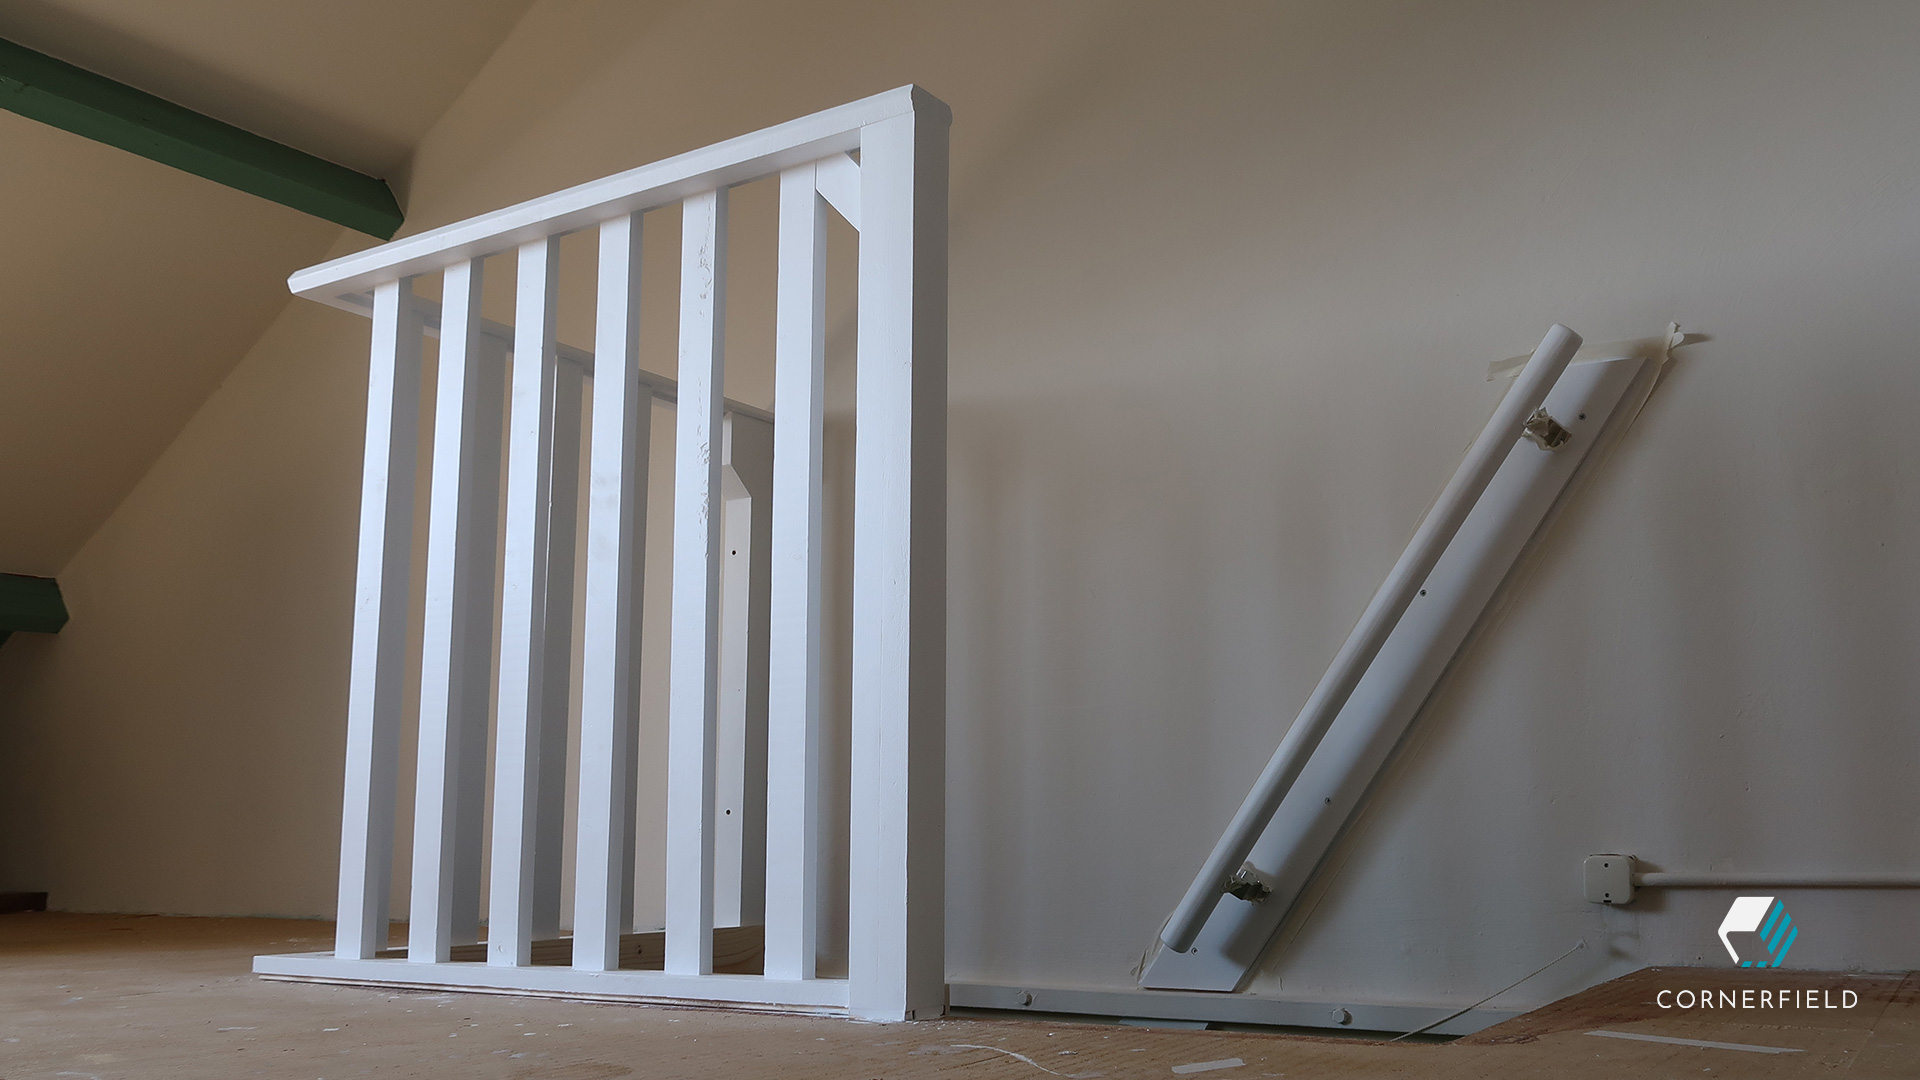
Installation
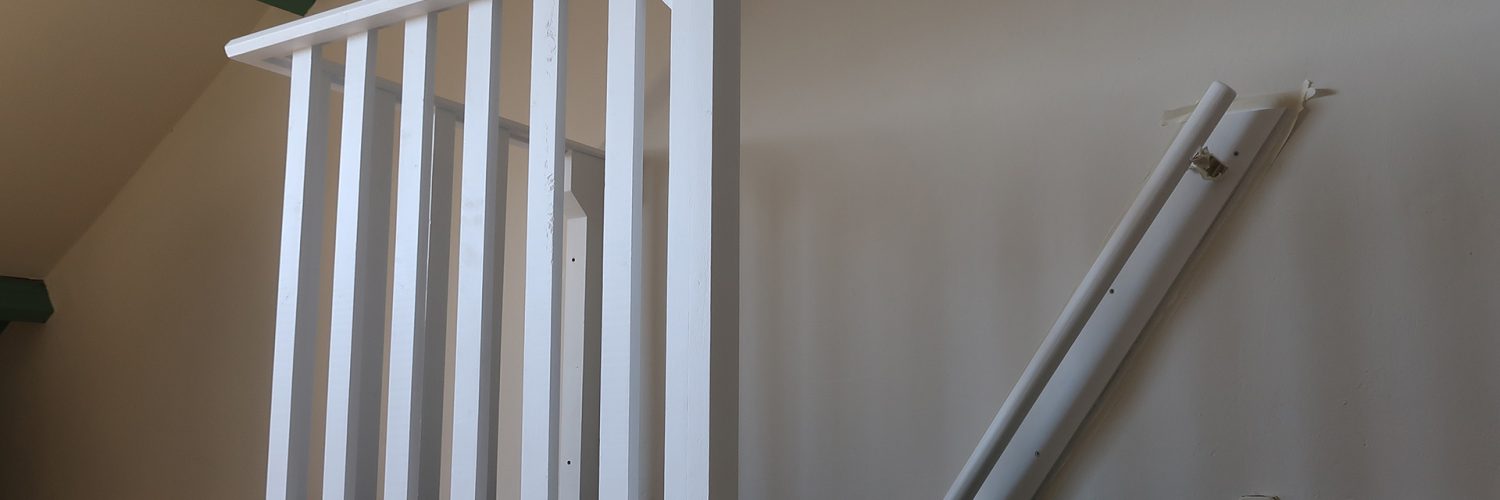
Installing the staircase handrail started on the side of the brick wall. Here I predrilled through the wood and marked the location on the wall. Then I drill holes where the marks are and put in wall plugs (a.k.a. anchors). The post can now be fastened to the wall with long screws. The bottom part could simply be screwed into the wooden subfloor, so that was pretty straight forward. Next, the other part of the handrail could be fastened to the first. I did this by drilling through the mitered corners and putting in long screws. Of course, also adding glue to the joint. Then that bottom gets fastened down the floor as well and it’s installed!
Result
The staircase handrail looks identical to the original and it feels really sturdy when you grab it walking down the steps. The owners of the house now have a much safer feeling walking around the staircase opening and down the steps. I also think it really adds to the feeling of a room now that it’s installed. In any case, it was a very interesting project to build, especially because of the requirements of the design. I wouldn’t mind making something like this again in the future. Who knows, perhaps I will do some more renovation related projects.
Download & Links
If you want to make one for yourself I have my SketchUp model available as a download in the link below.
SketchUp 3D-model
Instagram 1 | 2 | 3 | 4 | 5 | 6
I hope this post has inspired you to make something!
Don’t forget to follow your excitement  .
.
– Rico
Add comment