

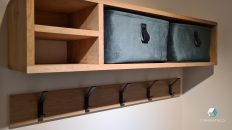
This toolbox is meant as a gift for a fellow YouTuber (Crafts with Ellen) but it is also meant as a
challenge for myself. I wanted to find out how much my skills have progressed since I started woodworking.
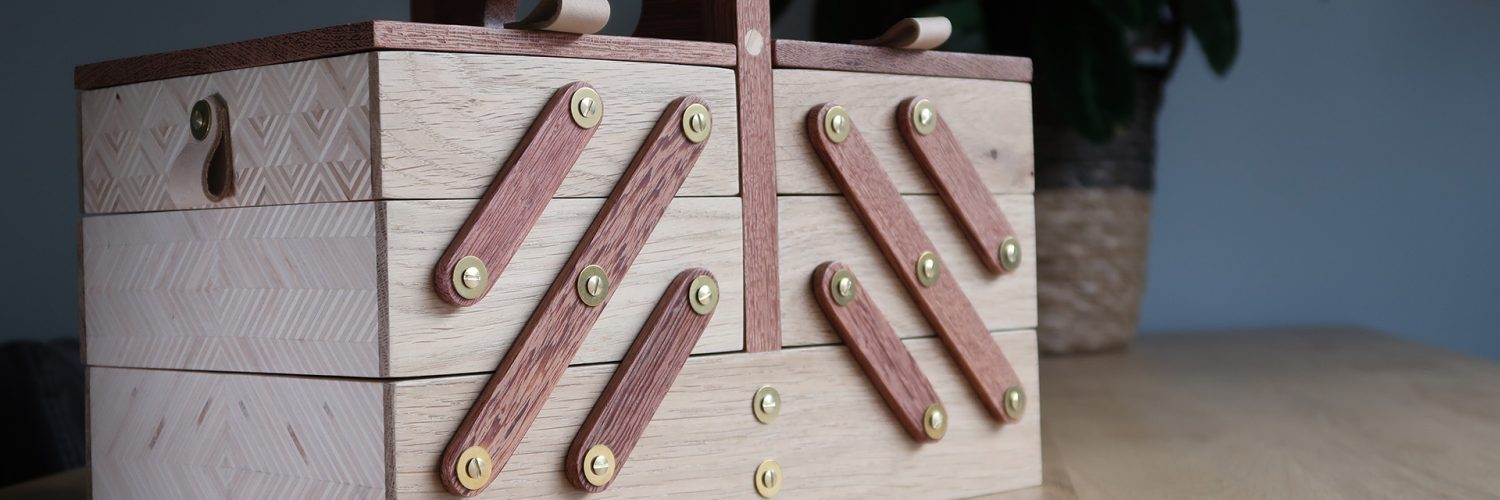
Both the patterned plywood as well as the cantilever action make it far from a standard toolbox.
Let me walk you through my process for this build.
Design
Thought behind the project
This project came from several different ideas combined into a single build. First I came across the patterned plywood projects from Michael Alm. I knew this was something I wanted to do, so that was first on the design list. Next came the idea to make something small and intricate to see how precise I was able to work. I wanted to measure my progress as a maker and I think this project turned out to fit that bill perfectly. Lastly, the shape in which this all came together. This came to me after seeing this Instagram post. I’ve seen Ellen make cool gifts for other makers and I wanted to return the favor. Since she is mostly into sewing I immediately thought of an old-school sewing box.
3D model
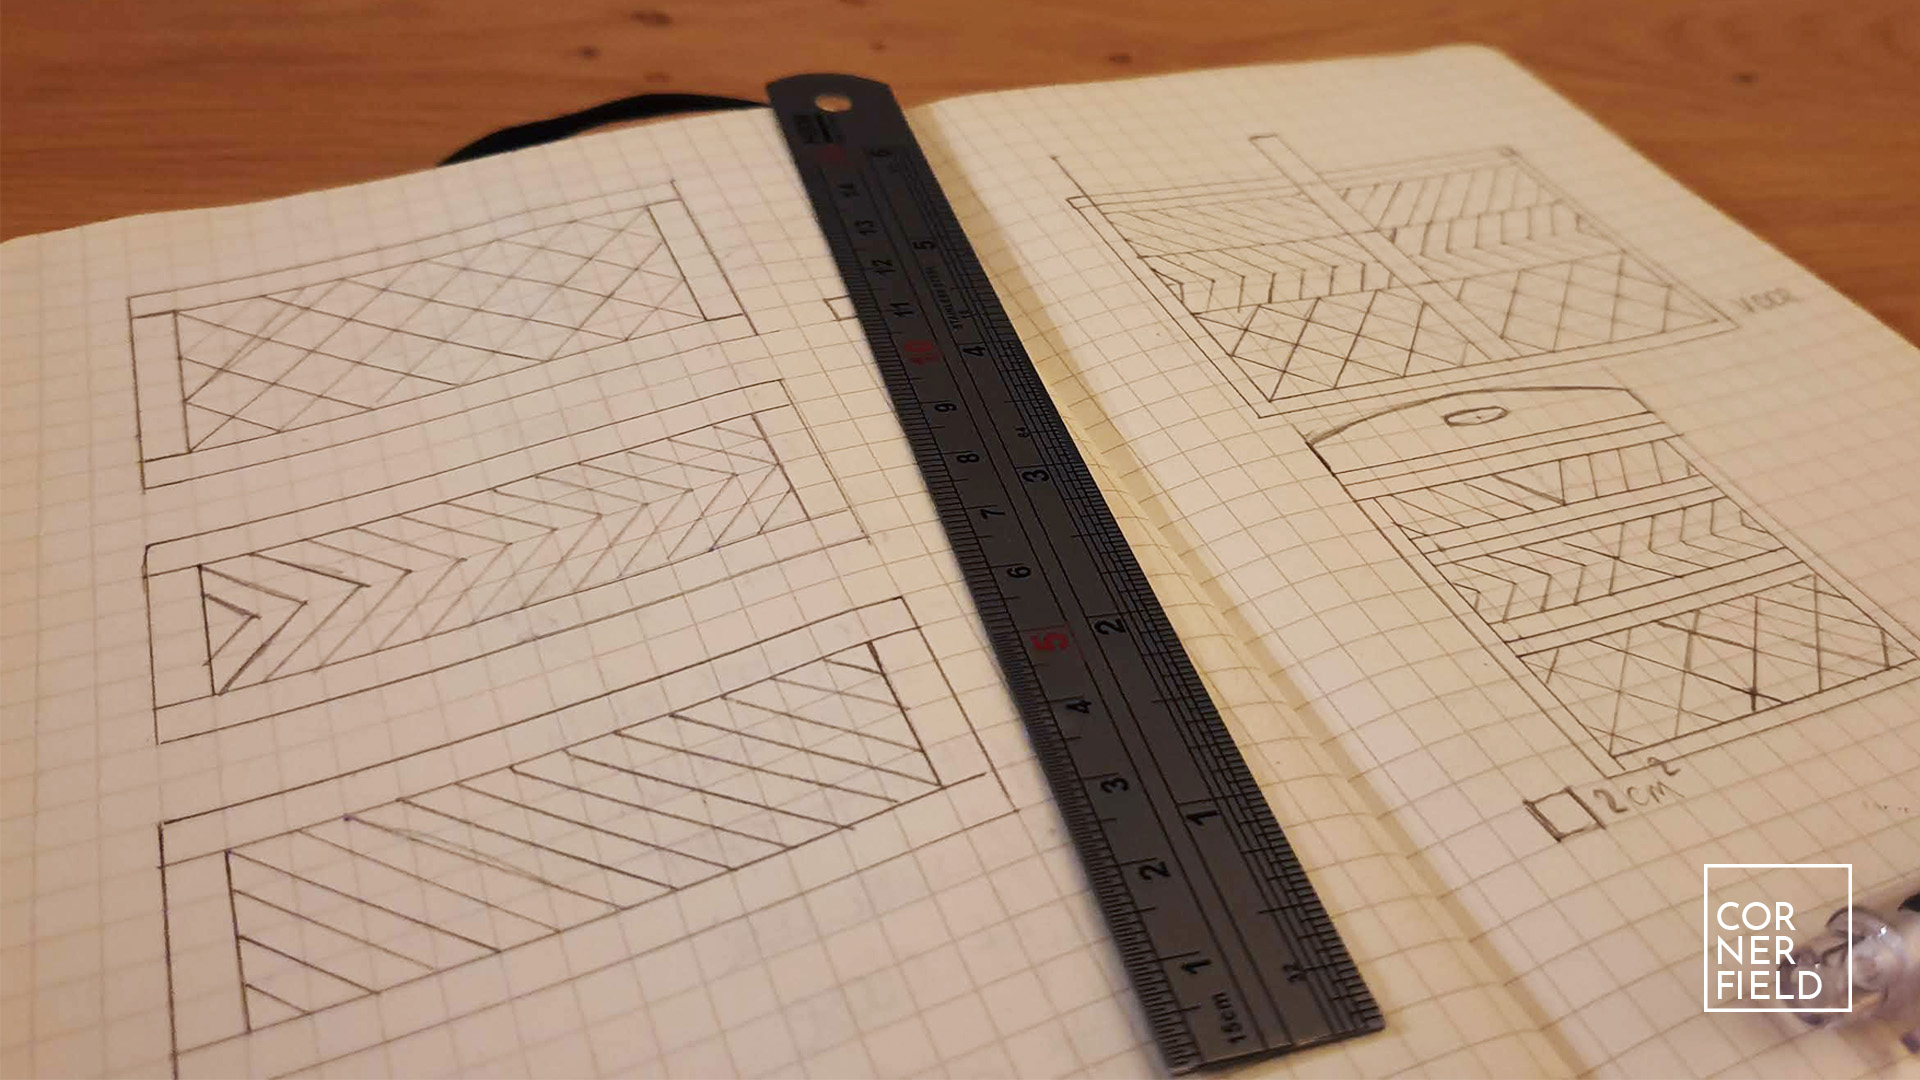
To visualize my idea for the plywood patterns I started out with some sketches.
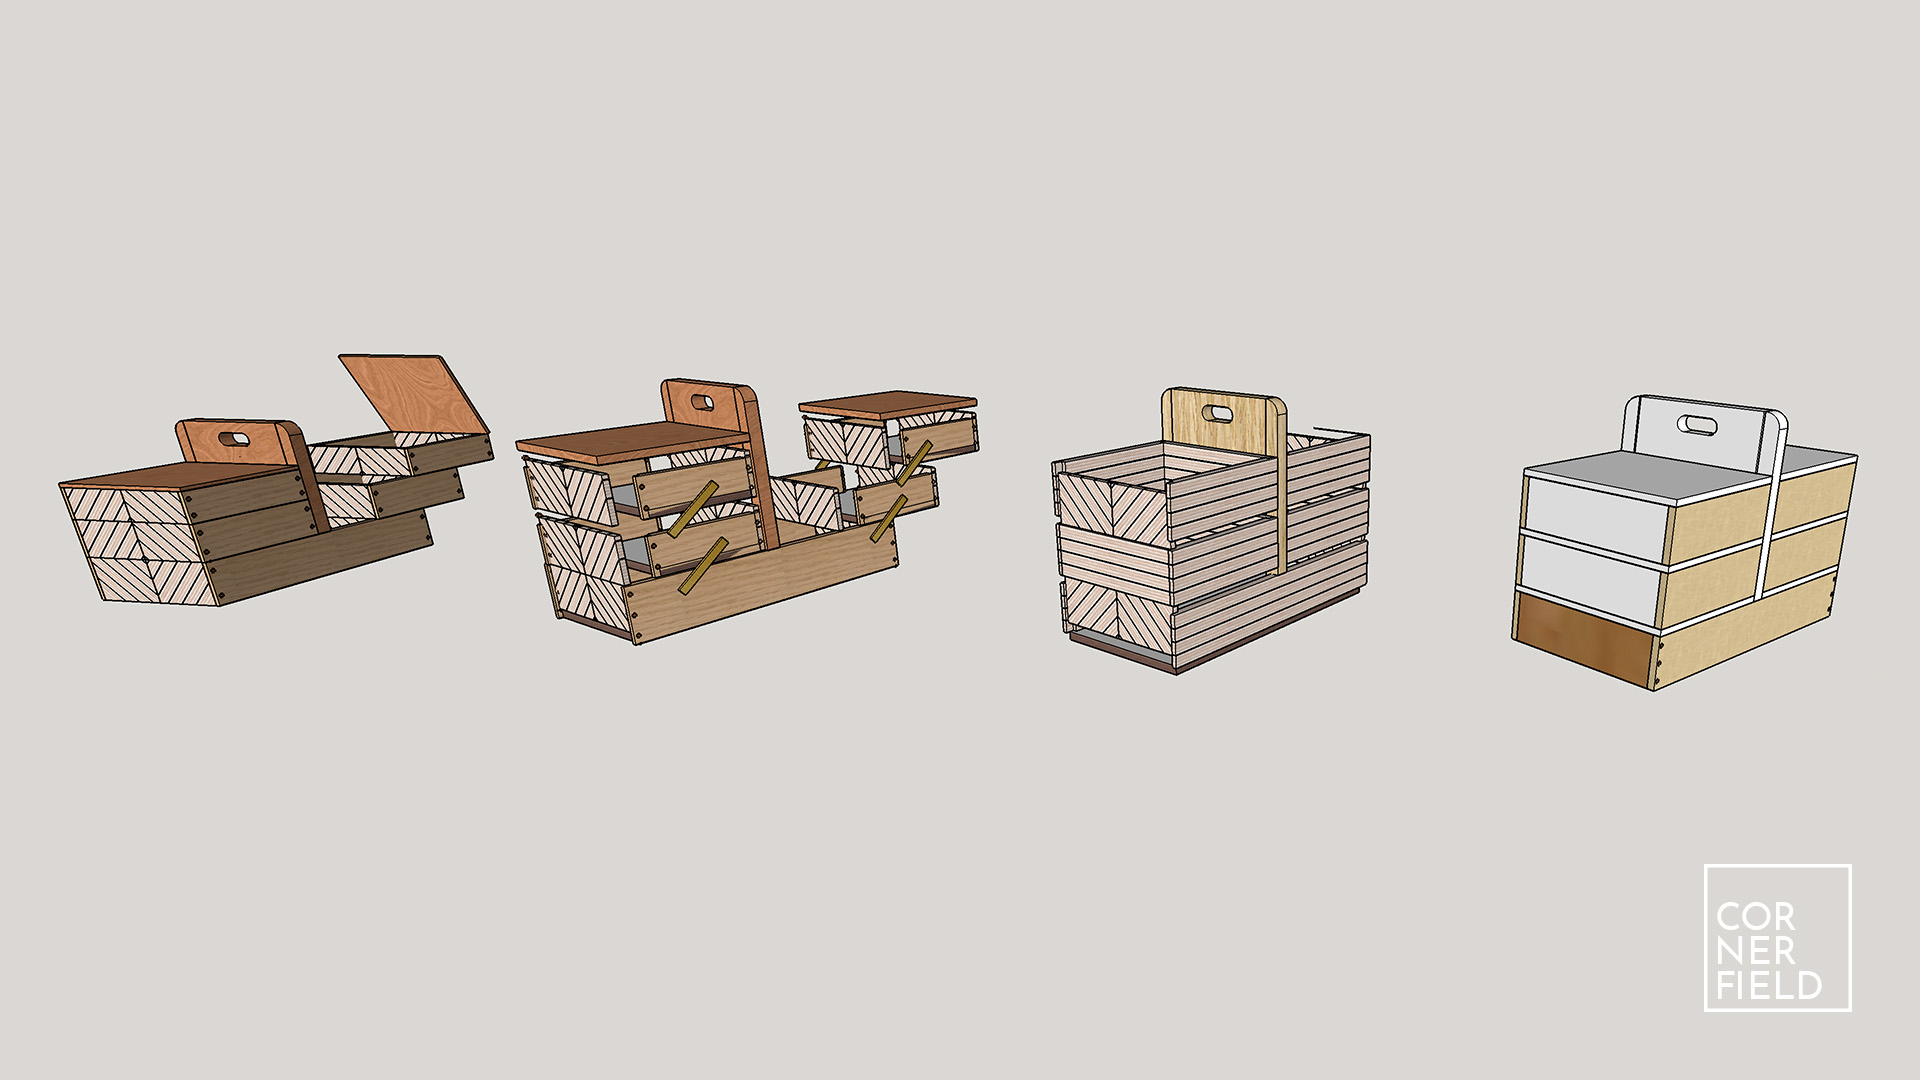
For the rest of the toolbox design, I went to Sketchup and worked through 4 different versions until I was happy with the result. However, like most of my projects, the end result is not exactly what I had in mind. More on that in the Build section.
Build
Preparation
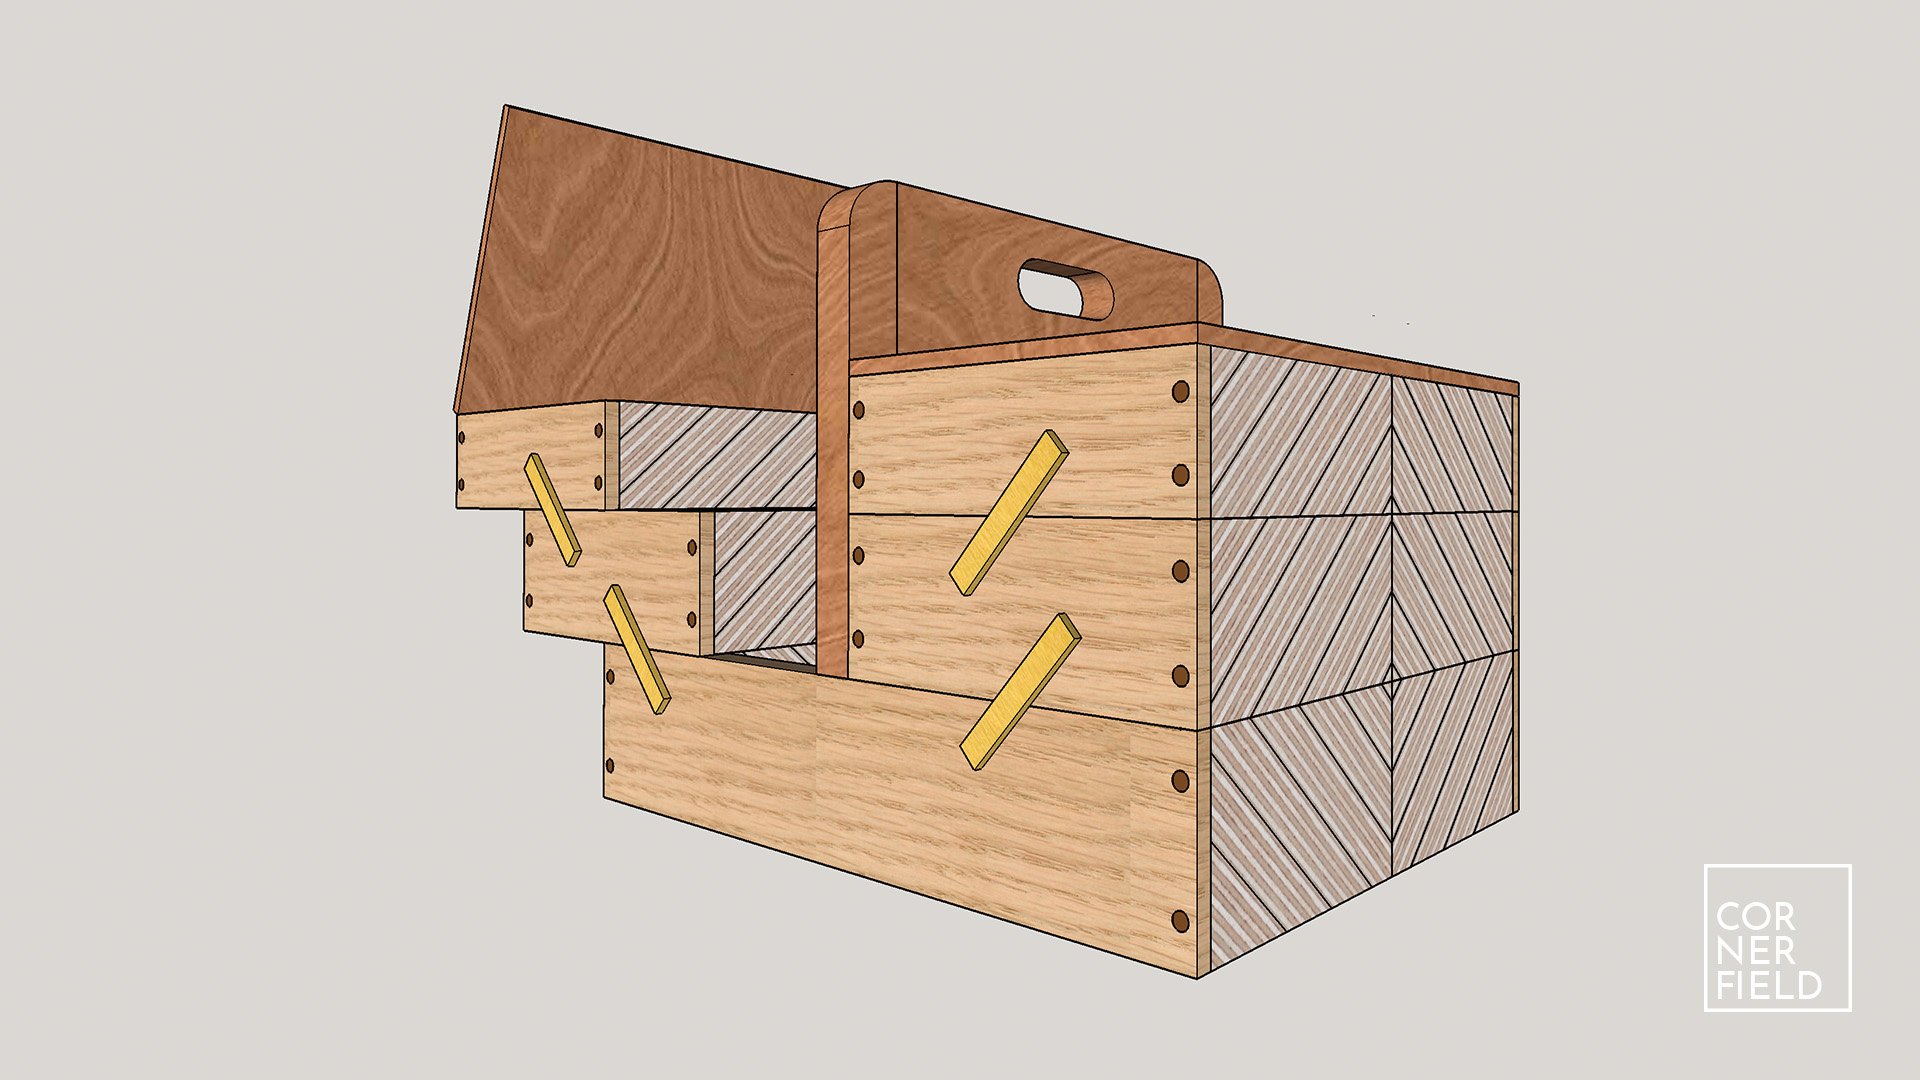
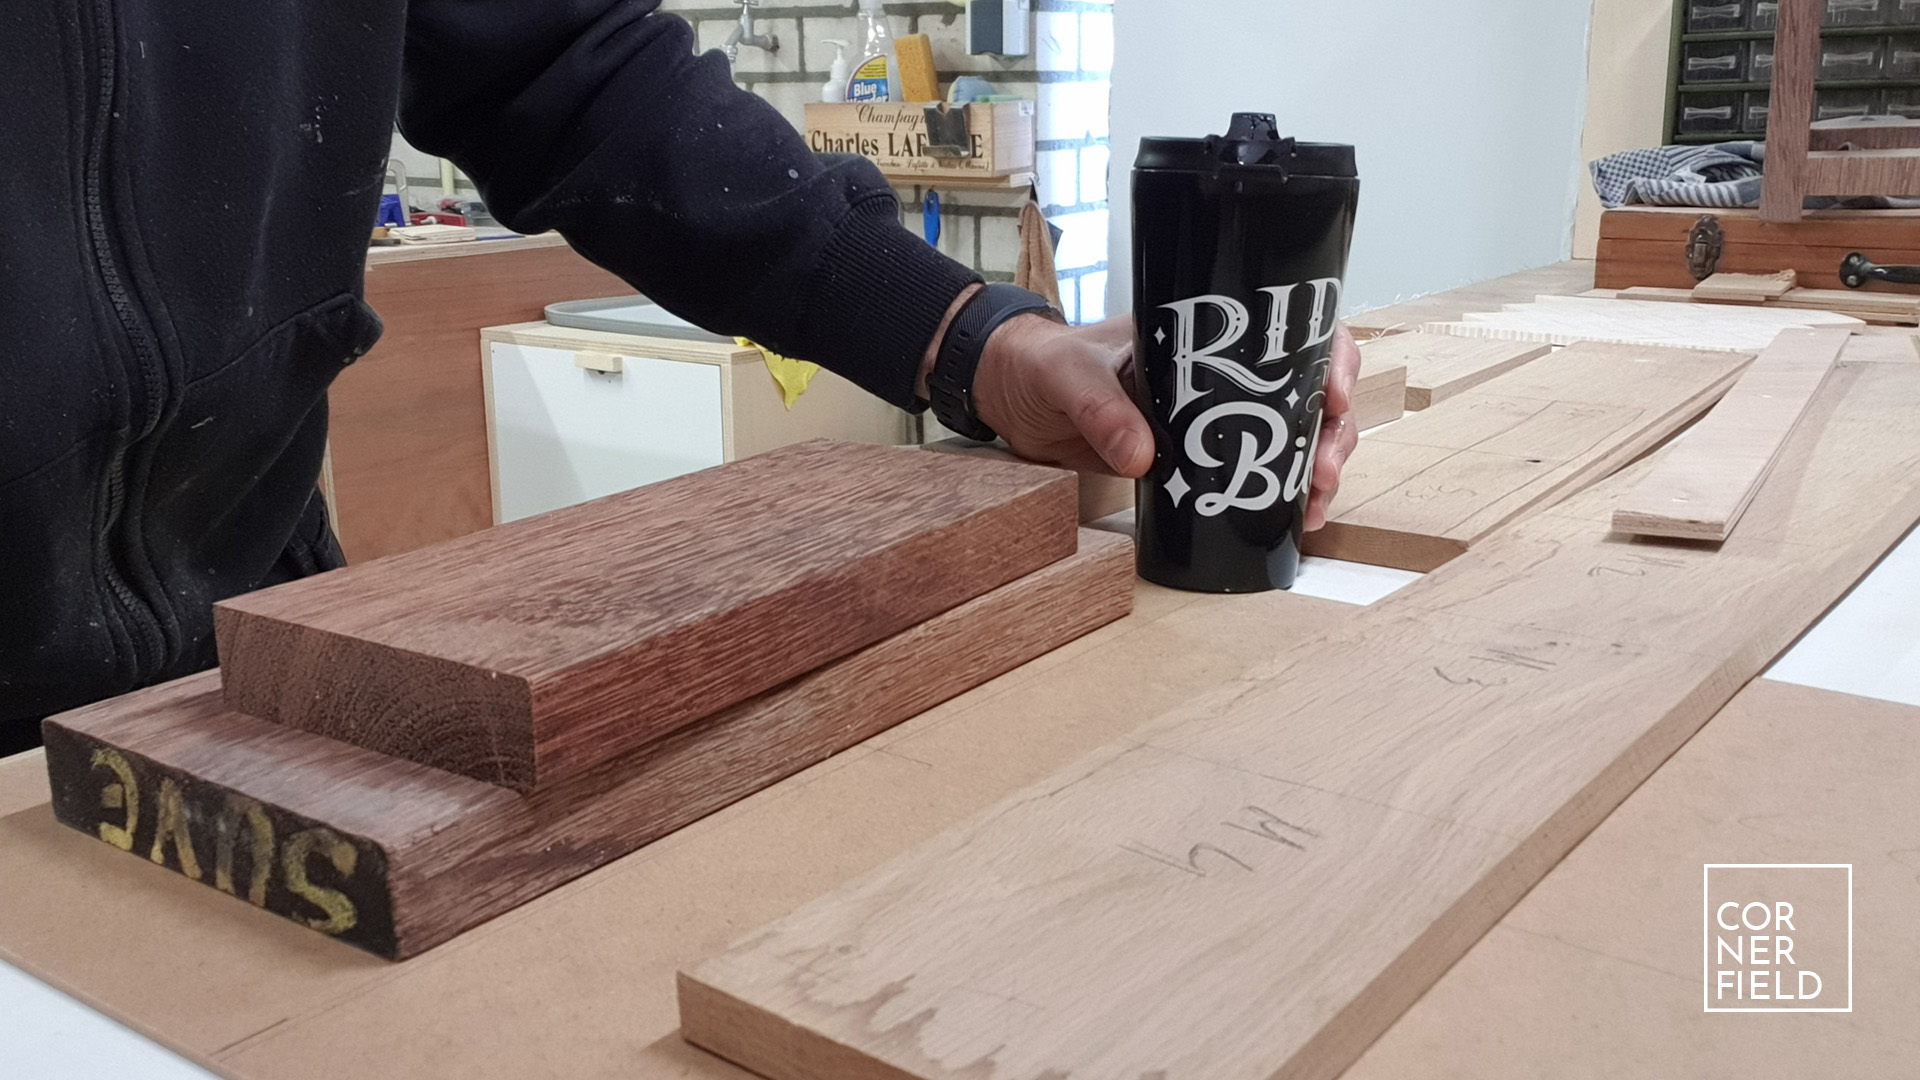
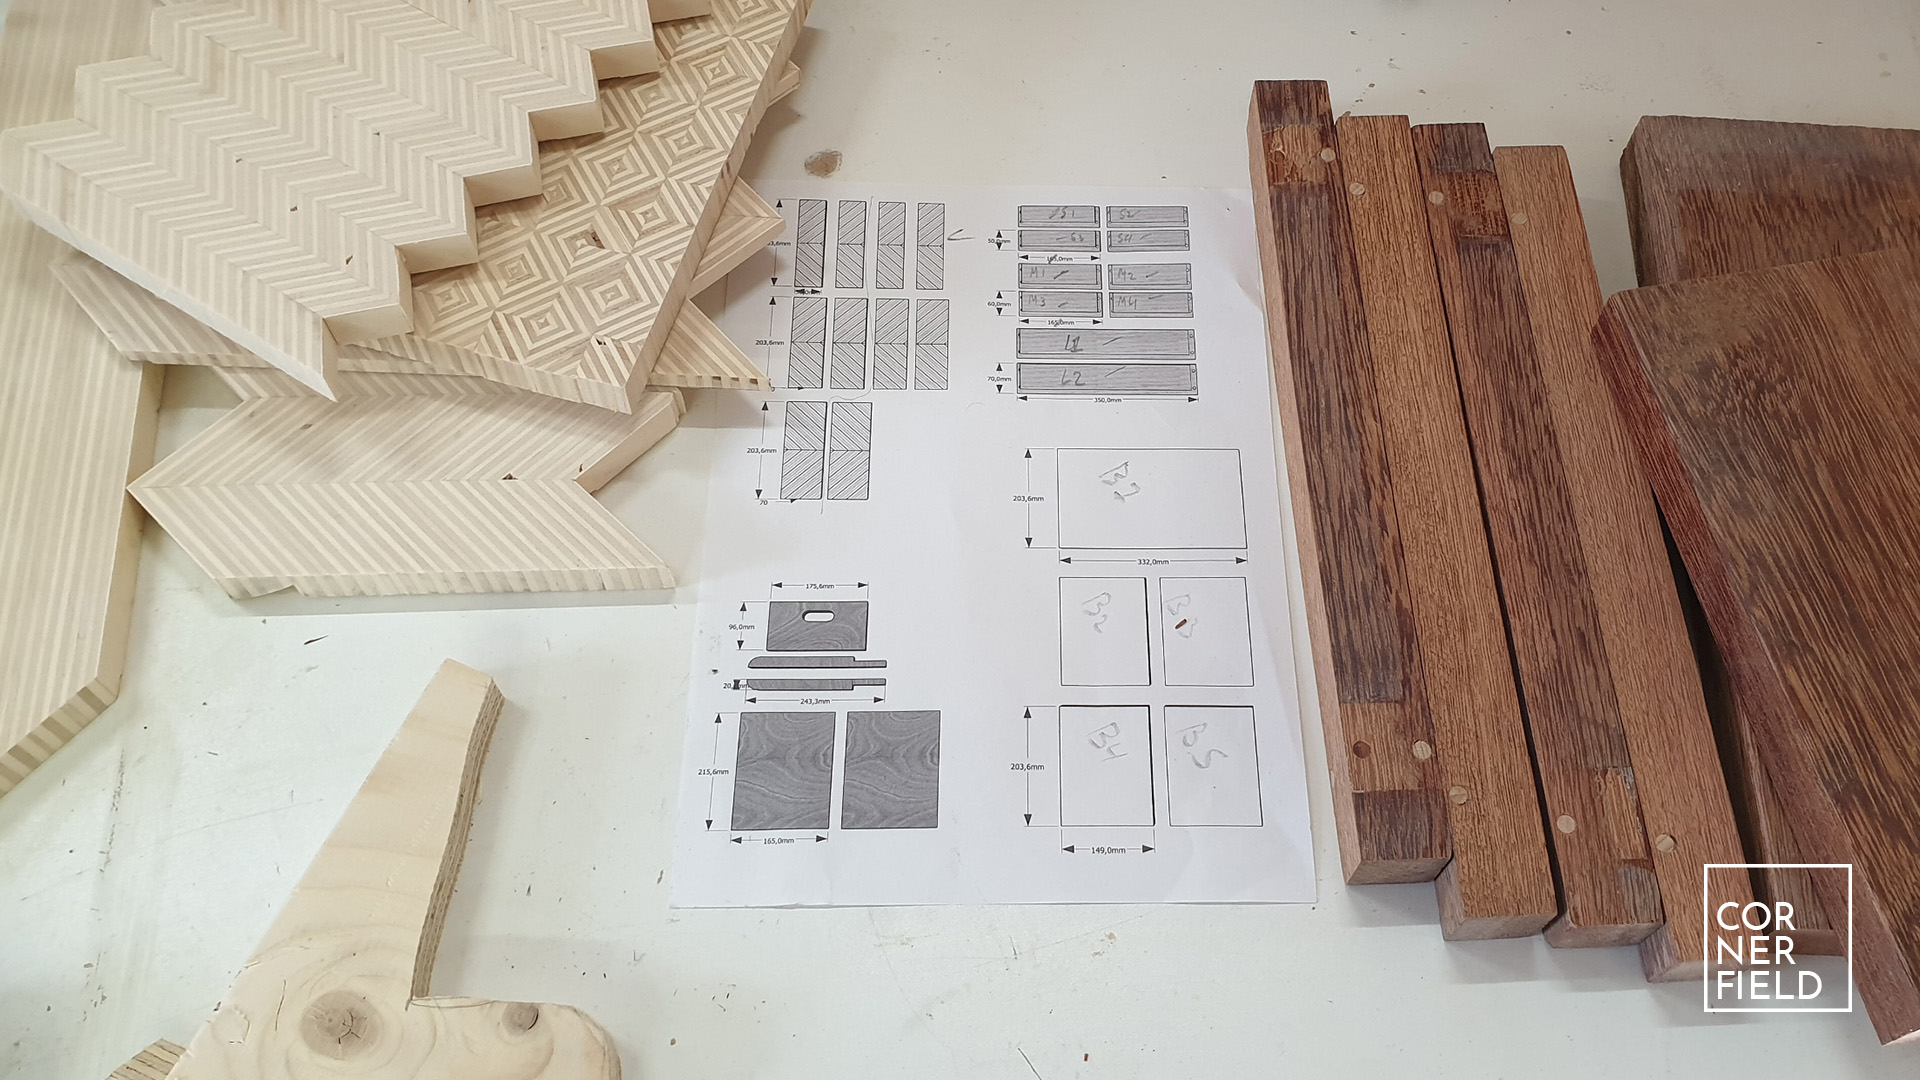
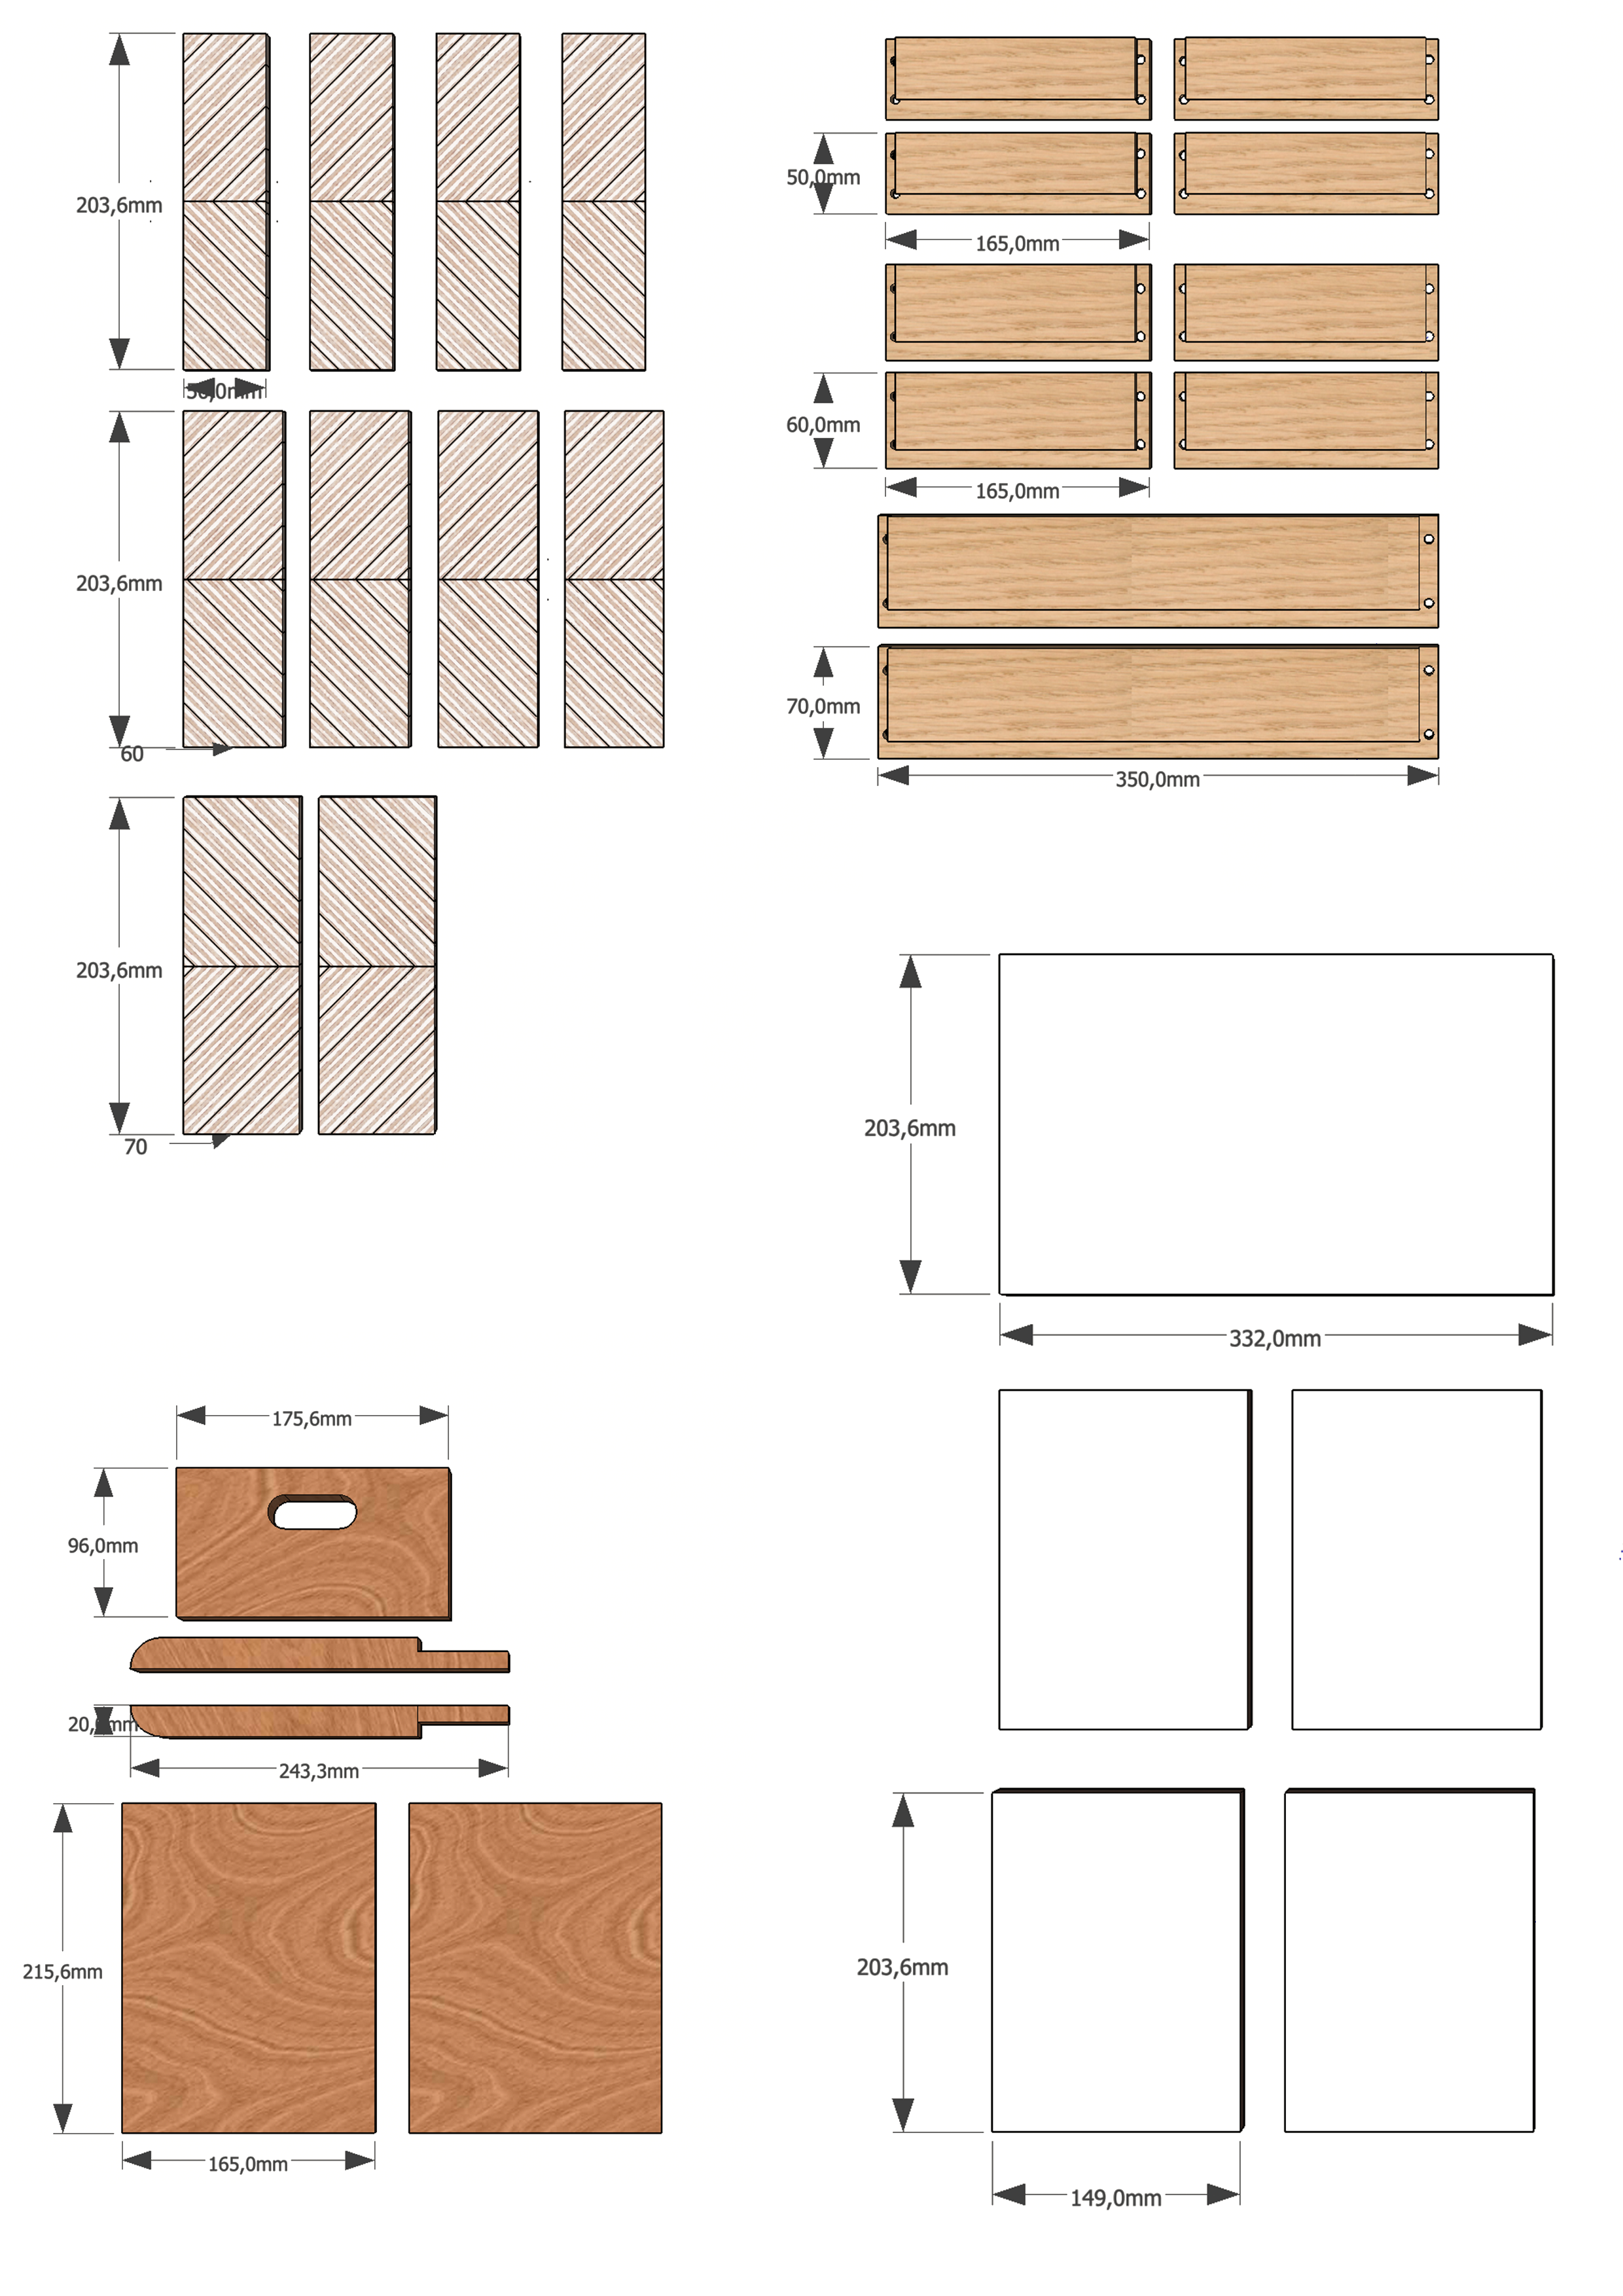
After I finished my 3D model I separated all the parts into a cut list. You can find a download of that list below. I printed out the list and named all the individual parts. Now it was time to go into the shop and find the wood I needed. I measured and marked all the pieces from my cut list on to the wood. Making sure I have enough and to see where all the different pieces are cut from.
Plywood patterns
With the solid wood marked out, I moved on to the plywood strips for the patterns. Before cutting anything I quickly made a zero clearance insert. This is to prevent thin strips from falling into the saw and causing all sorts of dangerous situations. With that out of the way, I cut a bunch of strips. The width of the strips determines the final thickness of your pattern piece. Something to keep in mind before cutting the strips. Next up is gluing the strips together, making sure that they meet at a 45-degree angle at the bottom. This prevents waste because we are cutting the glued piece into strips under a 45-degree angle.
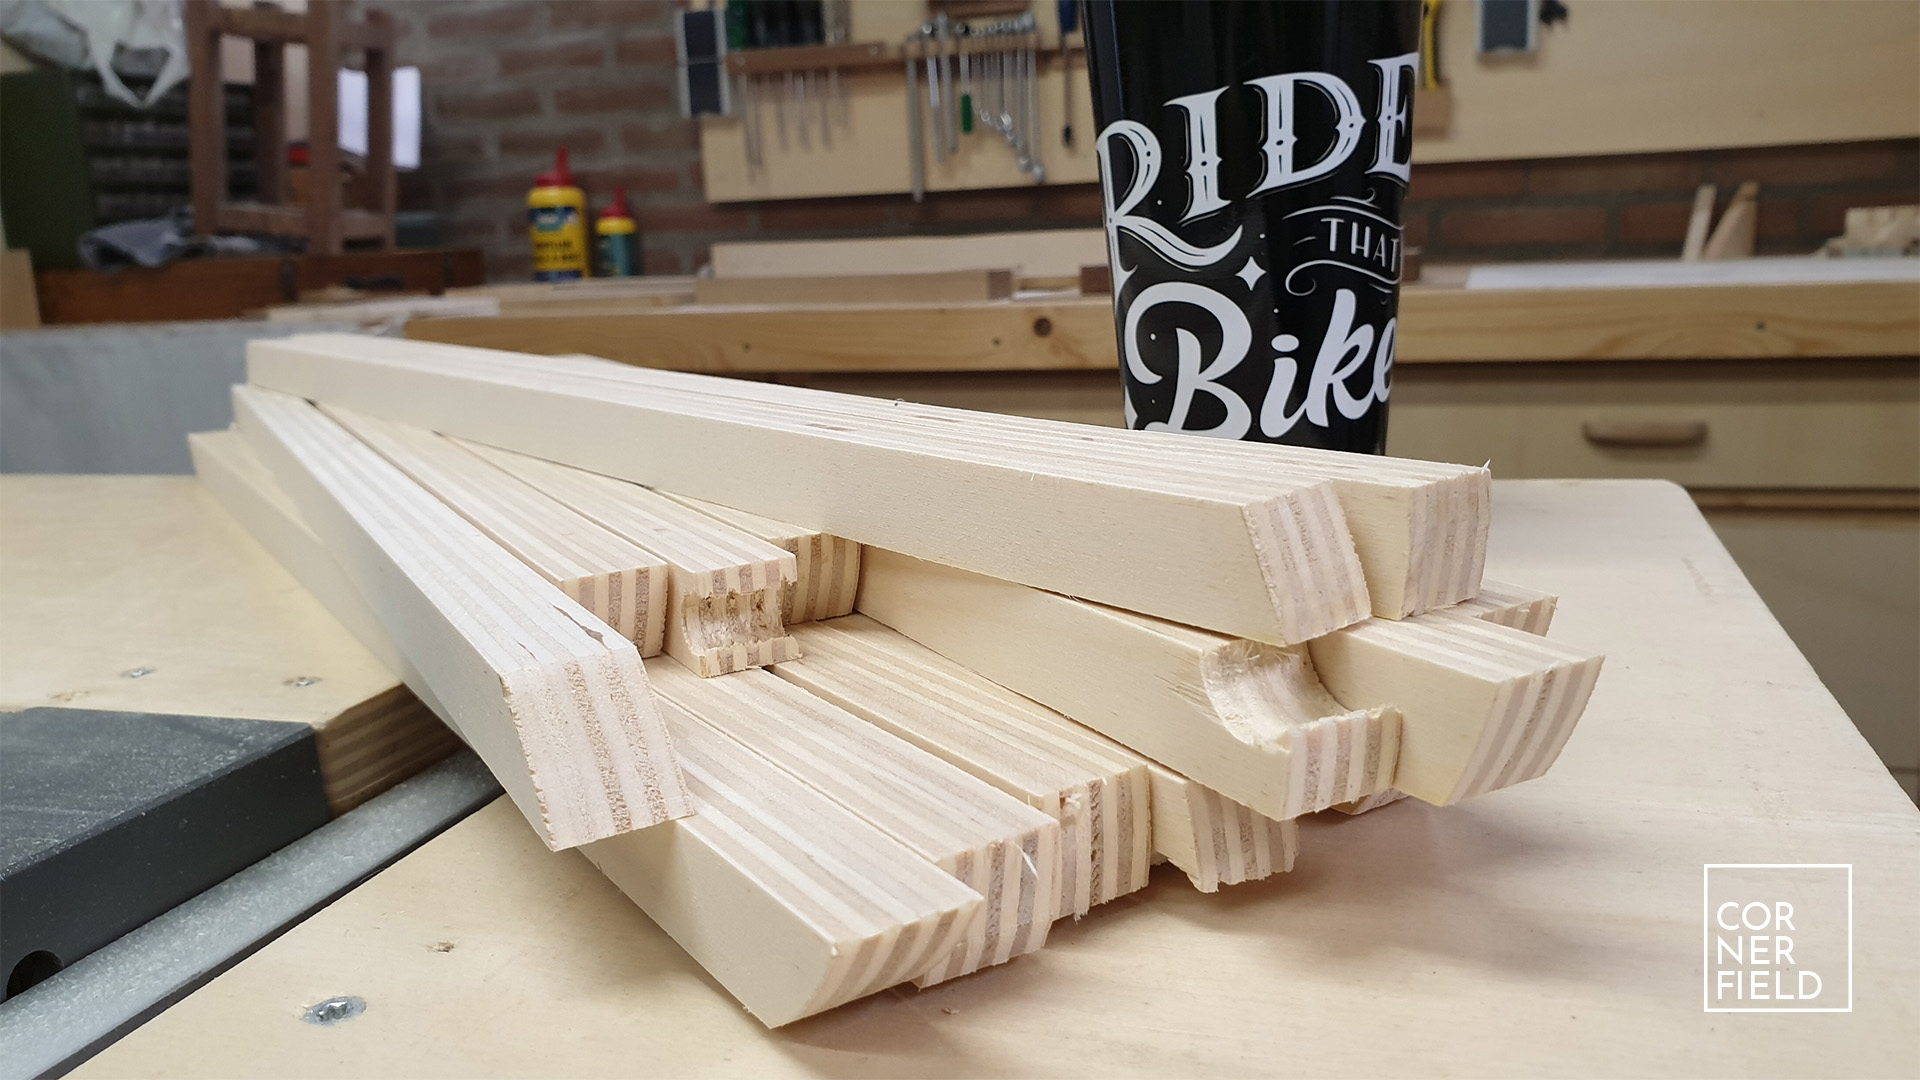
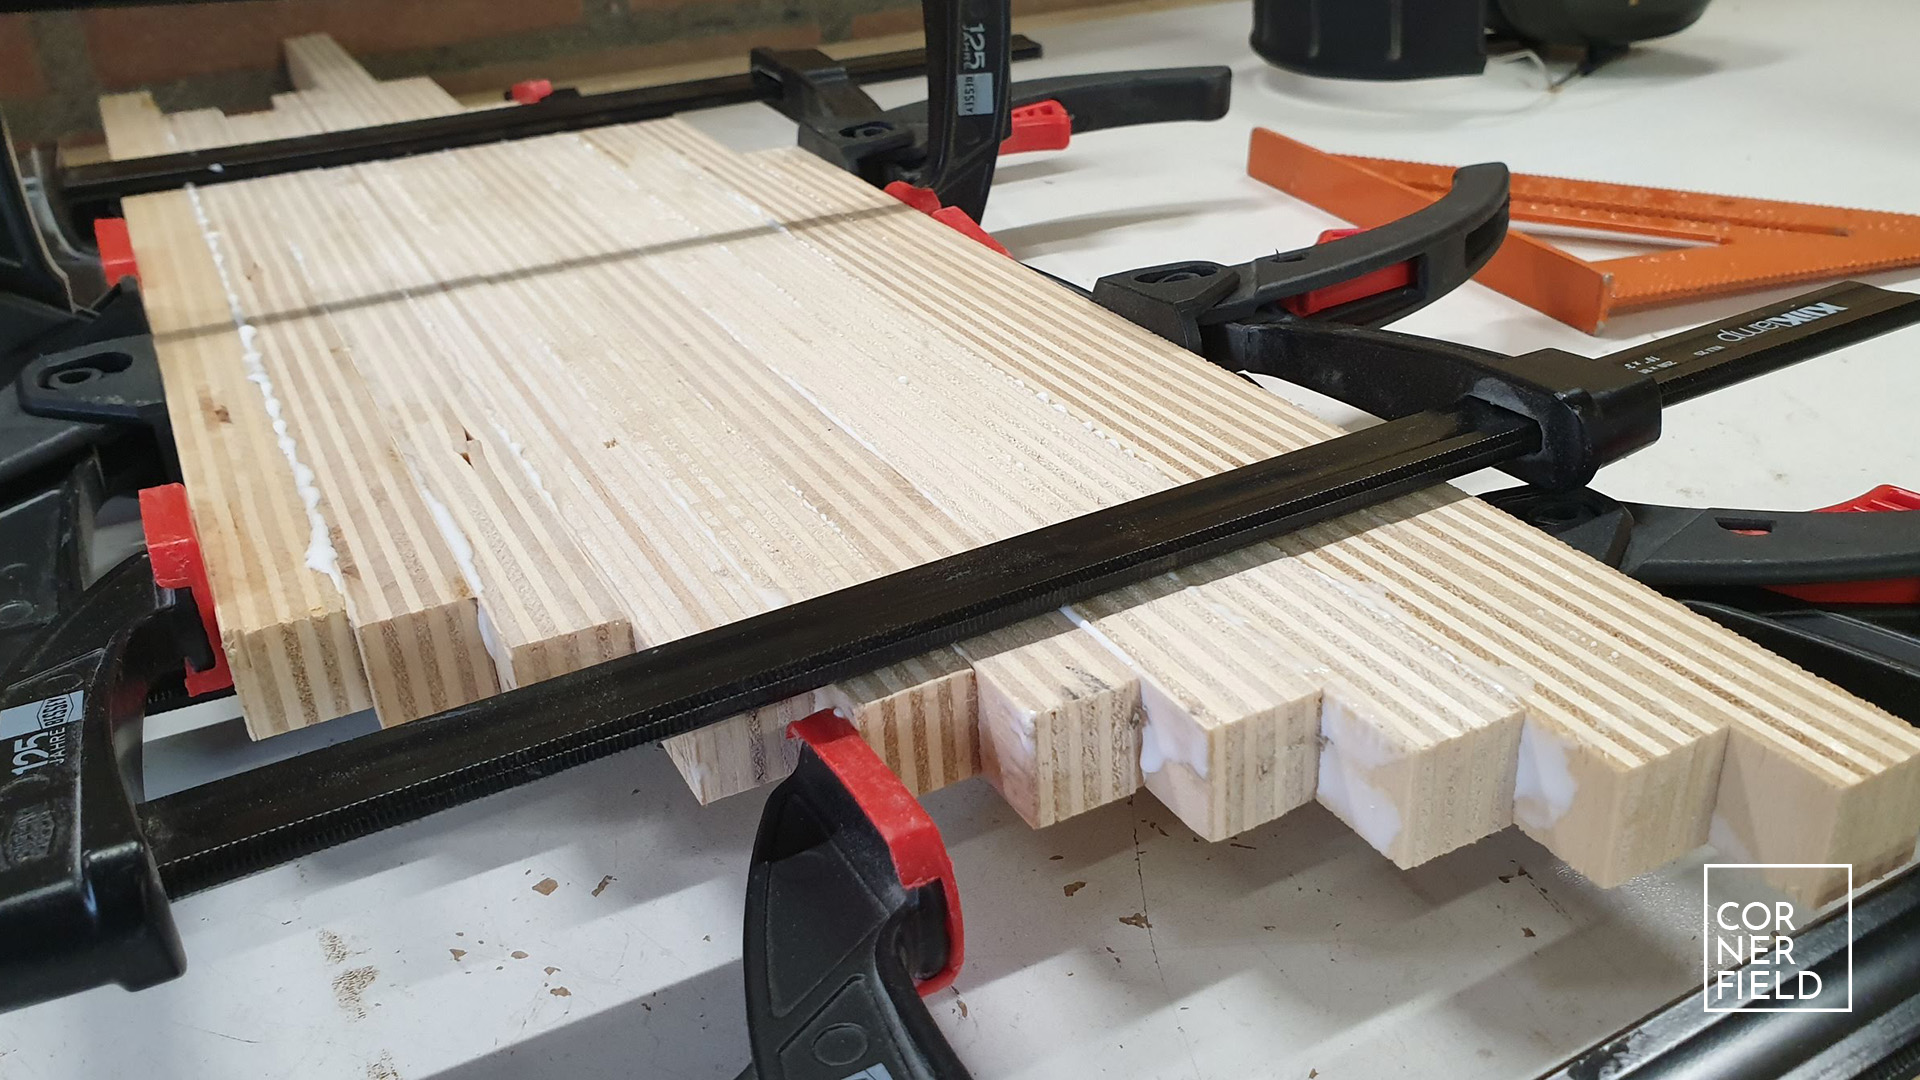
With the strips dry I cut new strips from that piece. These new strips are flipped every second piece and reglued. Here is where the pattern emerges (first image below). The more you repeat this action, the more complex the pattern becomes (second image below). Also, you can add straight cut strips in your glue-up to mix it up. This is something you can get really creative with. Lots of fun and not that hard to do.
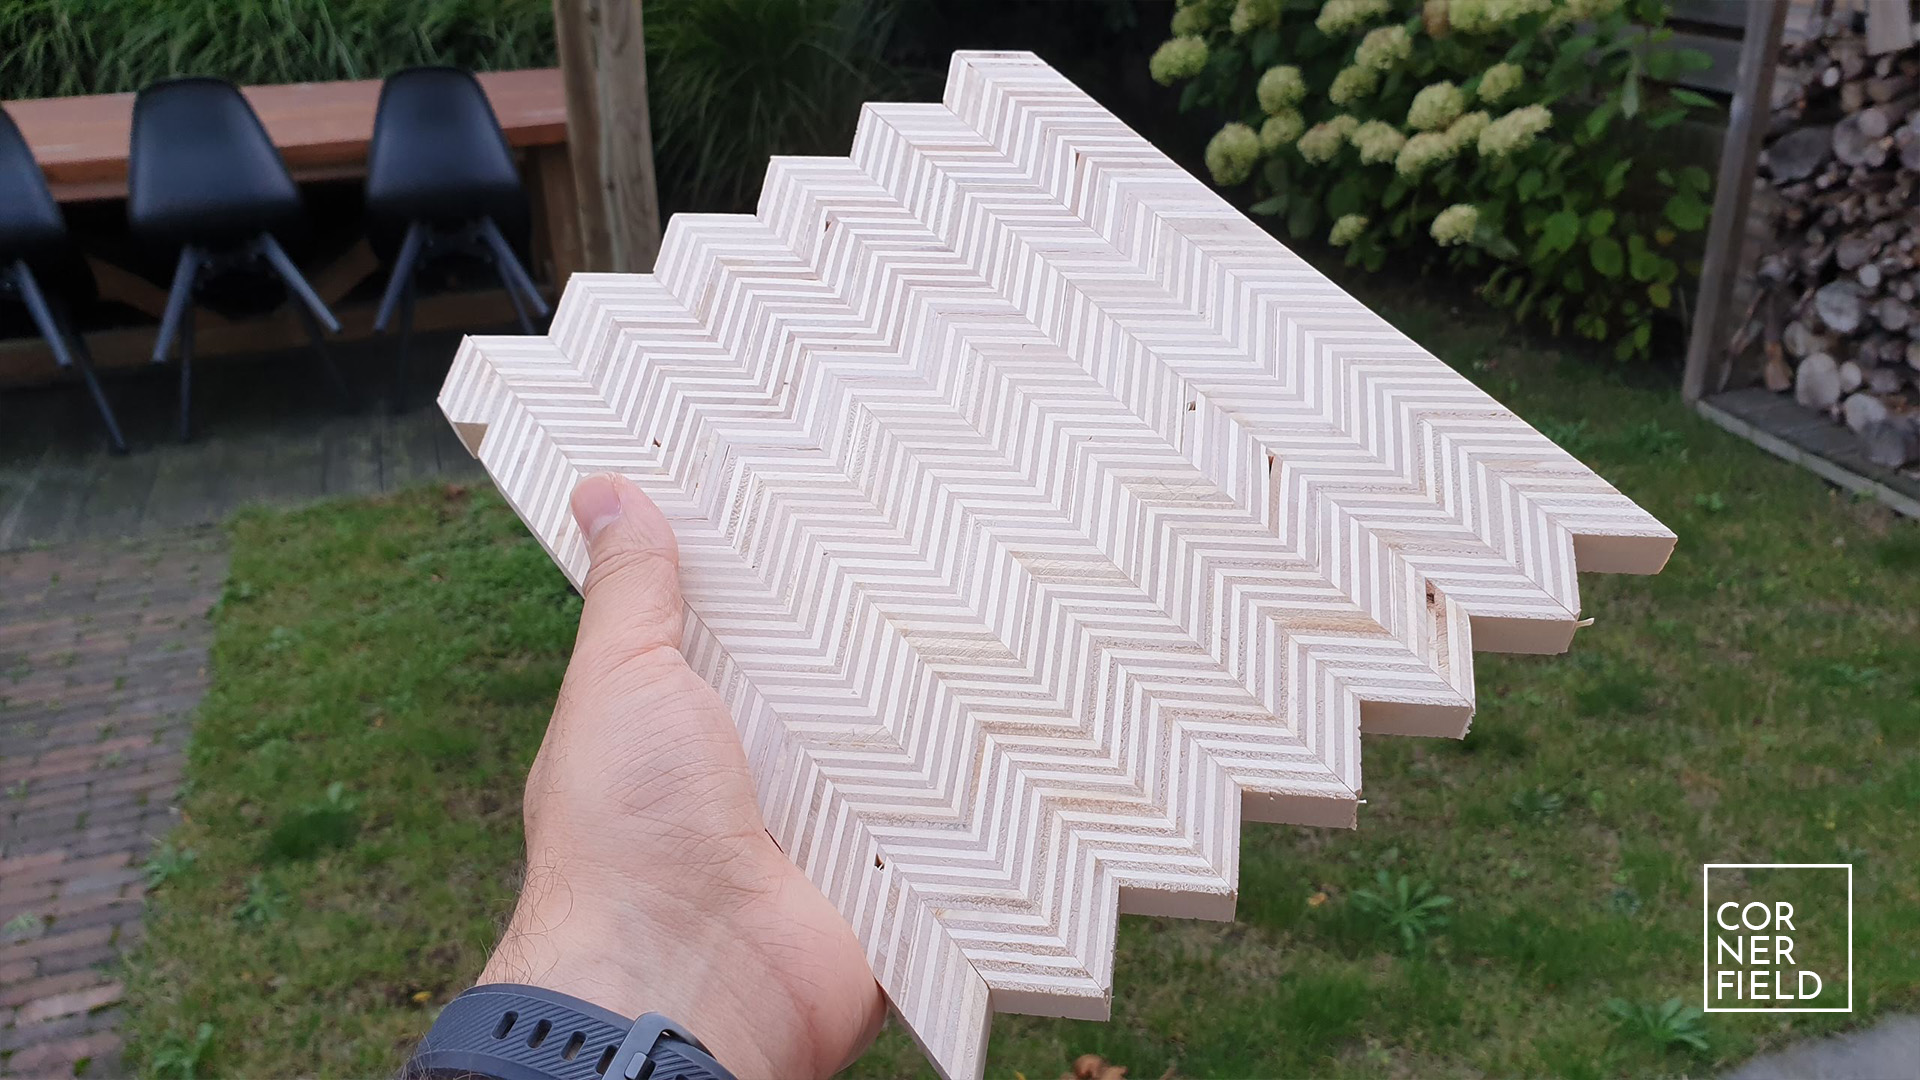
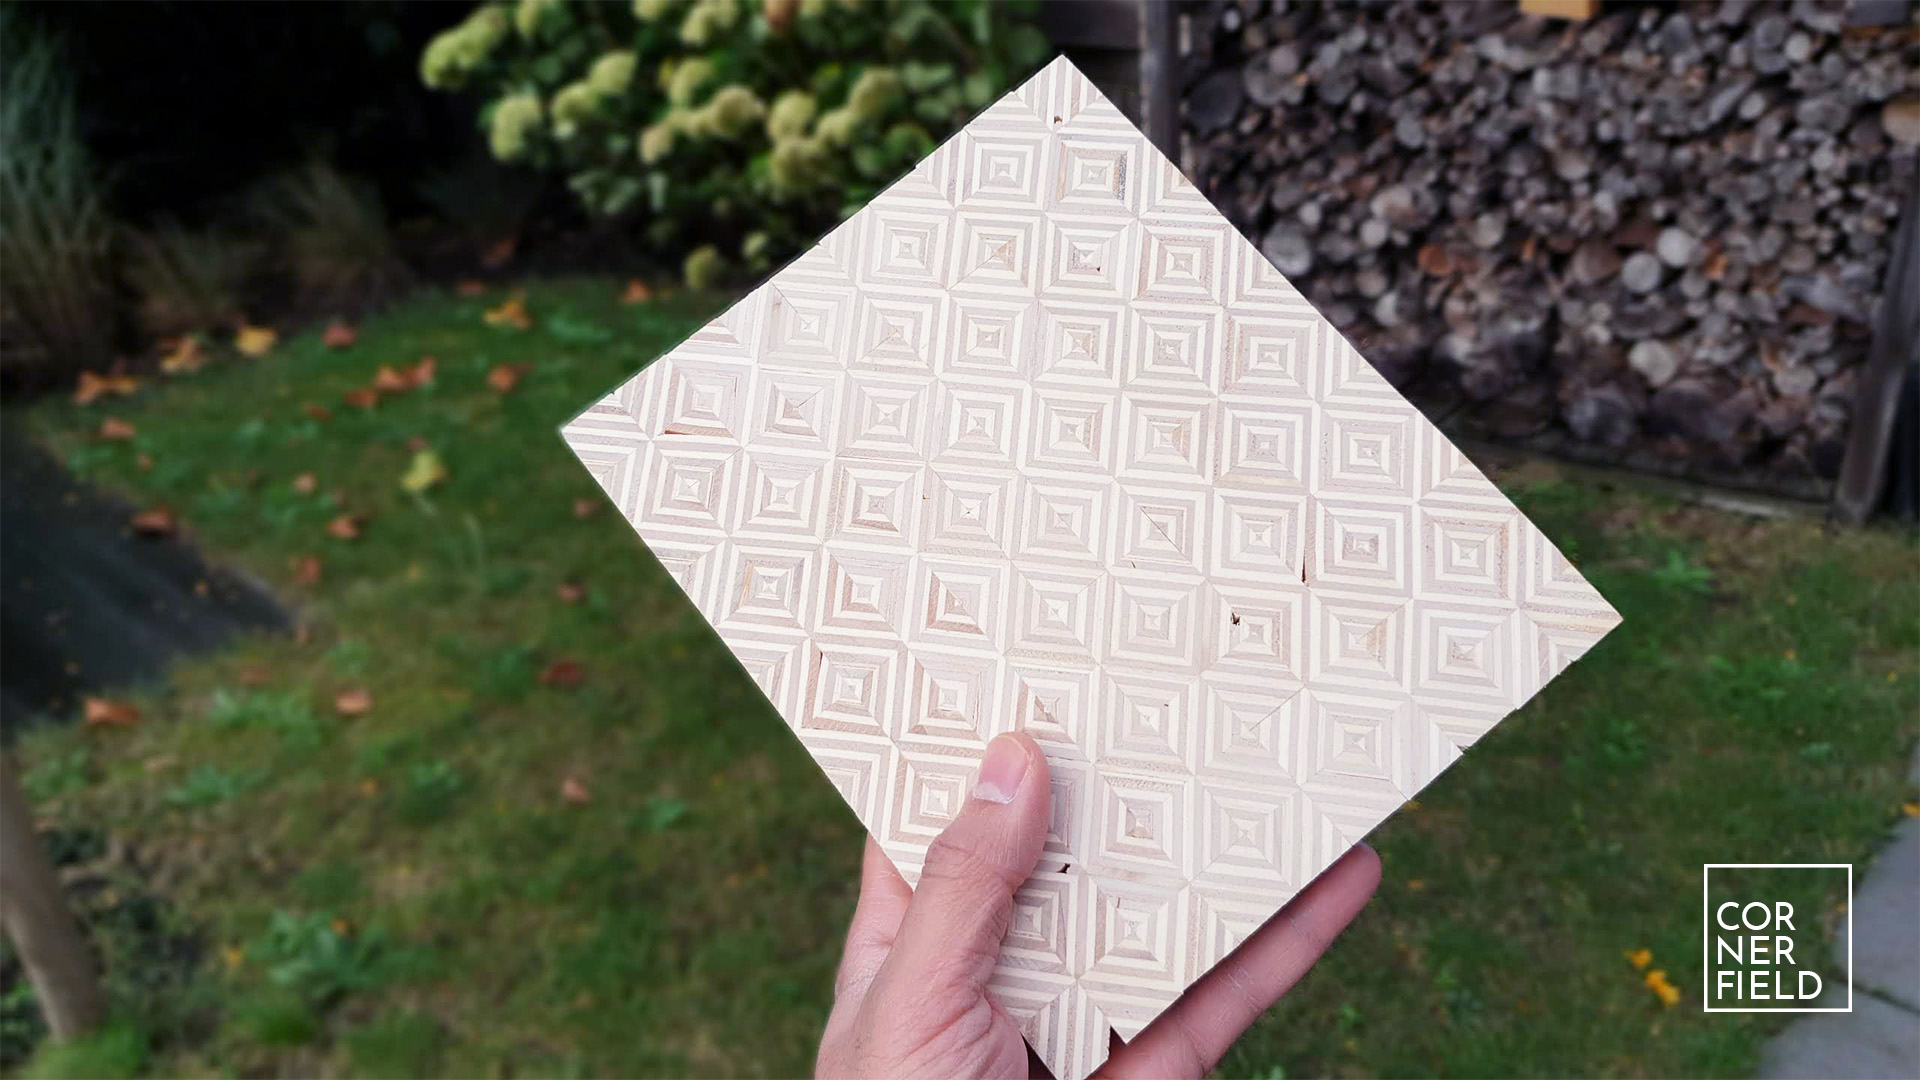
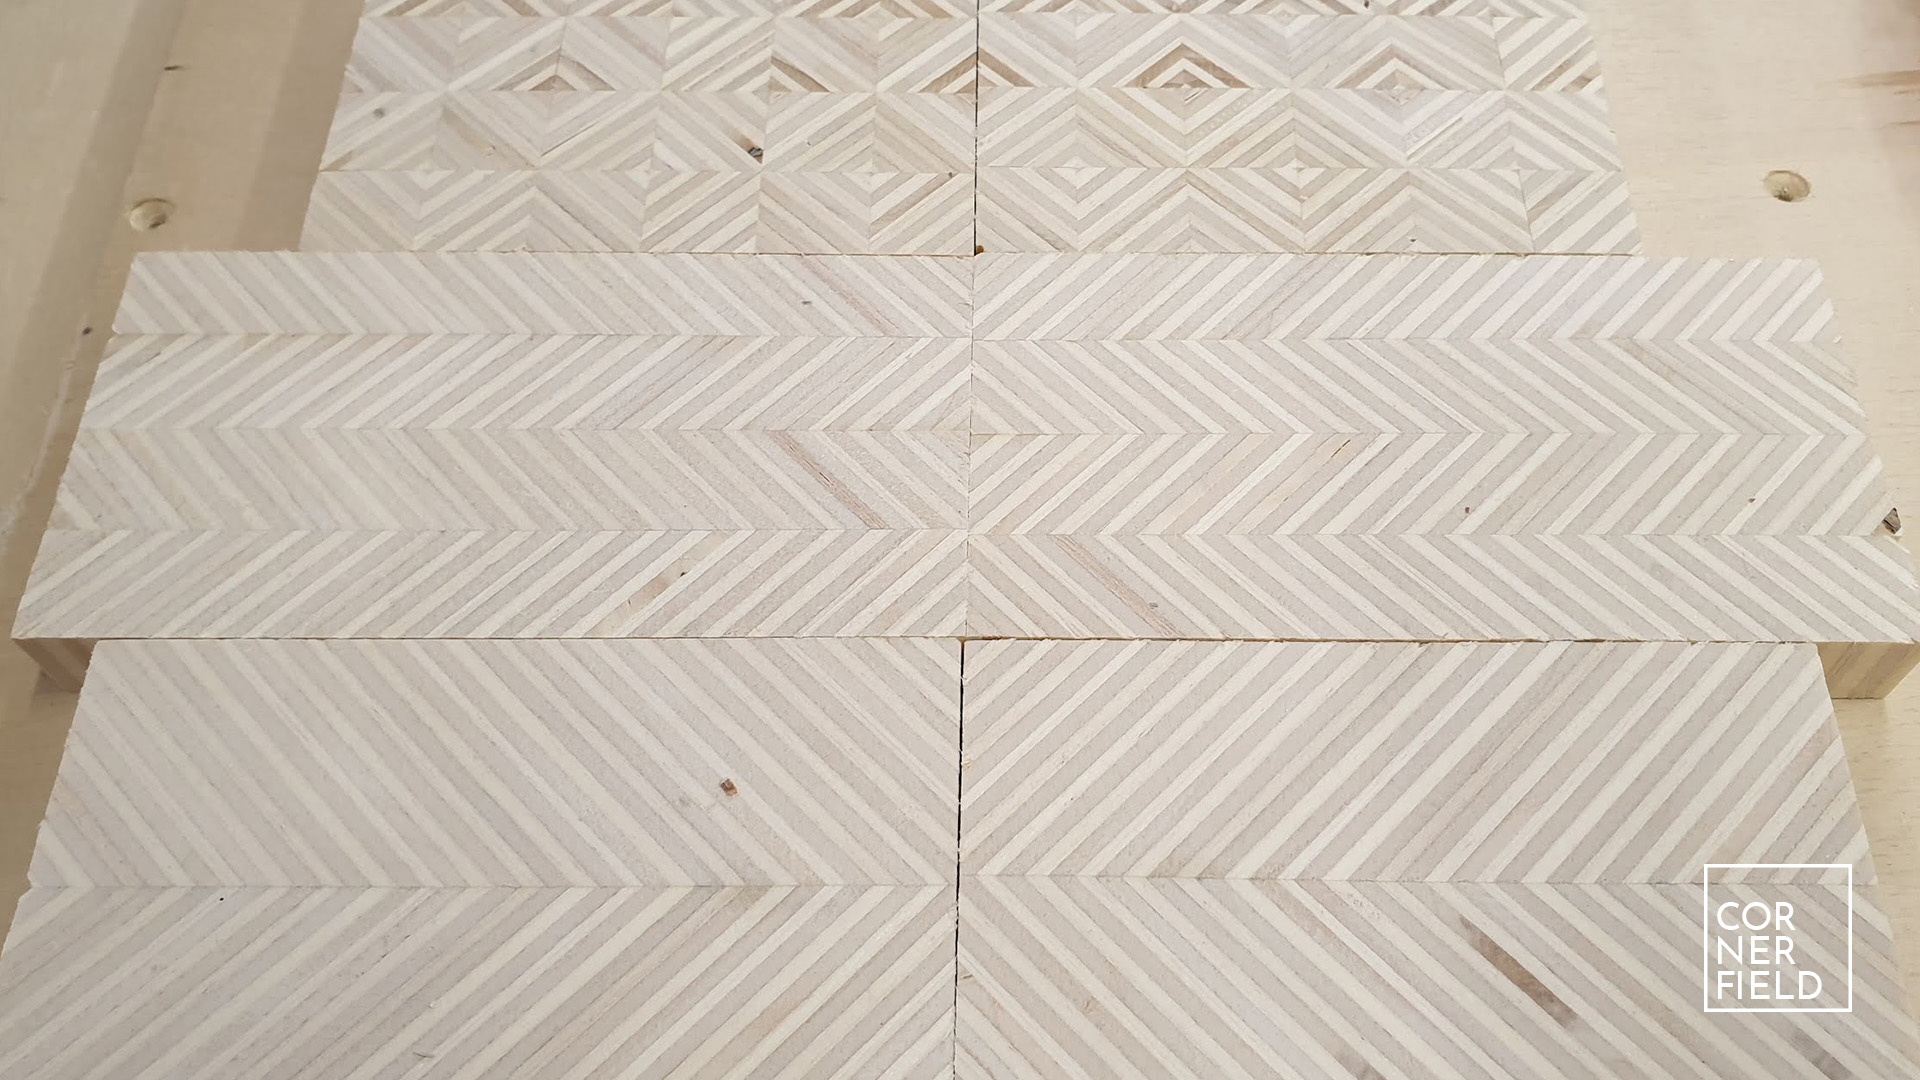
On the panels I ended up with, I drew the pieces that I wanted to get from it for the sides of my boxes. When doing this I decided there was enough thickness to resaw the pieces in half and glue them back together mirrored. This gave the pattern a sequence that added an extra dimension that I really liked.

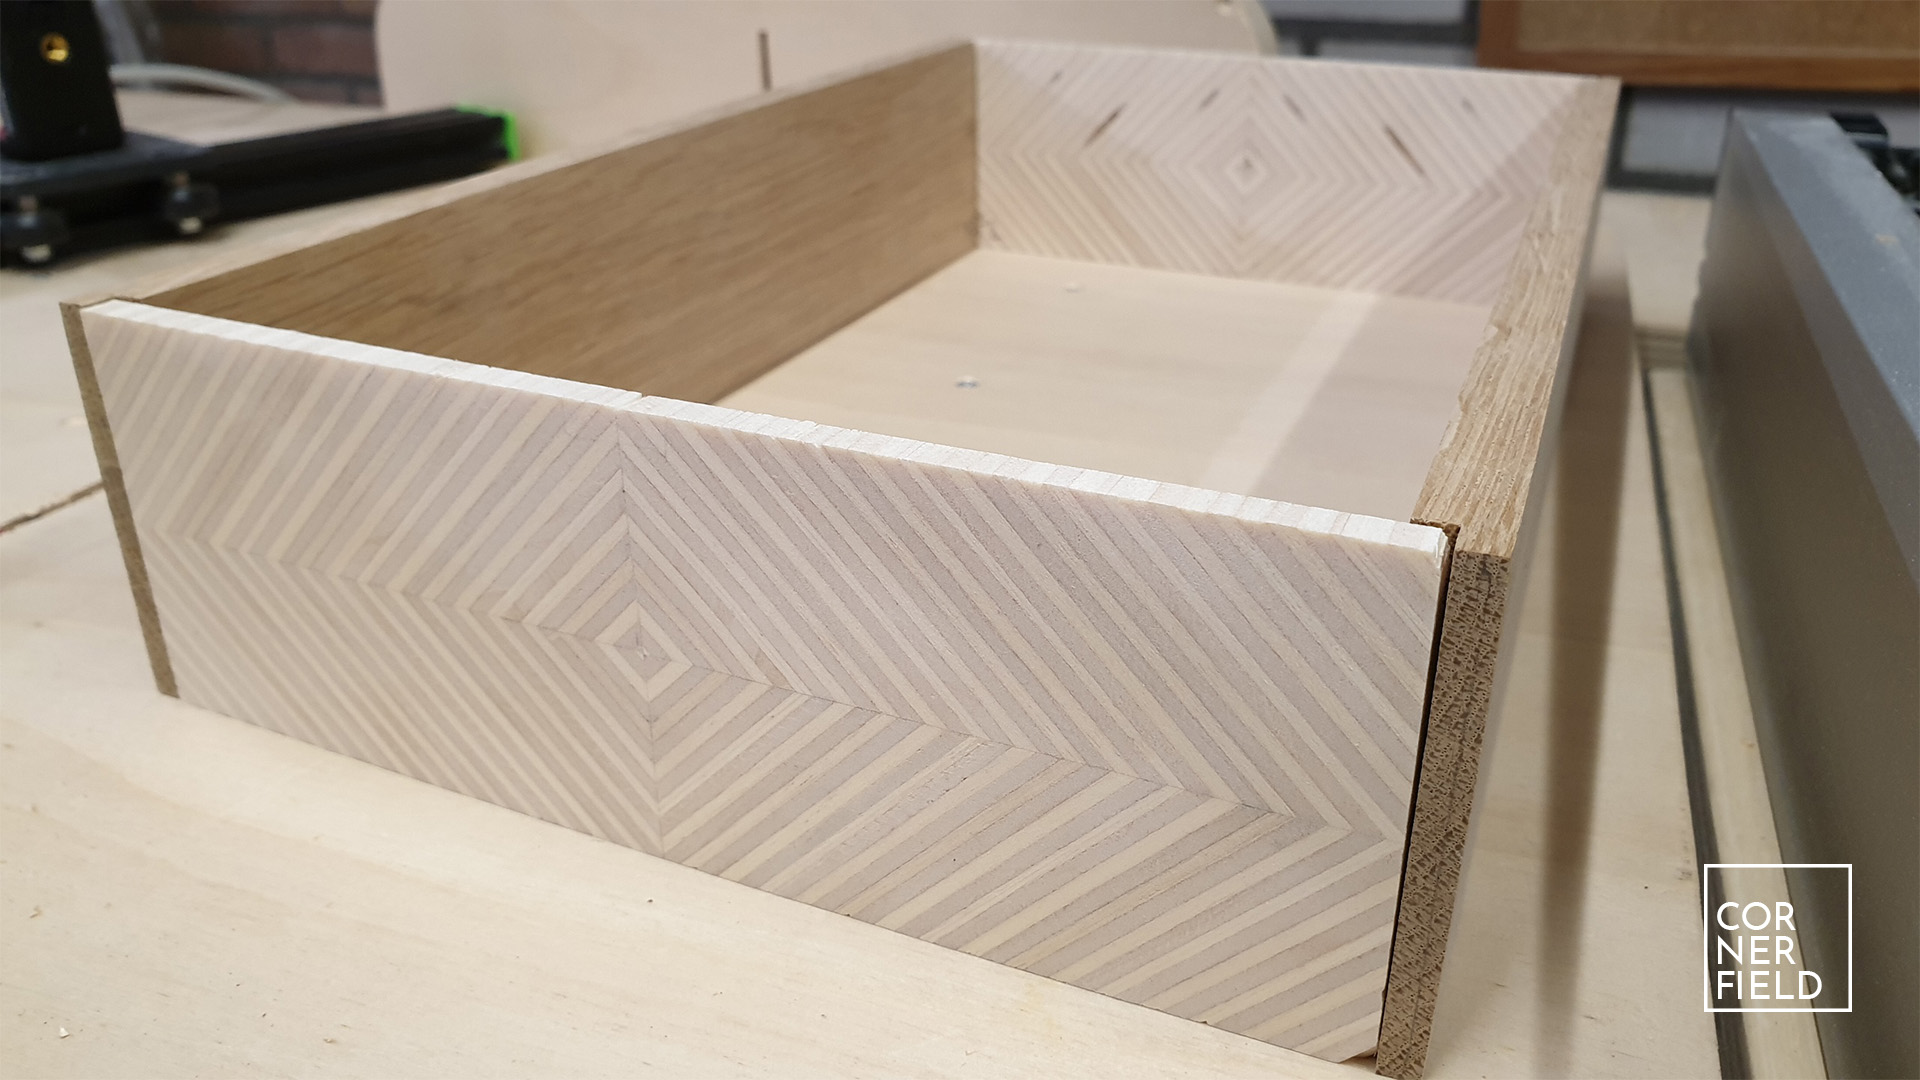
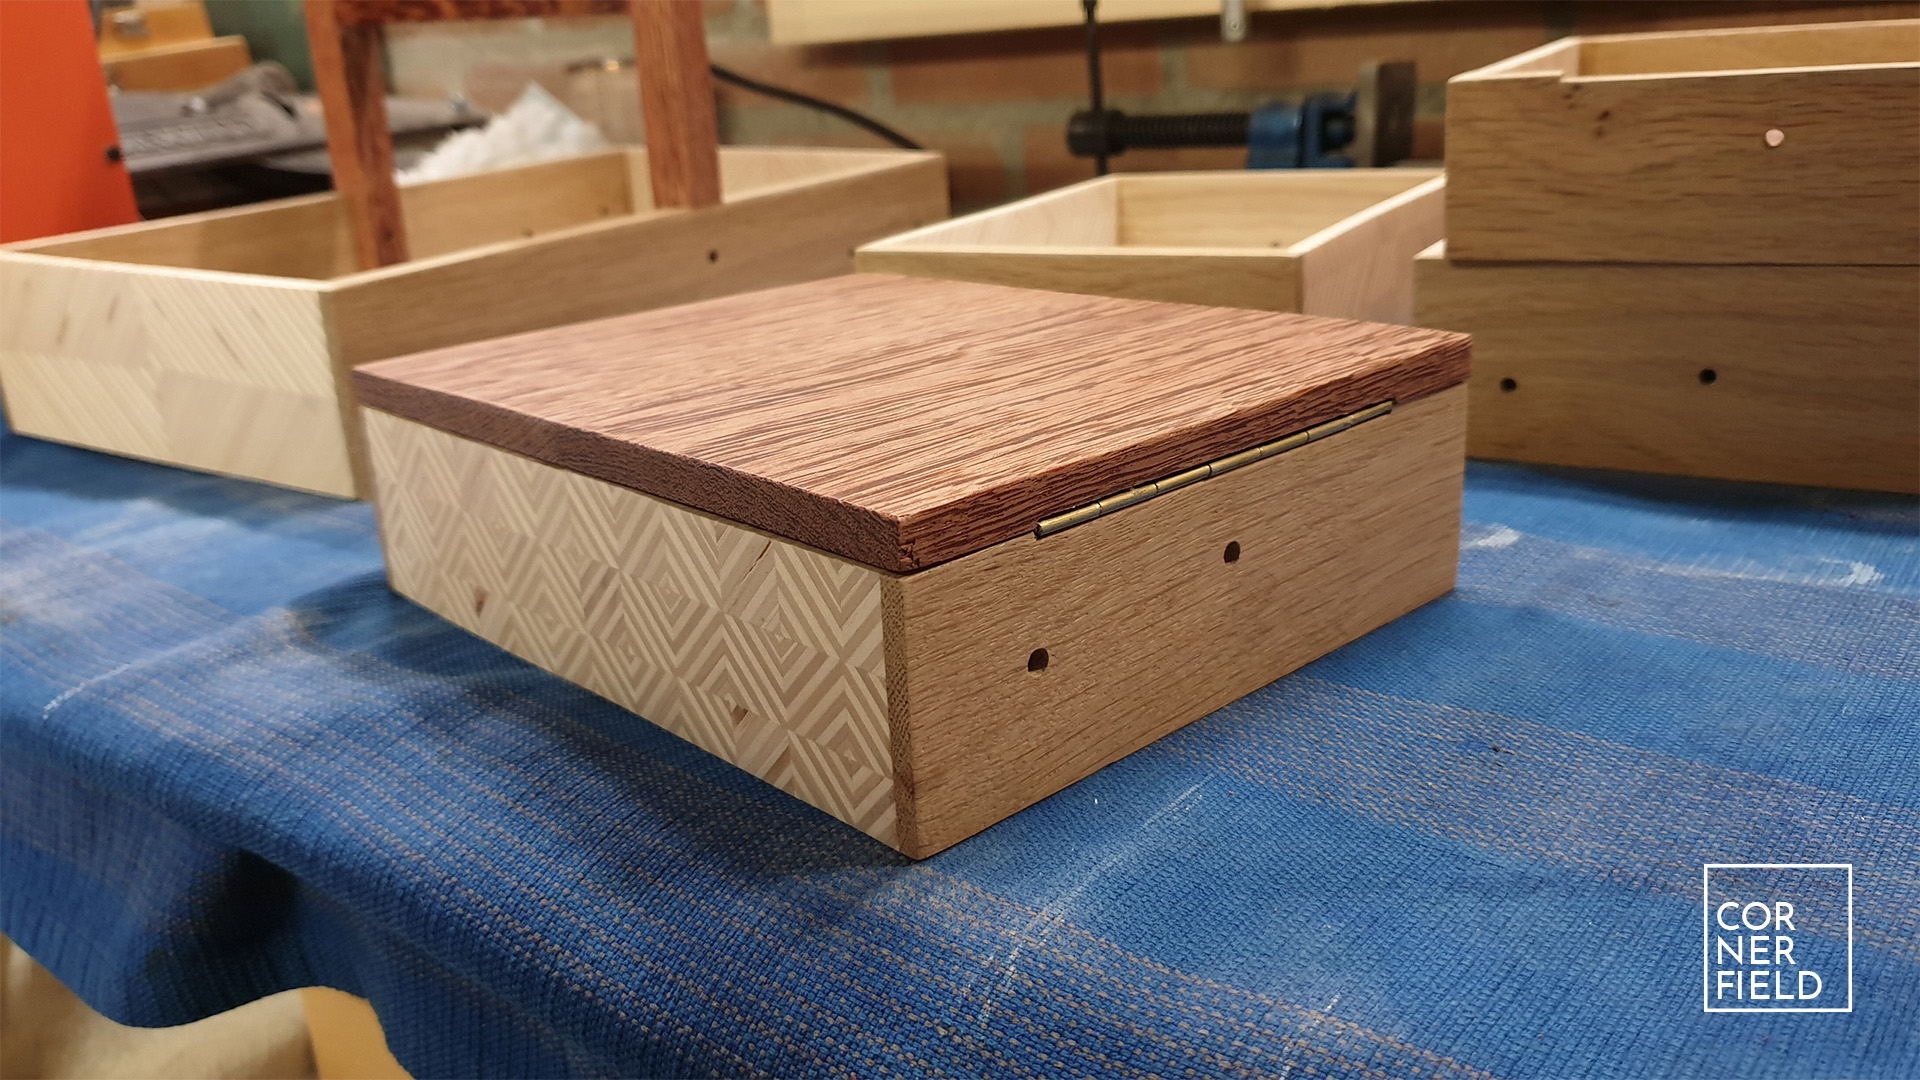
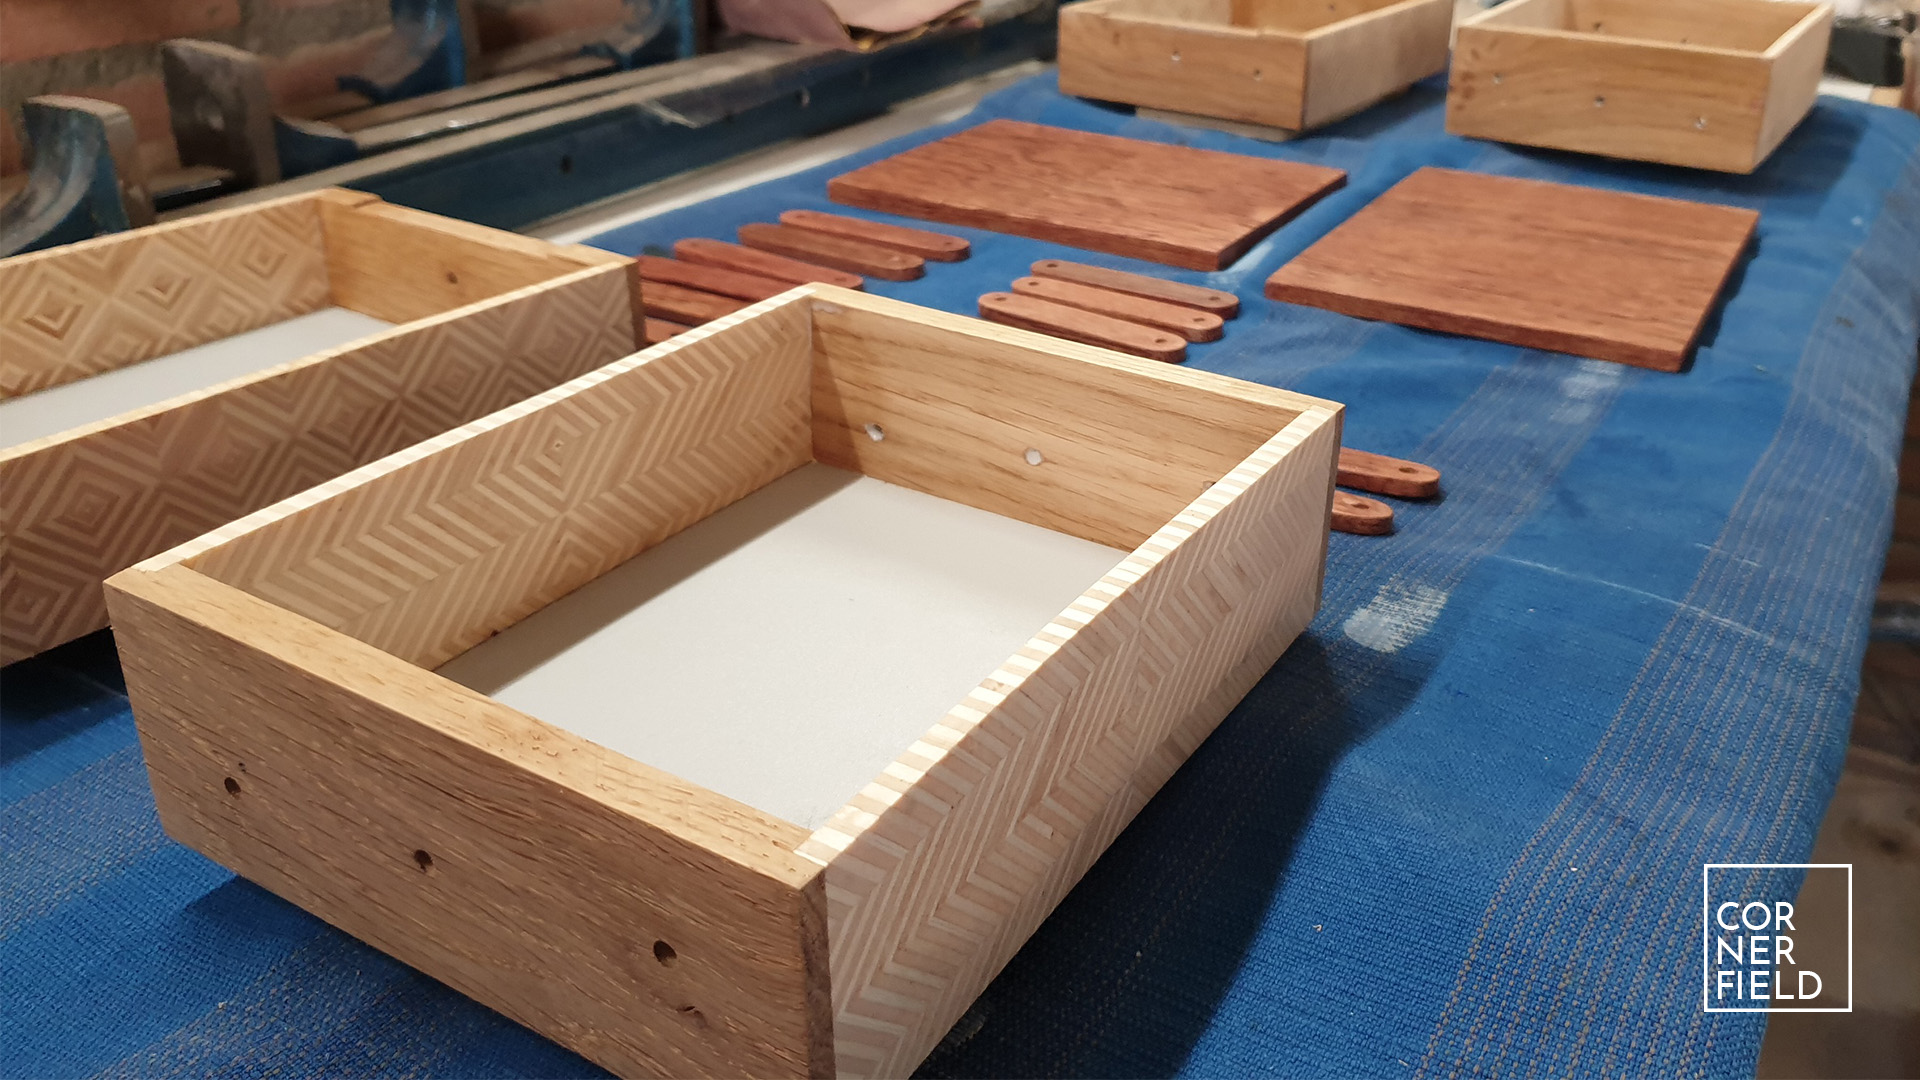
Boxes
My method of making boxes is always the same and I show you how I do this in my video. I make rabbets in the sides to fit the front and back. All pieces then receive a slot for the bottom. This works for big boxes but also for smaller boxes like these.

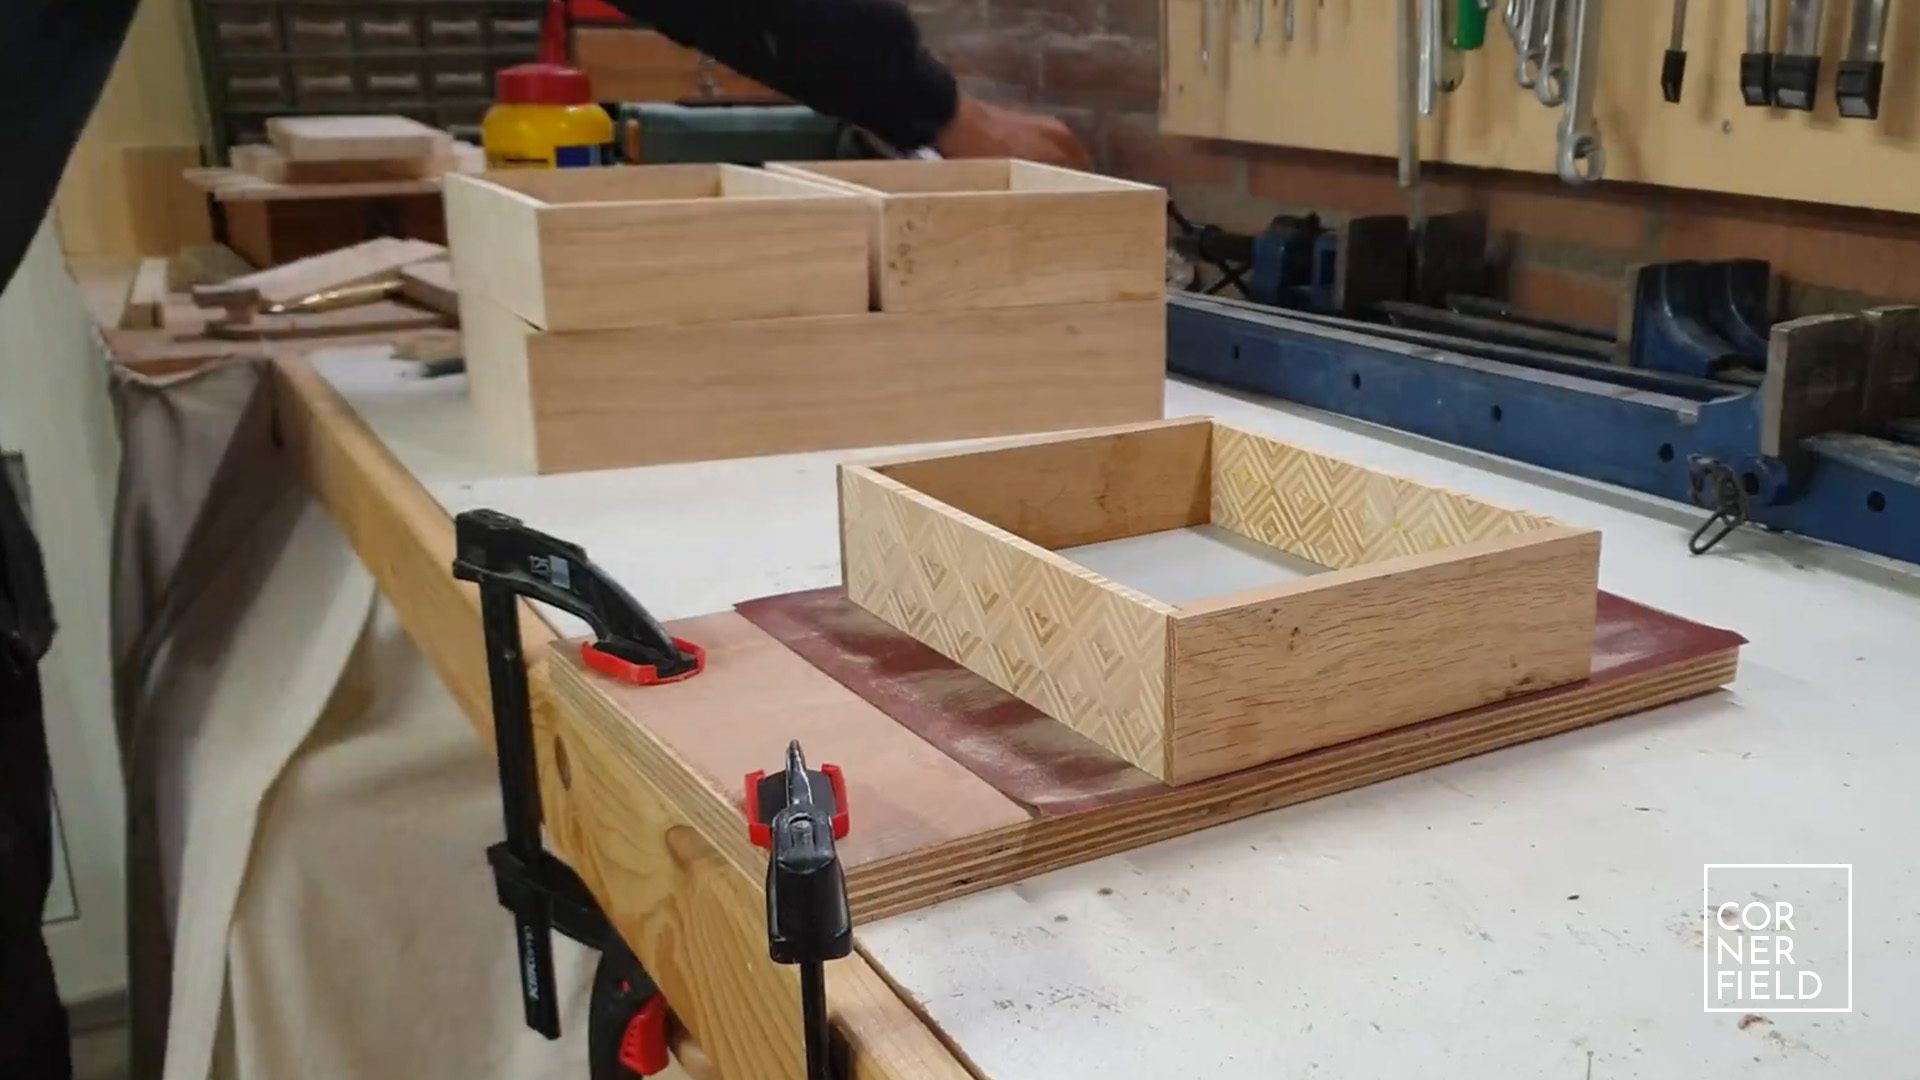
After cutting all the pieces on my table saw I do a dry assembly. When everything goes together it’s time for glue. Clamping these boxes was a piece of cake since they aren’t very big. Keep in mind to keep everything square and not to overtighten your clamps. It’s easy to apply too much pressure and make the plywood pieces buckle.
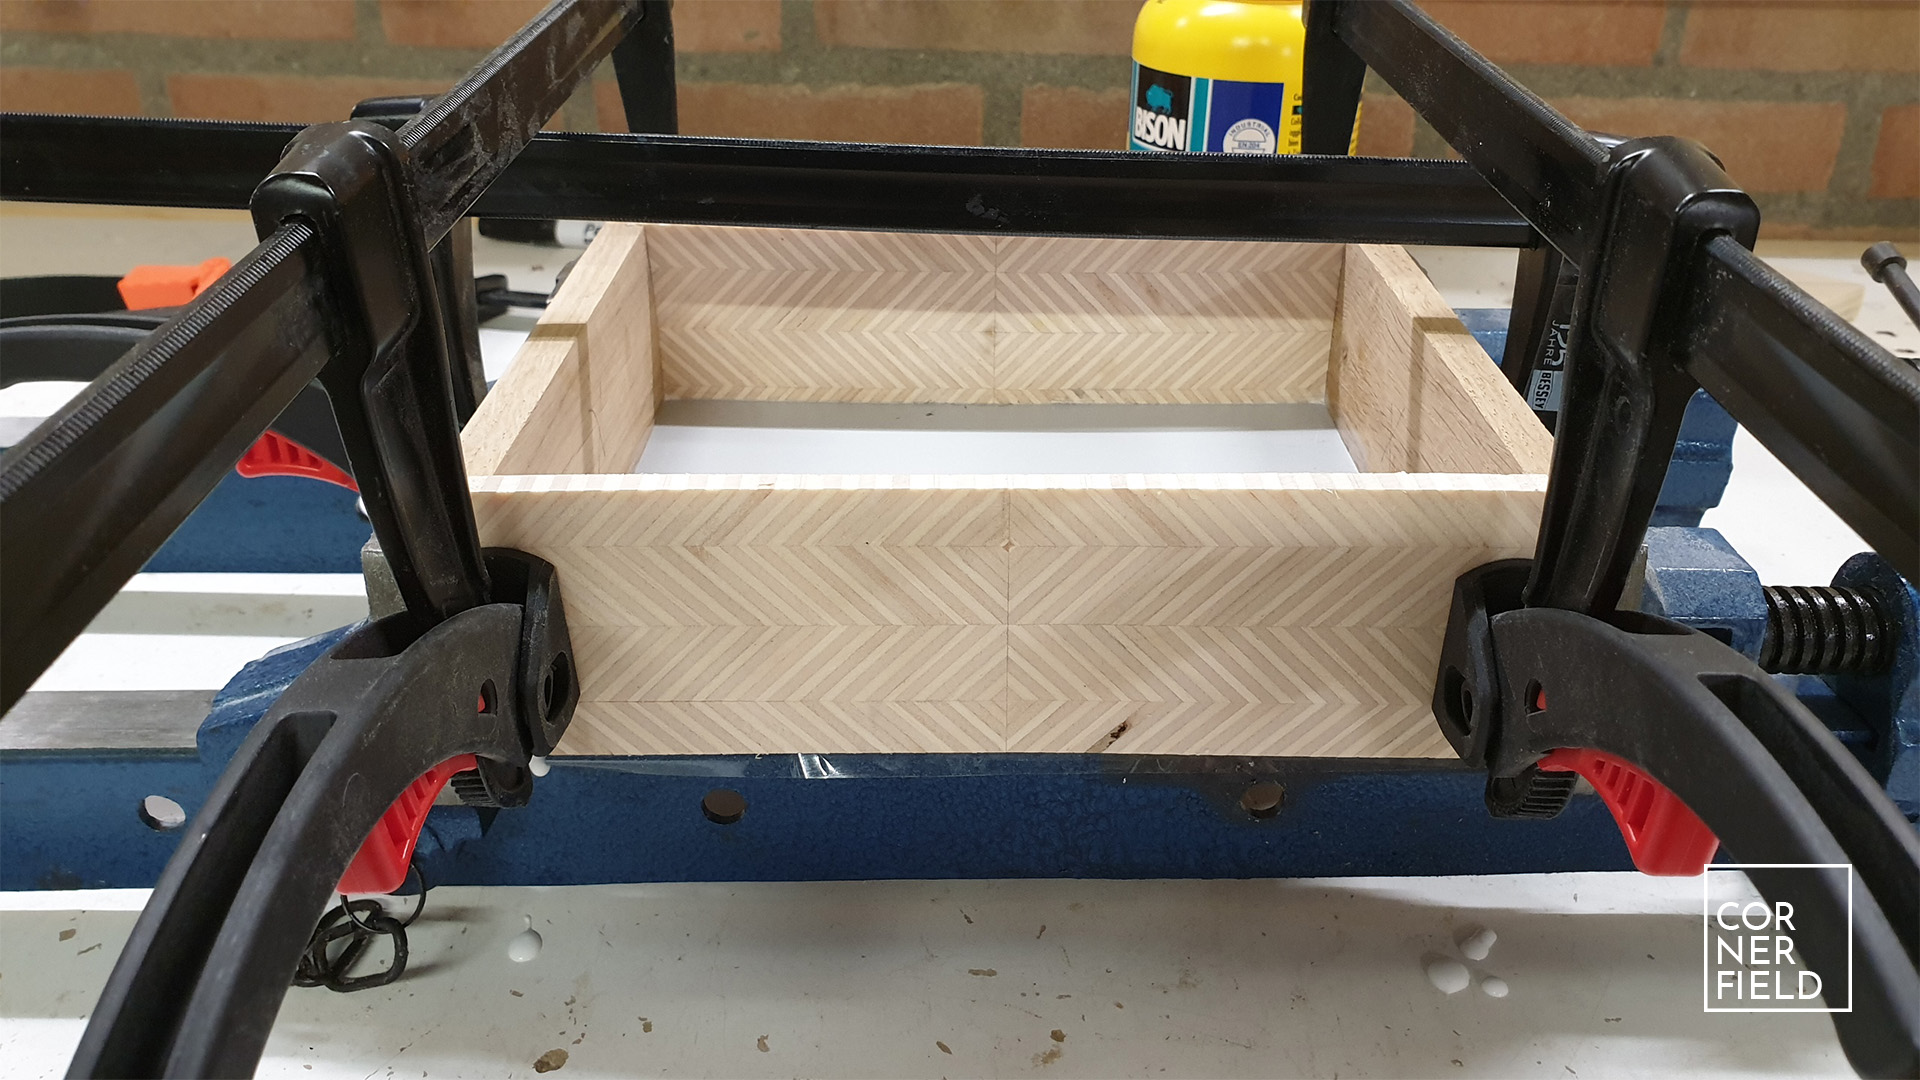
After the boxes are glued together they are most likely not completely flat on the top and bottom. At least for me, that was the case. To solve this you can run them through a drum sander or use a disc sander. Since I have neither, I used a trick for that. Gluing a piece of sandpaper to a scrap of wood and rubbing the boxes over it. This gets rid of all the high spots and flattens the box.
Handle
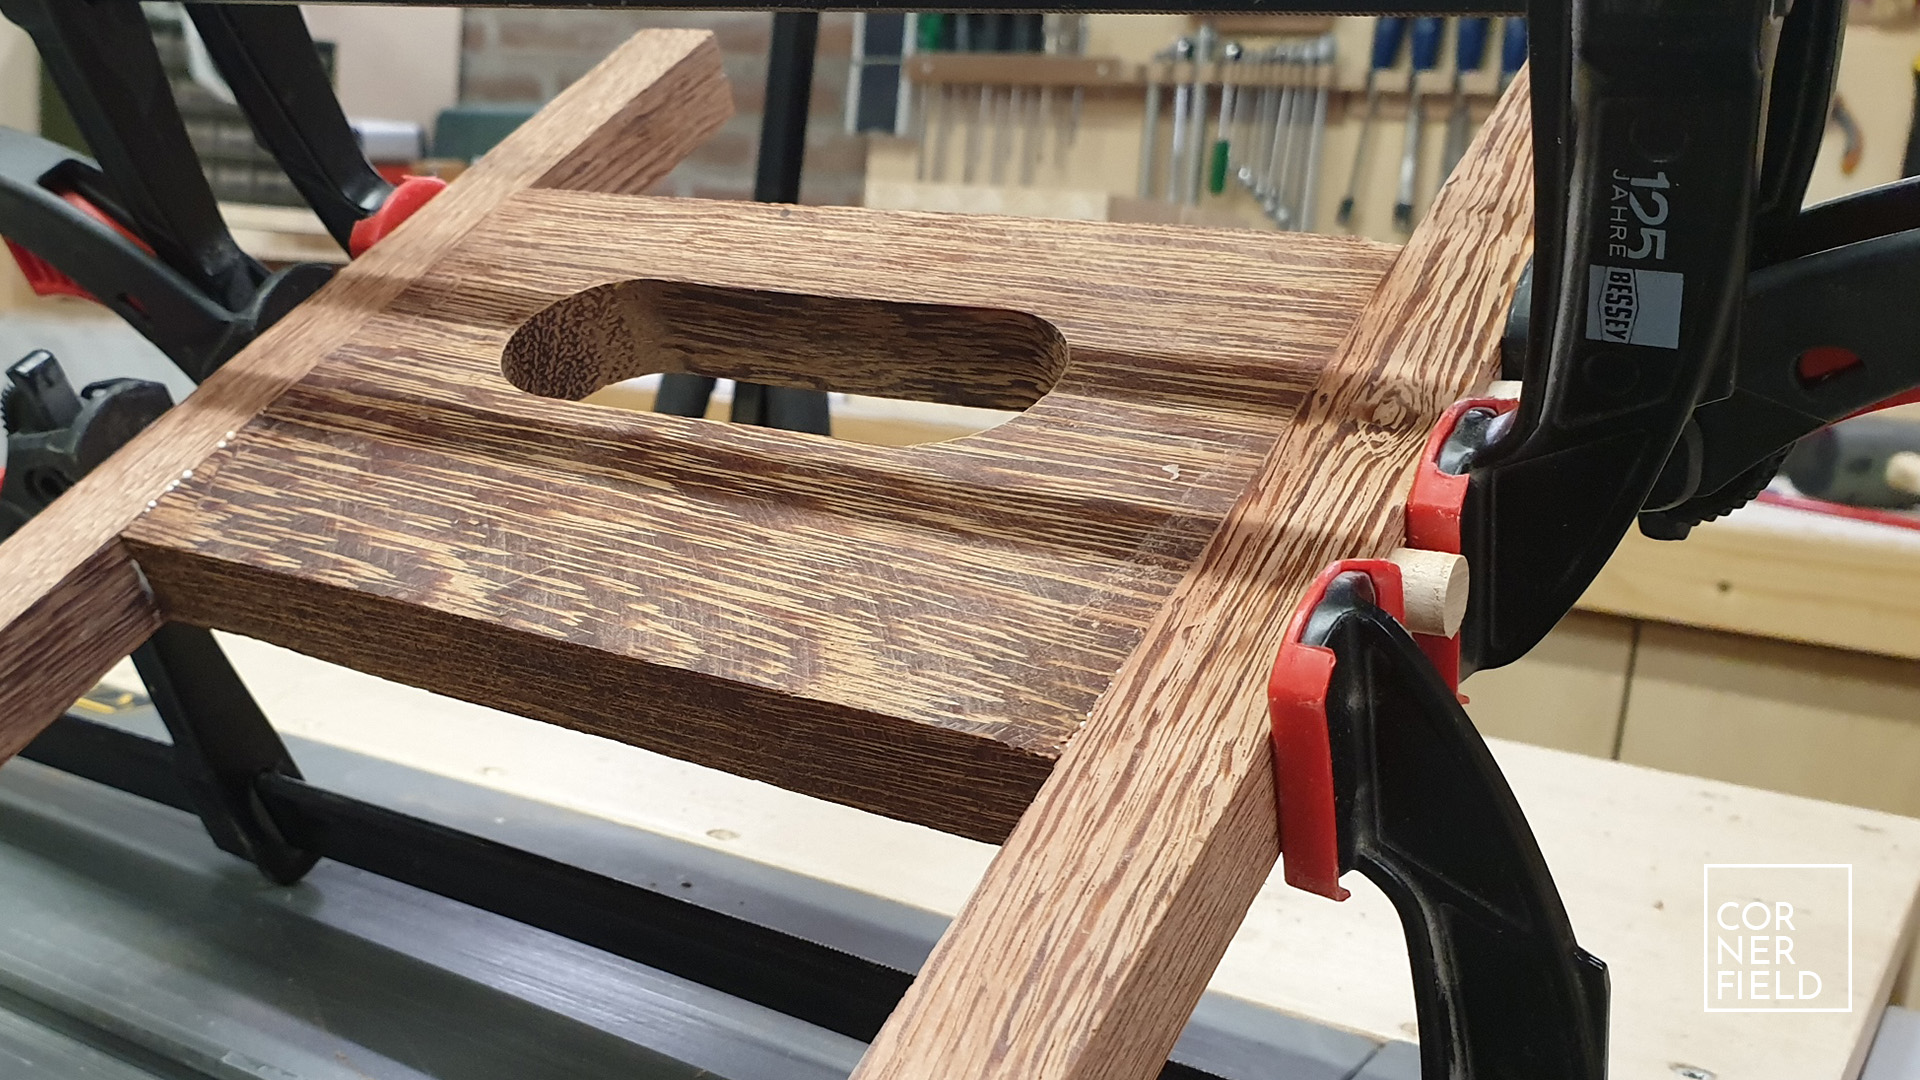
With the boxes complete I moved on to making the handle. This consists of two legs and a centerpiece. I’m attaching the legs of the handle to the lower box by making a rabbet in them. These get screwed into the box in the place first and later, when the entire assembly is done, glued. When attaching them make sure they are at a 90-degree angle with the sides and parallel to each other. The centerpiece gets measure when the legs are screwed in place.

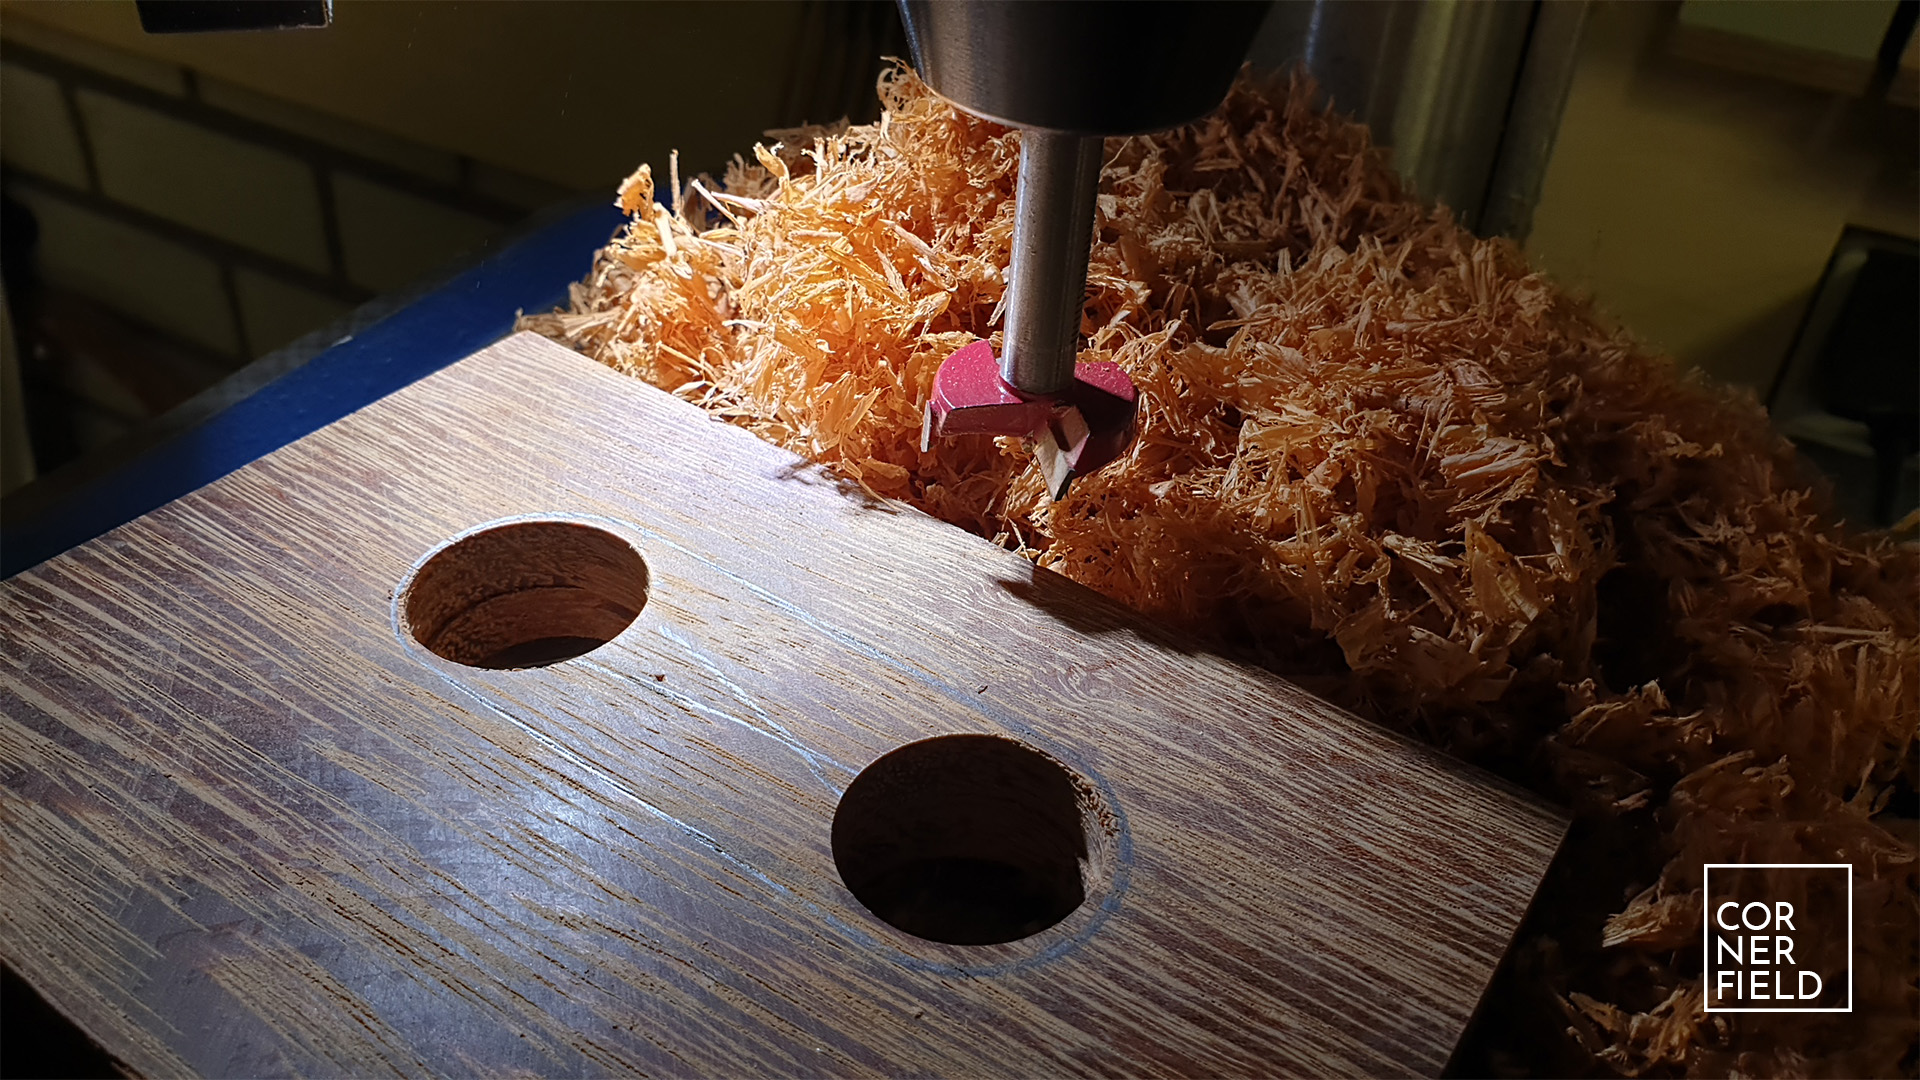
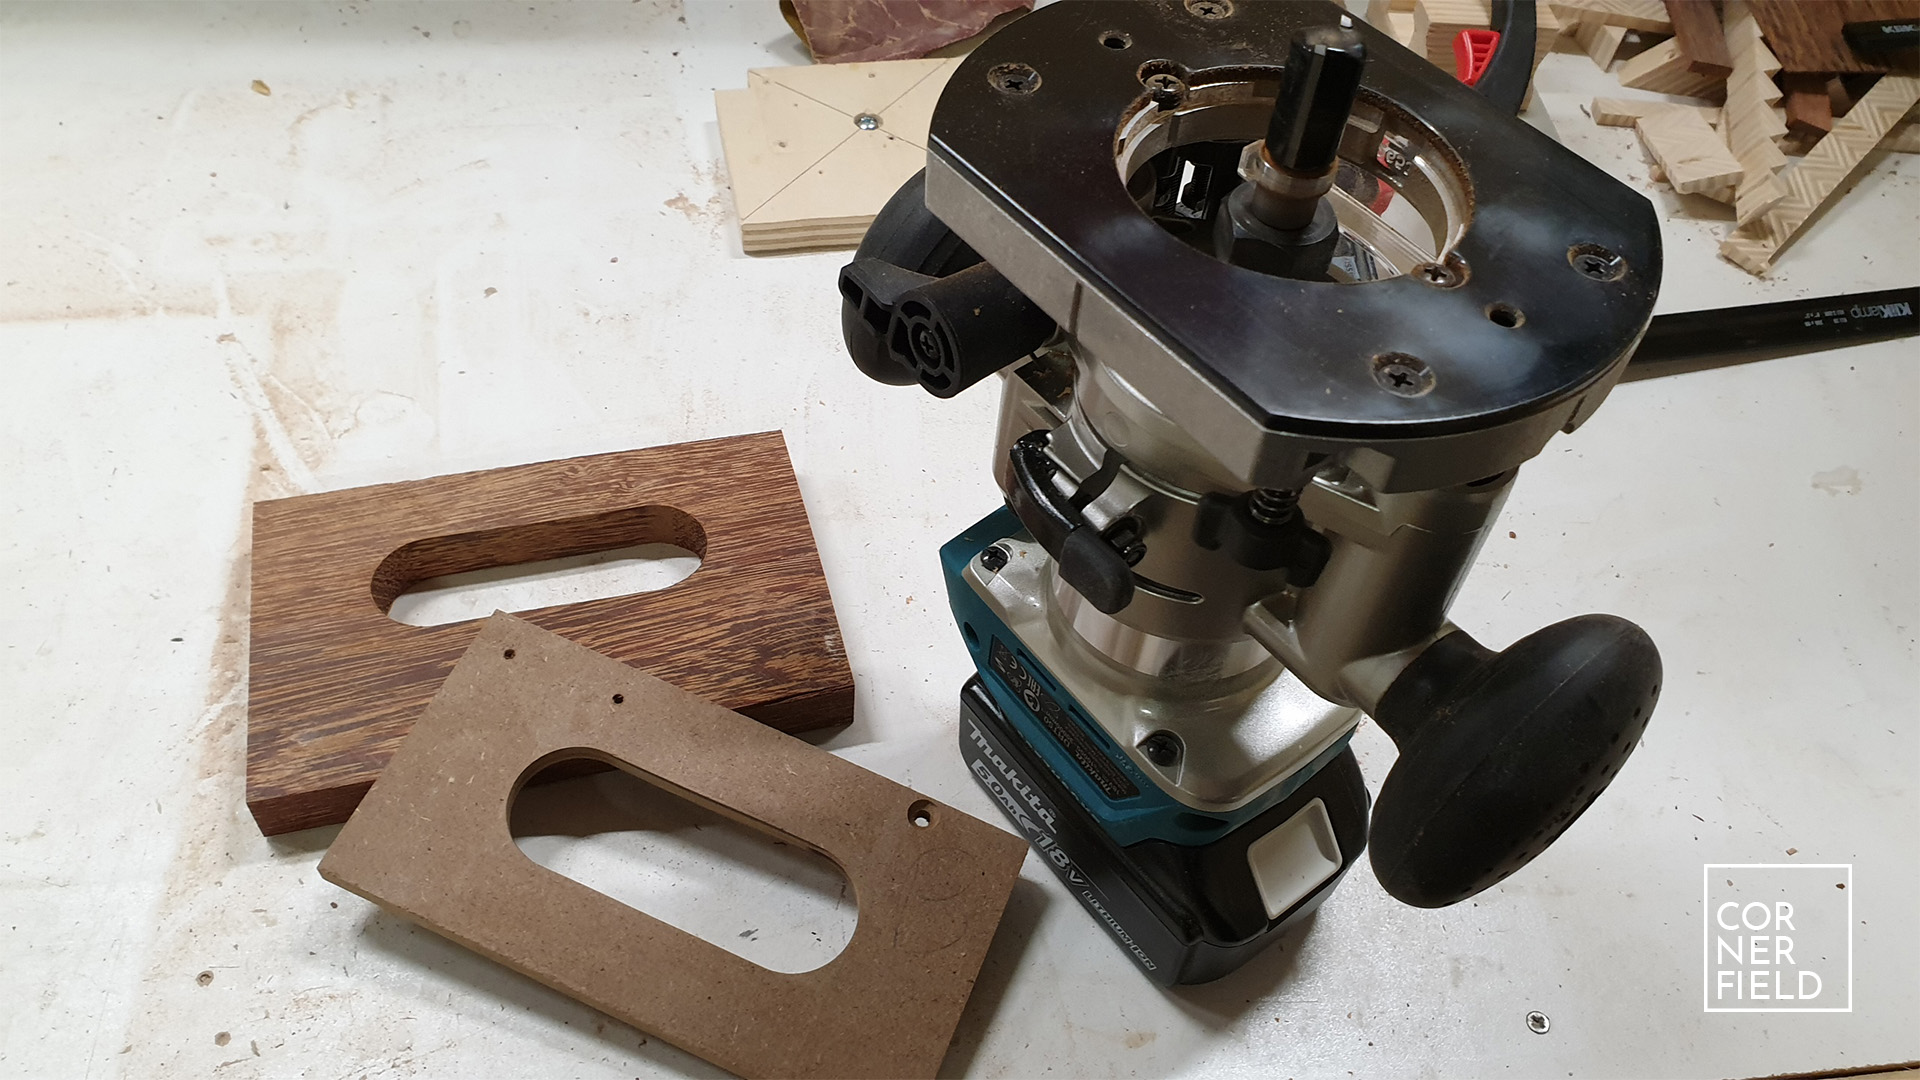
To make the hole for the handle, I first mark out where I want it to be. Then I drill two holes on the drill press. The piece between the two holes gets cut out with a jigsaw. I make sure to stay within my marked lines with both the drill and the jigsaw. The final shape is made using my router and an MDF template. This gives a really smooth finish and is easy to get right. Much easier in my experience compared to only cutting it out with a drill and jigsaw.
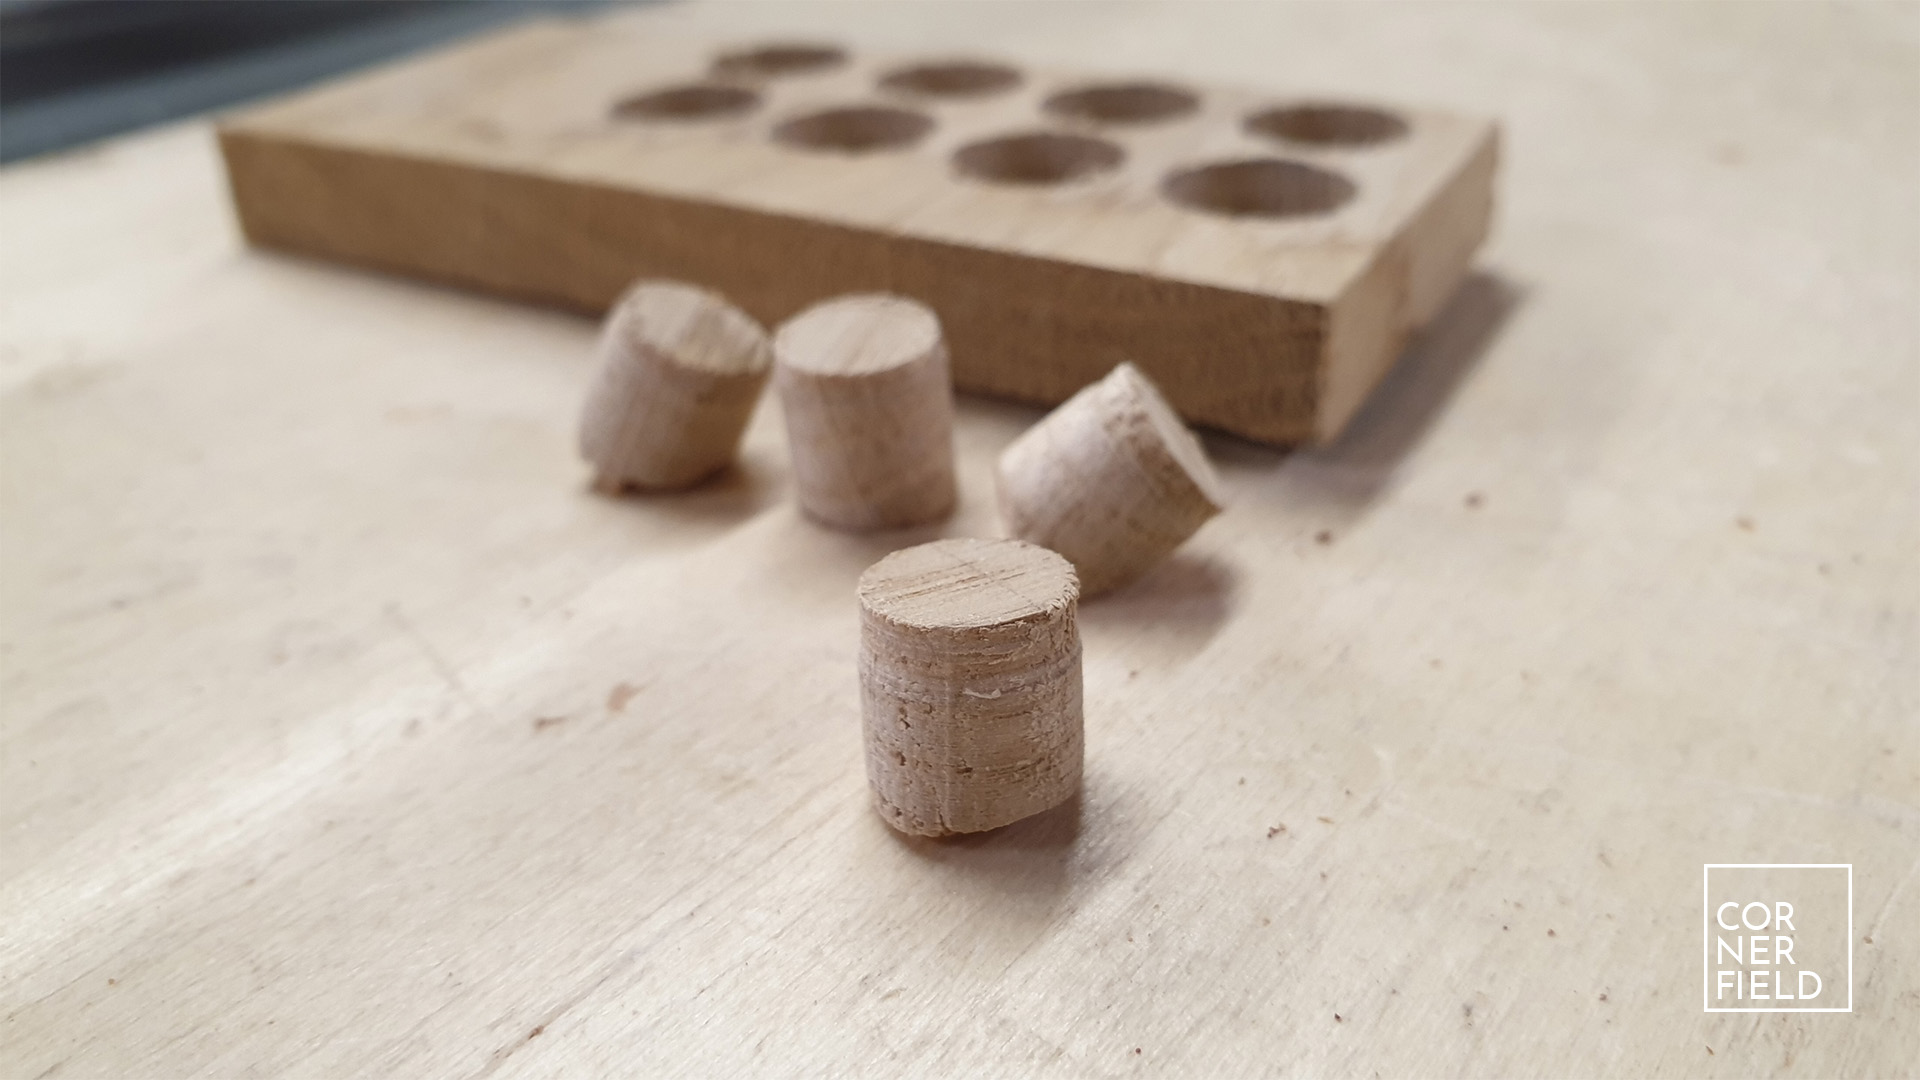
Using a round-over bit I round the inside of the handle. The outside is only sanded by hand. I found the round-over from the bit too much for my taste. To attach the centerpiece to the legs I drilled holes and fastened it with glue and screws. To make it look like I only used wood joints I drilled a shallow oversized hole that I plugged with some Oak plugs. You could off course only use dowels, screws or glue only.

Now that the assembly is complete it can be glued and screws to the lower box and this part of the toolbox is complete. Next up is making the cantilever.
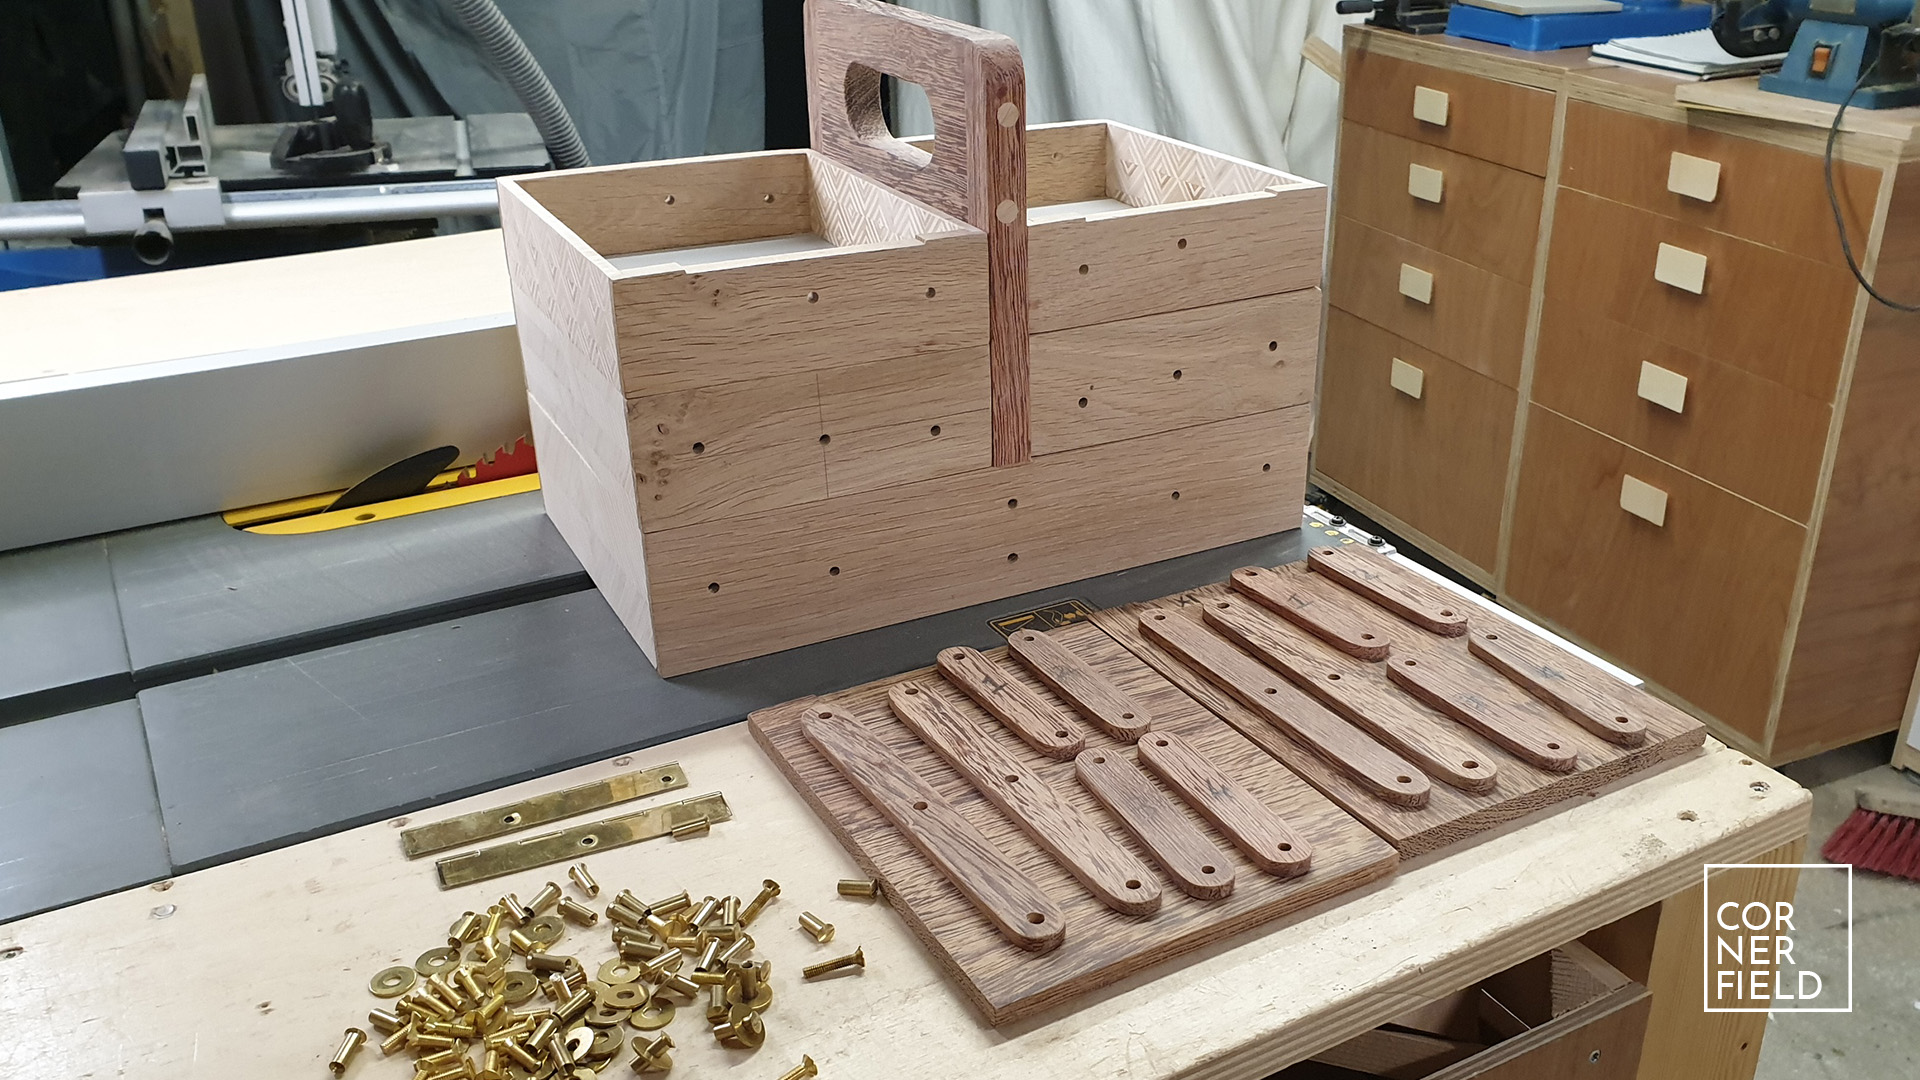
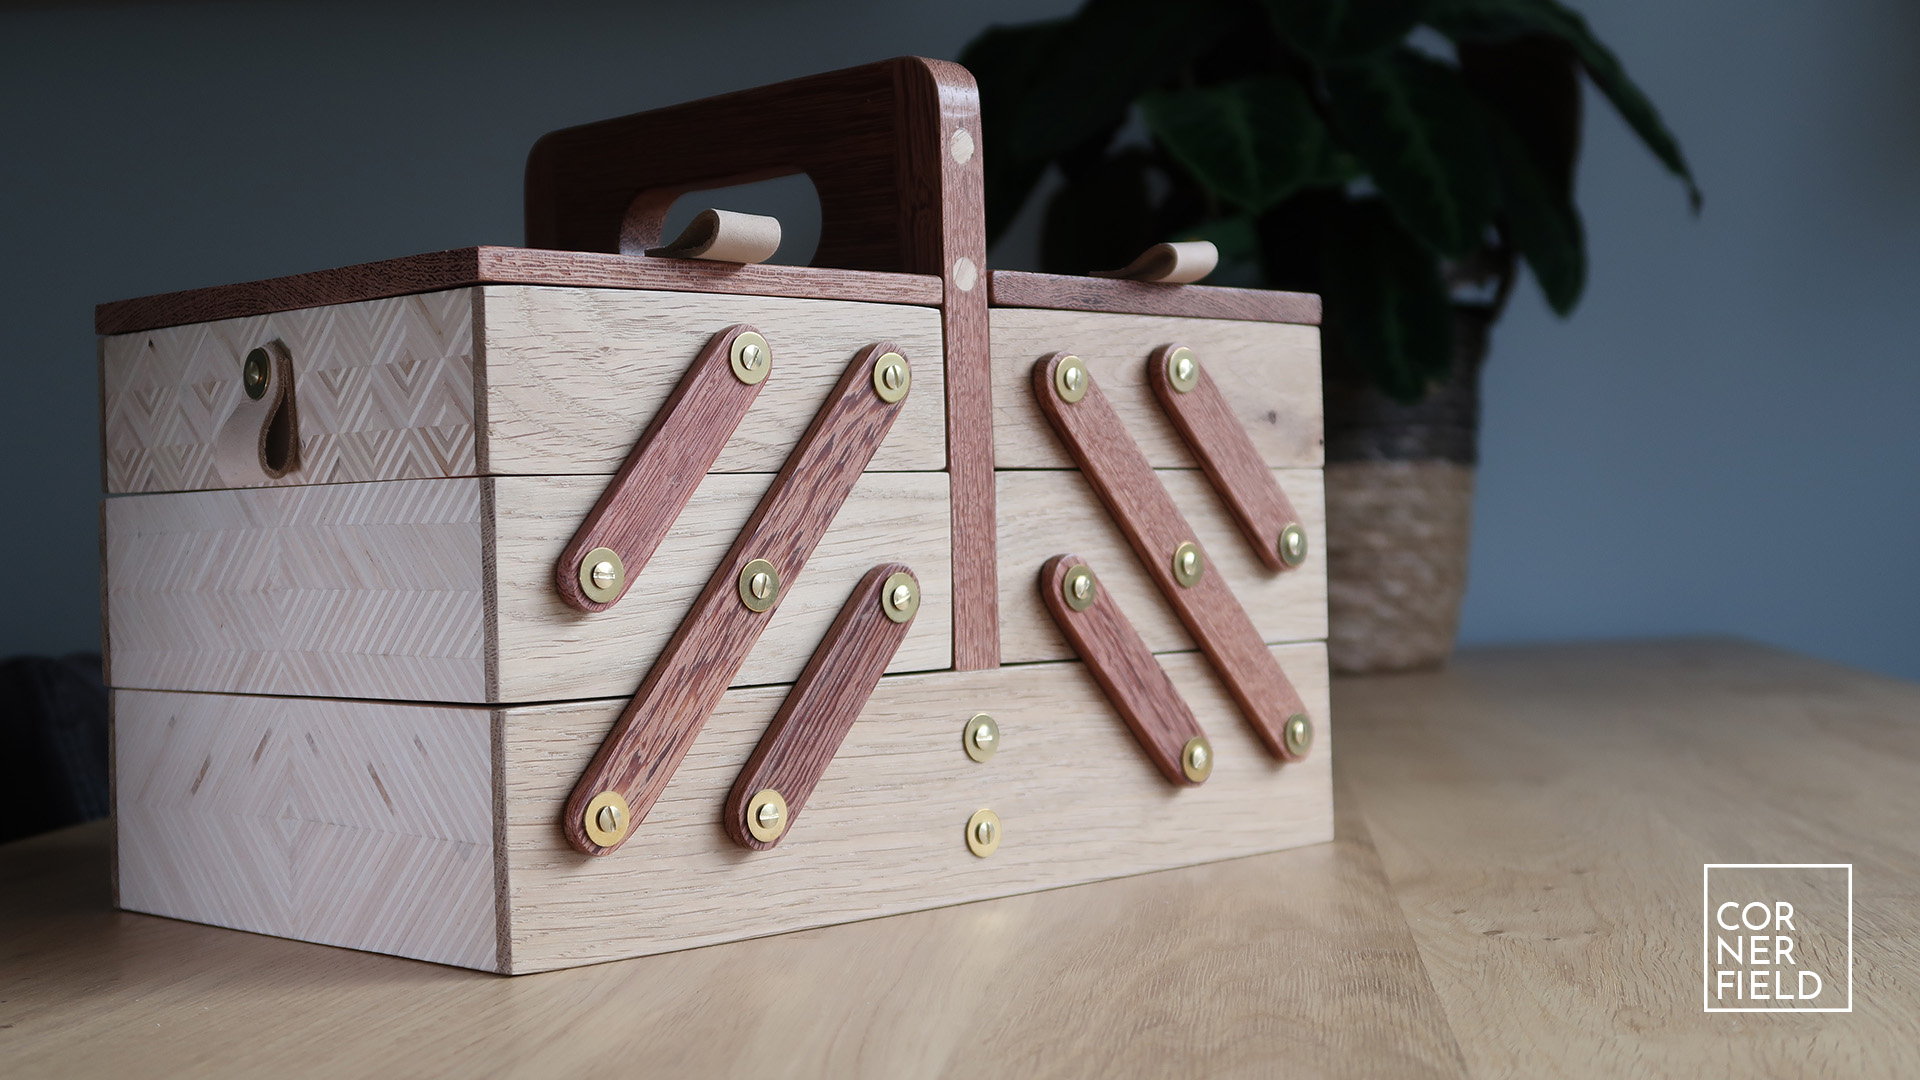
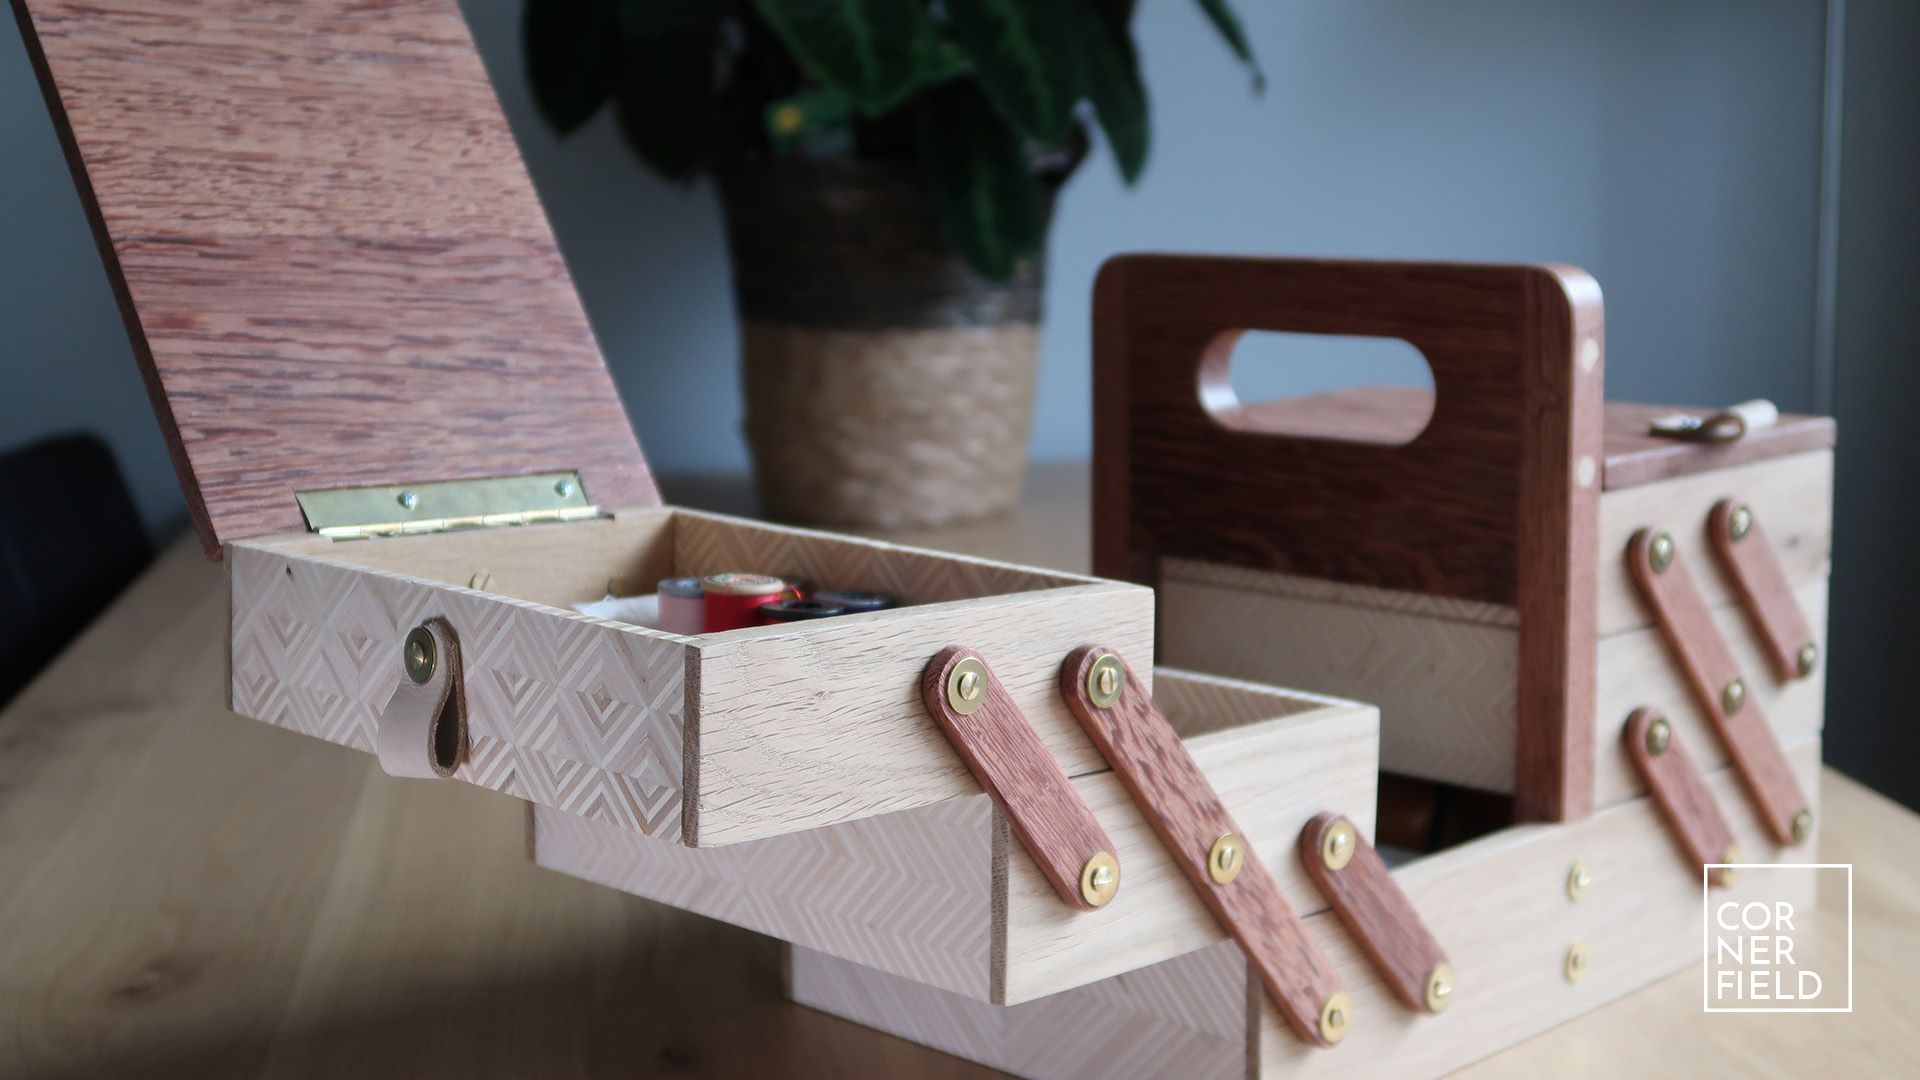
Cantilever
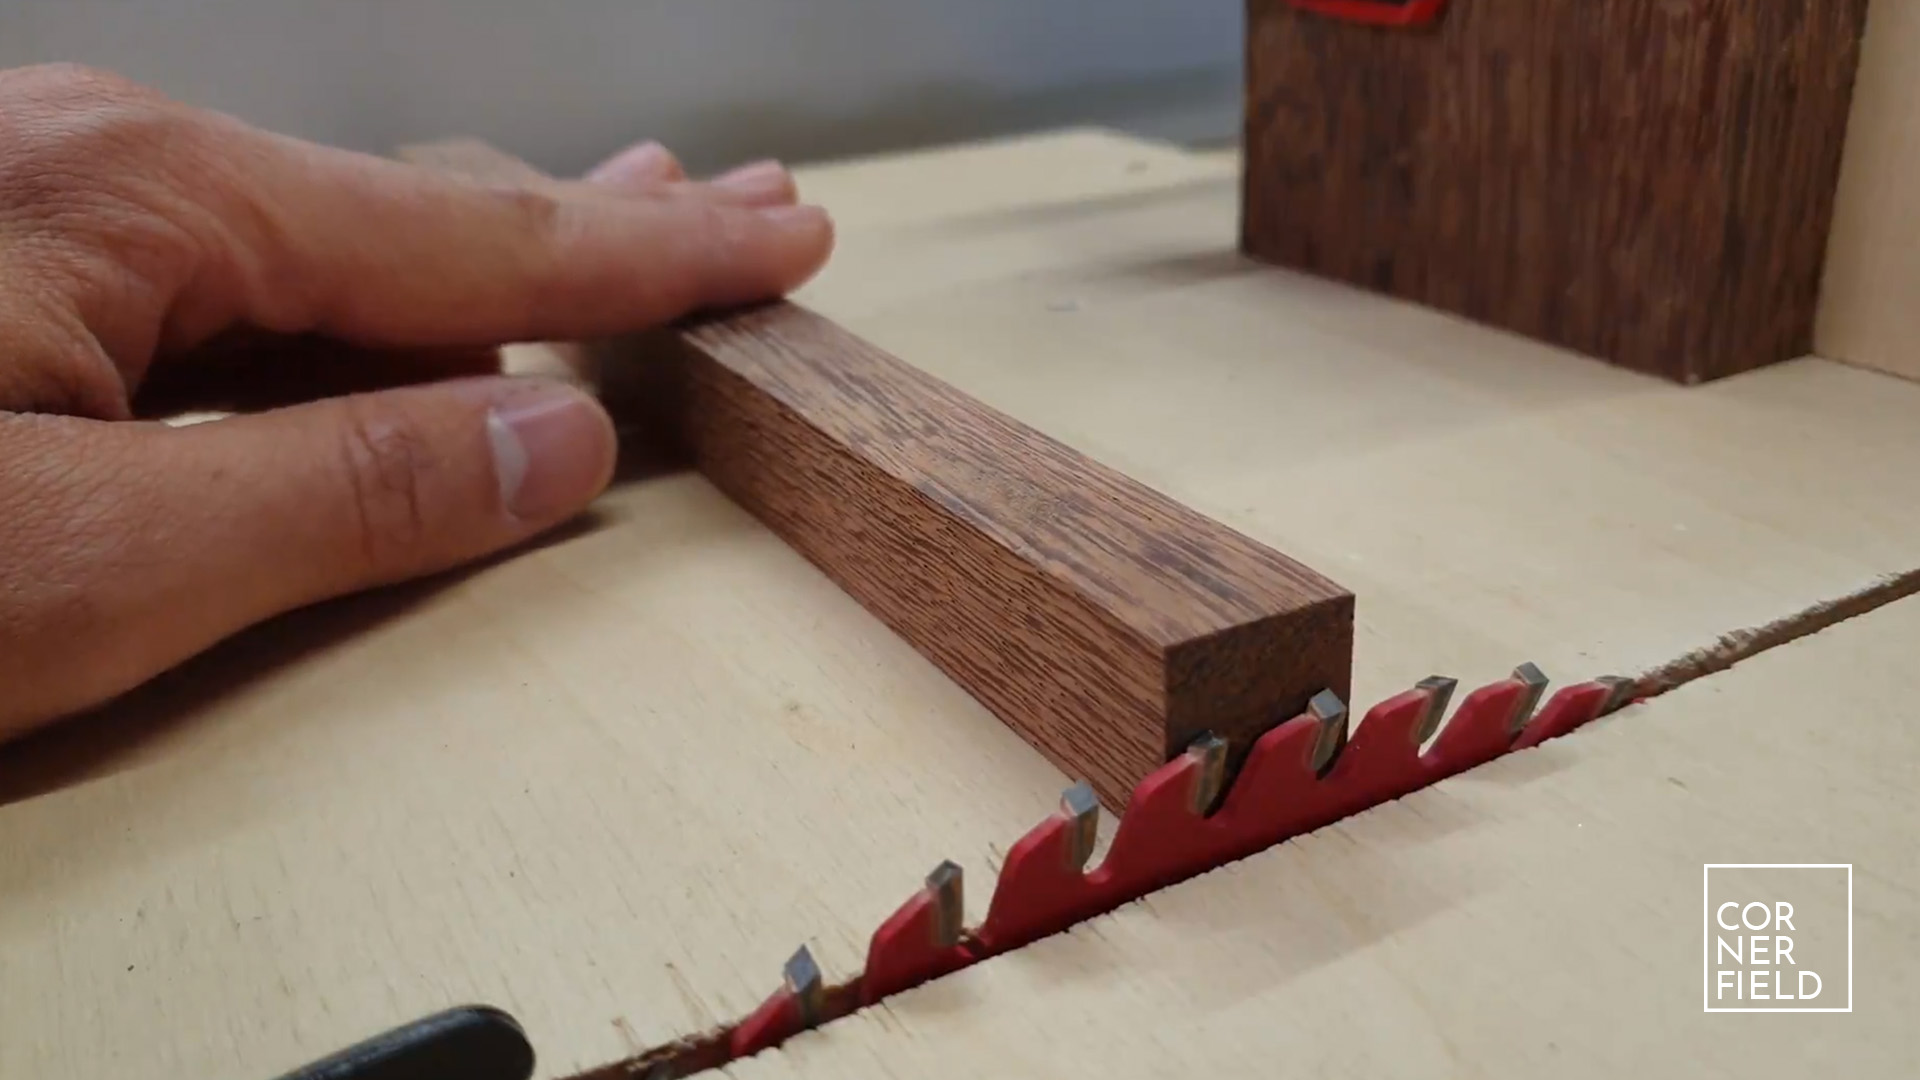
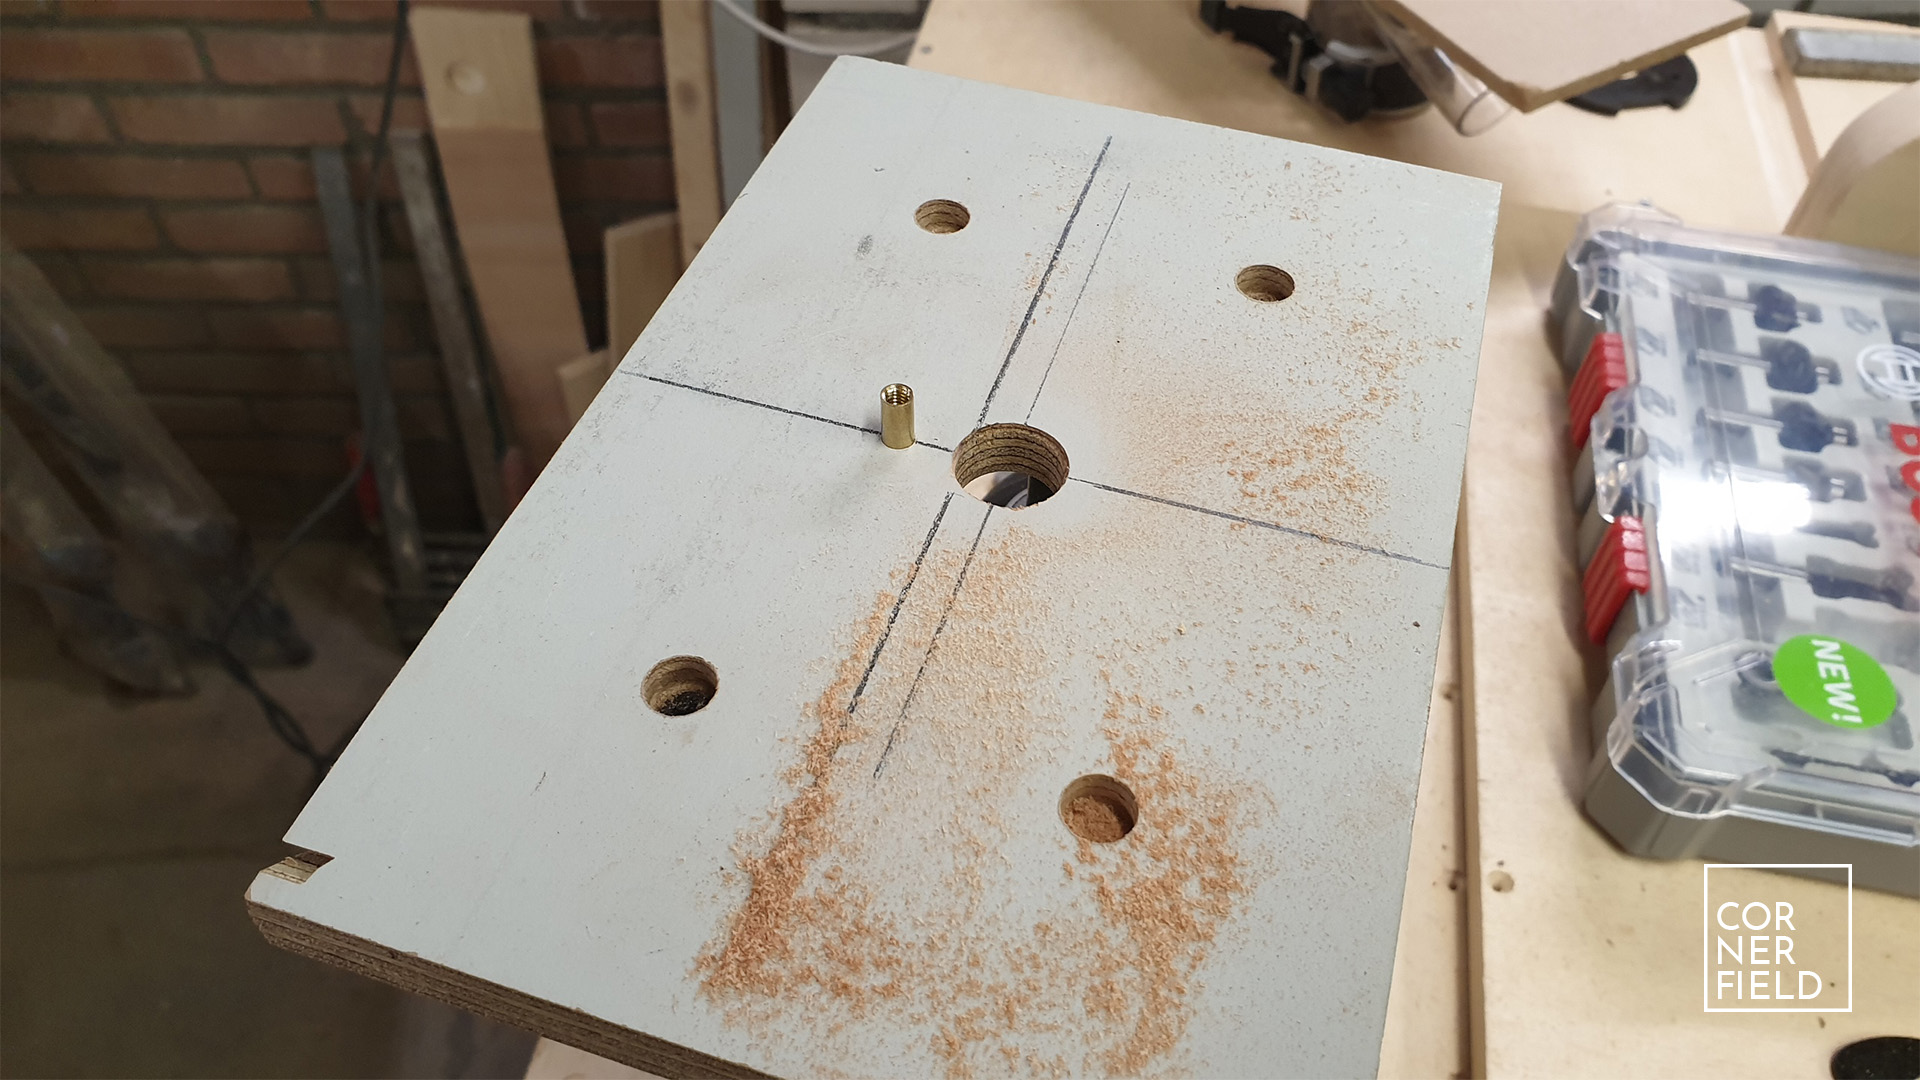
In my sketch, I only used two links per side. Aesthetically I liked this better than three. Unfortunately, it didn’t work out. The two links couldn’t support the boxes enough so I had to add the third link in the middle. To make the links I first had to figure out where I needed to make holes. I clamped down the boxes and drew everything out on one side before drilling the holes.
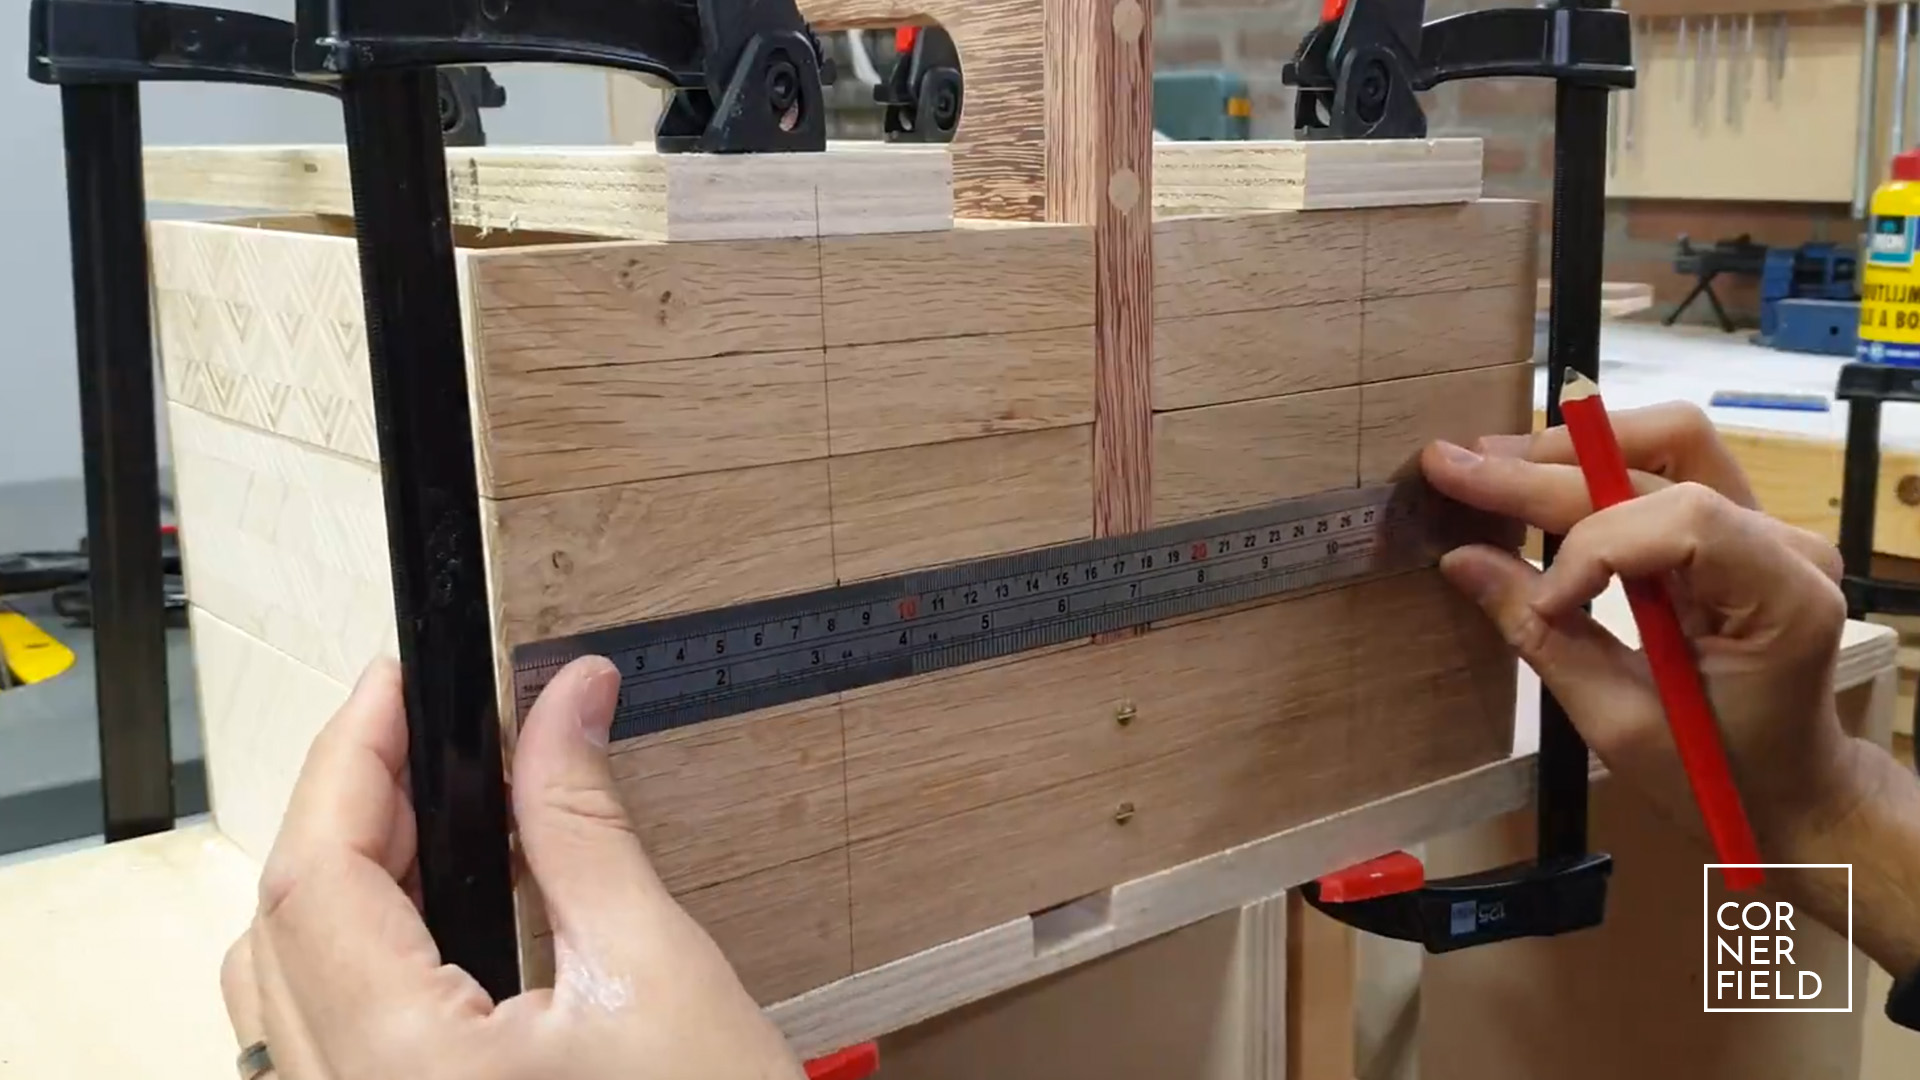

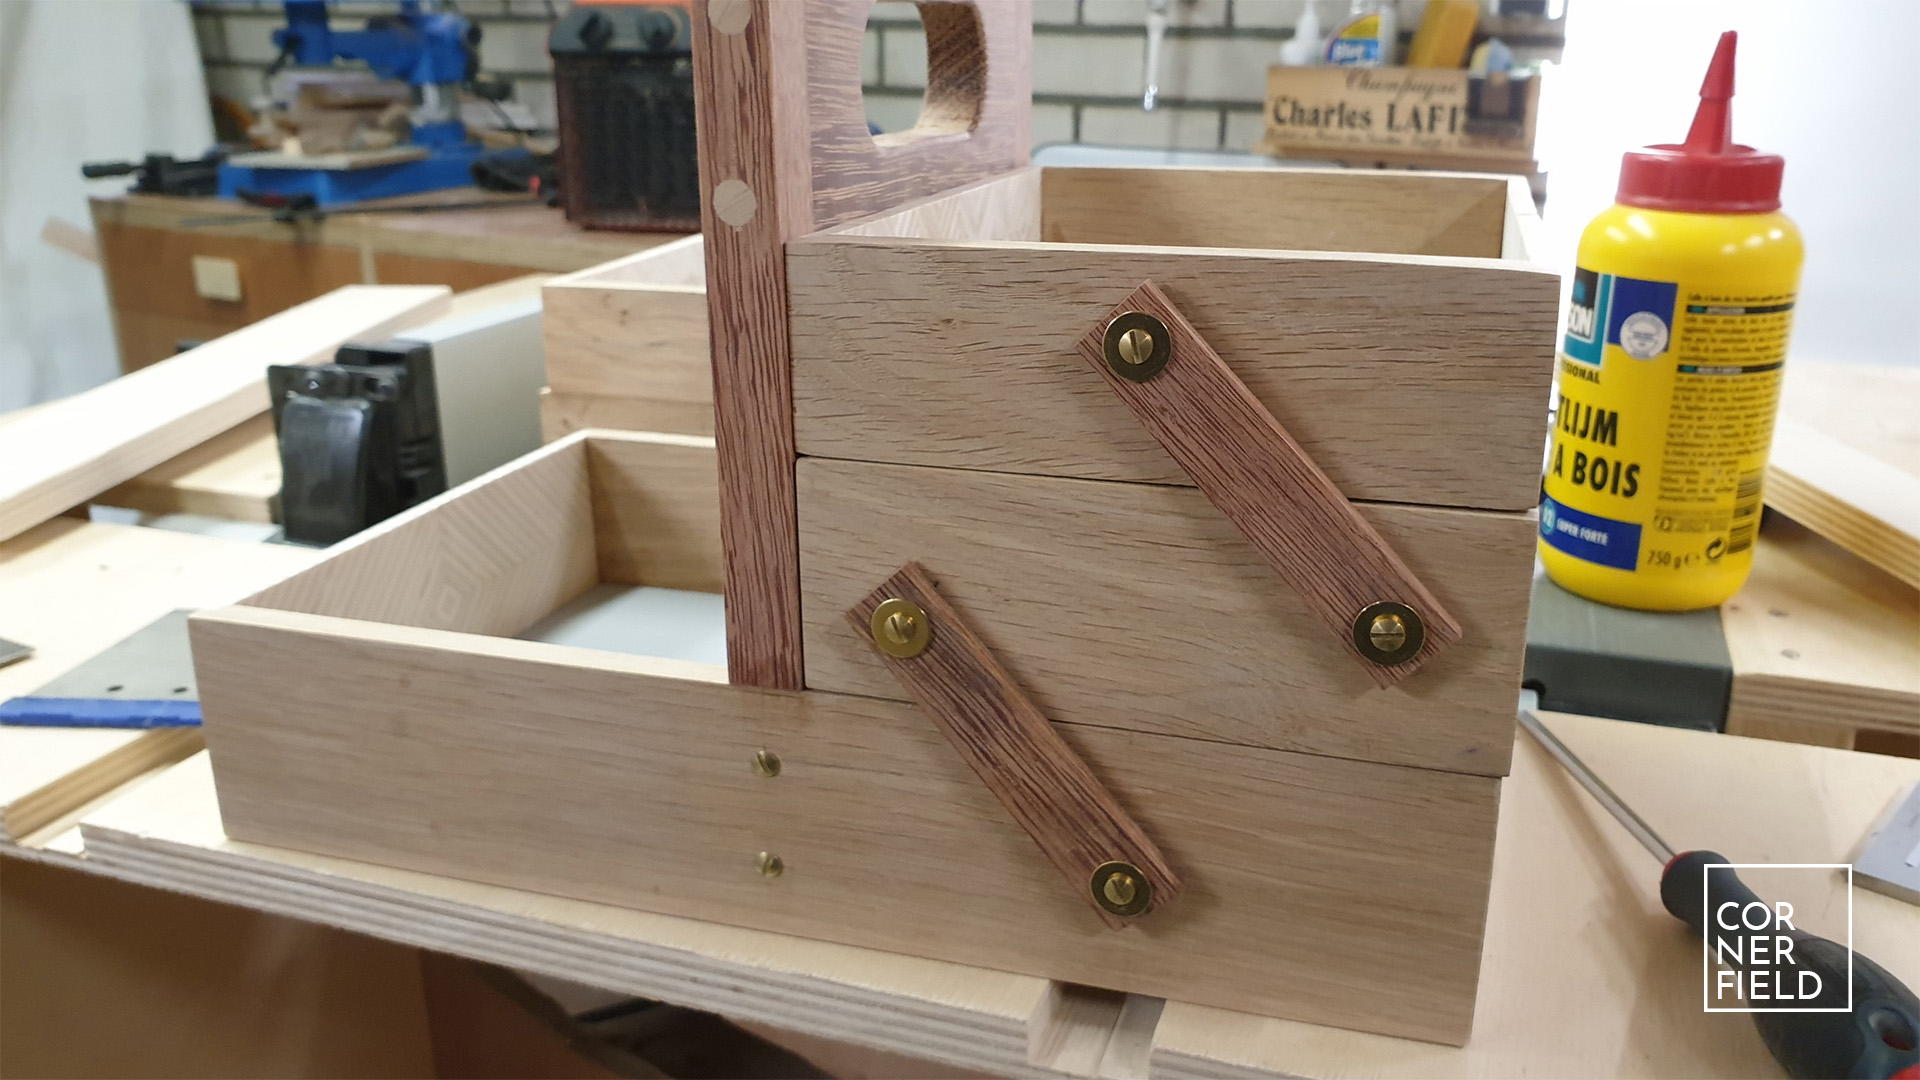
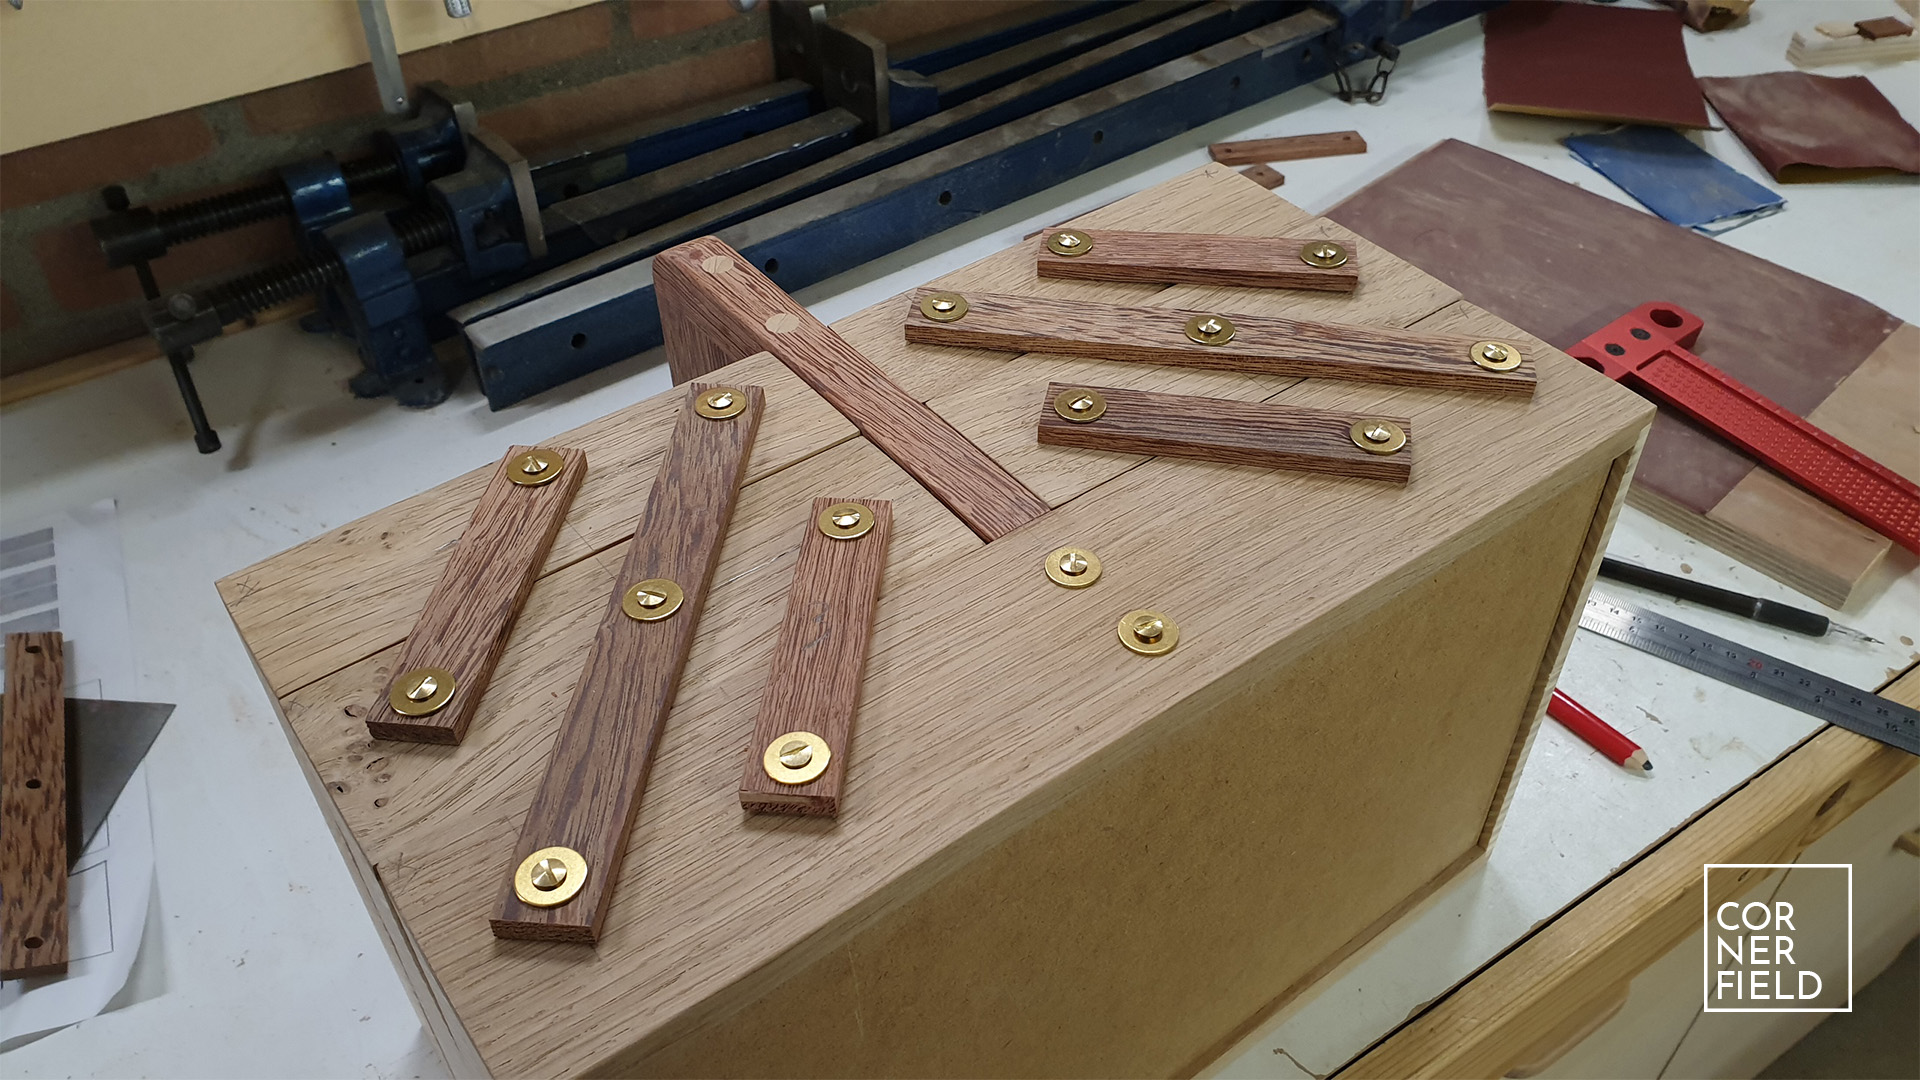
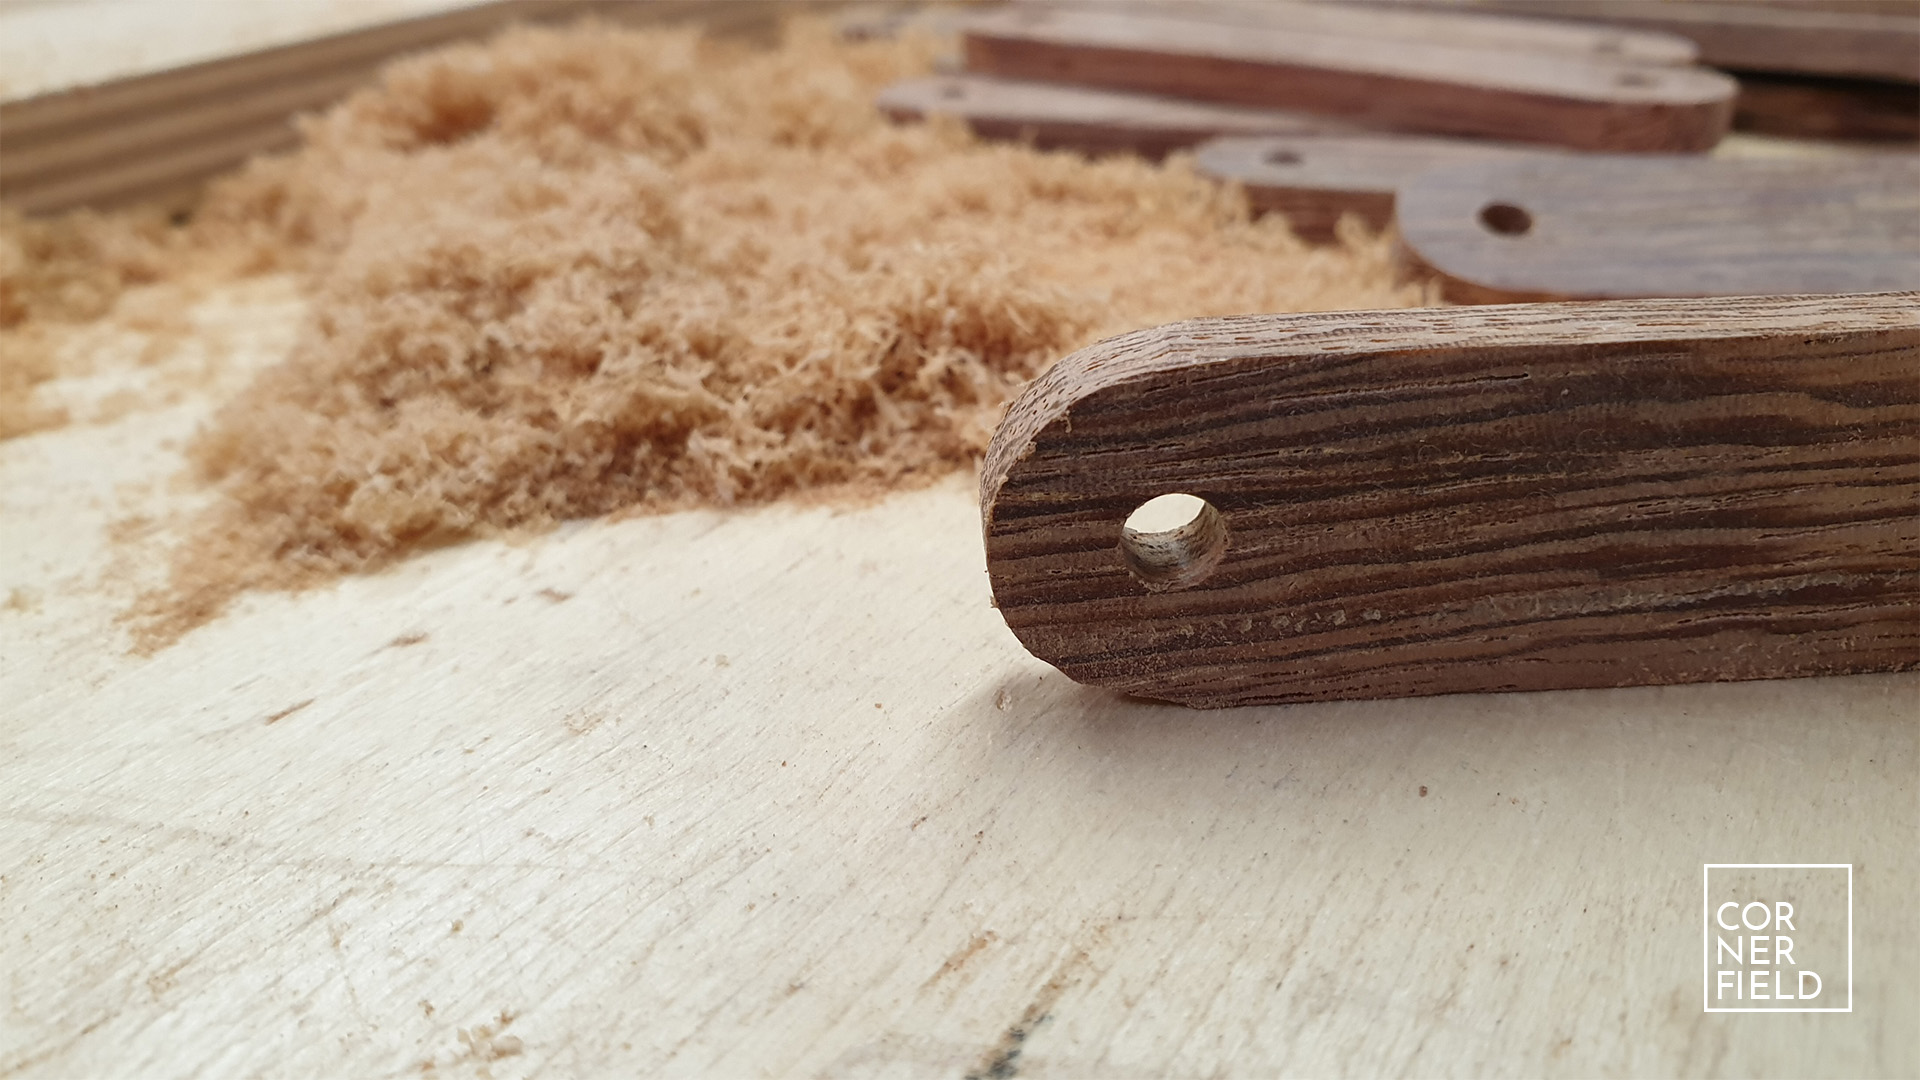
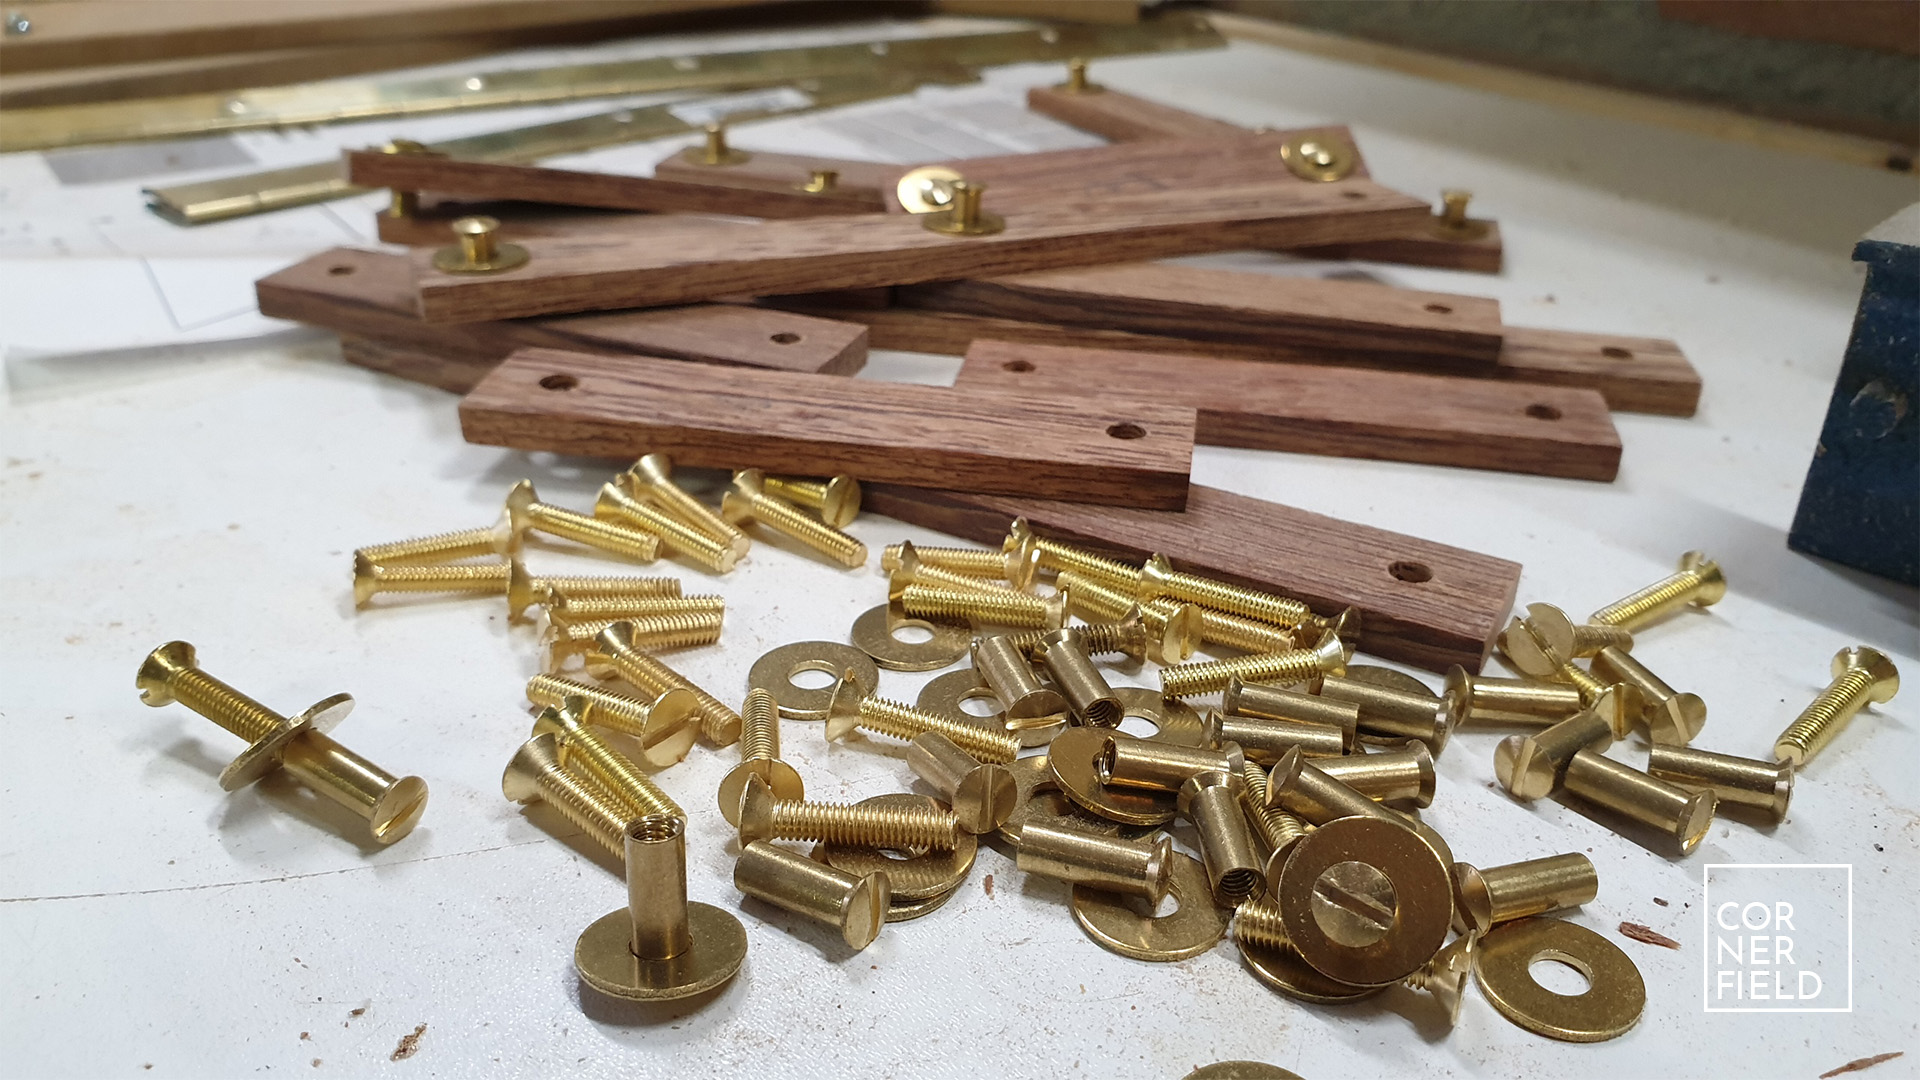
Having all the lines drawn out I could measure and cut the links I needed. I then drilled holes in the links and boxes, I did this one layer at a time. With two links attached, I tried the action and as I said before this didn’t work out. So I added the third middle link and that solved the problem. The next step for the links was to make the ends round. I made a simple jig for my plunge router to do this. It was as simple as attaching one side of the hardware to a board that was fixed to the base of the router. Now I could slide the link over the hardware and rotate it around the bit. Making all the links the same radius and the same distance from the hole.
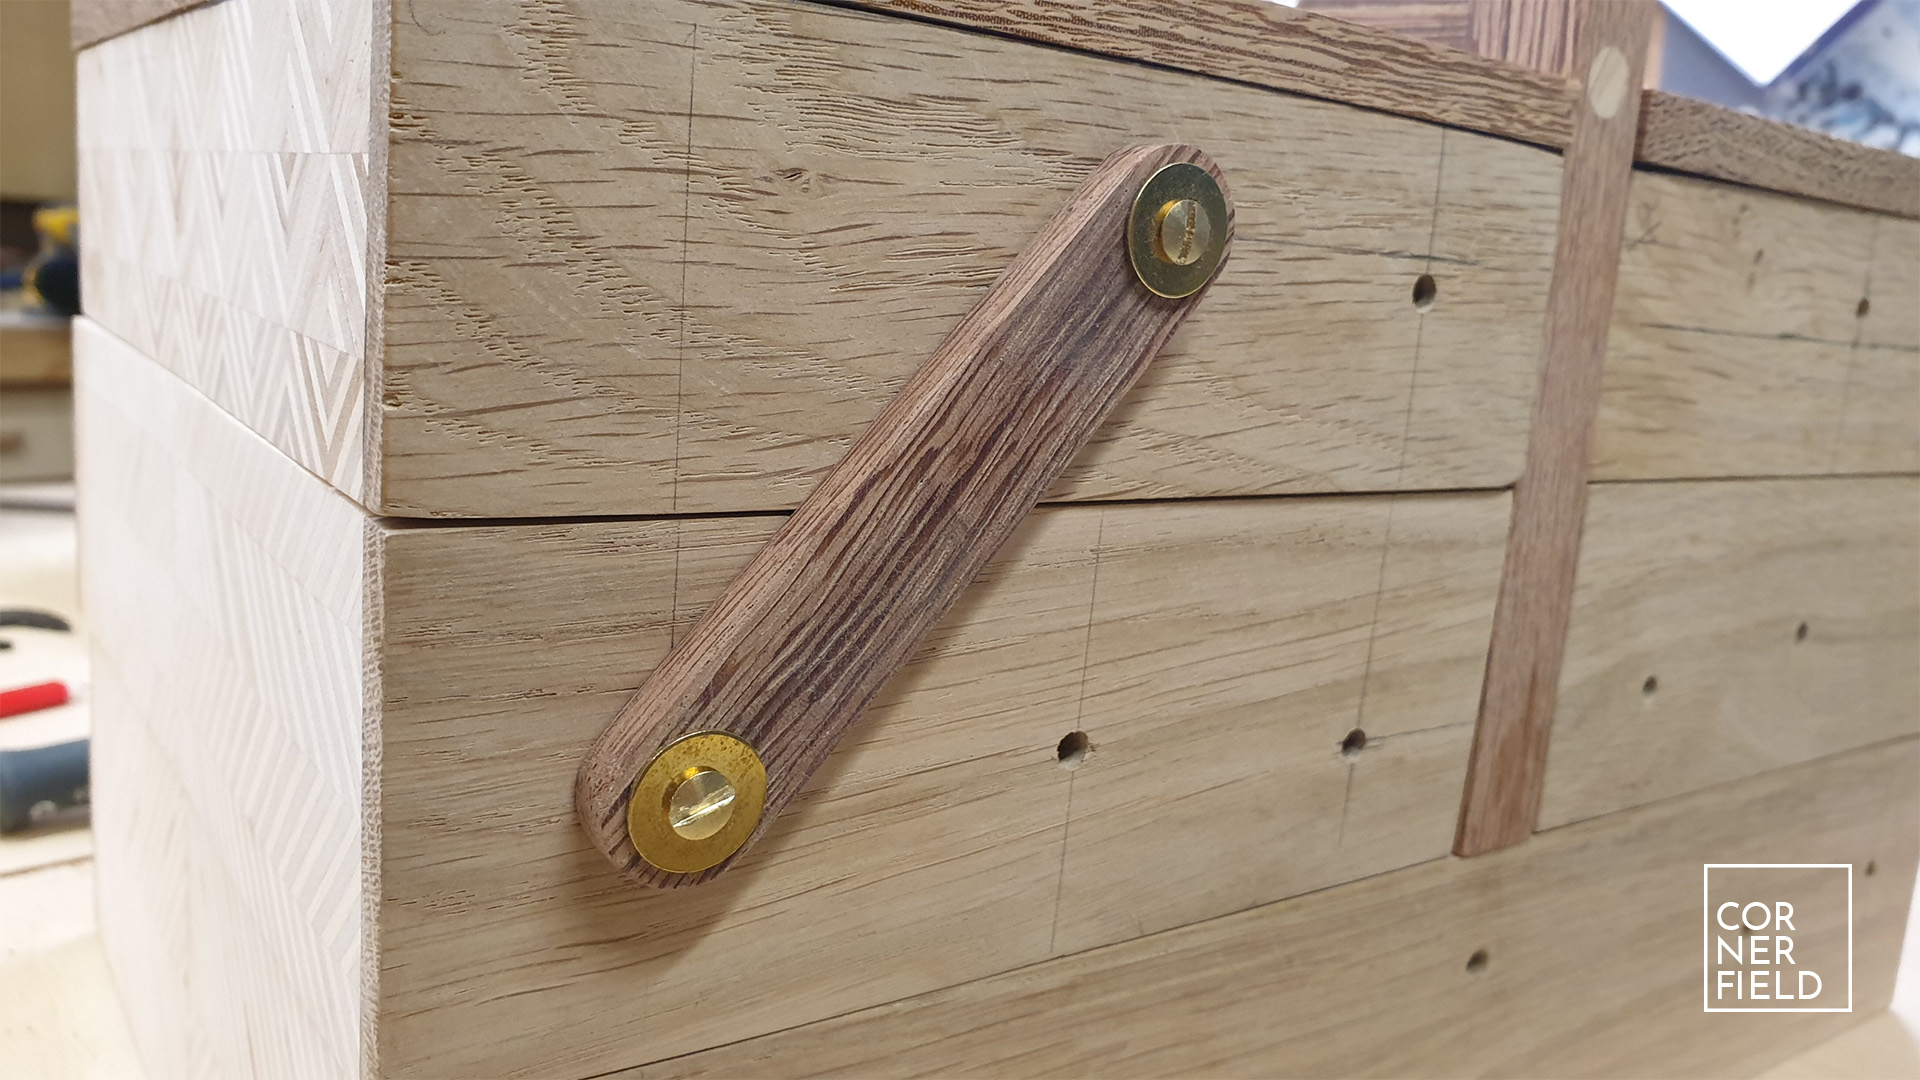
After the ends were rounded over the cantilever parts could be assembled. For hardware in this project, I’m using brass only. It looks great but it’s a pain in the butt to work with. It scratches really easily so be careful if you decide to use this yourself.
Lid
In my sketch, I had planned to attach the hinge of the lid to the front panel. As it turned out I’d rather have the lid open backward instead of to the side. This felt more natural to me so that’s what I did. There wasn’t enough material for the lid to make it out of a single piece, so I glued some pieces together. The lid was then fastened to the box using a brass piano hinge. To hide the hinge I routed a slot in both the side and the lid. Attaching the hinge was done with some regular screws since these are not seen.

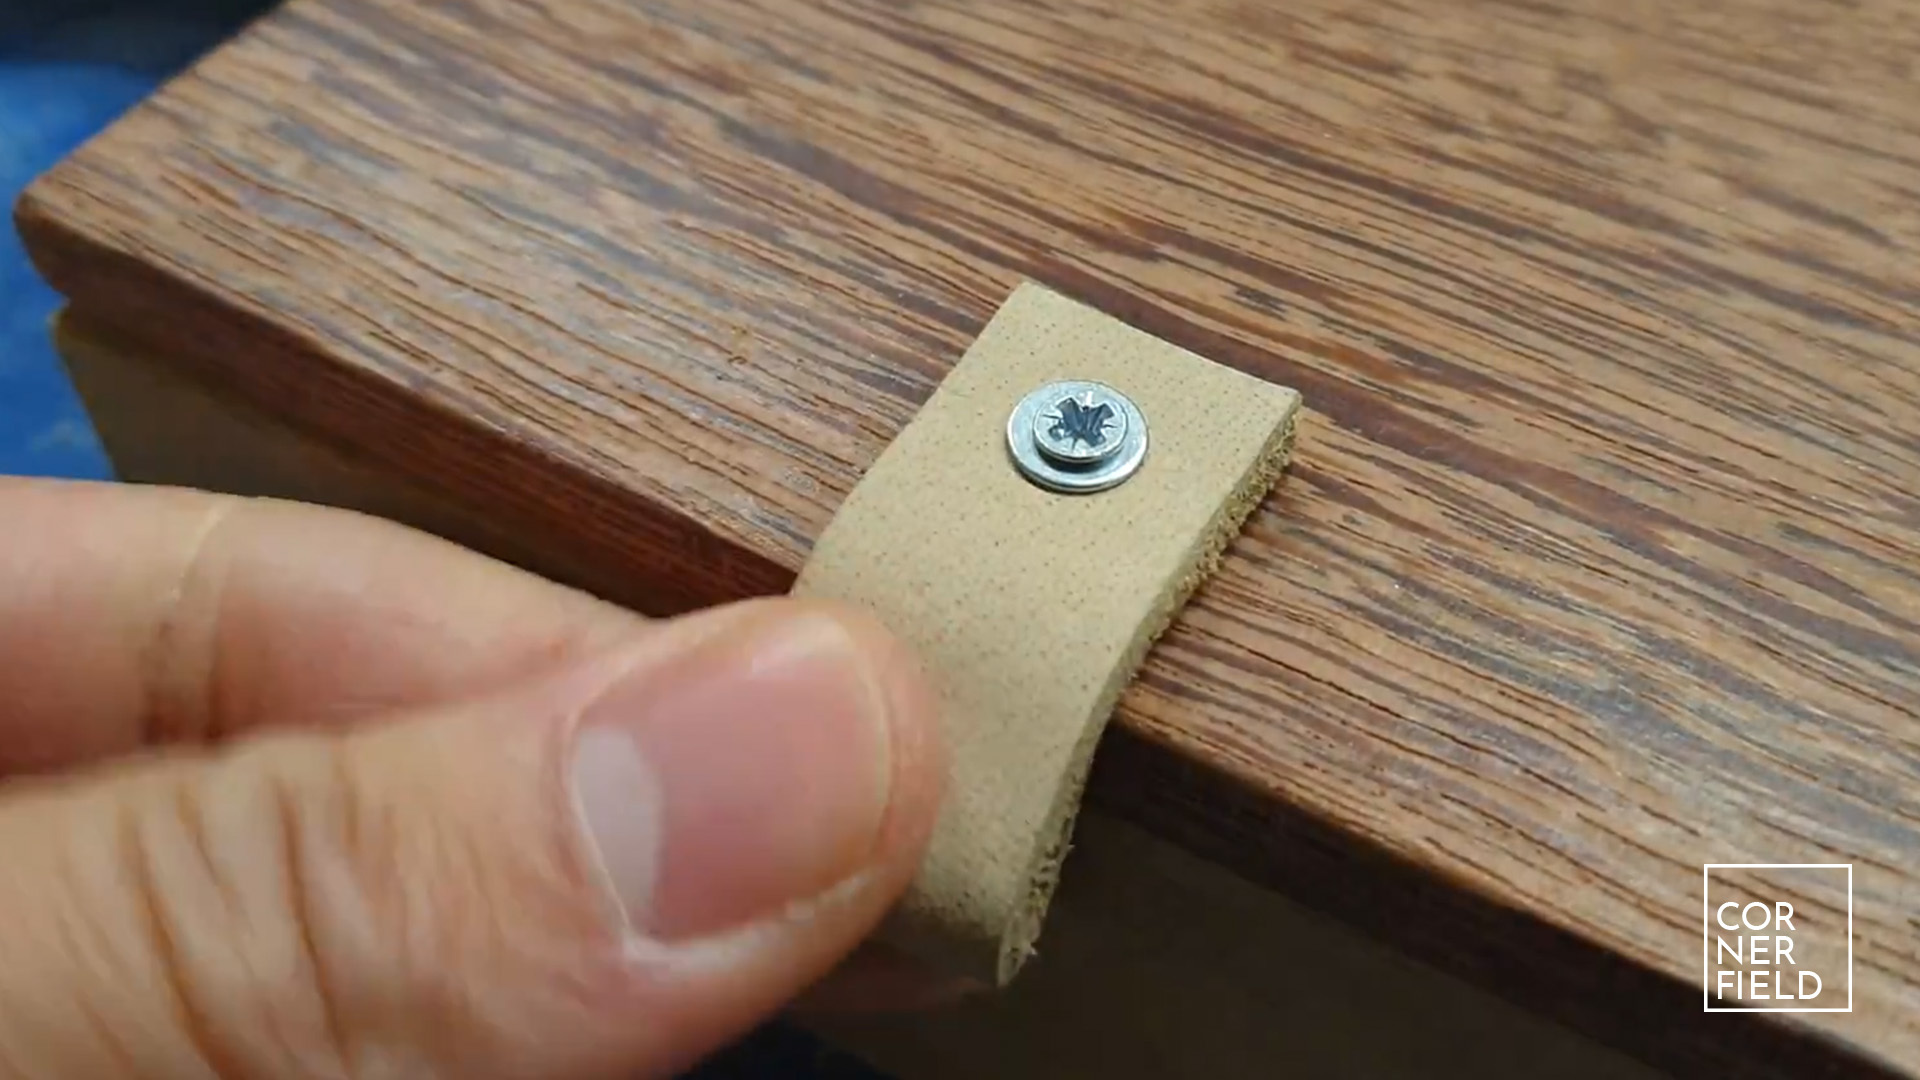
I still had the question of how to open the lid and the cantilever. This also wasn’t included in my design. After contemplating what would work best with the overall look I decided to go with leather straps. I bought some leather and attached it to both the lid and sides of the box using a screw and washer. This wasn’t only a very easy, I think it looks great as well.
Finishing
To protect the wood and not change the look I decided to coat everything in three layers of varnish. Before applying this I sanded everything up to 220 grit sandpaper and wiped it all down with some degreasing stuff. After that, I applied the finish and assembled the box one last time. This time I added Locktite to all the hardware holding the links in place. This is to make sure that it doesn’t come loose over time.
Result
I’m very pleased with how this project turned out. The scale on which I had to work was eye-opening to me. It showed me there is still a vast amount of skills for me to discover. However, I’m not disappointed with what I was able to make. It looks and functions surprisingly well. I’m happy I decided to make this particular project. Hopefully, Ellen is happy with my gift to her as well. That would make it two for two :-).

Links & Download
If you want to build something similar I’ve linked my 3D model below as a download.
SketchUp 3D-model
Metric cut list
Instagram 1 | 2 | 3 | 4 | 5 | 6 | 7 | 8 | 9 | 10 | 11 | 12 | 13 | 14 | 15 | 16 | 17 | 18 | 19 | 20 | 21 | 22 | 23 | 24 | 25 | 26 | 27 | 28 | 29 | 30 | 31 | 32 | 33 | 34 | 35
Hope this post has inspired you to make something!
And don’t forget to follow your excitement 
Awesome post! Keep up the great work! 🙂
Hi
What’s the thickness of the boxes?
Hi Harish,
I think I ended up with something like 8mm.
Thank you.
I am going to try and build a slightly bigger one for myself. One thing I’m a bit confused about is regarding the placement of the holes for the links. Is there any calculation to help me with this?
I have gone through the cut lis that you have posted but I do not see any measurements for the cantalievers themselves. Do you think you could give me those dimensions?
Hi Alex,
I would love to help you but I don’t have the box anymore so getting the dimensions will be impossible. There is a trick that I used to measure the dimensions for the links which I got from YouTube but I can’t seem to find that video. The best advice I can give you at this point is to make some test pieces to figure out what you need.
Sorry that I can’t answer your question, I hope you manage to make it regardless.
Kind regards,
Rico