

As part of my modular mobile workbench, I’m building a router table module.
Design
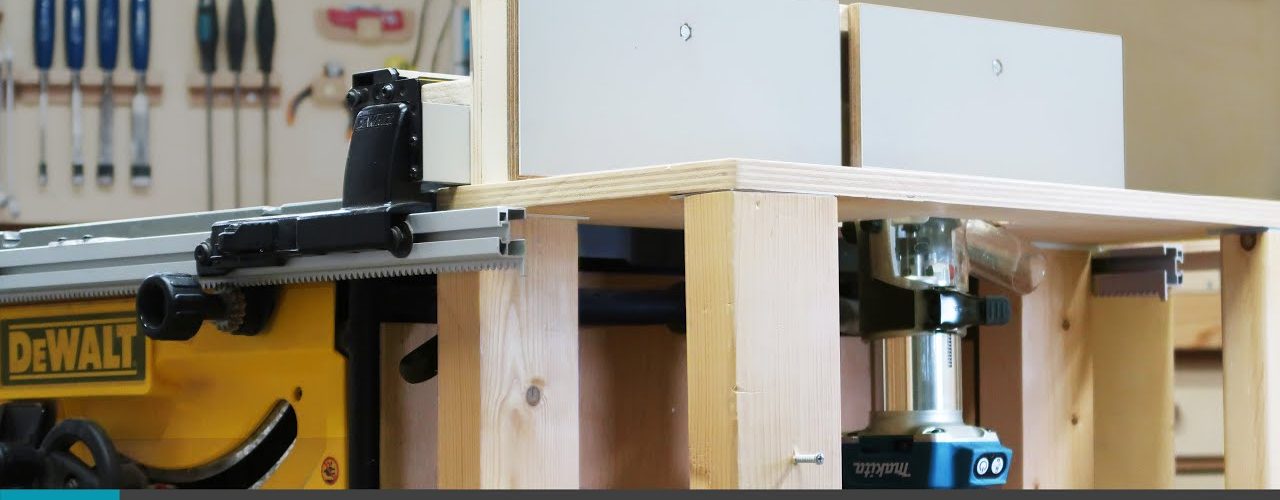
An important aspect of my workbench is that I want to be able to add components to it without having to pull it apart. I achieved this by building the workbench out of separate sections around my DeWALT table saw (DWE7491). More details on this build and the updates I’ve made to it so far can be found here:
1: Initial build article,
2: Updates and changes.
For the router table, I wanted to make sure everything is contained within a single section of my workbench. The fence for the router must be part of the table saw, but should also be easily removable. This way I have the advantages of my existing fence system but the flexibility of a home-made fence. The last design criteria I had was that it should be simple to make. In the workbench build series, I had novice builders in mind and I want it to be makeable with a minimal set of tools.
Build
Preparation
The materials for this build are as follows. You will need a 2 by 4, 18mm plywood, 12mm plywood, two bolts, washers, wing nuts, and some screws. Optionally you could use plexiglass for the insert plate as I did but you could also just use a piece of wood. This list of materials is based on that you already have a workbench.
As far as tools go, you should also be able to manage with a basic set. A saw of some kind, a drill with a few bits and drills, sandpaper, a chisel, measure and marking tools, a few clamps, and your set. Of course, you have a router or you wouldn’t be building this. You will need to use that as well.
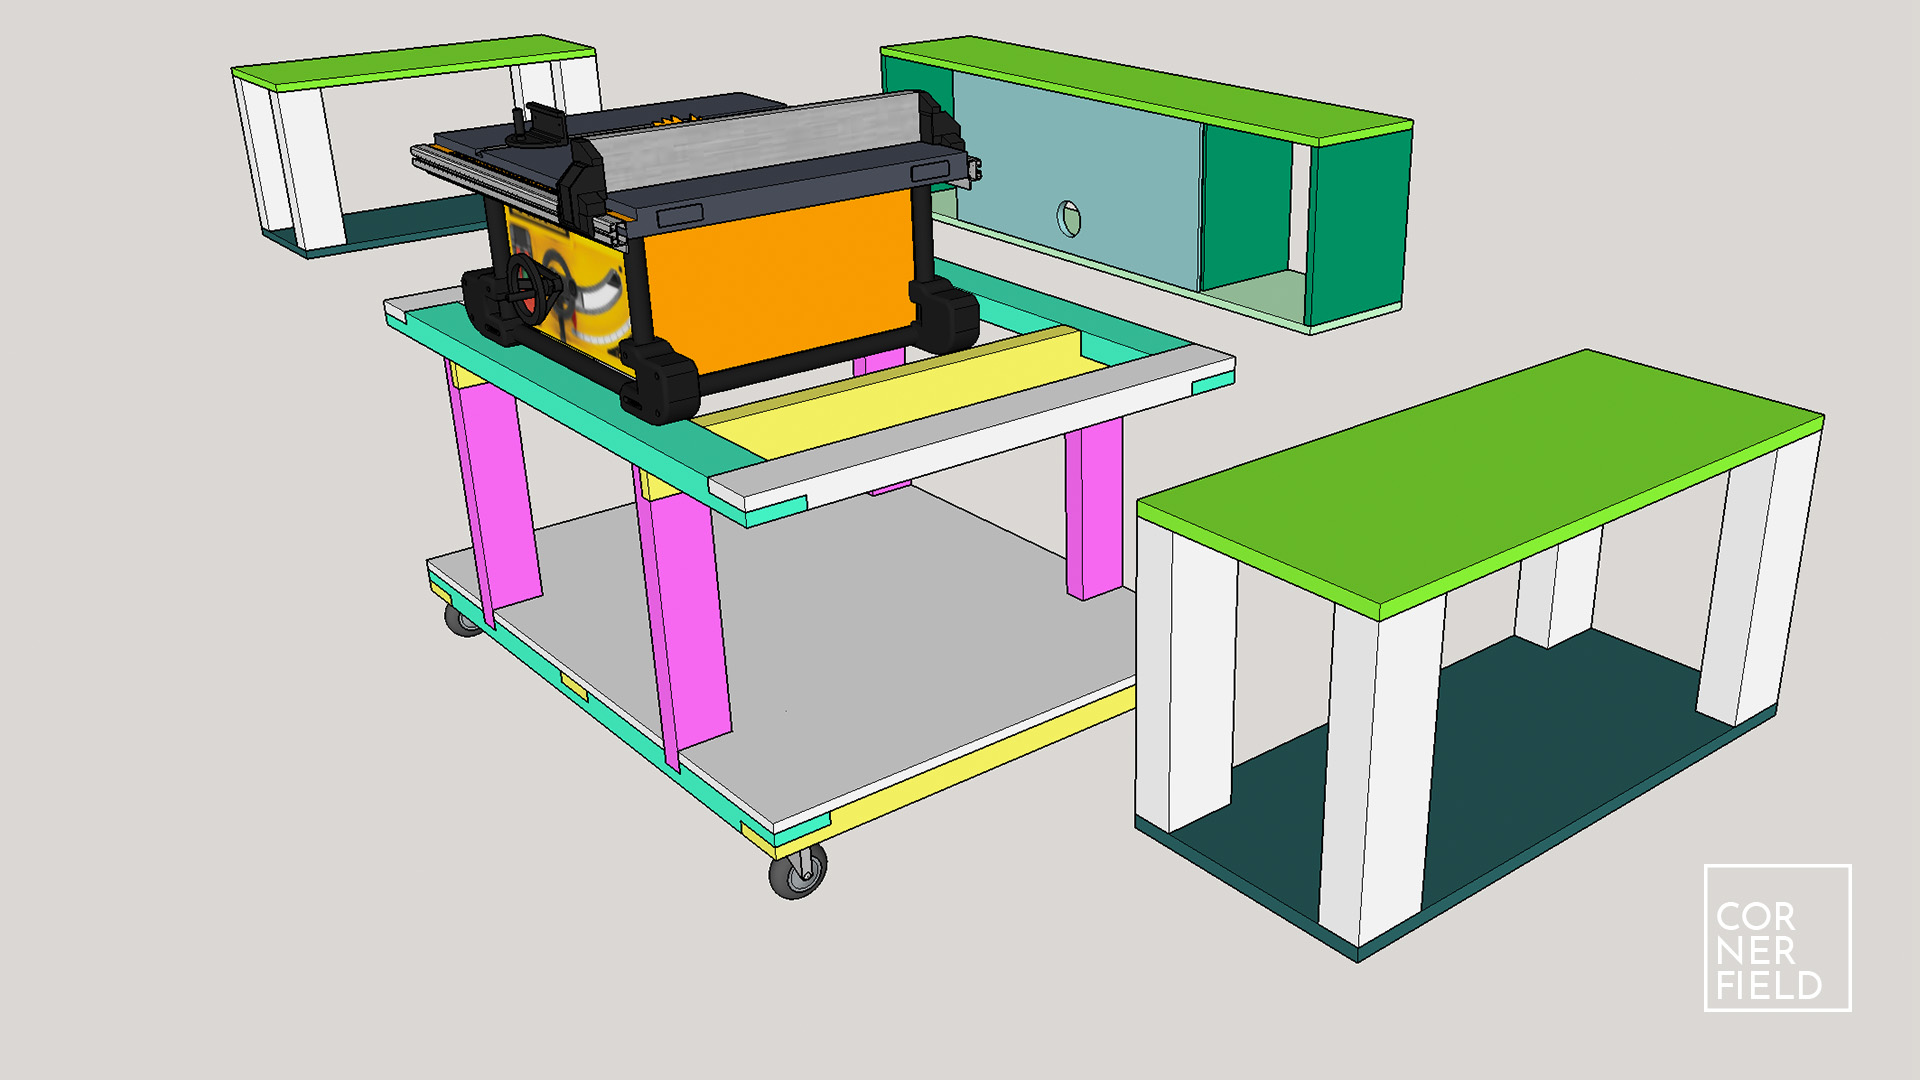
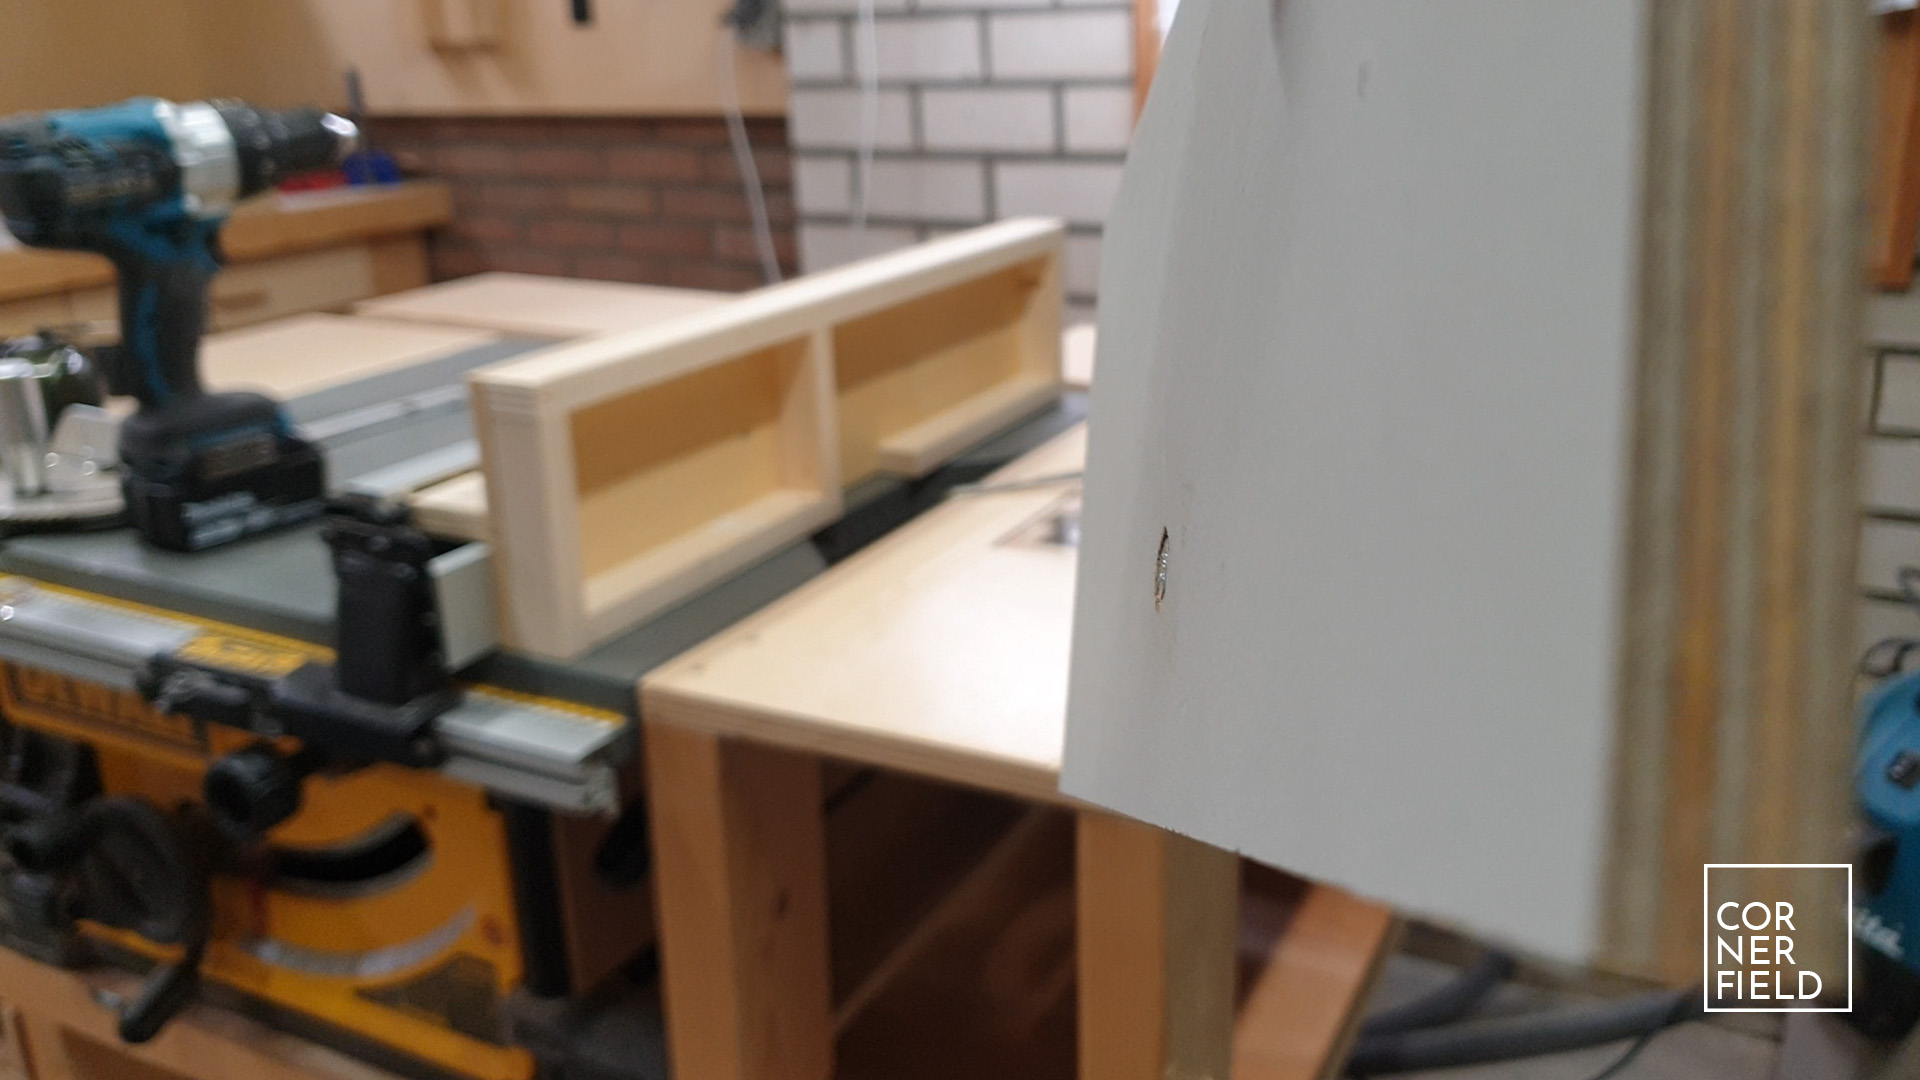
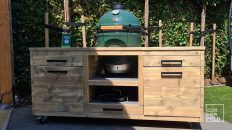
Cabinet
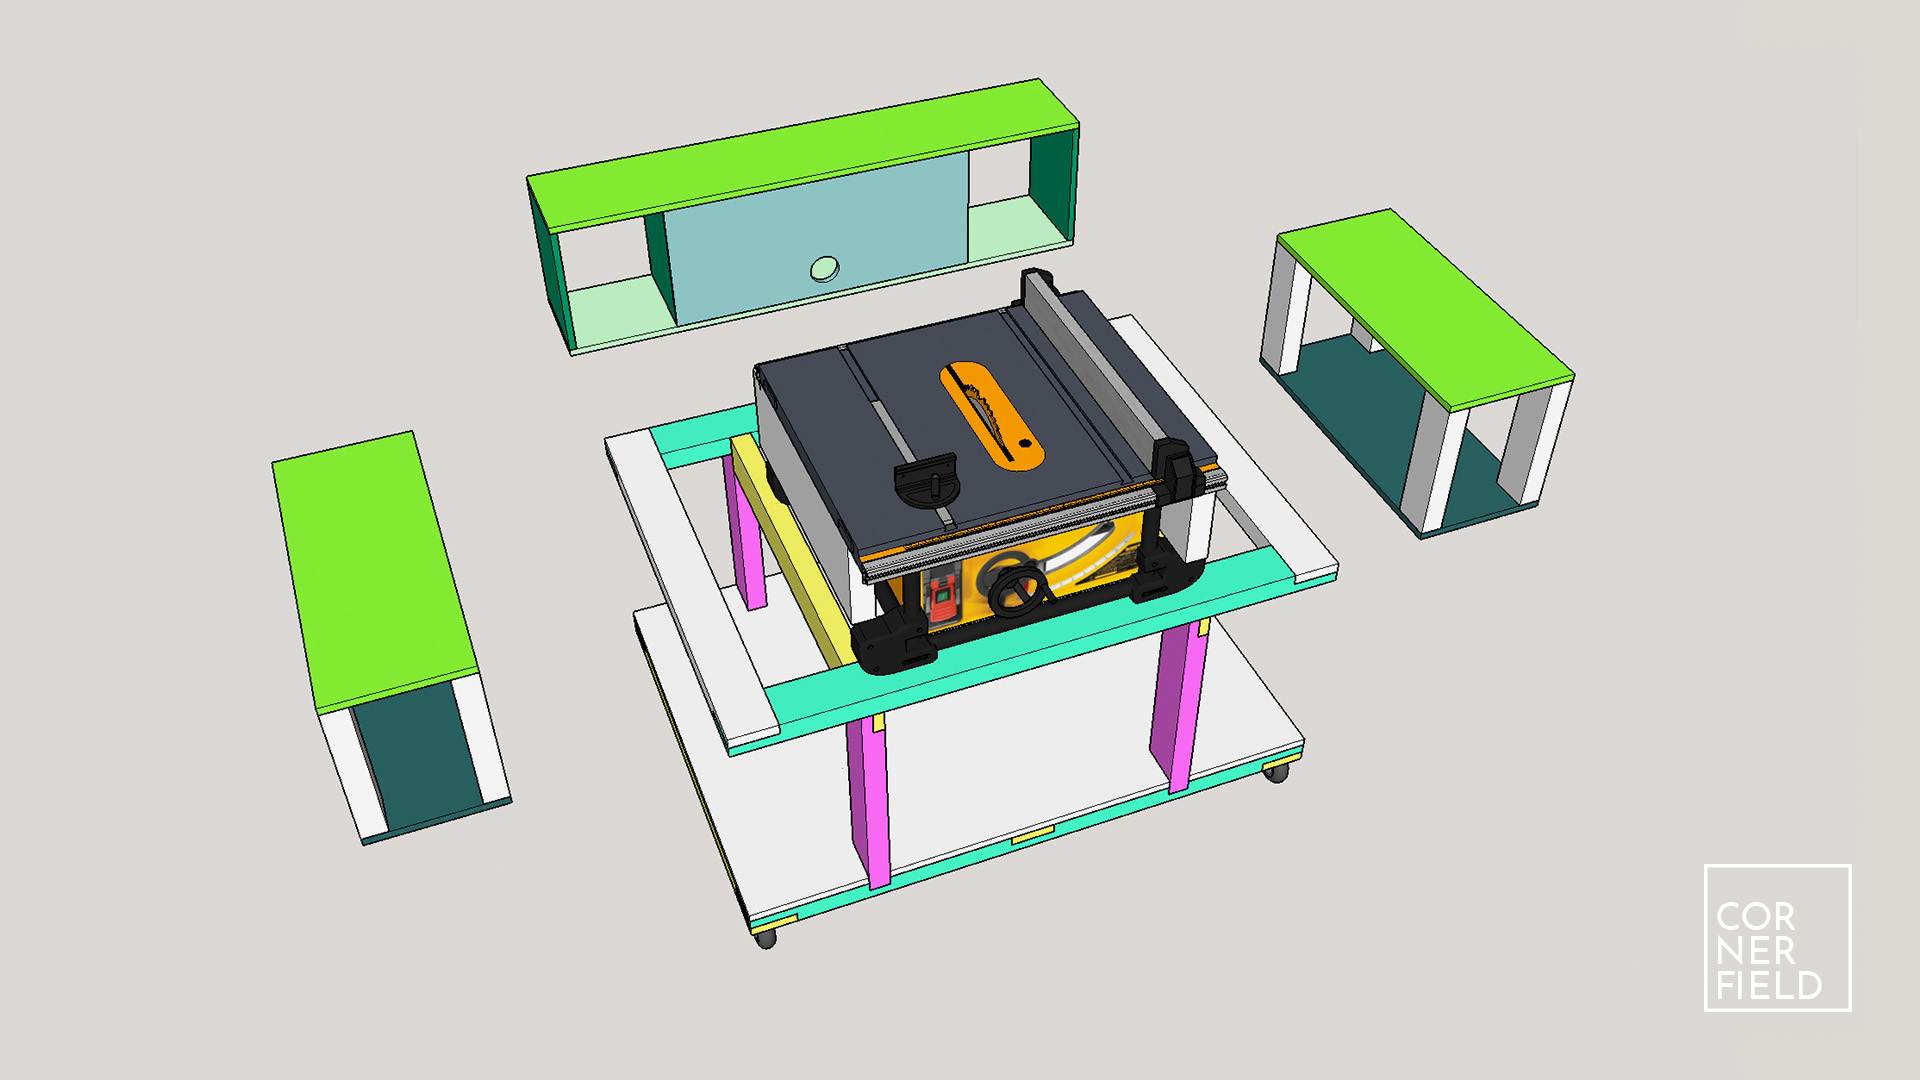
This router table requires a cabinet of some kind for the router to be mounted into. Mine is a construction of 2 pieces of plywood with 4 pieces of 2 by 4 as the legs. You could also make this completely from plywood and close it off with some doors. That would further cut down on the dust floating through your shop and give you some additional storage options. The router I’m mounting in this cabinet is the Makita DRT50.
Insert plate
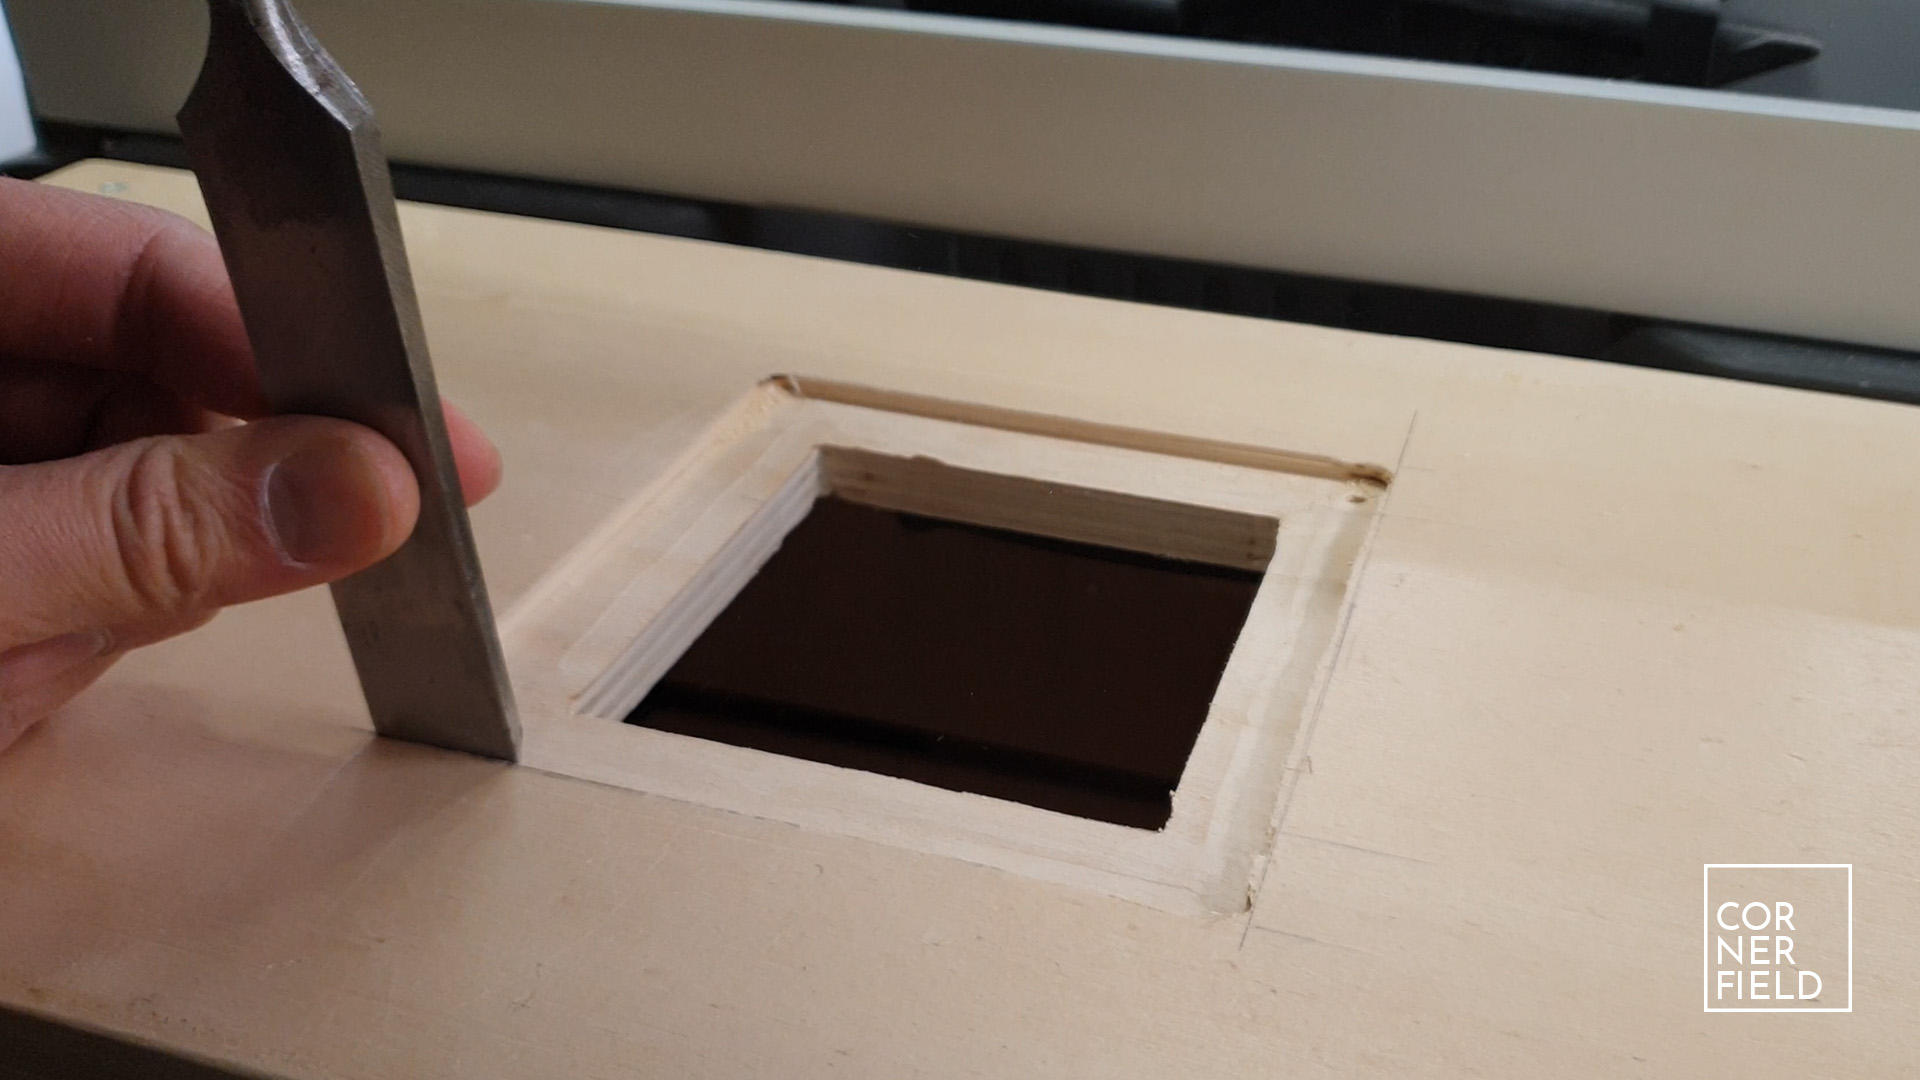
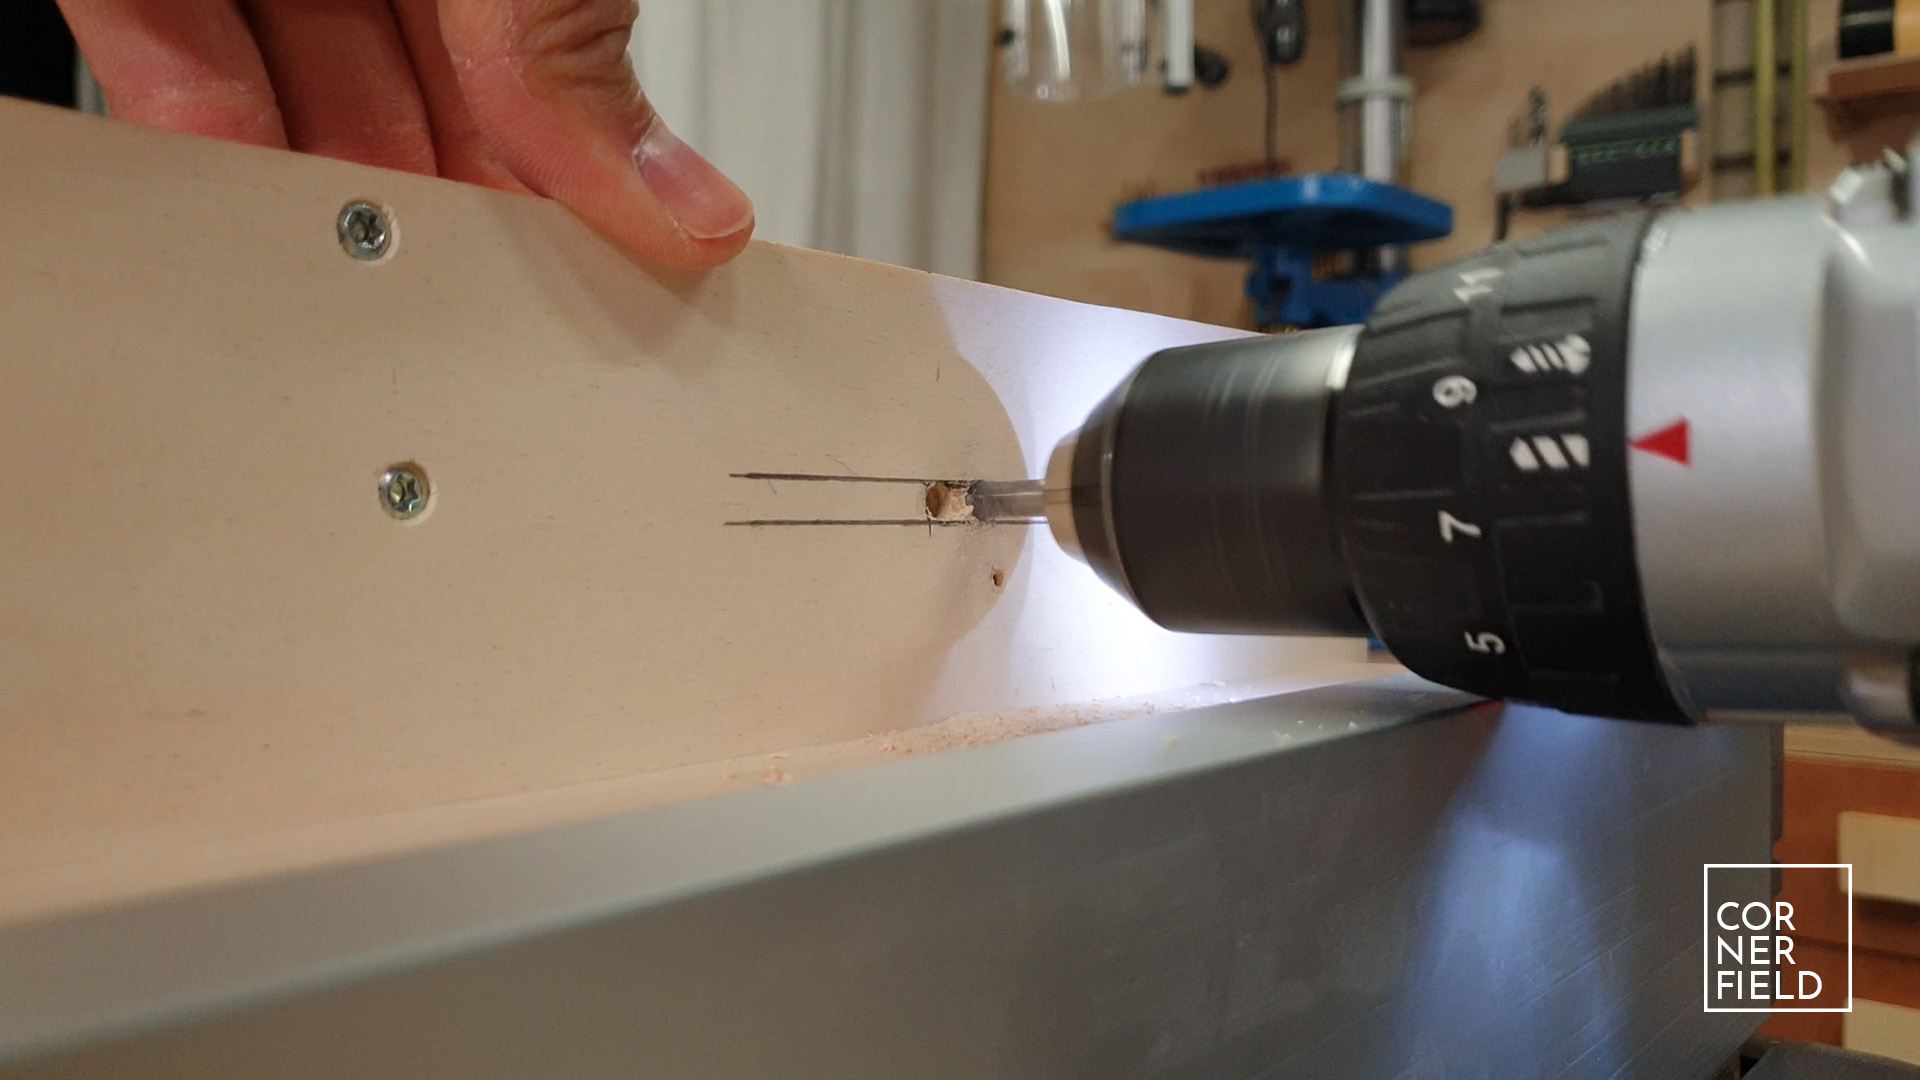
I’m mounting the router into the table by using a removable insert plate. There are several advantages to this, most notably that you can easily take the entire assembly out of the cabinet. The insert plate needs a cut out in the cabinet surface. The first step is to measure and mark the hole required for the router itself. It’s important that this can pass through completely. Next, you add about 2cm all around for the insert plate to rest on.

I removed the material in the center by drilling a few holes in the corners and cutting in between them with a jigsaw. The material around this hole needs to be removed to accommodate the thickness of the insert plate.
I use a plunge attachment for my router to do this. I set the depth using my insert plate. The corners are round because of the router. You can either round over the insert plate or square off the corners of the hole with a chisel. I chose to do the last.
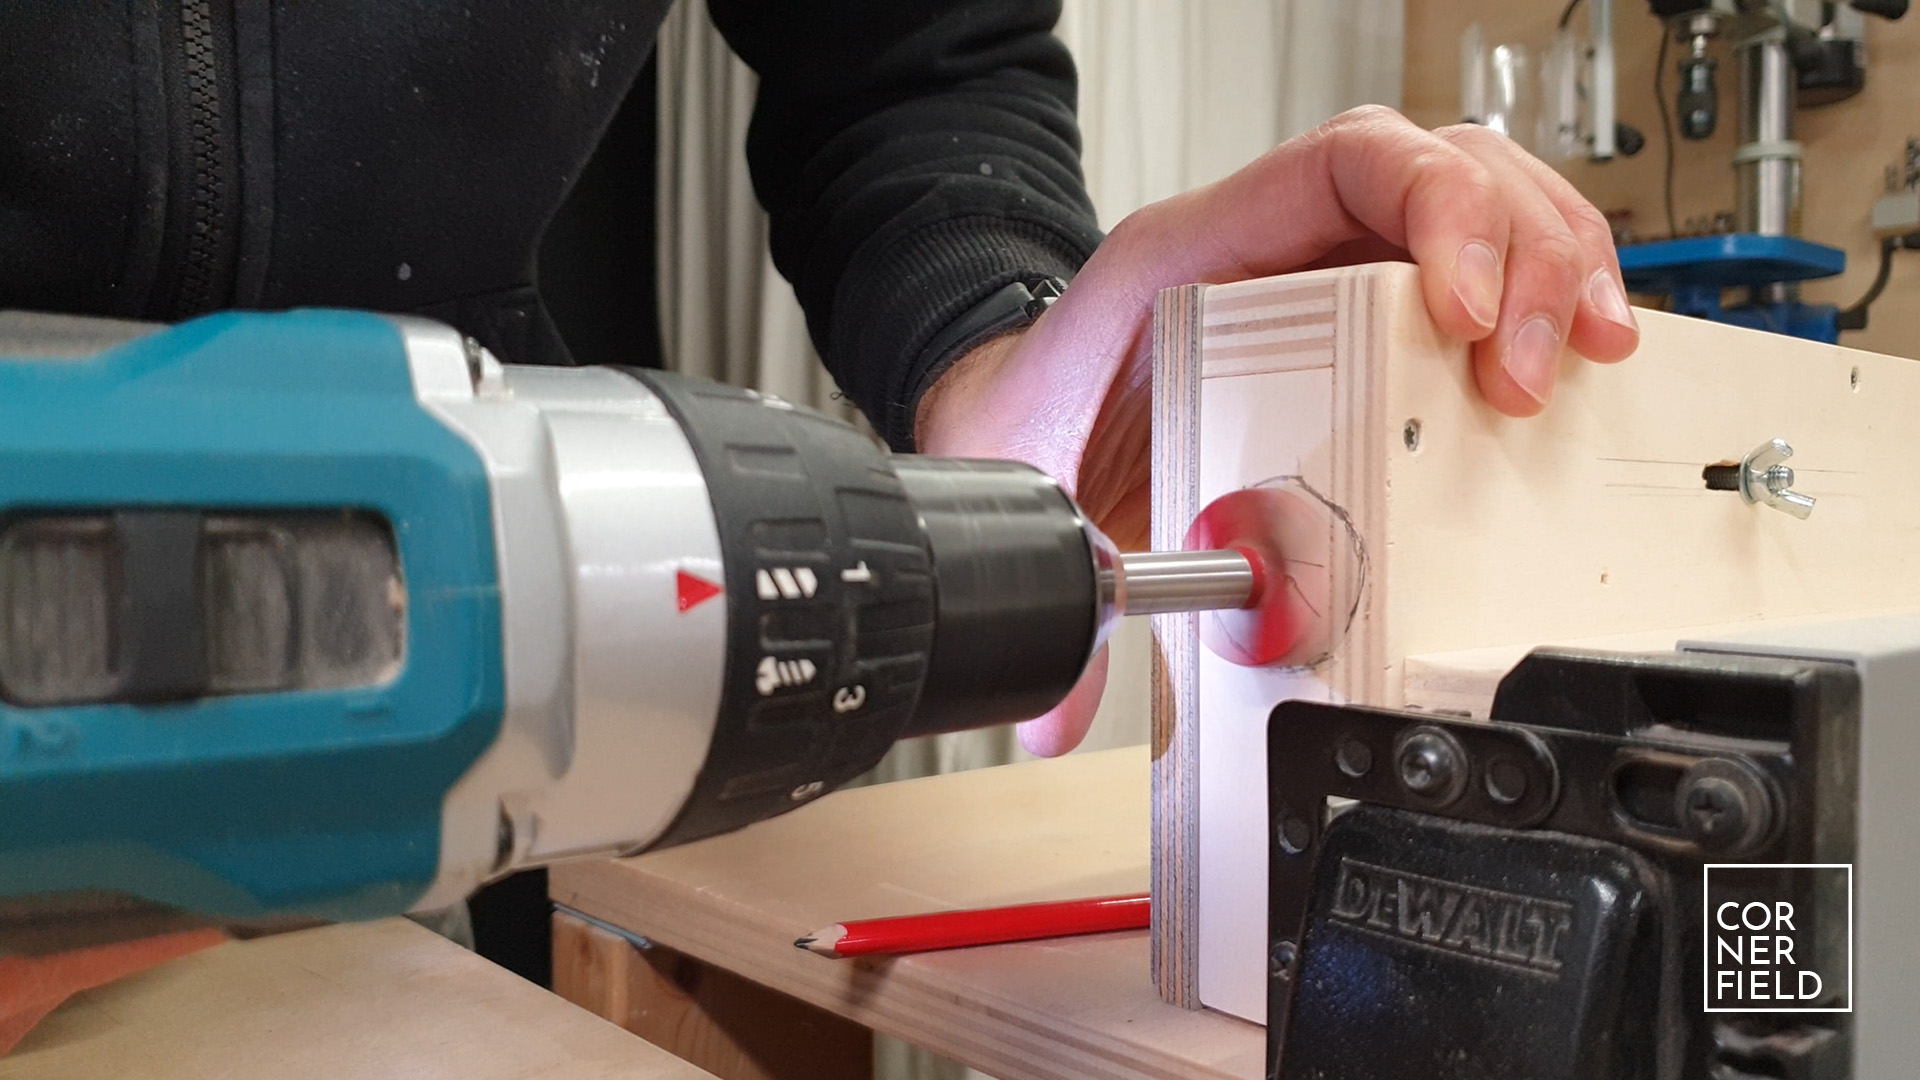
Attaching router to plate
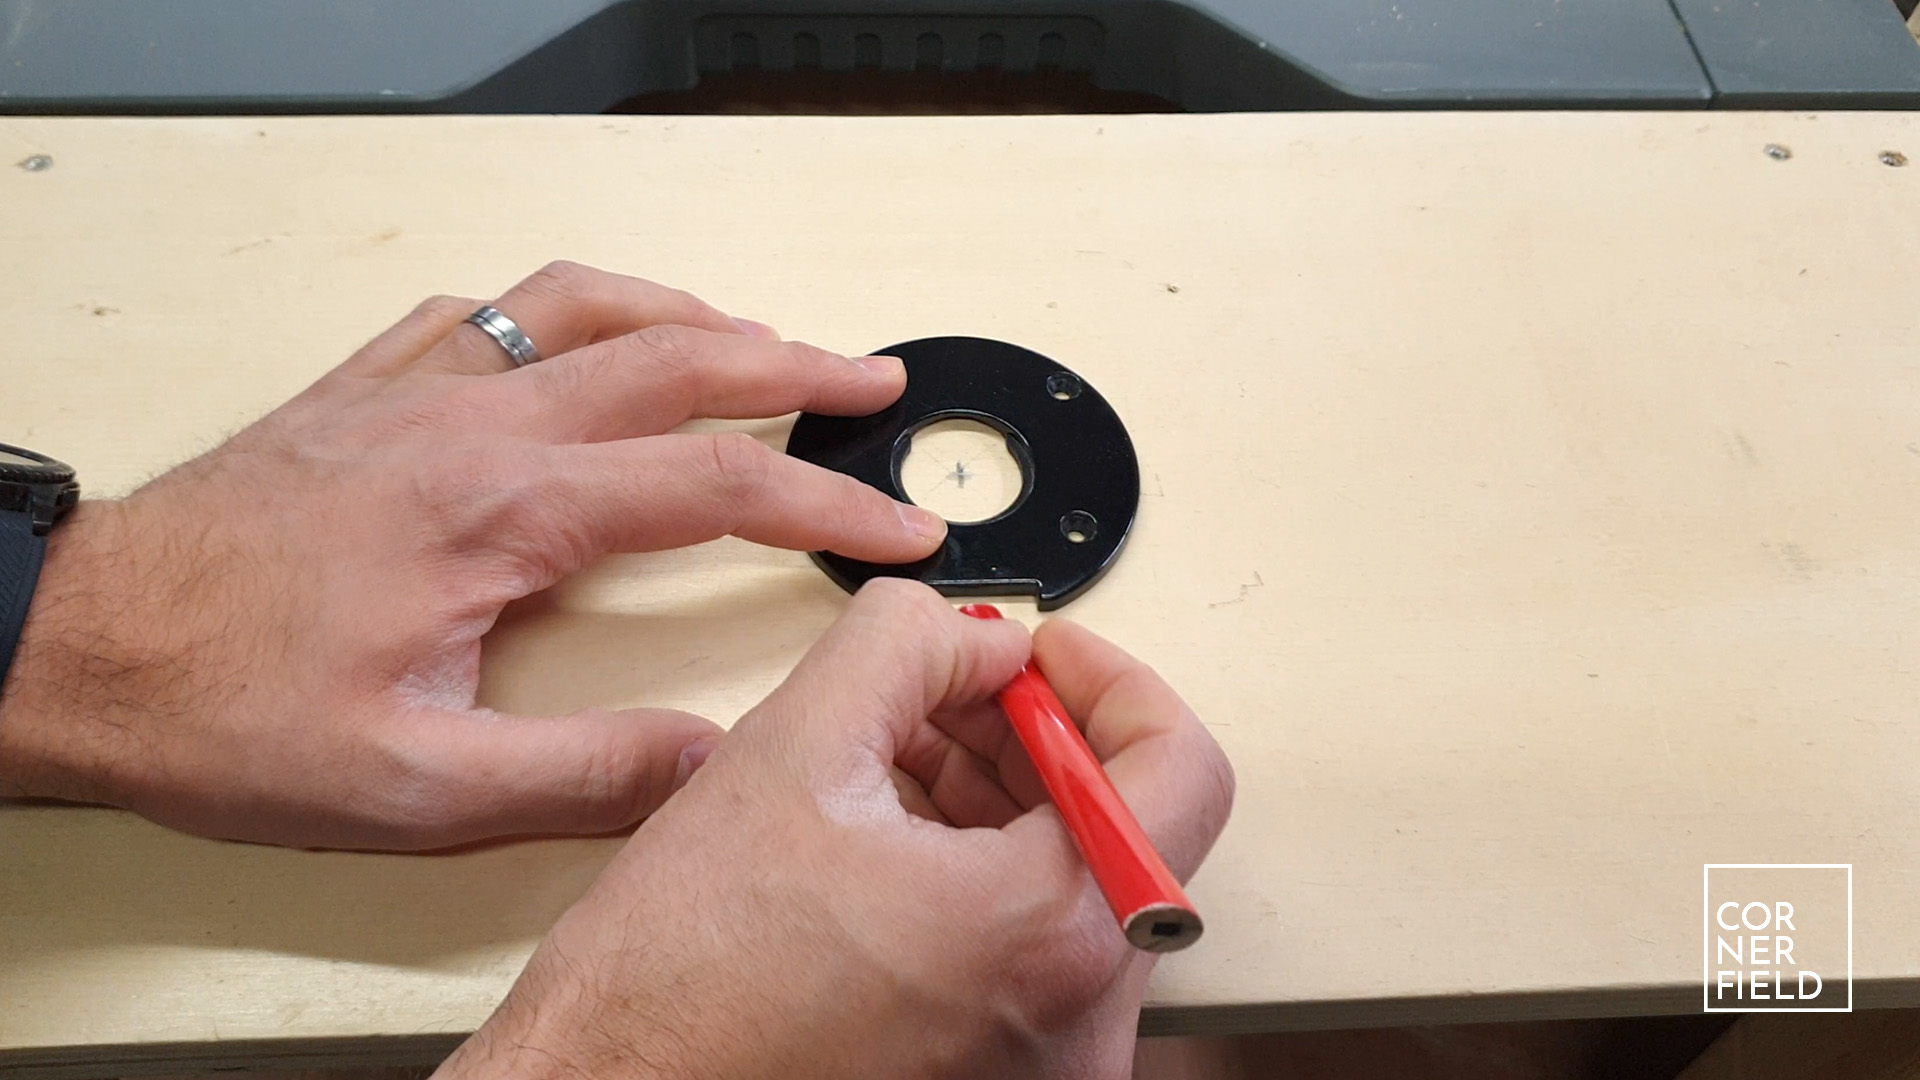
Now that the plate fits into the surface it’s time to attach the router to it. I first find the center of the plate then I use a base plate from the router to mark out the screw holes. Make sure after drilling the holes for the screws the heads are recessed or they will be in the way when using the table. In my specific situation, I had to make some room for a knob that is attached to the base that I’m screwing to the plate. I made quick work of that by marking out where the knob is and cutting a small piece out with a jigsaw.

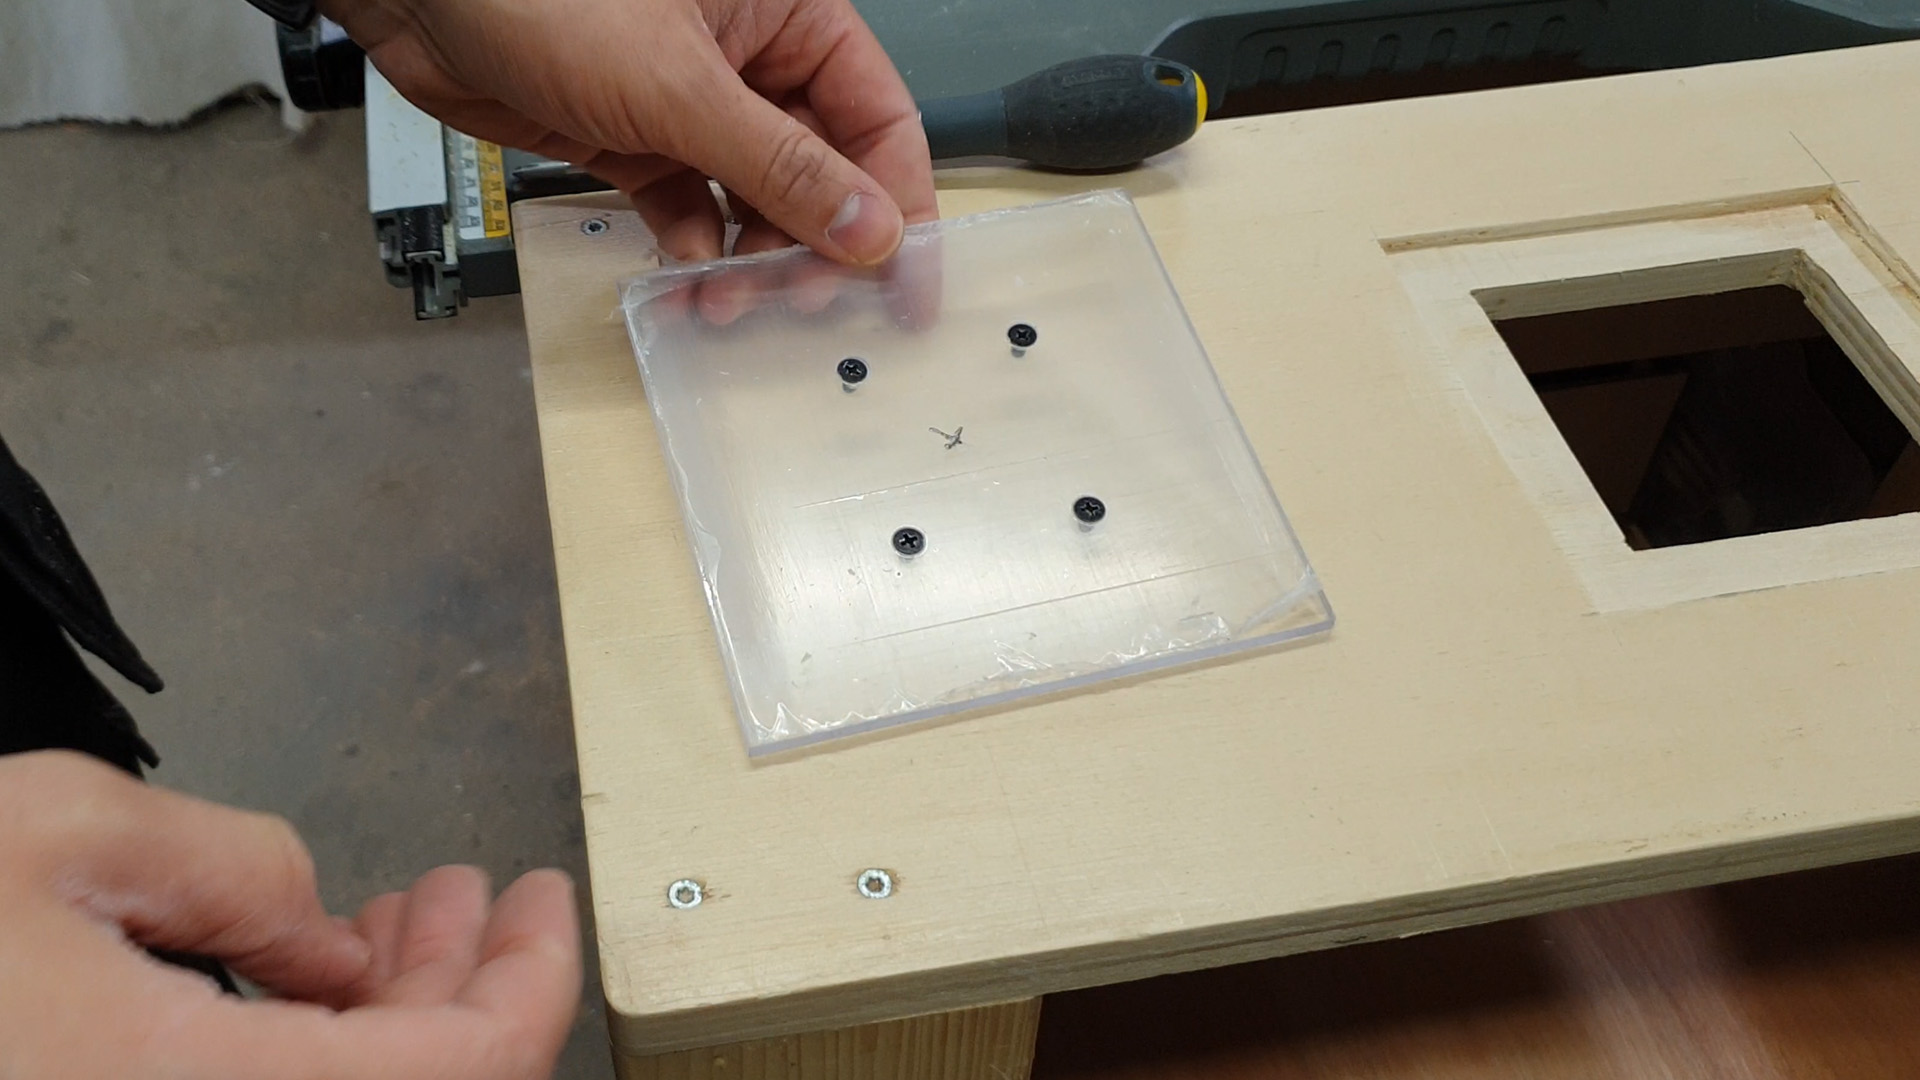
To make sure the router can’t move I fasten the insert plate to the cabinet using two screws. This is optional with a snug fit of the plate and the weight of the router pulling it down. However, I’m rather safe than sorry.
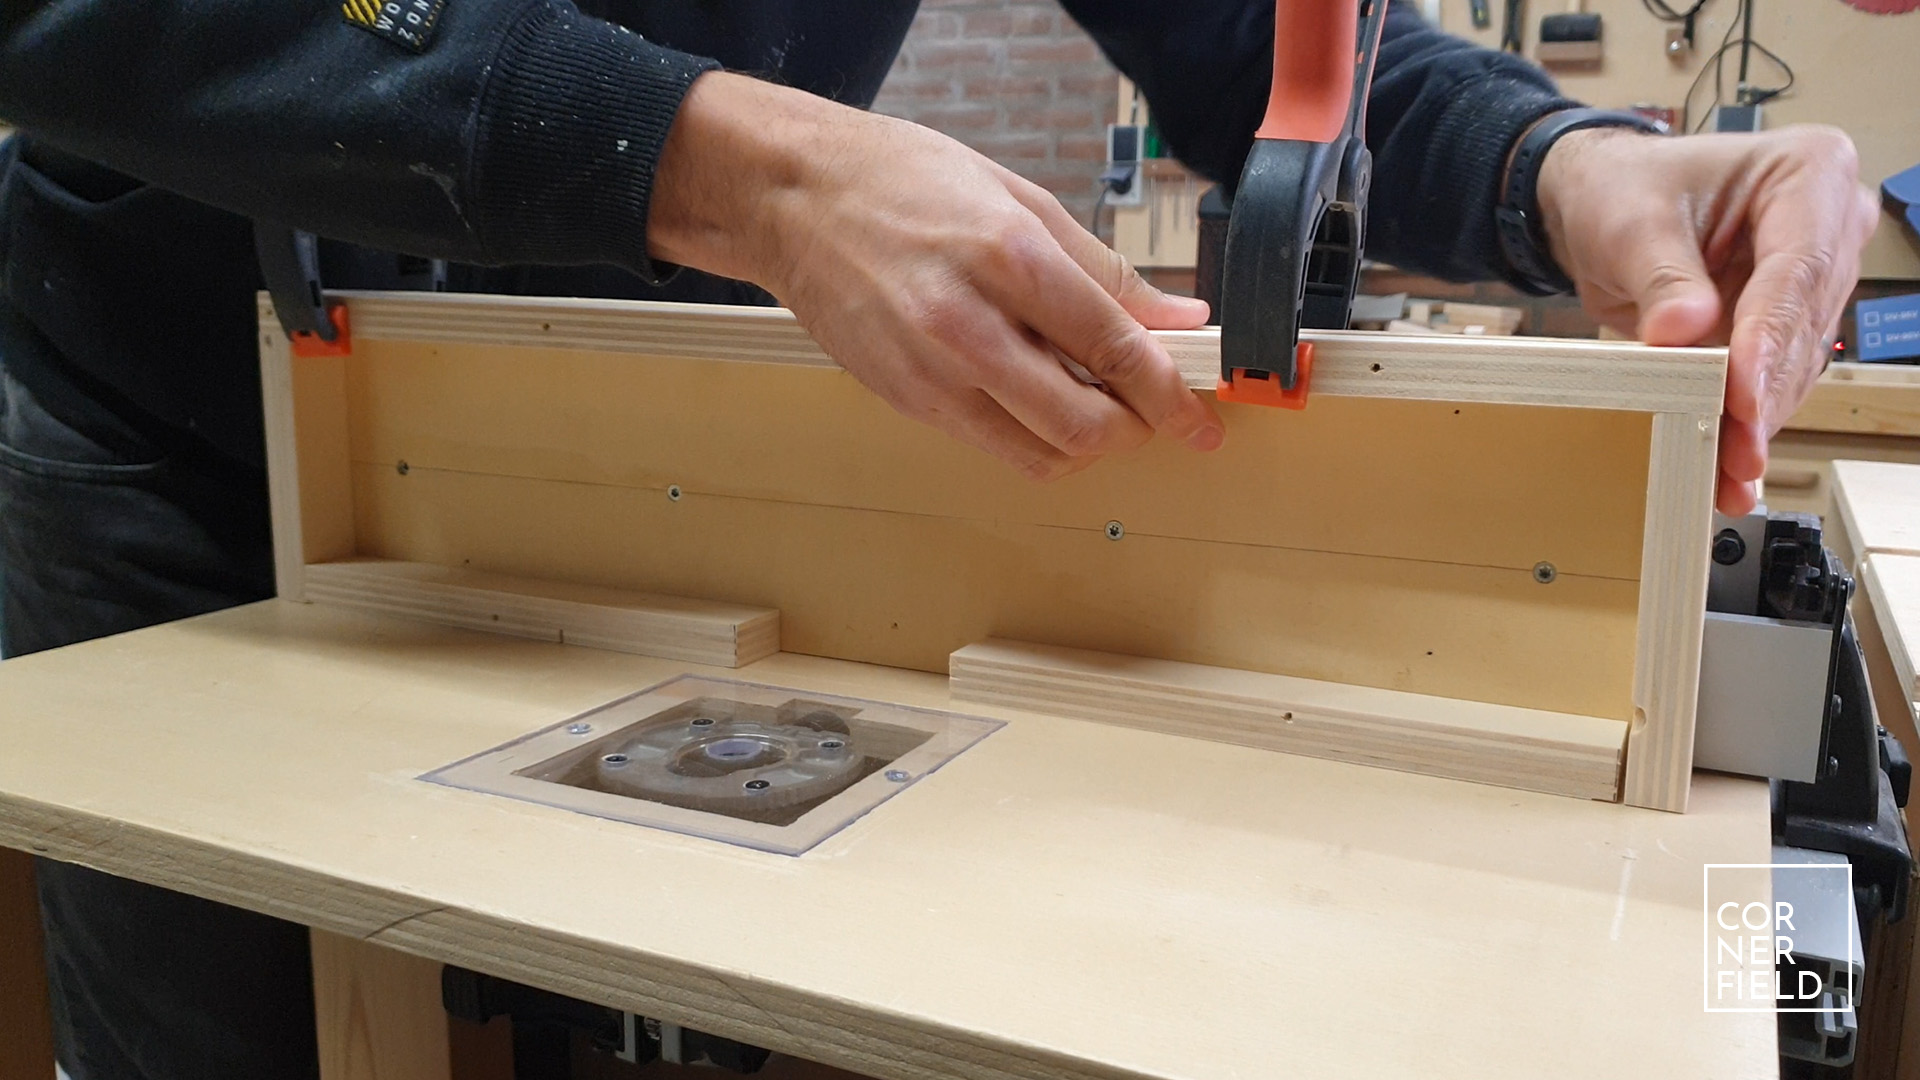
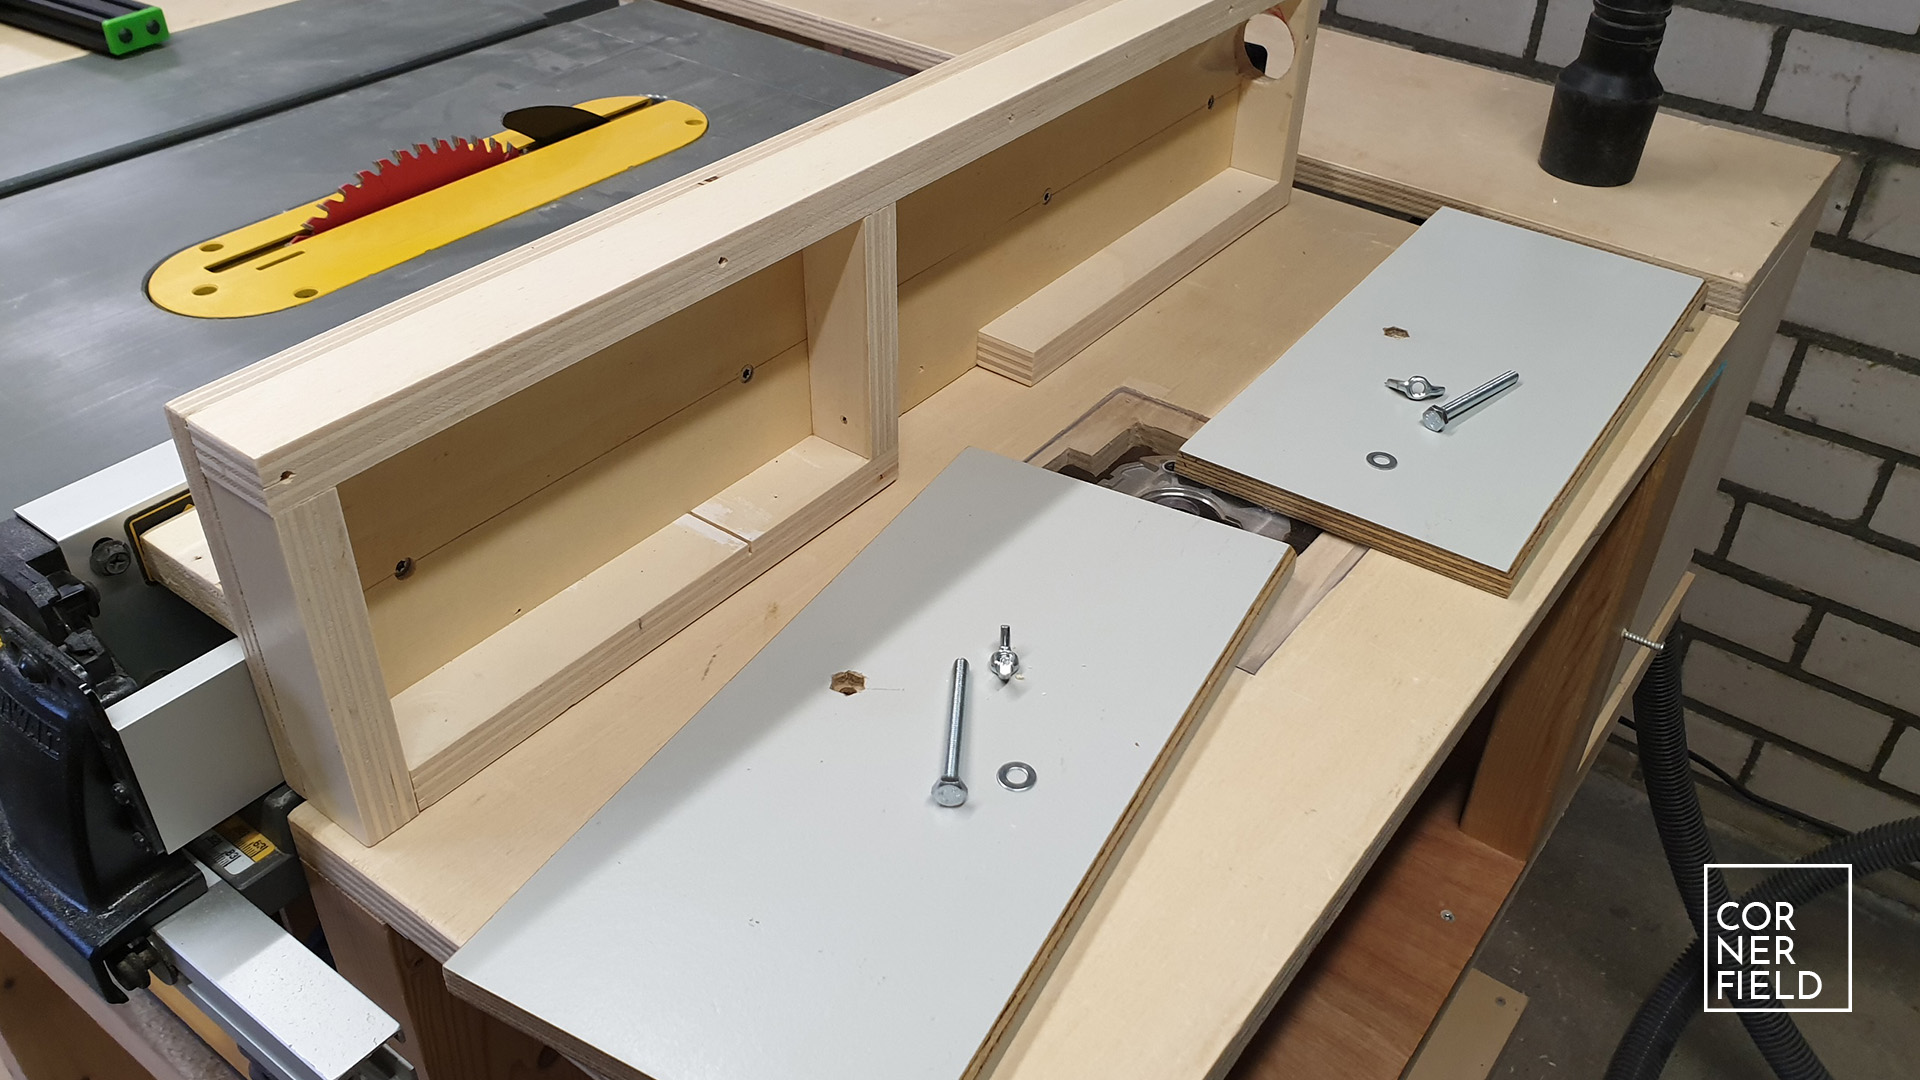
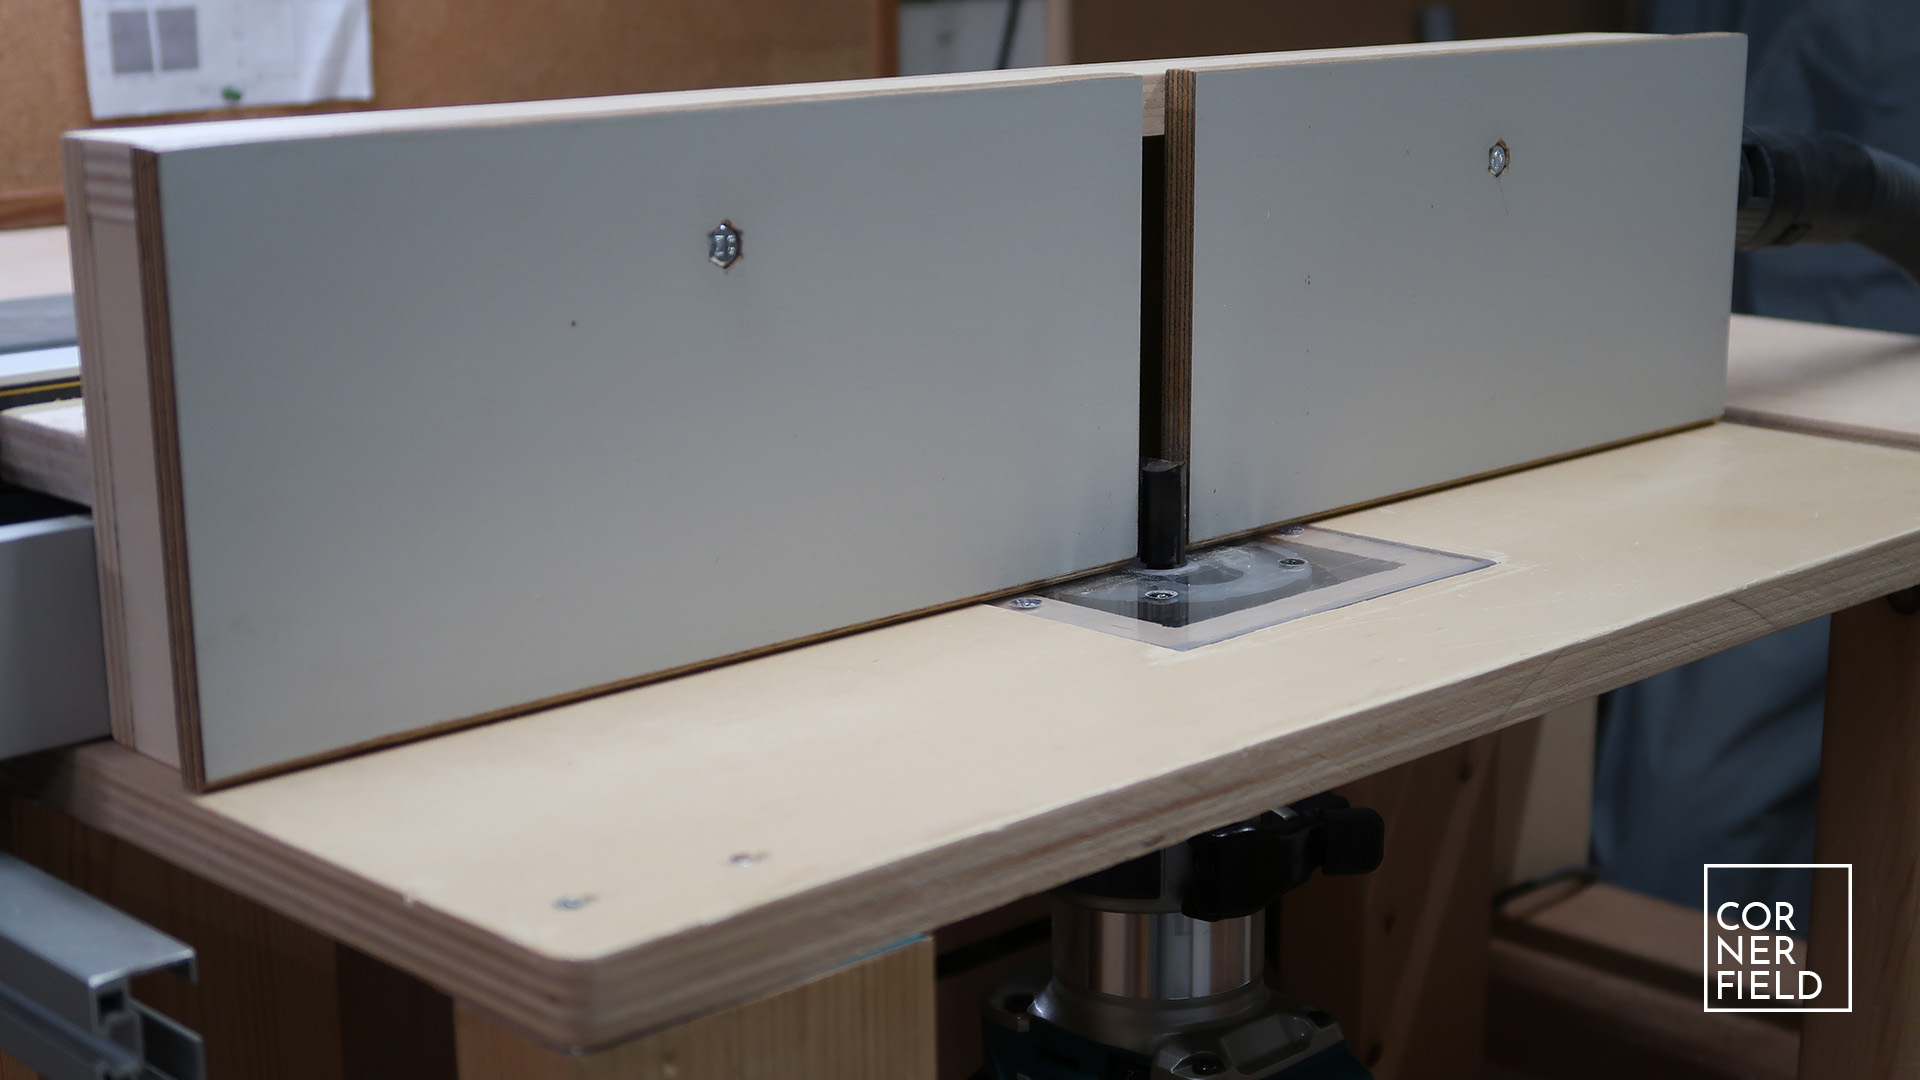
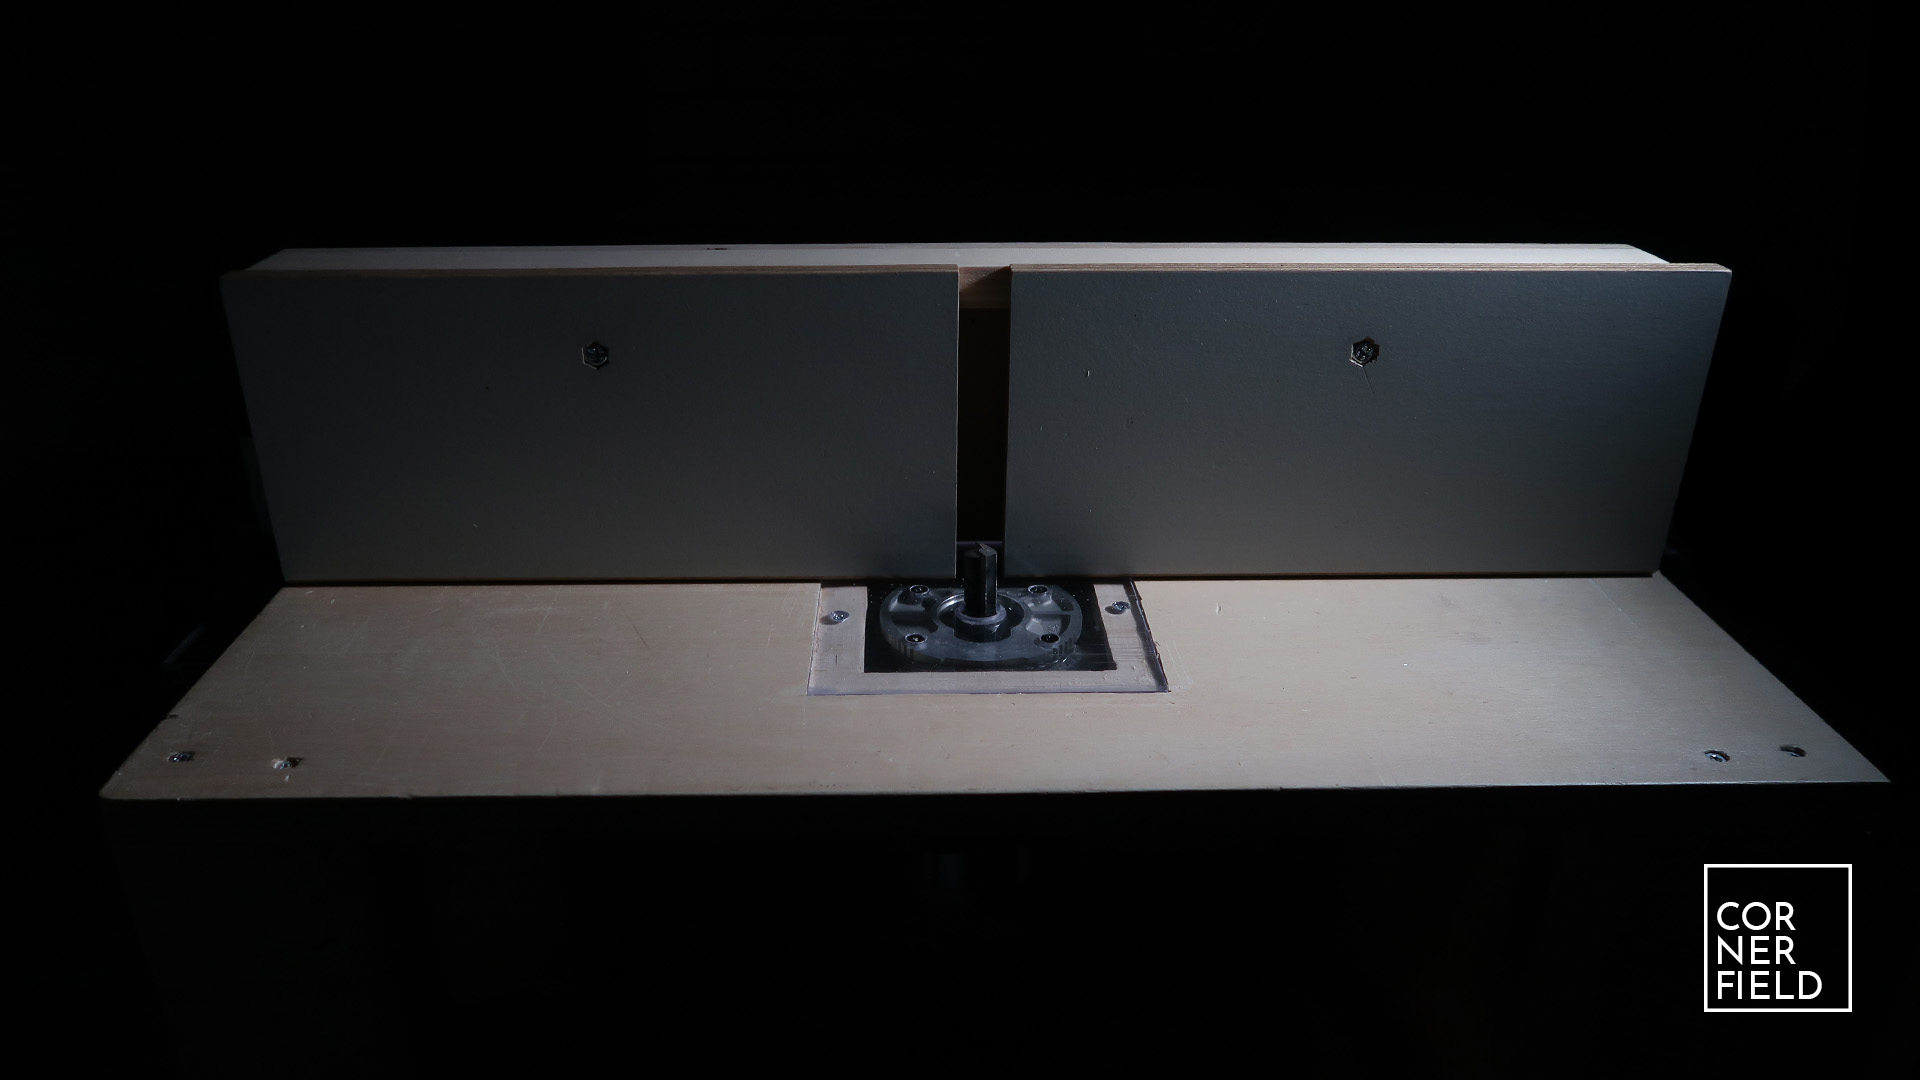
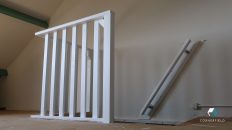
Fence
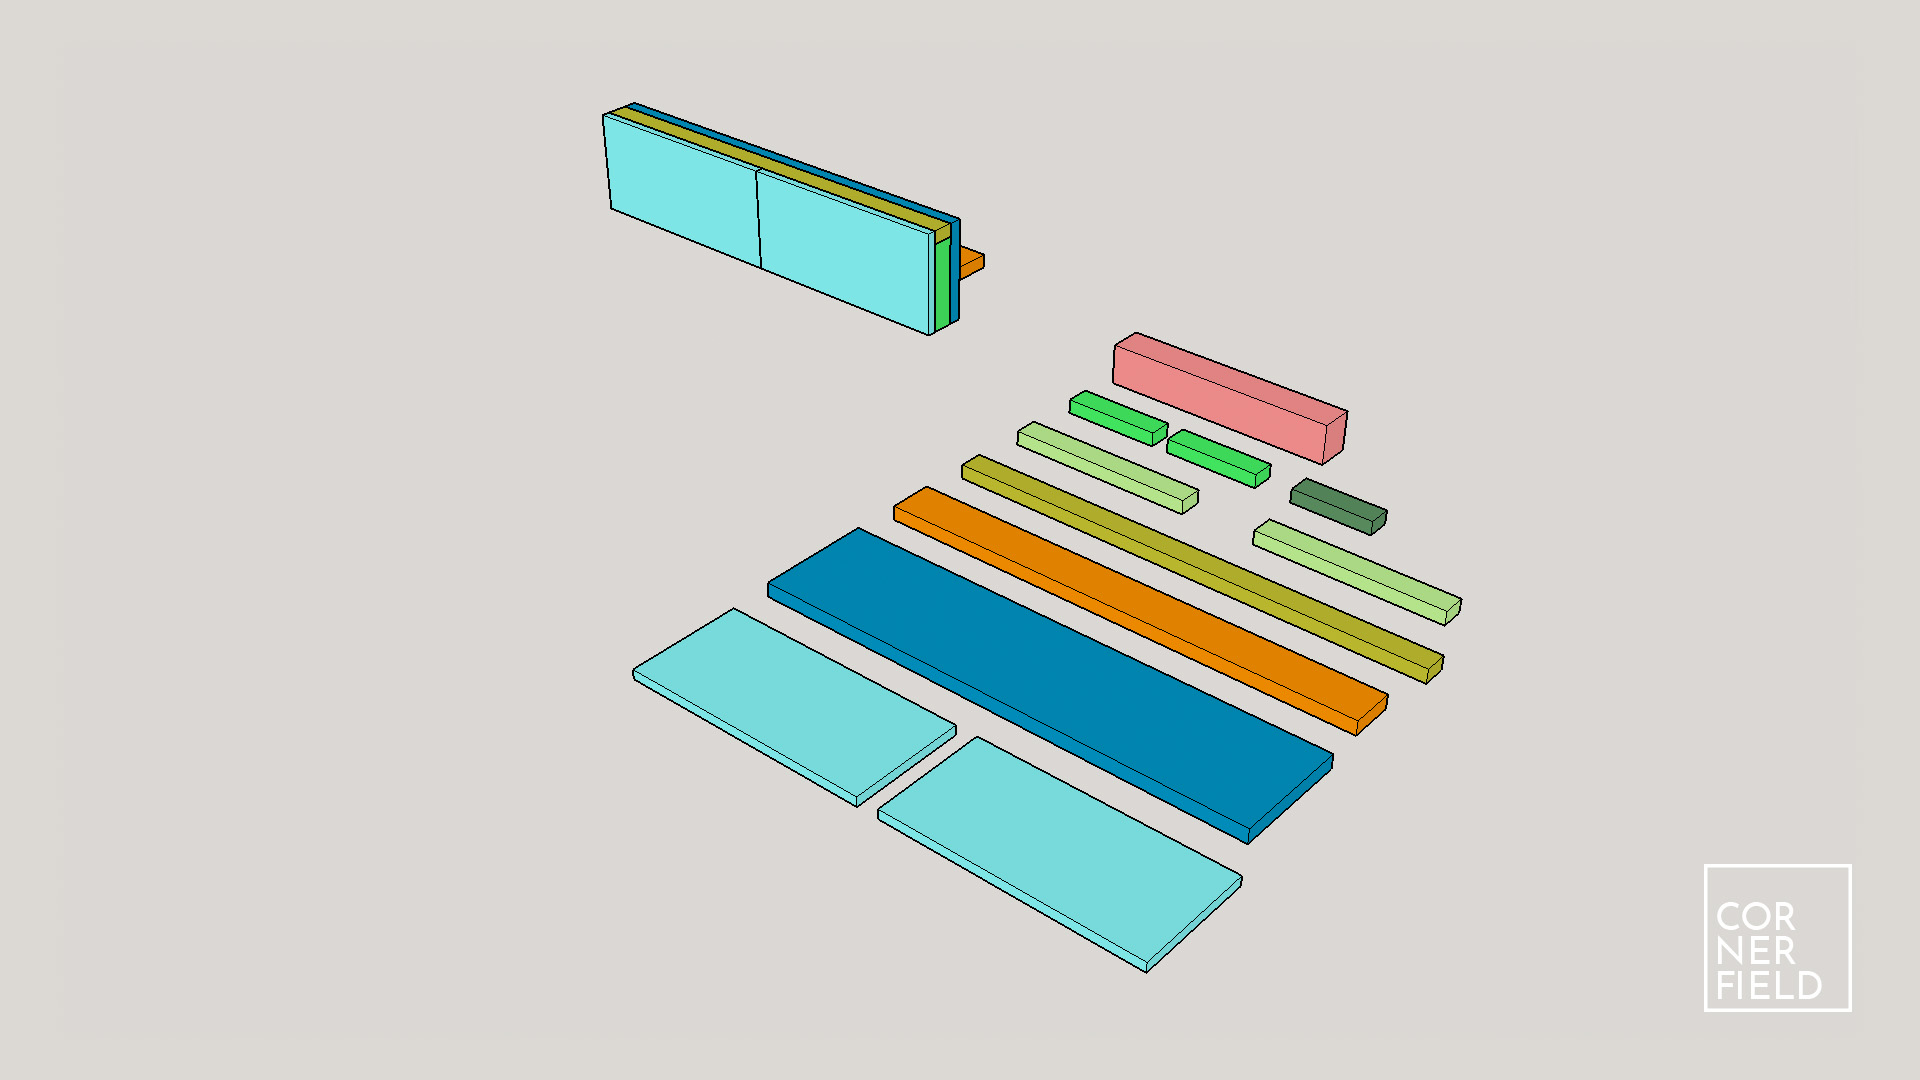
Next up is building a specific secondary fence on top of the DeWALT fence. I’m doing this without actually fastening them to each other. For this saw specifically a piece of 2 by 4 fits very snugly between the two fence pieces. This will form the basis for the router fence. After cutting the 2 by 4 to size to make it fit inside the table saw fence I attached a strip on top. This strip should fit only just between the front and back of the existing fence. To that strip, I attach the first piece that will form the fence. The size of this piece will determine how large your fence will become. Check out my 3D model if you are interested in the dimensions I ended up with.


To this vertical piece, I’m attaching strips of plywood. Building up the interior of the fence. The width of these strips determines how much room there will be inside the fence for your bits. I went with 30mm. If this should be insufficient I can always replace them since I’m only using screws for the assembly.
The outer plates that will be the actual fence are made from prefinished exterior grade 12mm thick plywood.
I chose this for its strength and because it’s not influenced by moisture and temperature changes. Fastening them is done with the bolt and wingnut. To allow the fence to open and close, drill several holes next to each to form a slot in the back piece of the fence. The size and position of this slot are up to you but make sure the bolt heads are completely recessed in the face of the fence.
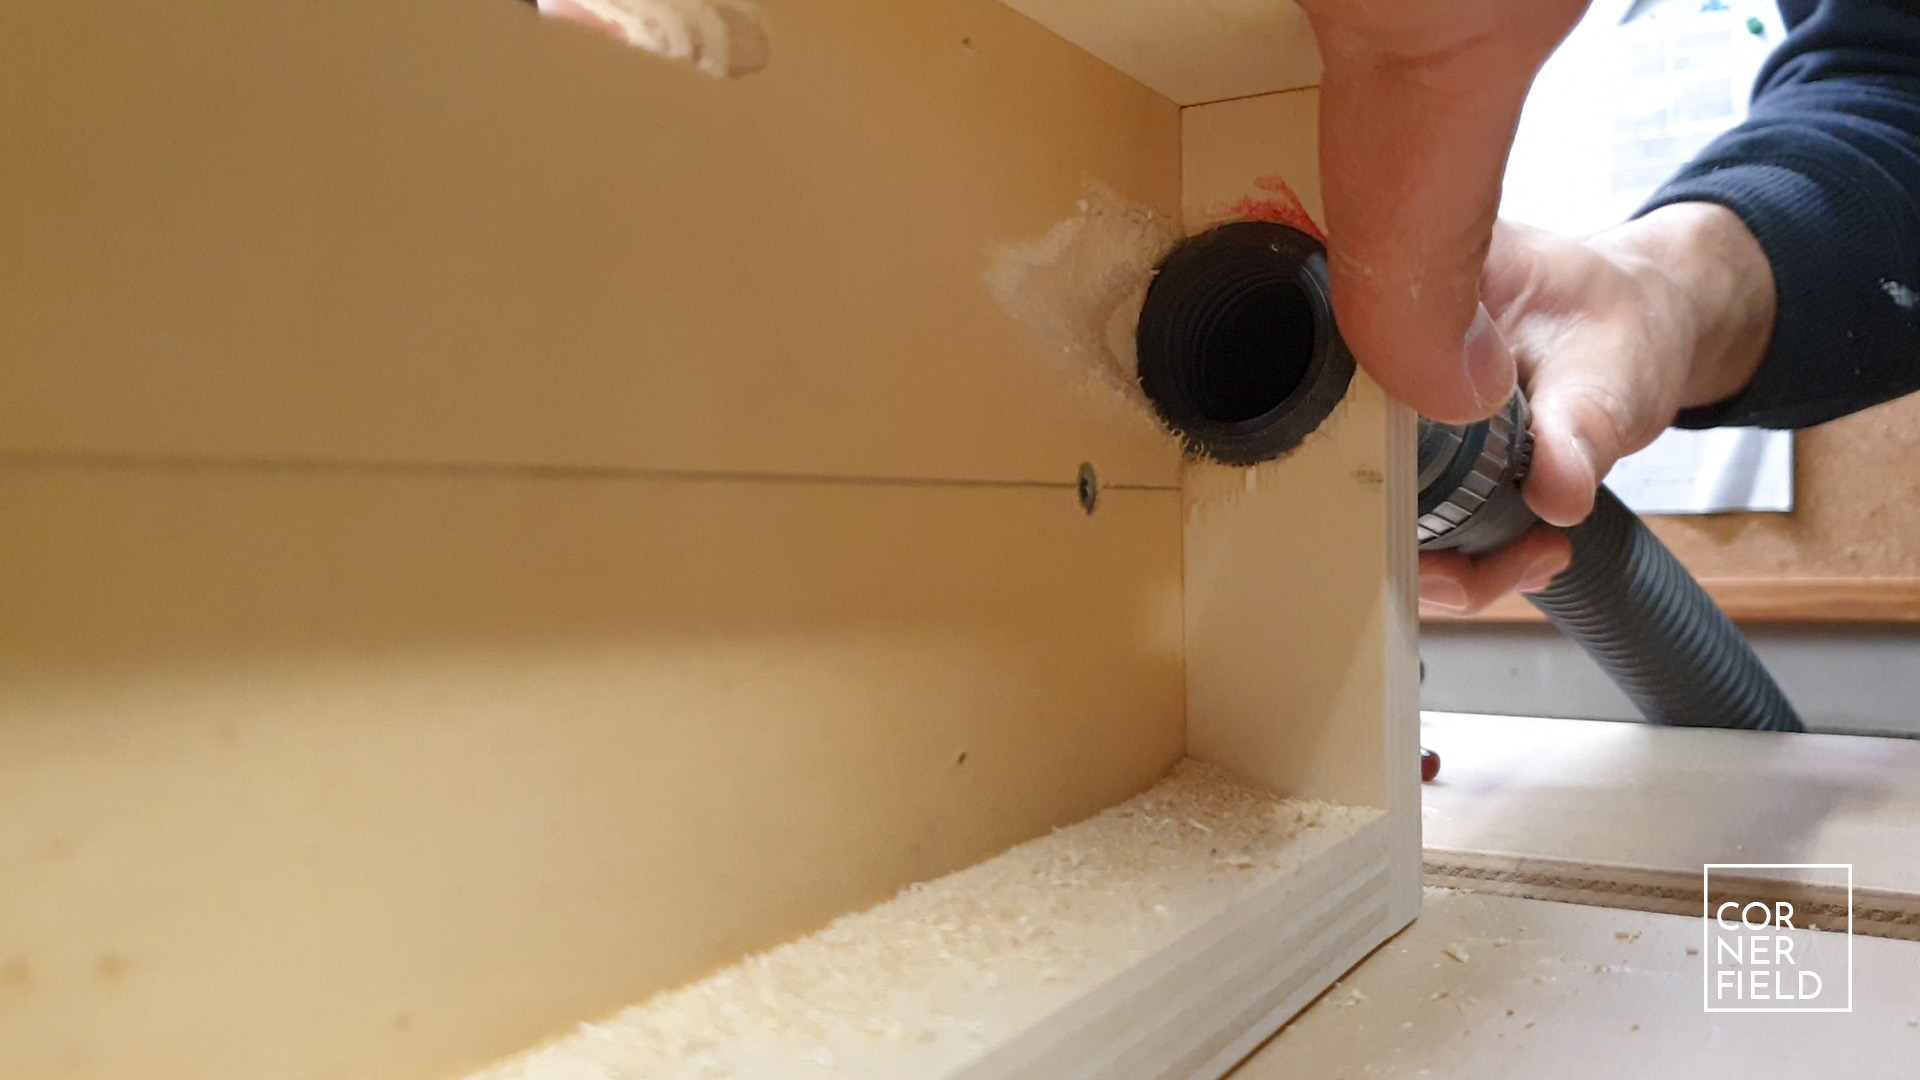
Dust collection
The last part of this build is adding a hole to the back of the fence for dust collection. You don’t have to do this but I’m pretty sure it will save a lot of cleaning up down the line. In my setup, it was as easy as drilling a hole for a connector that fit between the front and back of the fence. If you have a bigger vacuum hose it can be slightly more complicated.
Last but not least is finish the whole assembly off with 3 layers of varnish. After that, it was a matter of reassembling and testing!
Result

At this point I consider this build the first draft. There is still a lot of room for improving on this. Adding T-slots, for example, will greatly increase the usability. However, in my experience, it’s always a good idea to first use the basic version of the shop project. Later, when I have used it for a while I know exactly what needs to be added.
There is no doubt in my mind this is the last you will see or read about this project. For now, though I’m excited to start using it!
Links & Download
For the workbench itself, I have the details in separate articles you can find here:
Mobile Workbench – Initial build
Mobile Workbench – Updates and changes.
For the fence, I have made a 3D model that lists all the pieces you need. Keep in mind that the dimensions are specific to the DeWALT DW7491. If you have a different saw or fence these measurements won’t work for you.
SketchUp 3D model of the fence
Instagram 1 | 2 | 3 | 4| 5 | 6 | 7
Hope this post has inspired you to make something!
And don’t forget to follow your excitement 
Mobile workbench and router table great post! keep it up.
Thanks!