

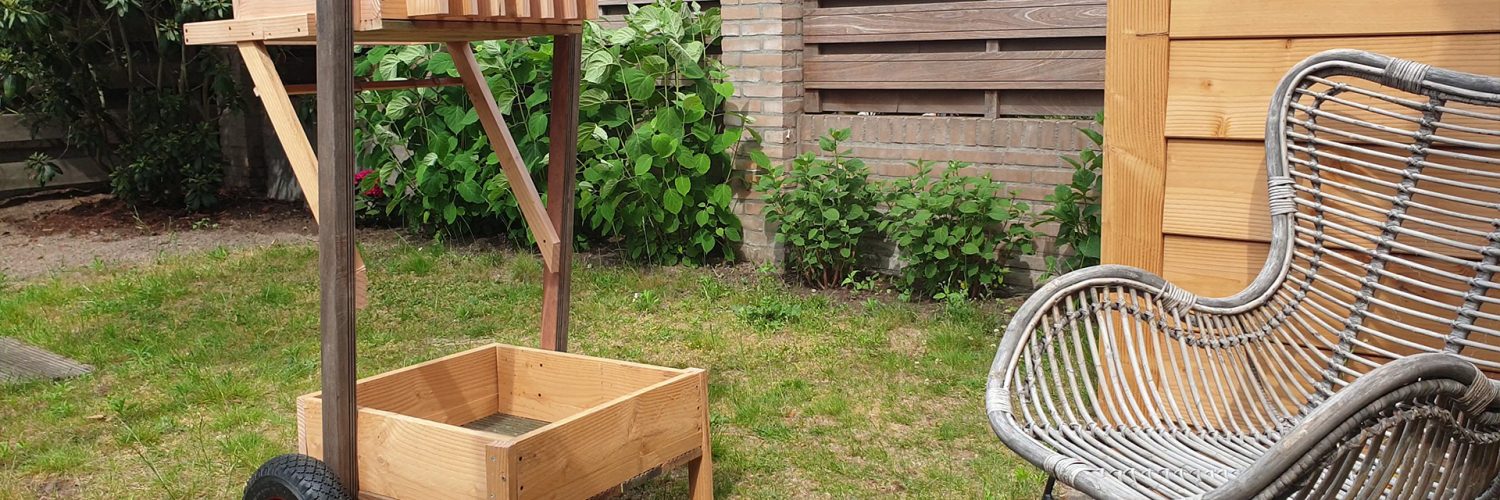
This garden tool storage is for all the gardeners that are tired of dragging their tools with them while working.
Design
This garden tool storage caddy definitely has function over form. The most important aspect was that its usability, and not so much the looks. Also my client asked if I could focus on using reclaimed wood instead of buying new material. With those things in mind the first step was to formulate what the functions should be. First and foremost it has to be mobile and function as a caddy when it’s stationary. It needs to store both long and short tools. Also, the form factor was something to consider. It should be big enough to store different items but small enough to set it down wherever you like, not taking up too much space. This is the design that I came up with.

Build
Let’s start by summarizing what I used to make this design a reality.
Tools & Materials
First off the tools I used:
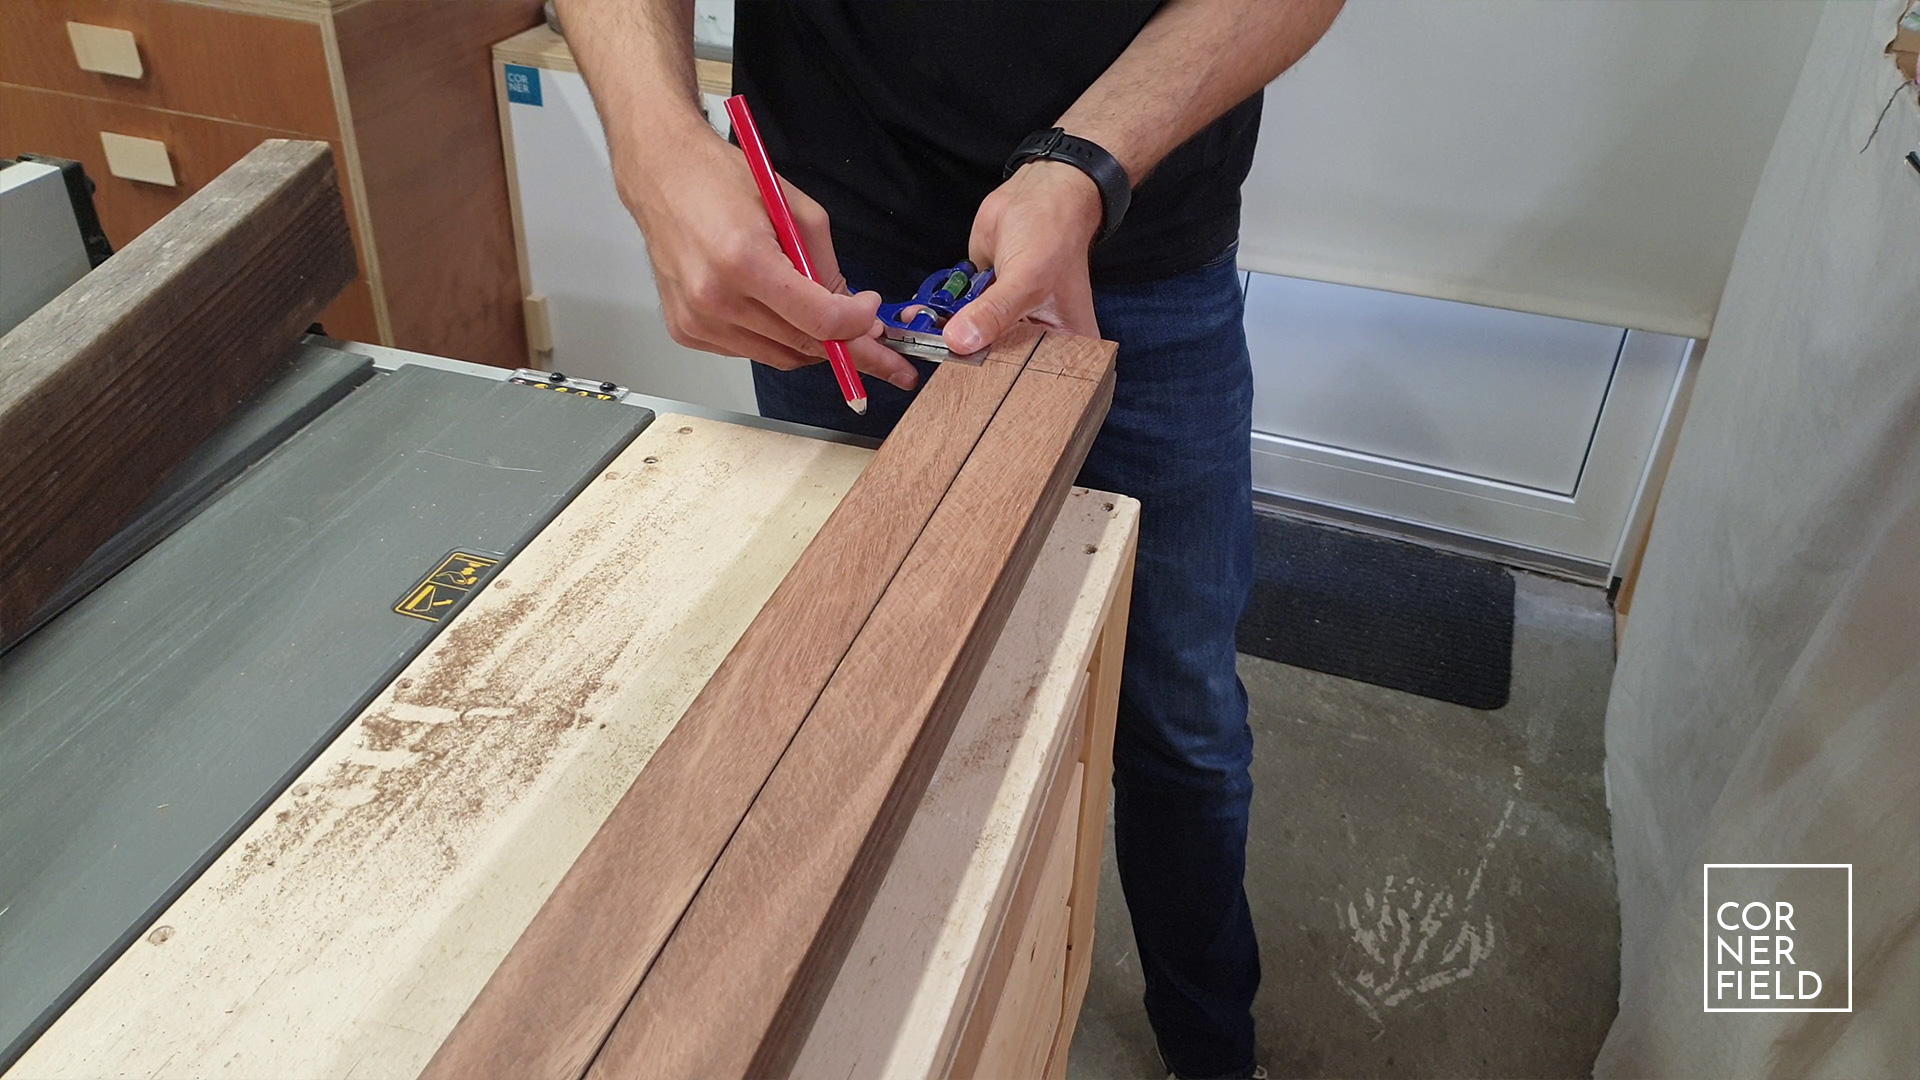
- Measure and marking tools (combination square, bevel gauge, tape measure, pencil)
- Table saw with a cross-cut sled
- Flush trim saw (pull saw)
- Drill press with drill press vice
- Forstner bit 20mm, 4mm drill & countersink bit
- Drill & driver with Torx bit
- 18Ga nailer
- Wood clamps
- Random orbital sander & 120 grit sandpaper
I’m confident that if you really want to build this project you can achieve that with fewer tools but since I have them, I used them.
Materials list:
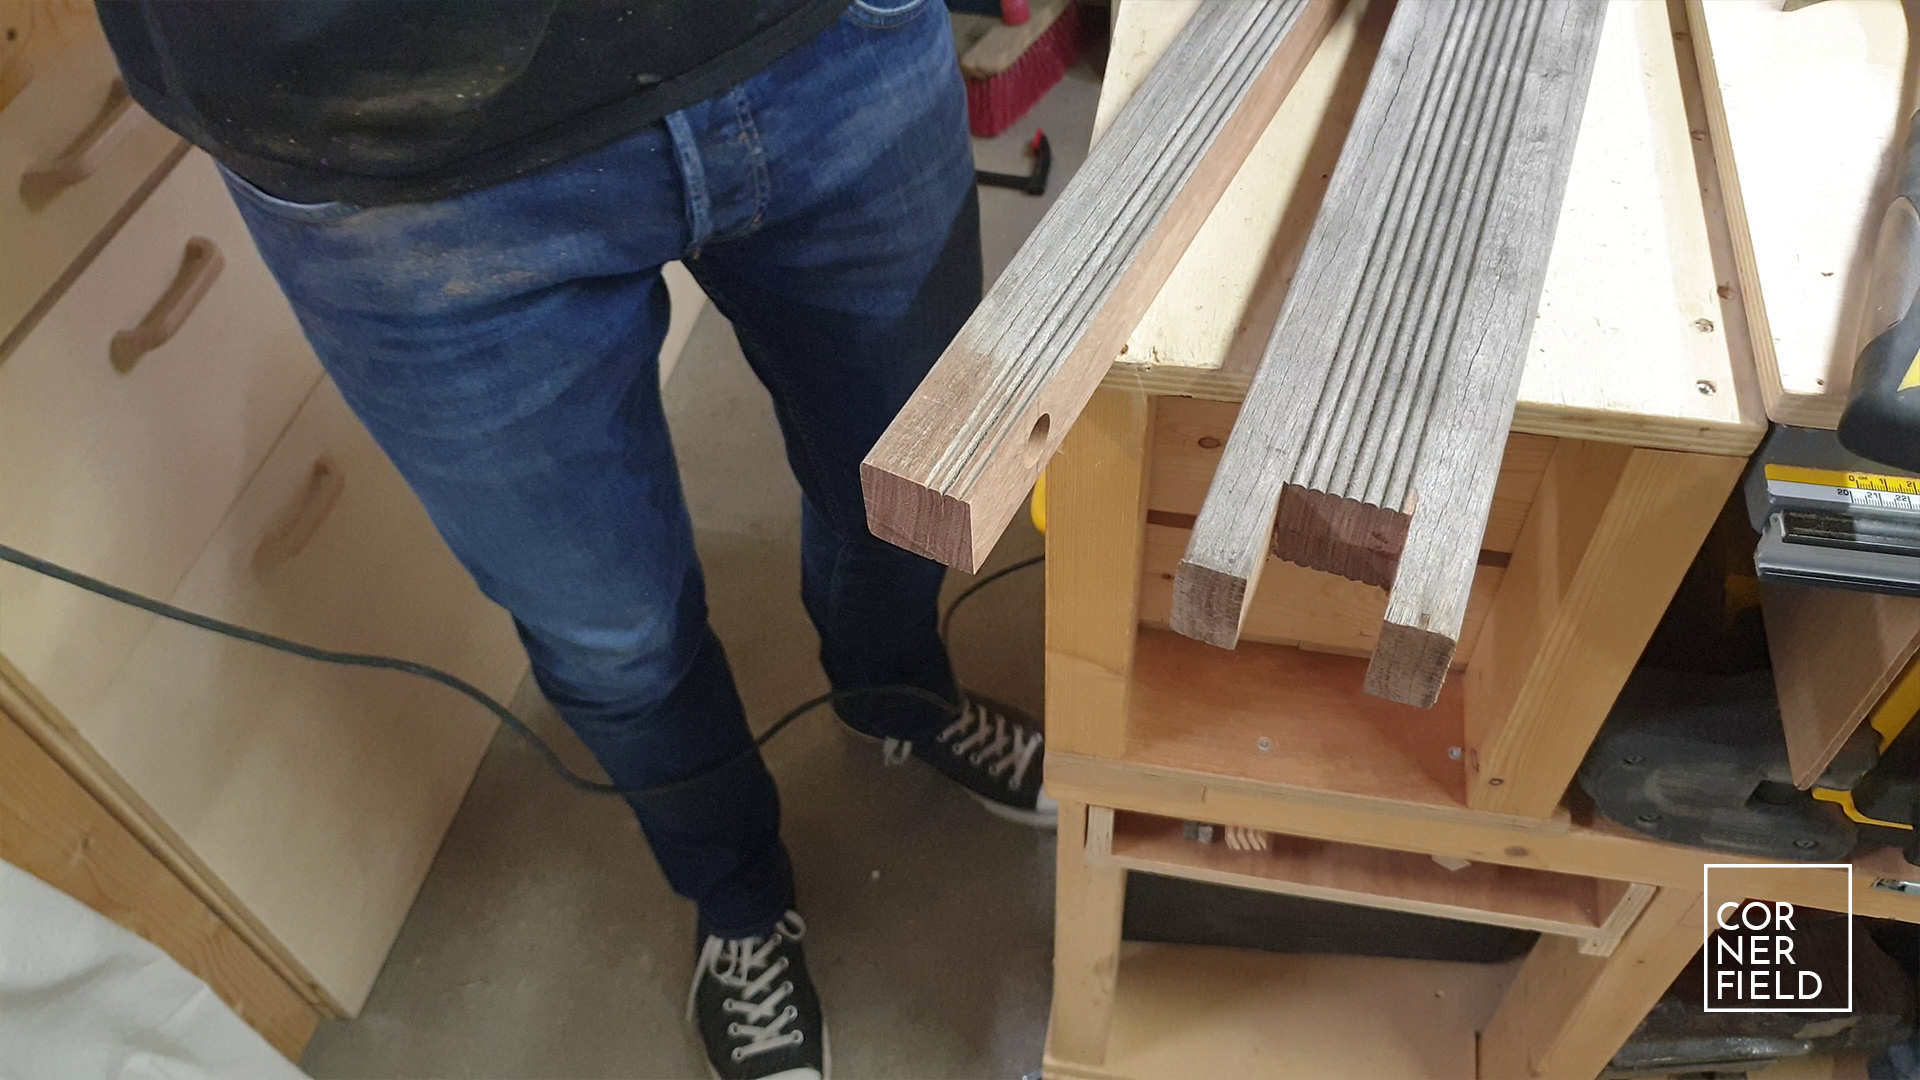
- Hardwood
- Douglas fir
- Decking boards
- Tires 26cm diameter
- Axel 20mm
- Locking end-caps for the wheels
- 5 x 50mm stainless steel screws
- 40mm stainless steel pins
- Elastics
- Tool hooks
Frame
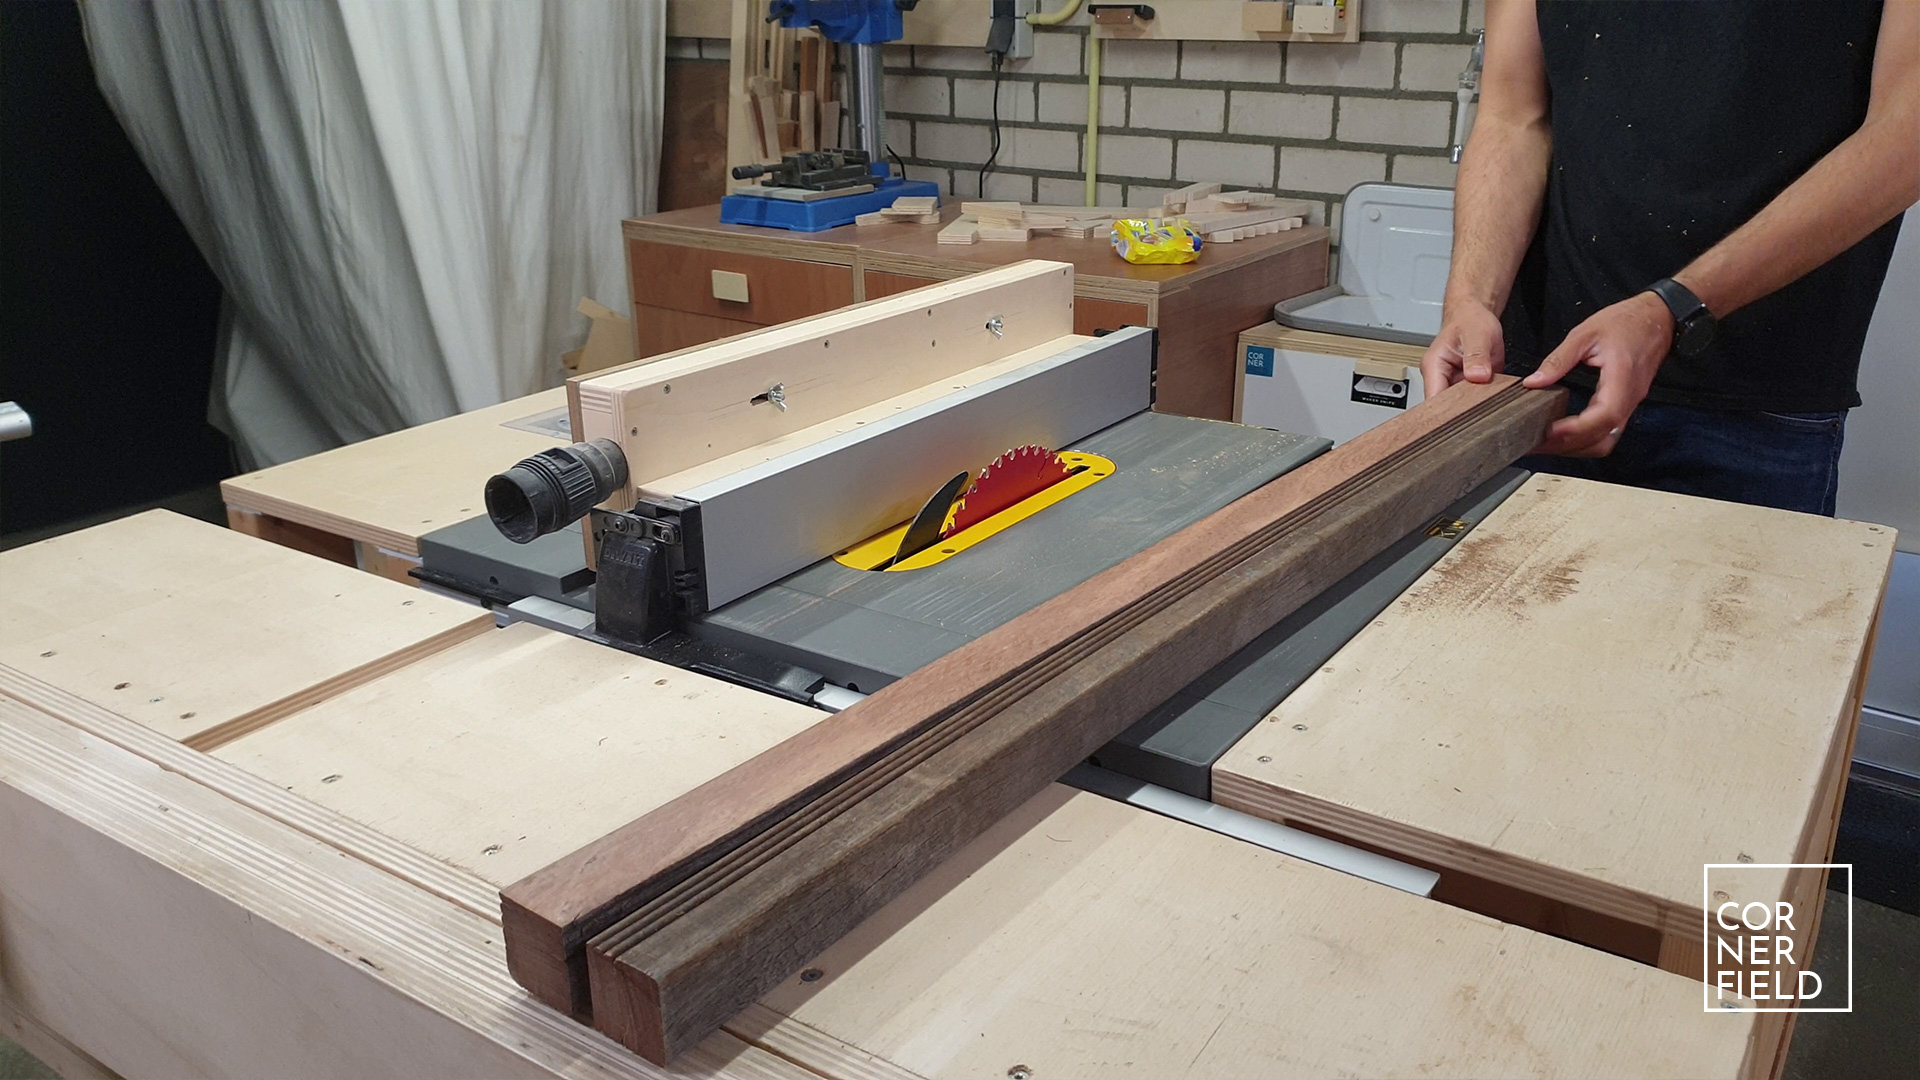
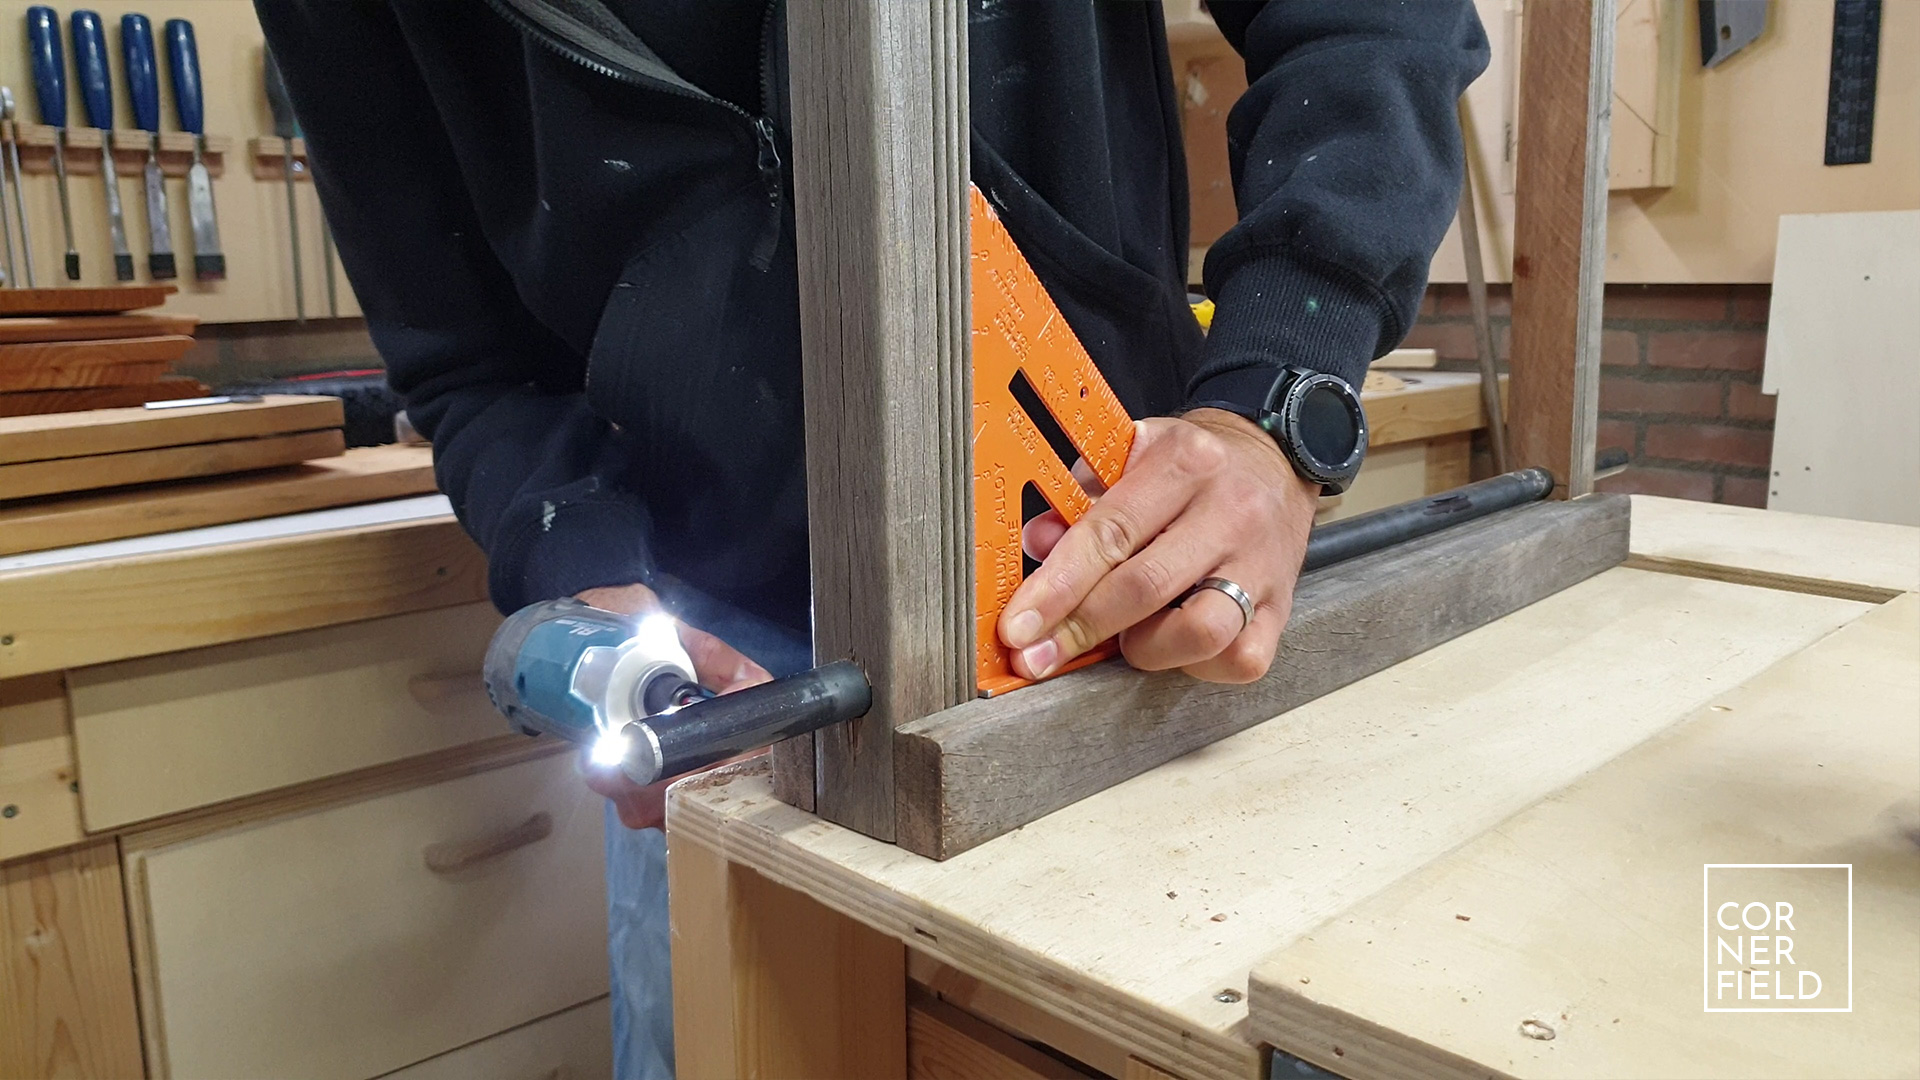
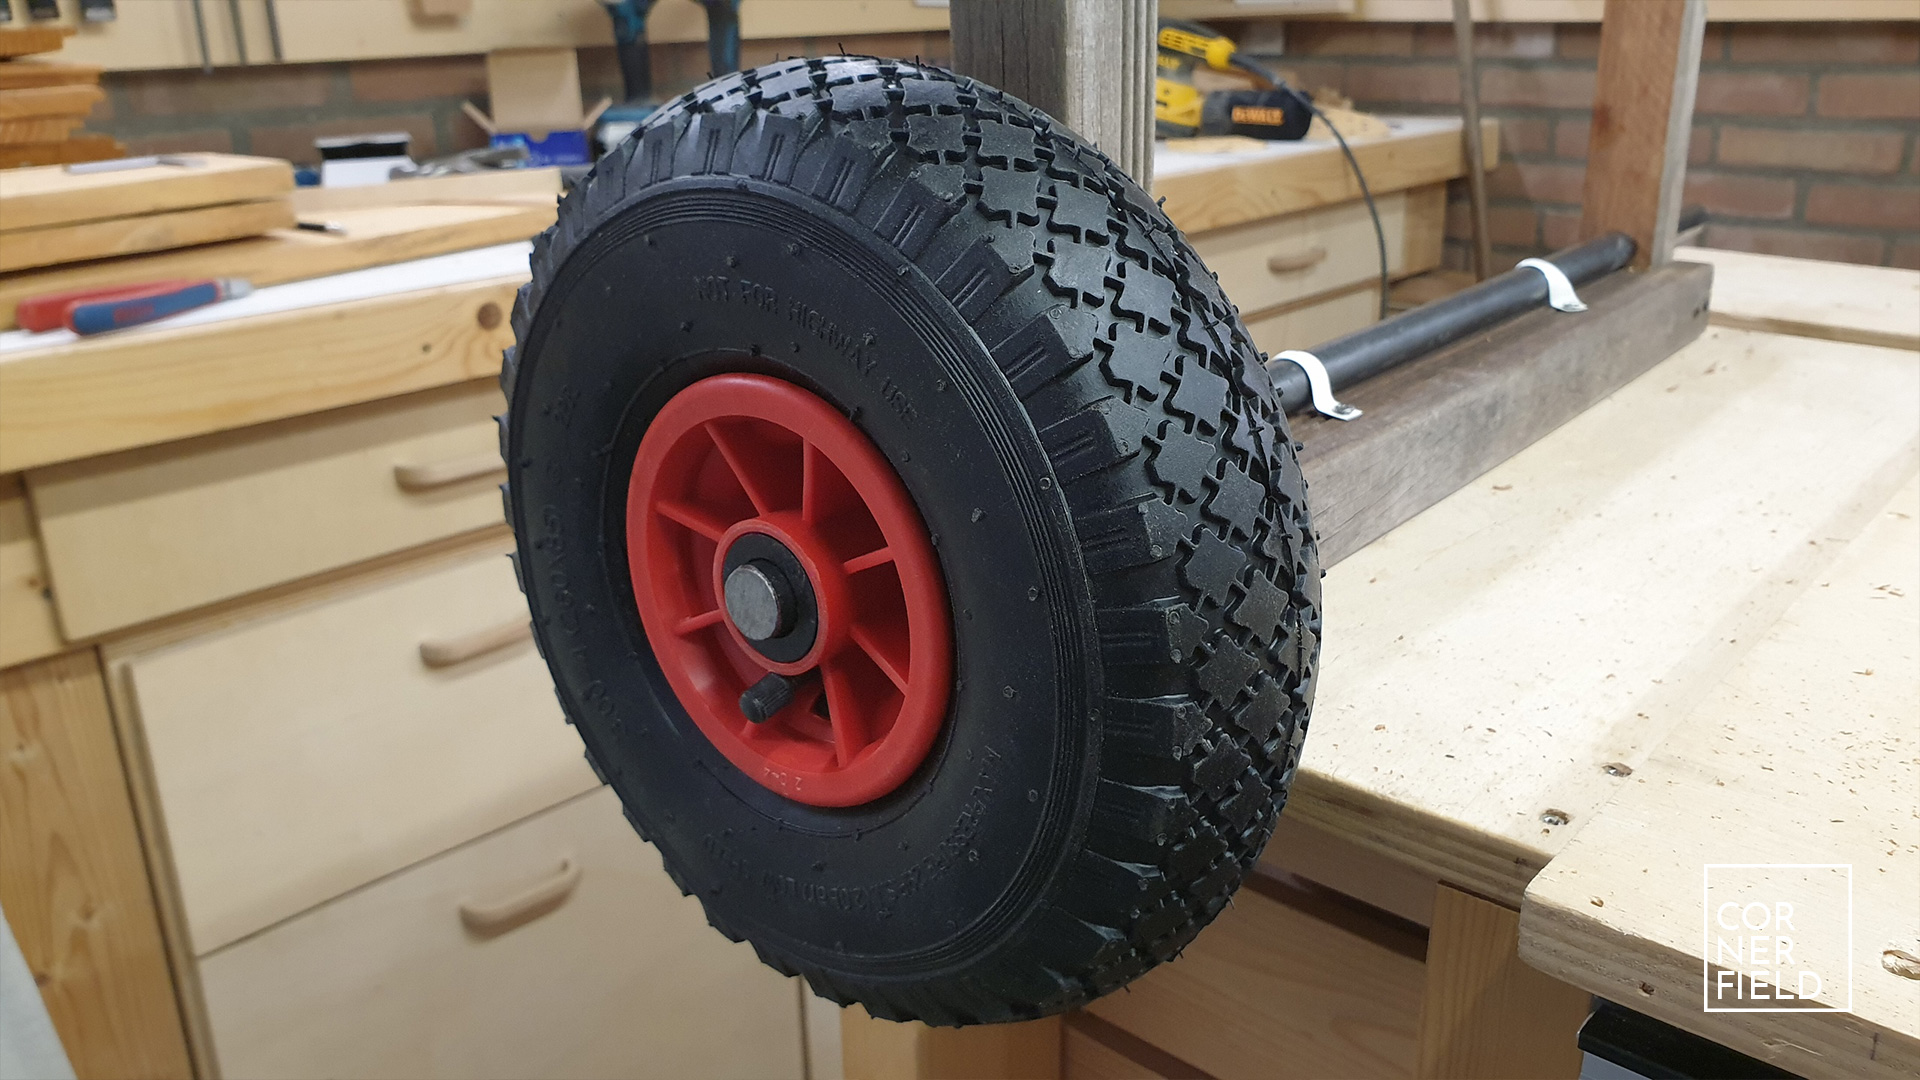
The garden tool storage will have to be able to handle some weight, so I wanted a sturdy frame. I started by cutting the hardwood into shorter pieces that will form the bottom and sides. The pieces are joined together by cutting a notch in the bottom piece to receive the smaller side pieces. Since wood glue does very little with this dense wood I only used screws here. Making sure to pre-drill all the holes otherwise the wood will split. But before I put this together I first drilled holes in both sides for the axel, using a 20mm Forstner bit on the drill press. The holes are just above the bottom piece to maximize ground clearance.
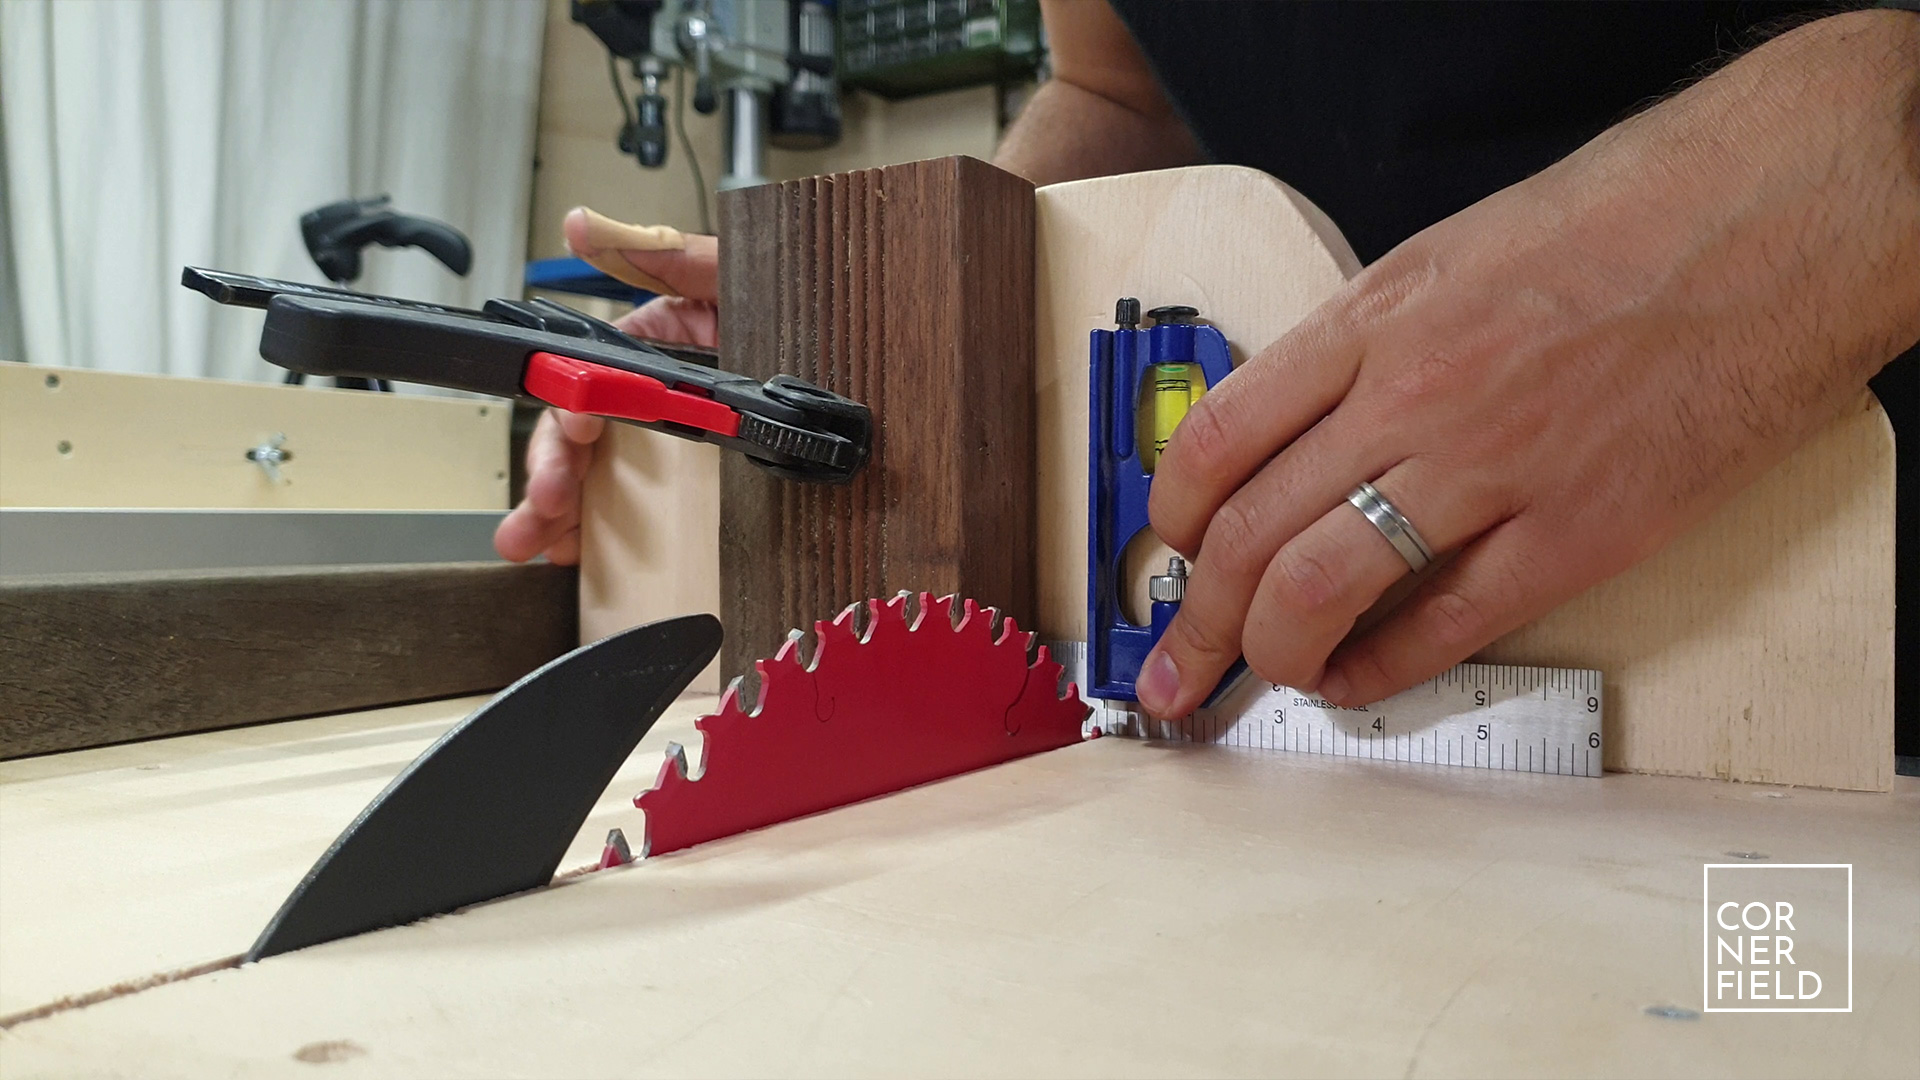
With the holes made I could assemble the frame and slide in the axel. Before the wheels could go on I had to cut some spacers. Small blocks that will prevent the wheels from rubbing against the sides. I cut those out of some hardwood, pre-drilled some holes, and fastened them over the axel to the sides. Next, the wheels could slide on and be locked in place with the locking end-caps.
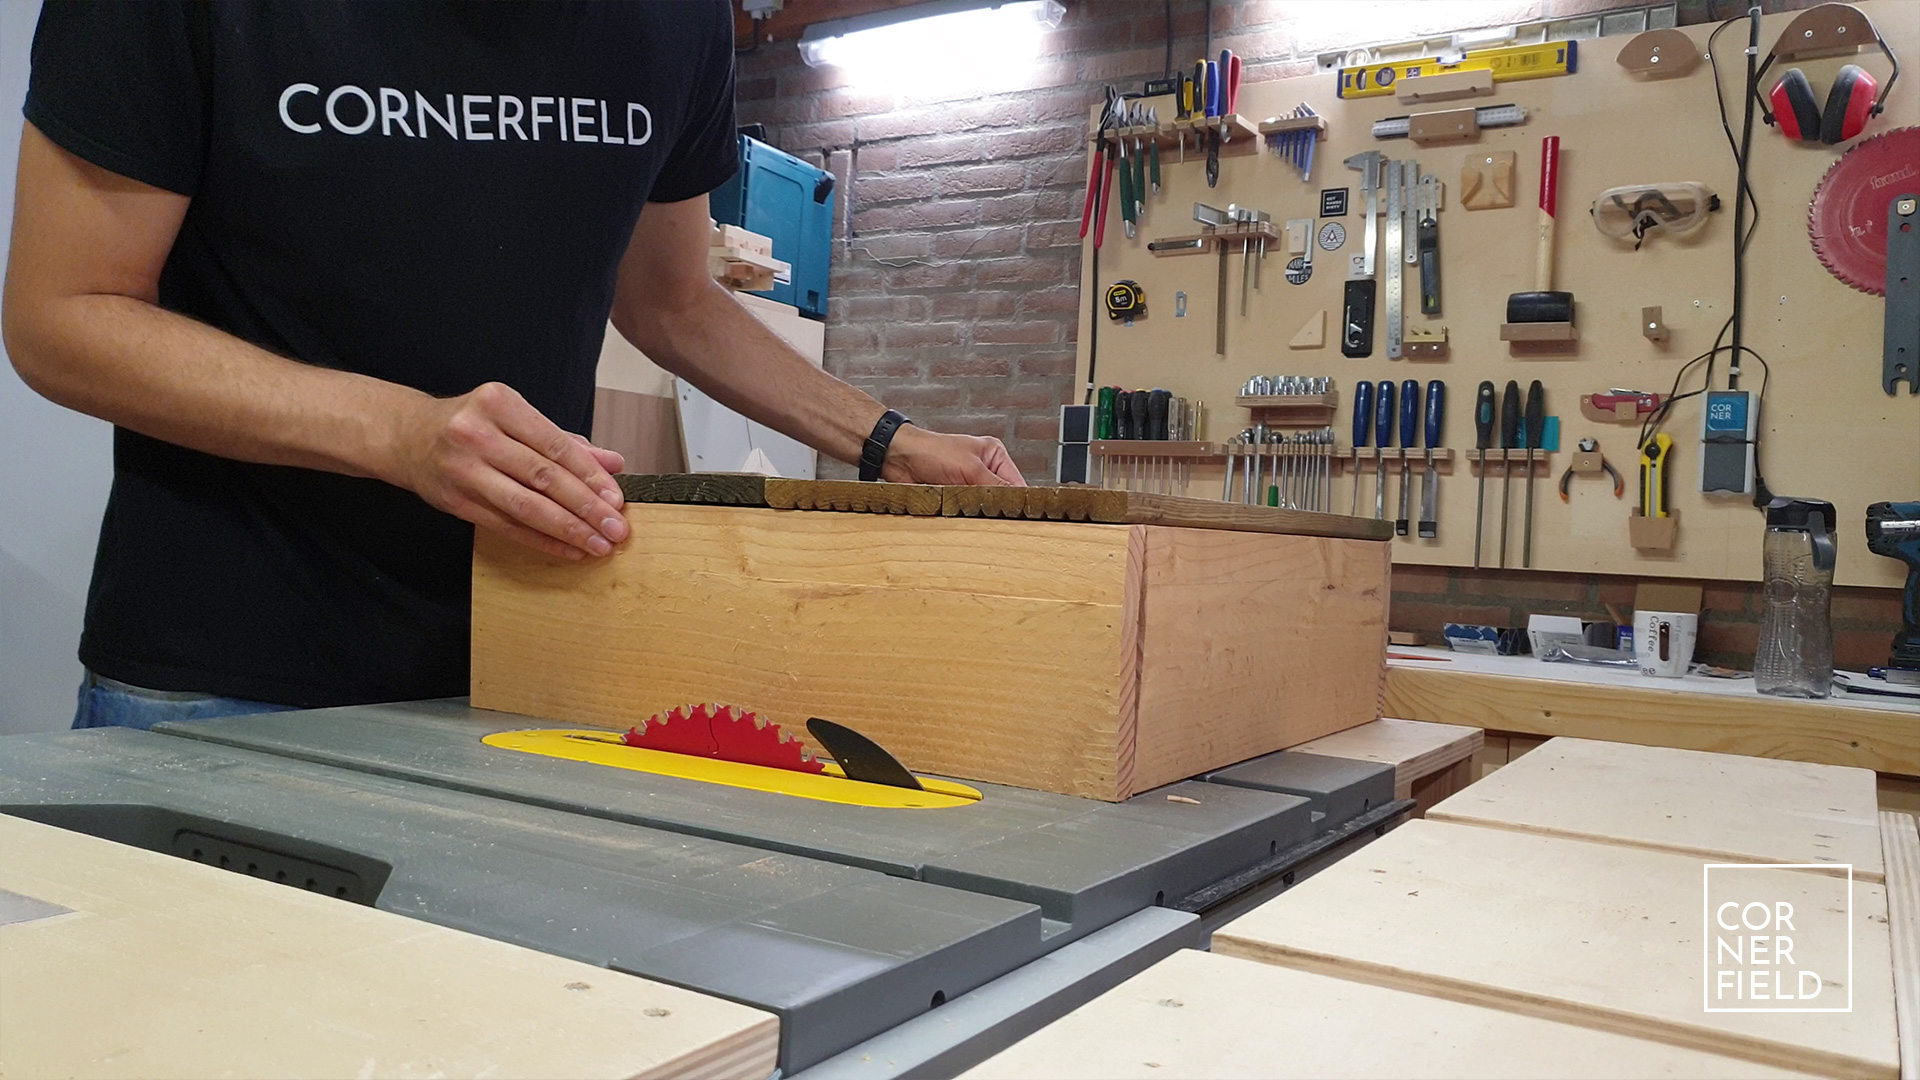
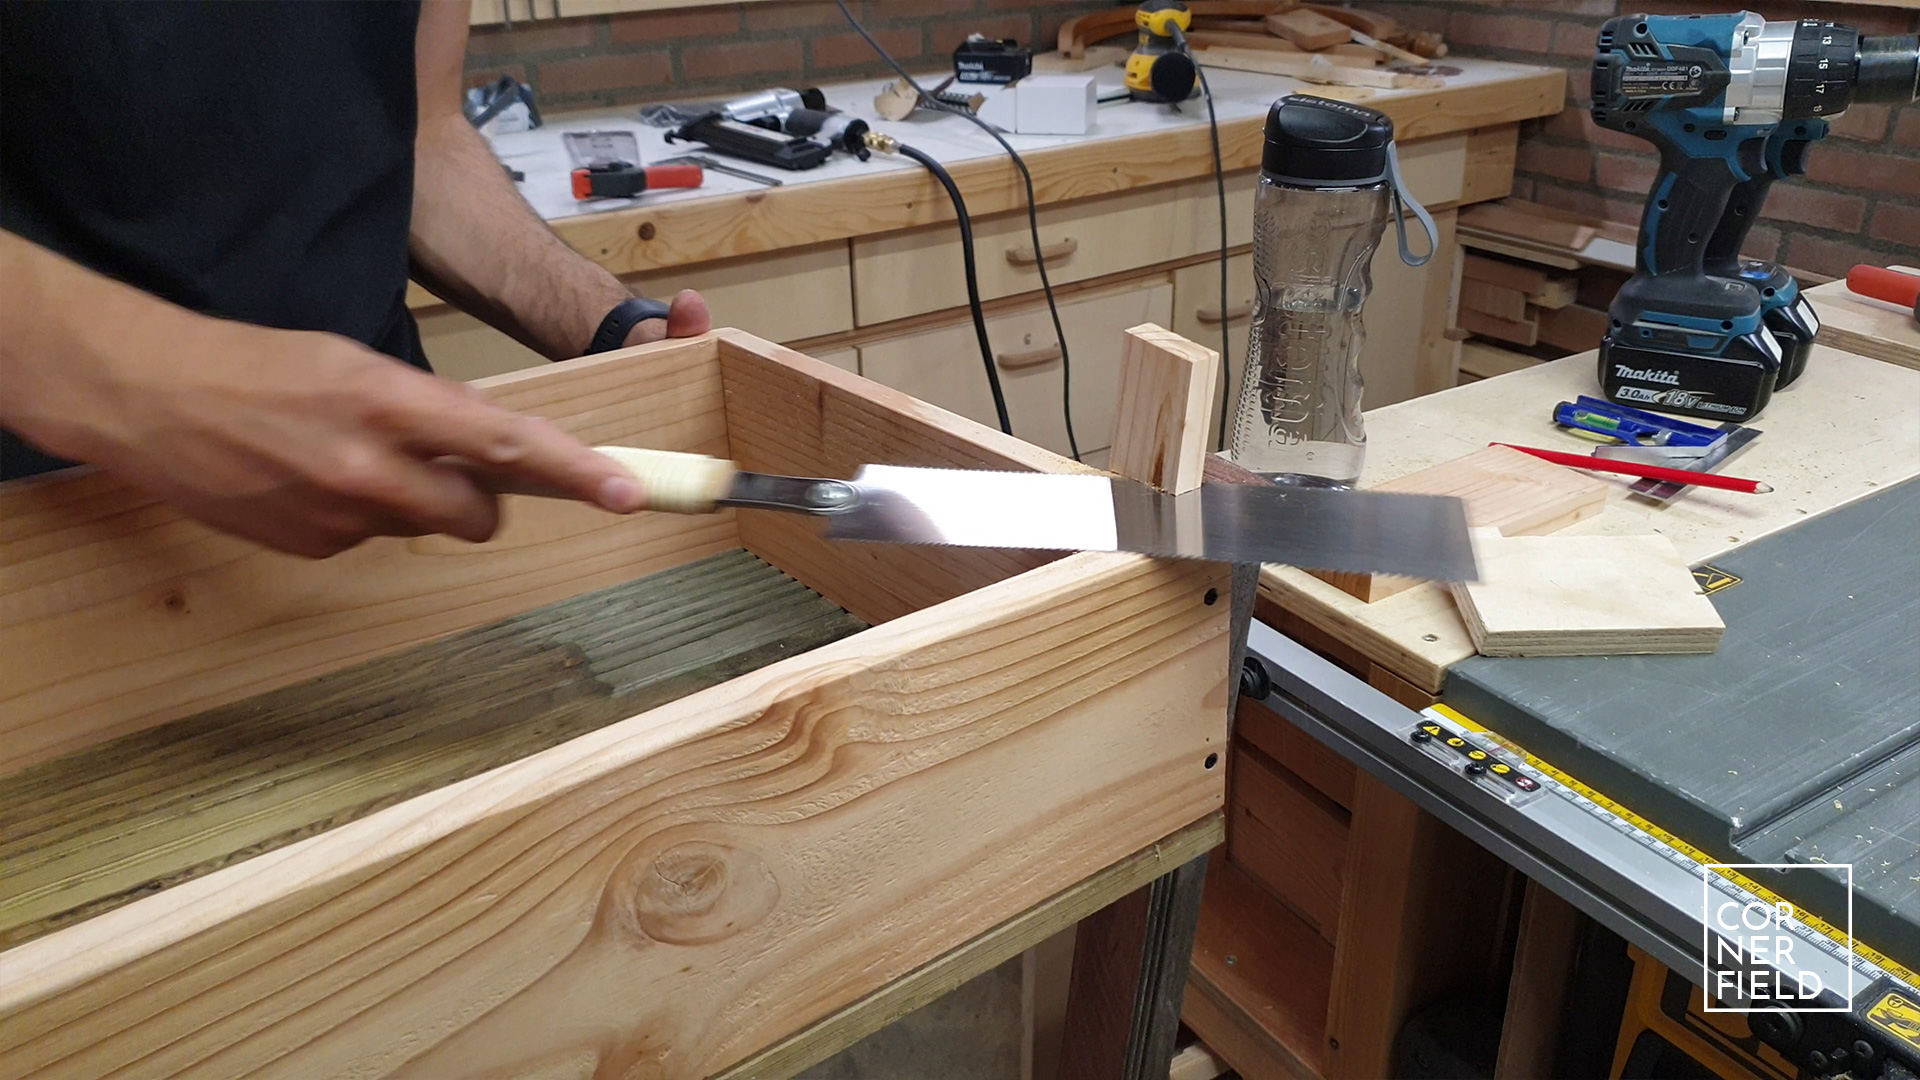
Lower box
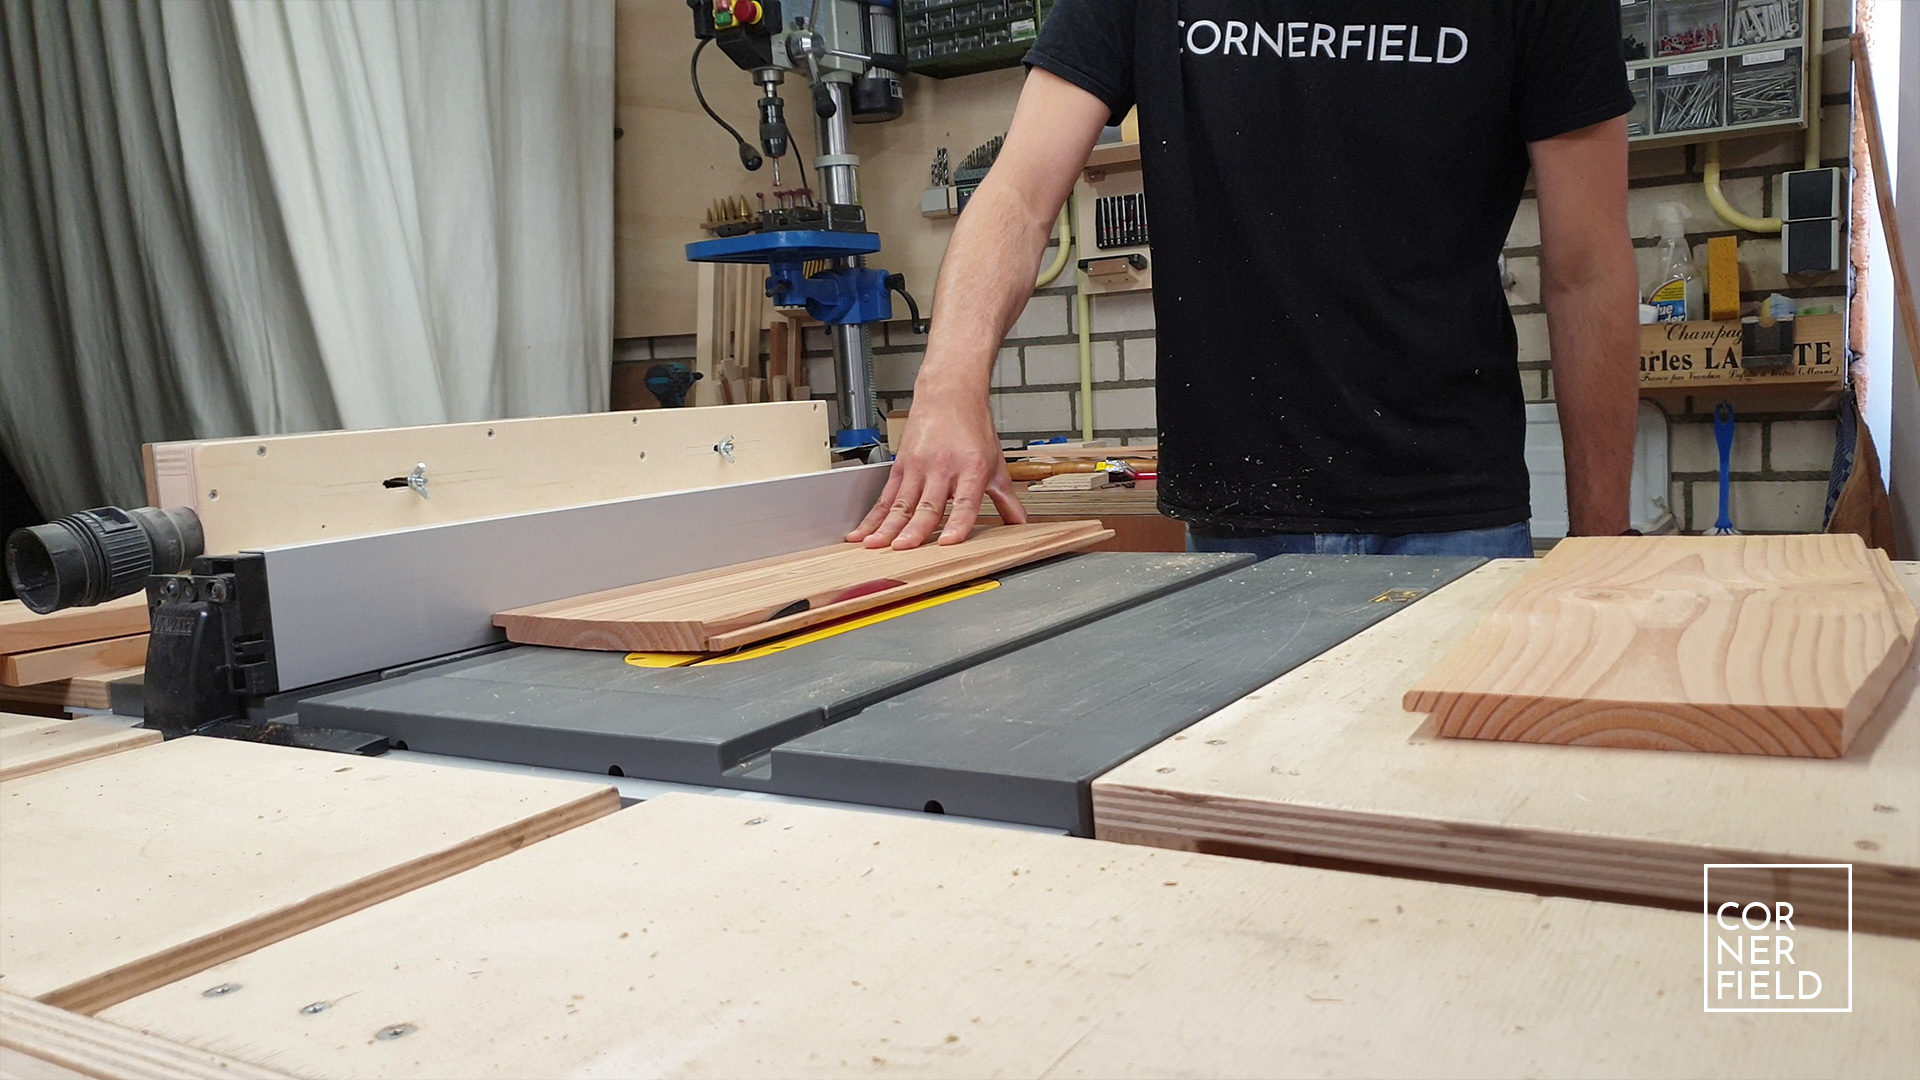
Now that we have a frame for our garden tool storage it’s time to make some boxes. I made the sides of the boxes out of Douglas and the bottoms are made out of decking boards. The joinery I used is simple butt joints. Since my Douglas was pretty bowed I had to use some nails to keep it in place before I could use screws. If your boards are straight, chances are you don’t need that additional step. Once all the pieces are cut I use plenty of screws in both sides and the bottom especially since I’m not using any glue. If you use exterior glue you could use fewer screws here.
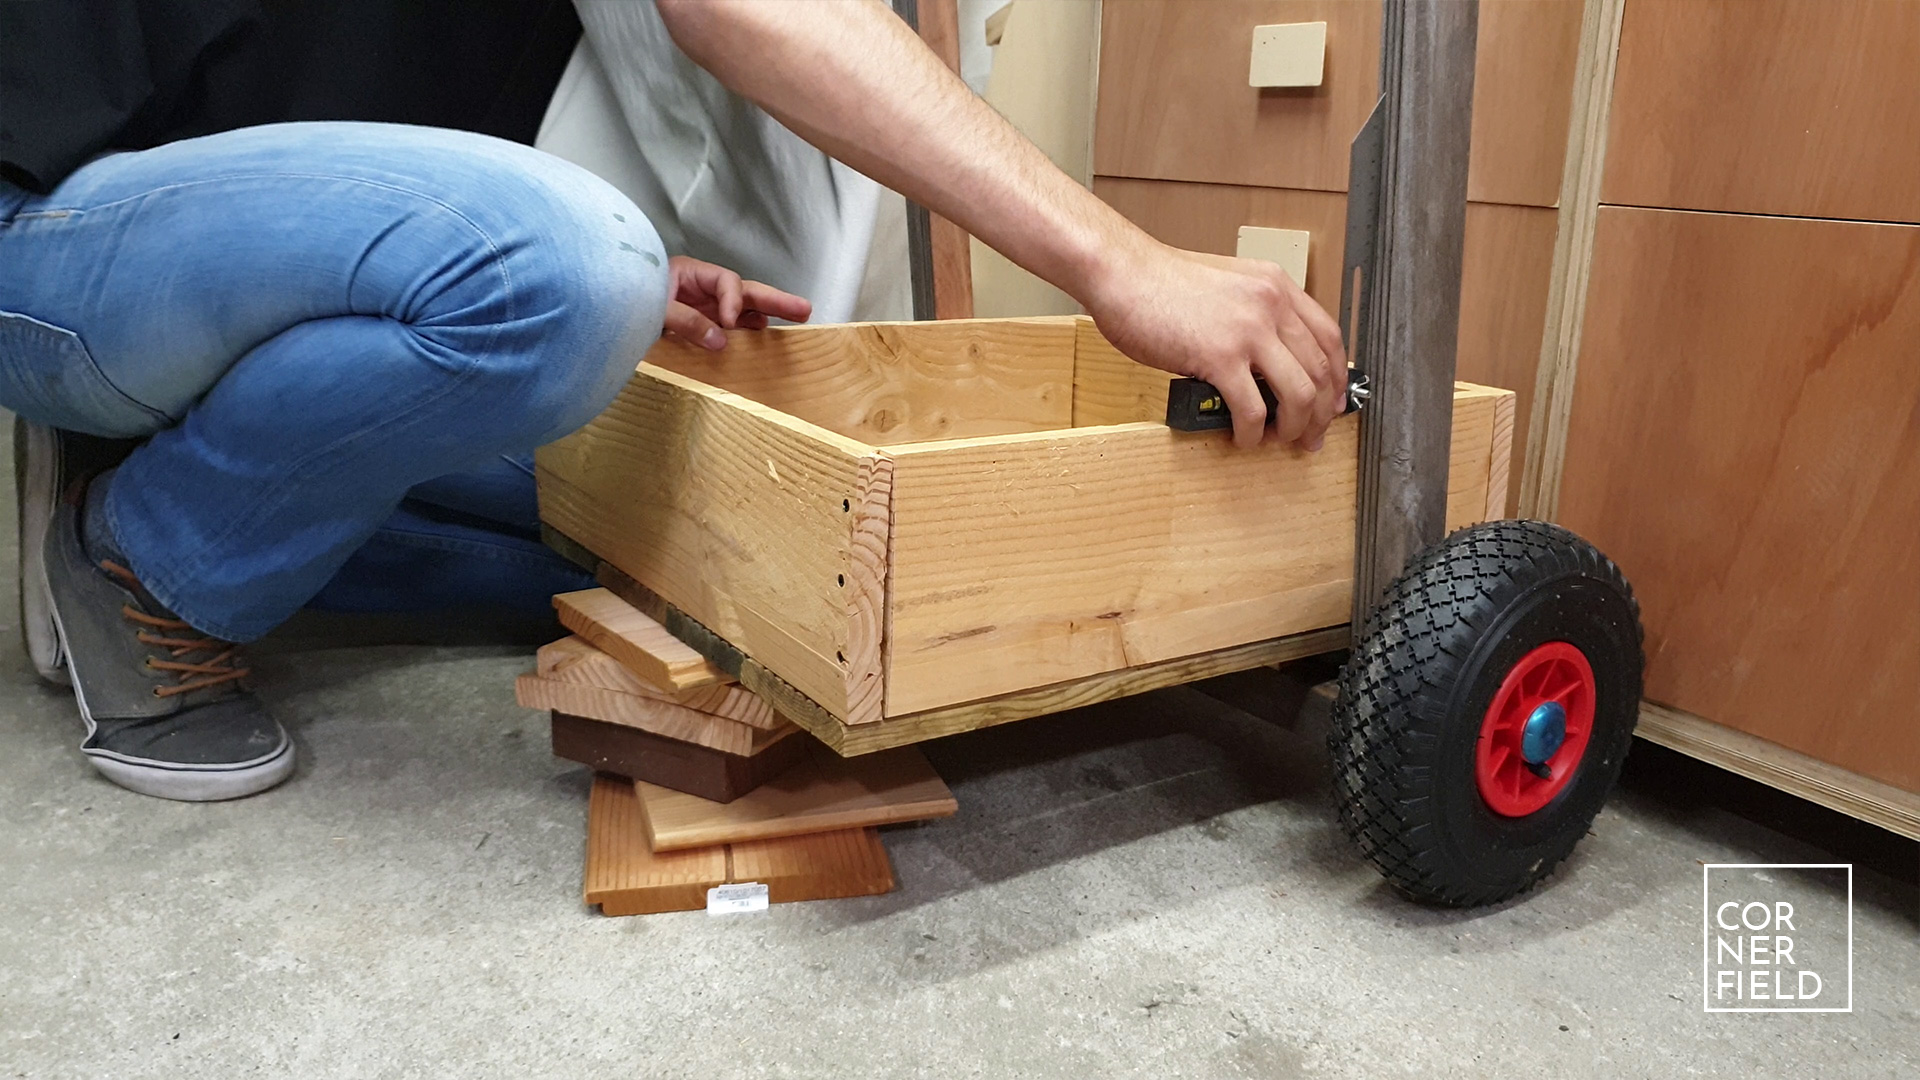
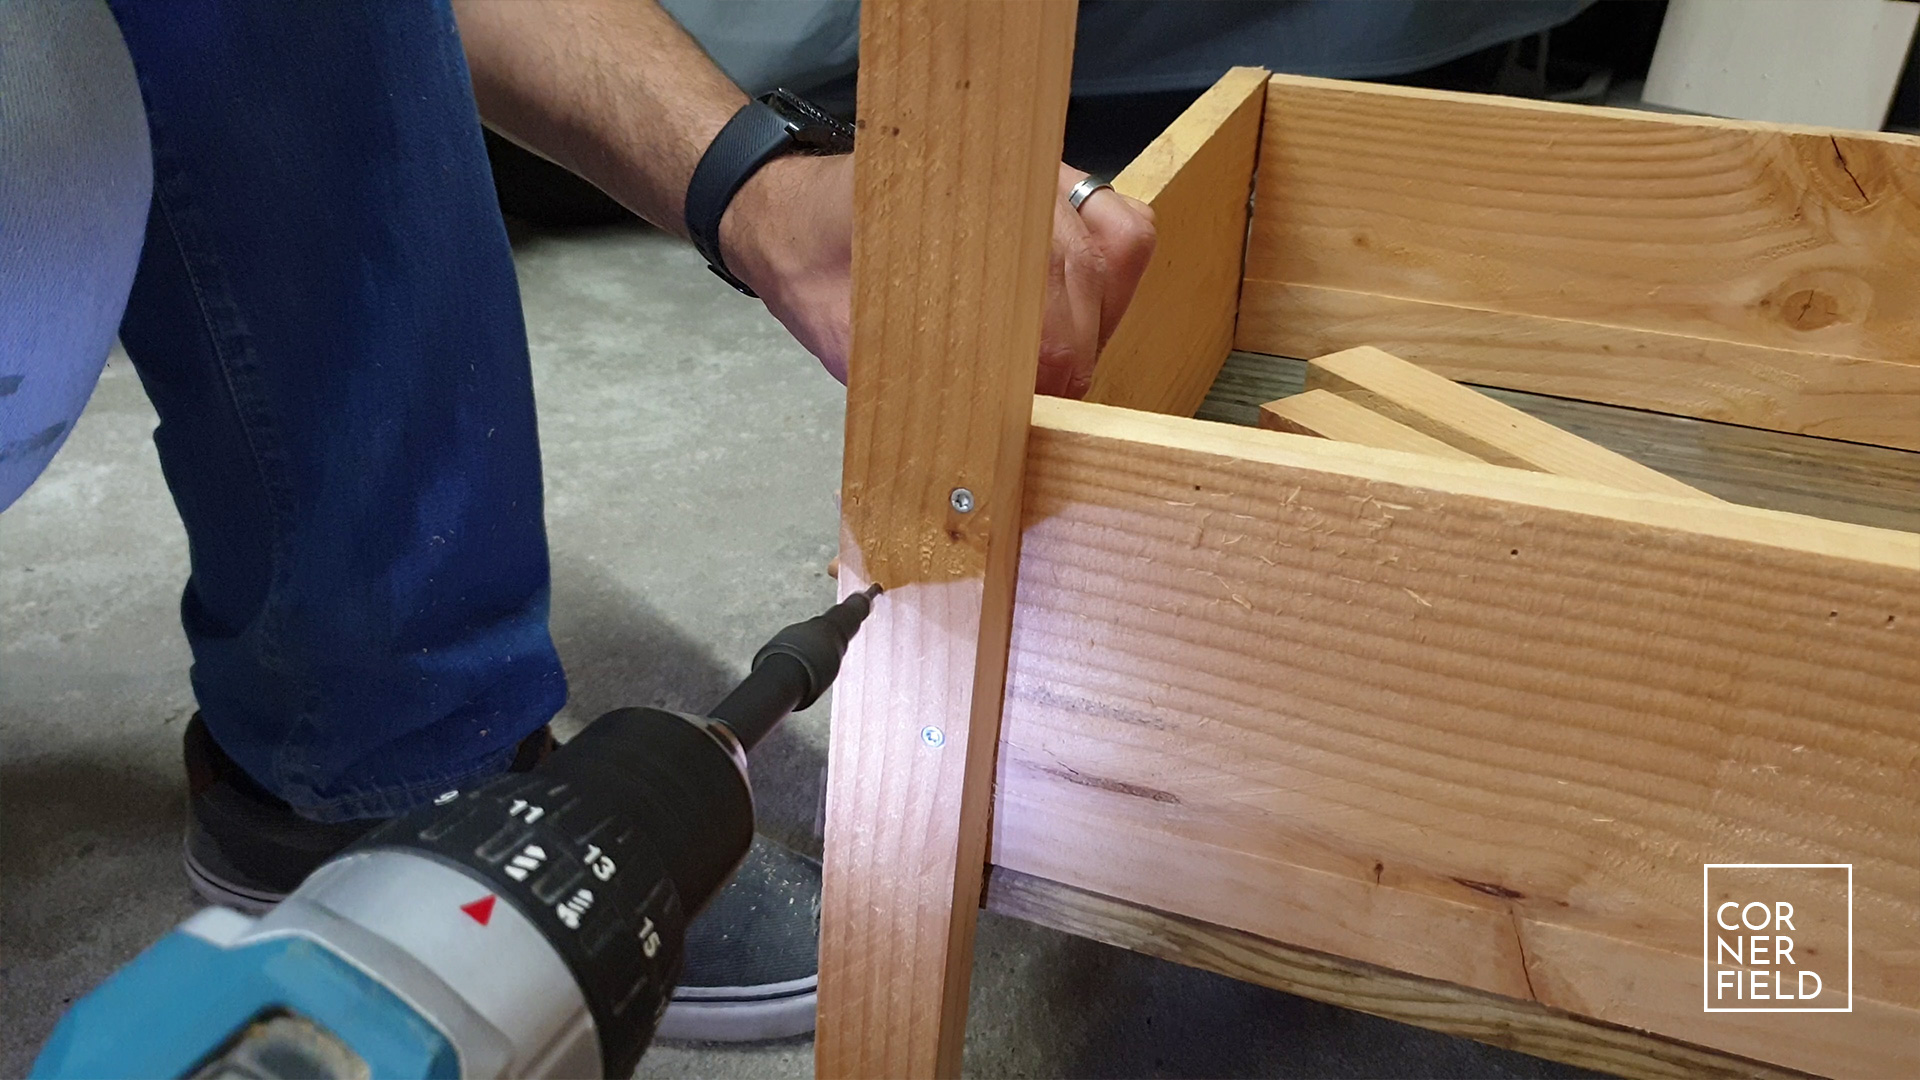
When attaching the lower box of the tool caddy it’s important to set the angle relative to the frame correctly. This is important to keep the tools from falling out when moving the cart and when you’re setting it down. To create a space for the box the stand over the axel I first added some blocks. Then I determined my angle with some scraps underneath the box and fastened everything with screws. When I did this I used a bevel gauge to be sure my sides are angled the same relative to the box. When it was fastened I added two scraps to the corners that will act as the feet. I made sure to have the caddy angled towards the legs slightly before attaching them. This way it won’t fall over when standing still.
Upper box
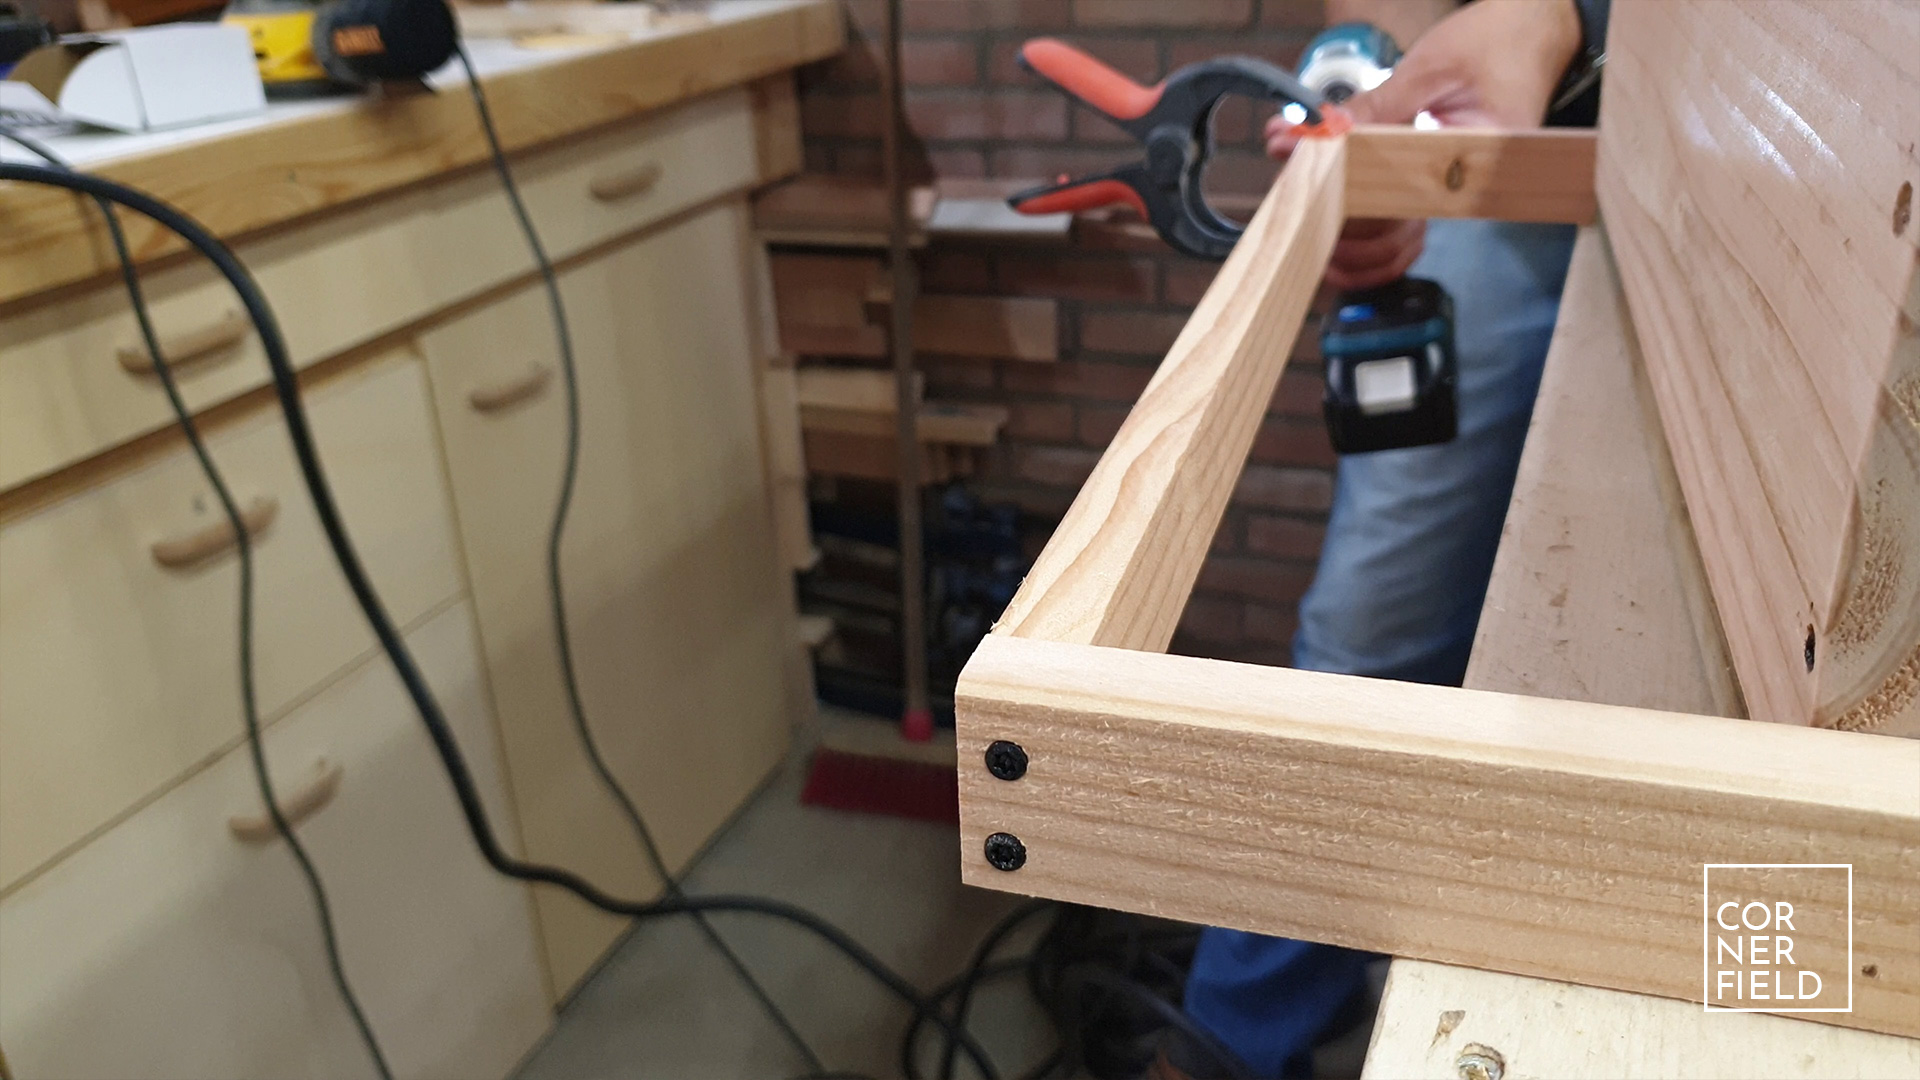
The materials and construction of this box are identical to the lower, it’s only less tall for easier access. Additionally, I added two strips on the side that will form the handle. The front of the handle is also a strip of the same width with the edges rounded over to provide a softer grip.
To allow for the longer tools to stand and not fall over, the upper box of the garden caddy needs to be inset relative to the front of the lower box. To assemble it to the frame I first marked a line on the sides using my bevel gauge. Next, I clamped a few scraps to that line. The box could then be clamped to the scraps, positioned correctly, and fastened using screws. In my specific situation, the distance between the sides was larger at the top than at the bottom. This was caused by tension in the wood itself that was released when I cut it in half. To fix this I added some scraps to fill the gap.


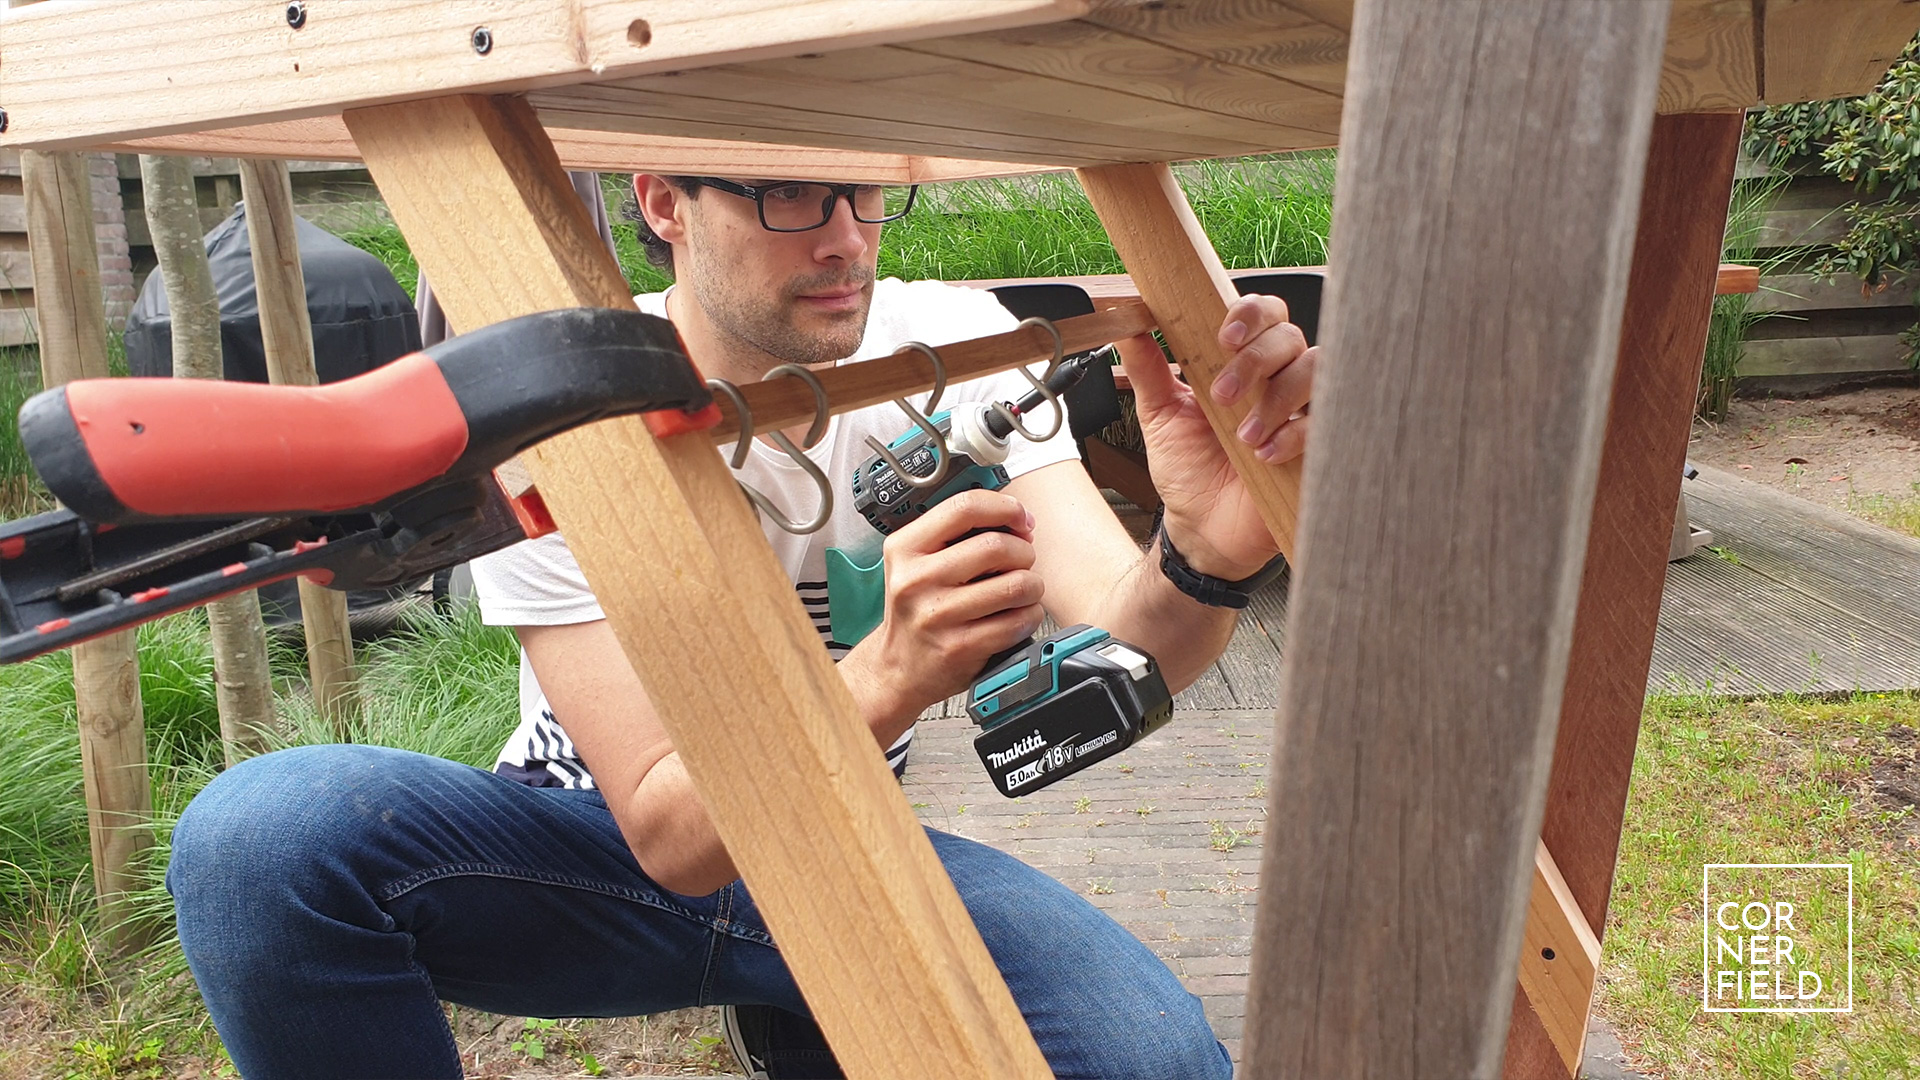
For additional support, I added some struts underneath the box. This support takes away some of the strain that will be put on the screws that hold the box. Depending on how large your box is and what you plan to put in it, this can be optional.
Tool dividers
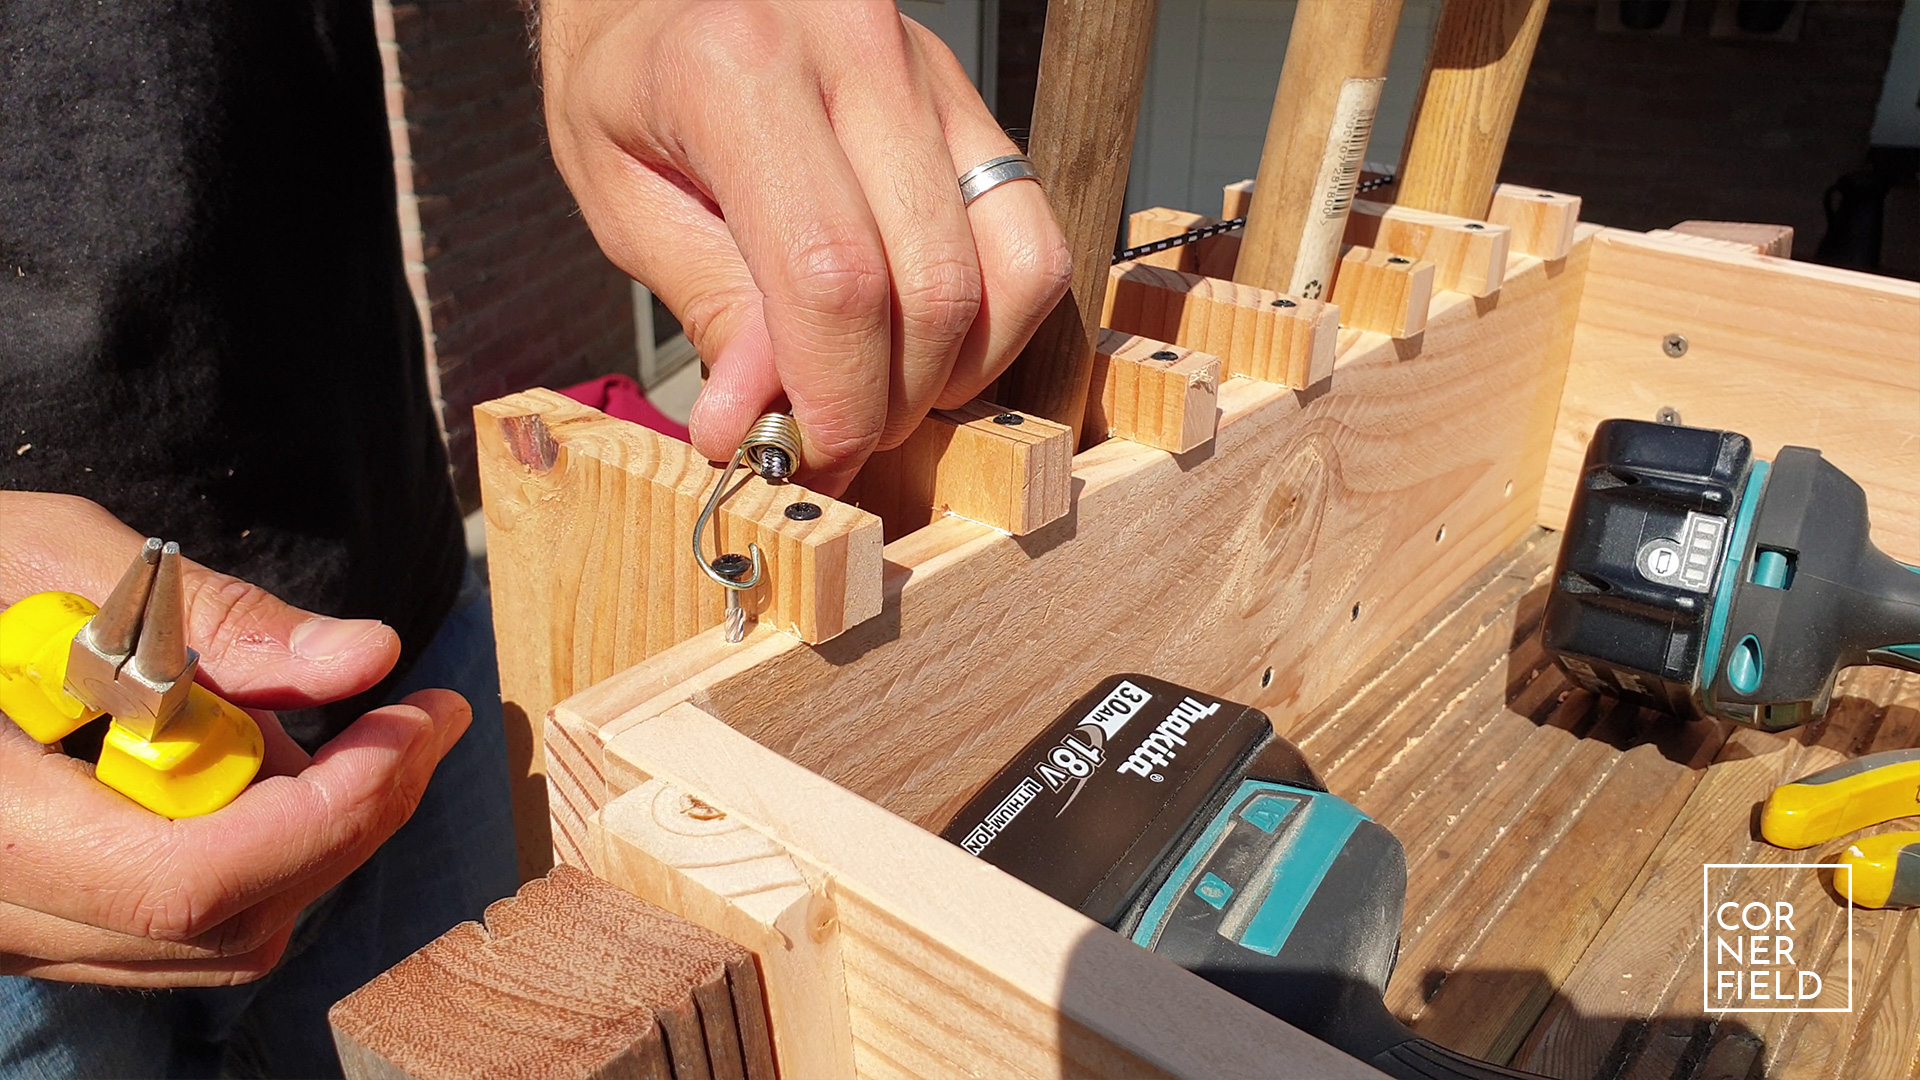
To keep the tall tools in the garden storage separated from each other I’m adding in some dividers. The dividers are scraps of Douglas with a notch cut into them. The notch is there to provide an area to a screw to go in vertically. From the back screws will go in vertically. I used some double-sided tape to temporarily attach the dividers so I could figure out the spacing I wanted. Once I had that I fastened them permanently. As an extra safety measure, I wanted to have a way to hold the tall tools in place when the caddy is being moved. With 2 screws and a piece of elastic that has hooks on the ends I found something that worked perfectly!
Tool hooks
To use the space underneath the handle a little more efficiently I decided to add some tool hooks. These are simple hooks I had left-over that slide on a scrap of Douglas.
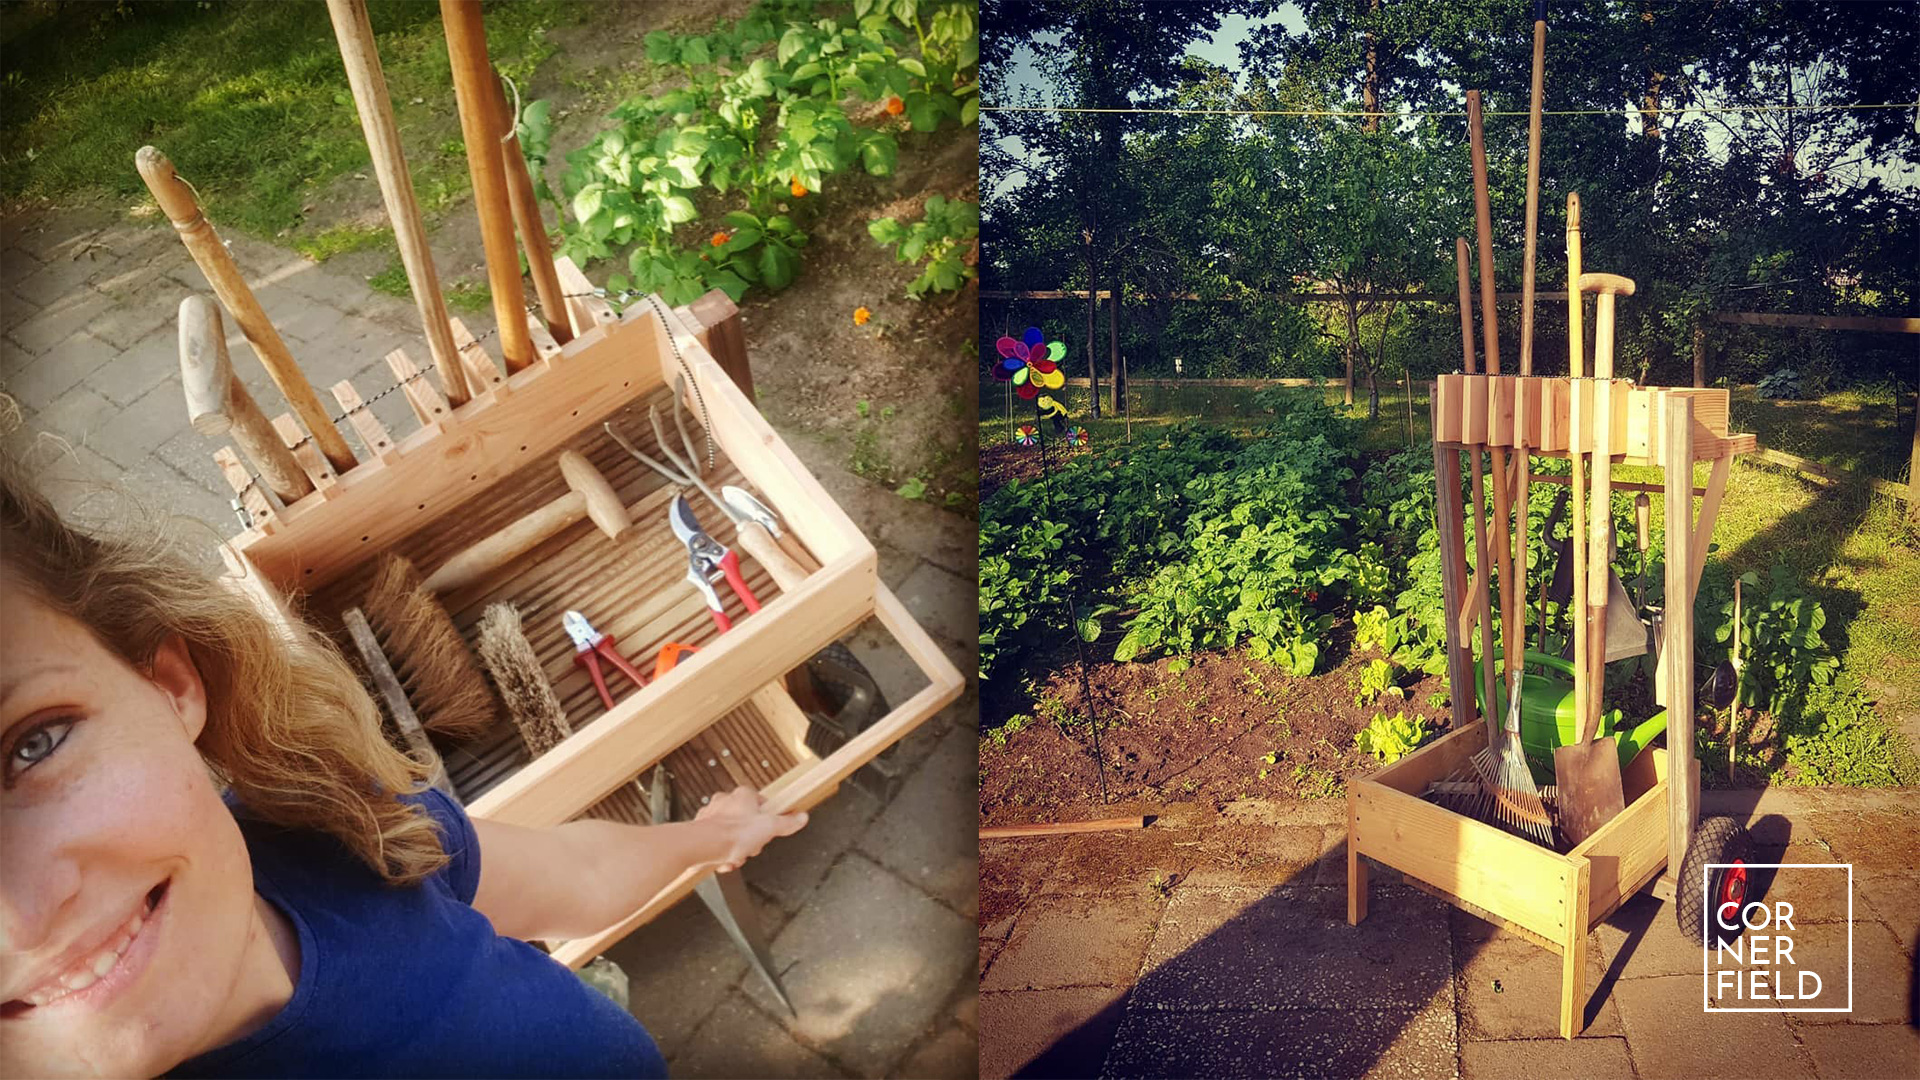
Result
This mobile garden tool caddy turned out as good as I hoped. It’s a very versatile tool that offers lots of practical uses. The different types of wood look pretty cool together and I’ve had a lot fun building it. The cherry on top is that I’ve had great positive feedback from my client. Happy days!
Download & Links
If you want to make one for yourself I have my SketchUp model available as a download in the link below.
SketchUp 3D-model
Instagram 1 | 2 | 3 | 4 | 5 | 6
I hope this post has inspired you to make something!
Don’t forget to follow your excitement  .
.
– Rico


Add comment