


Looking for a small project I decided to build this wooden puzzle.
Design
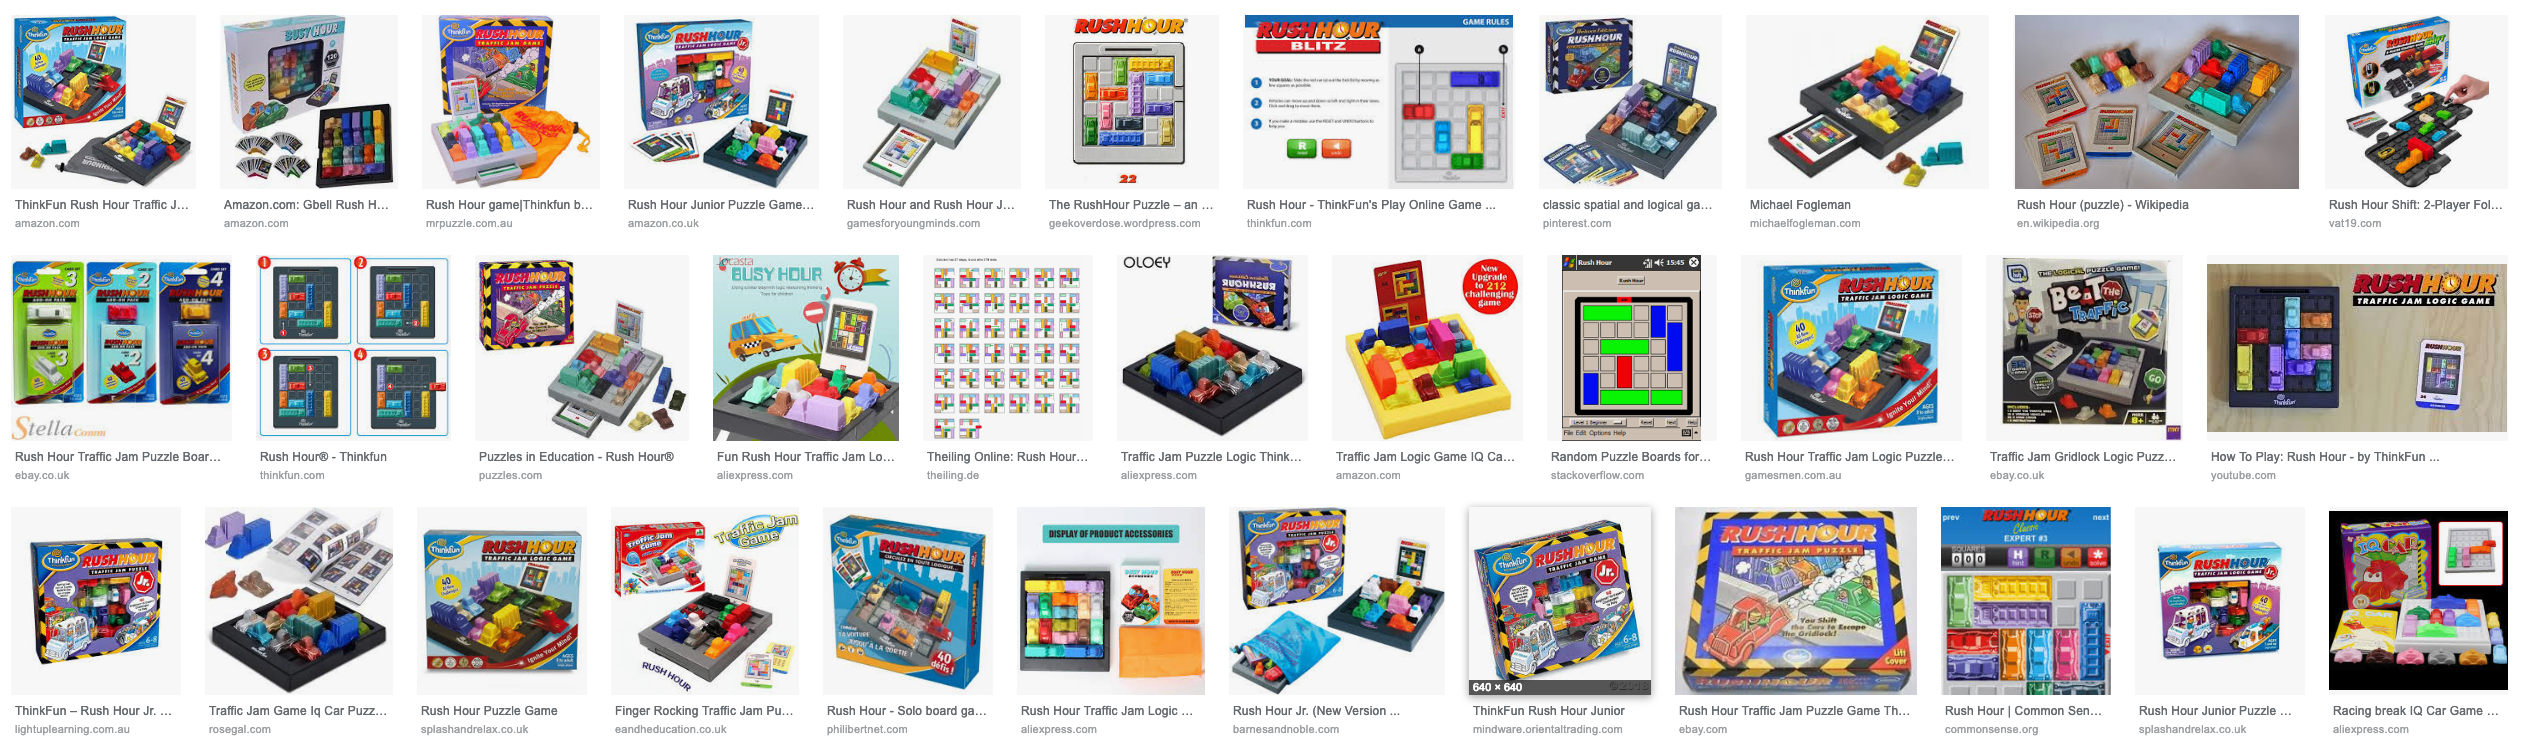
I wanted the design to be minimalistic and not as flashy as some of the commercial variants. Below an example of what most of them look like:
Working on a 3D model (that you can download at the end of this article) I came up with this:

The contrast for the cars is going to come from different species of wood. The red car which is the main piece on the board is made from the darkest hardwood I own. You can also distinguish it further with some decoration or an inlay of some kind. I’m happy with this basic wooden version of the game, so I got started on the build.
Build
The game consists of two main components that we are going to build. The board or base of the puzzle and the pieces or the cars. First I’m going to build the base.
Puzzle base
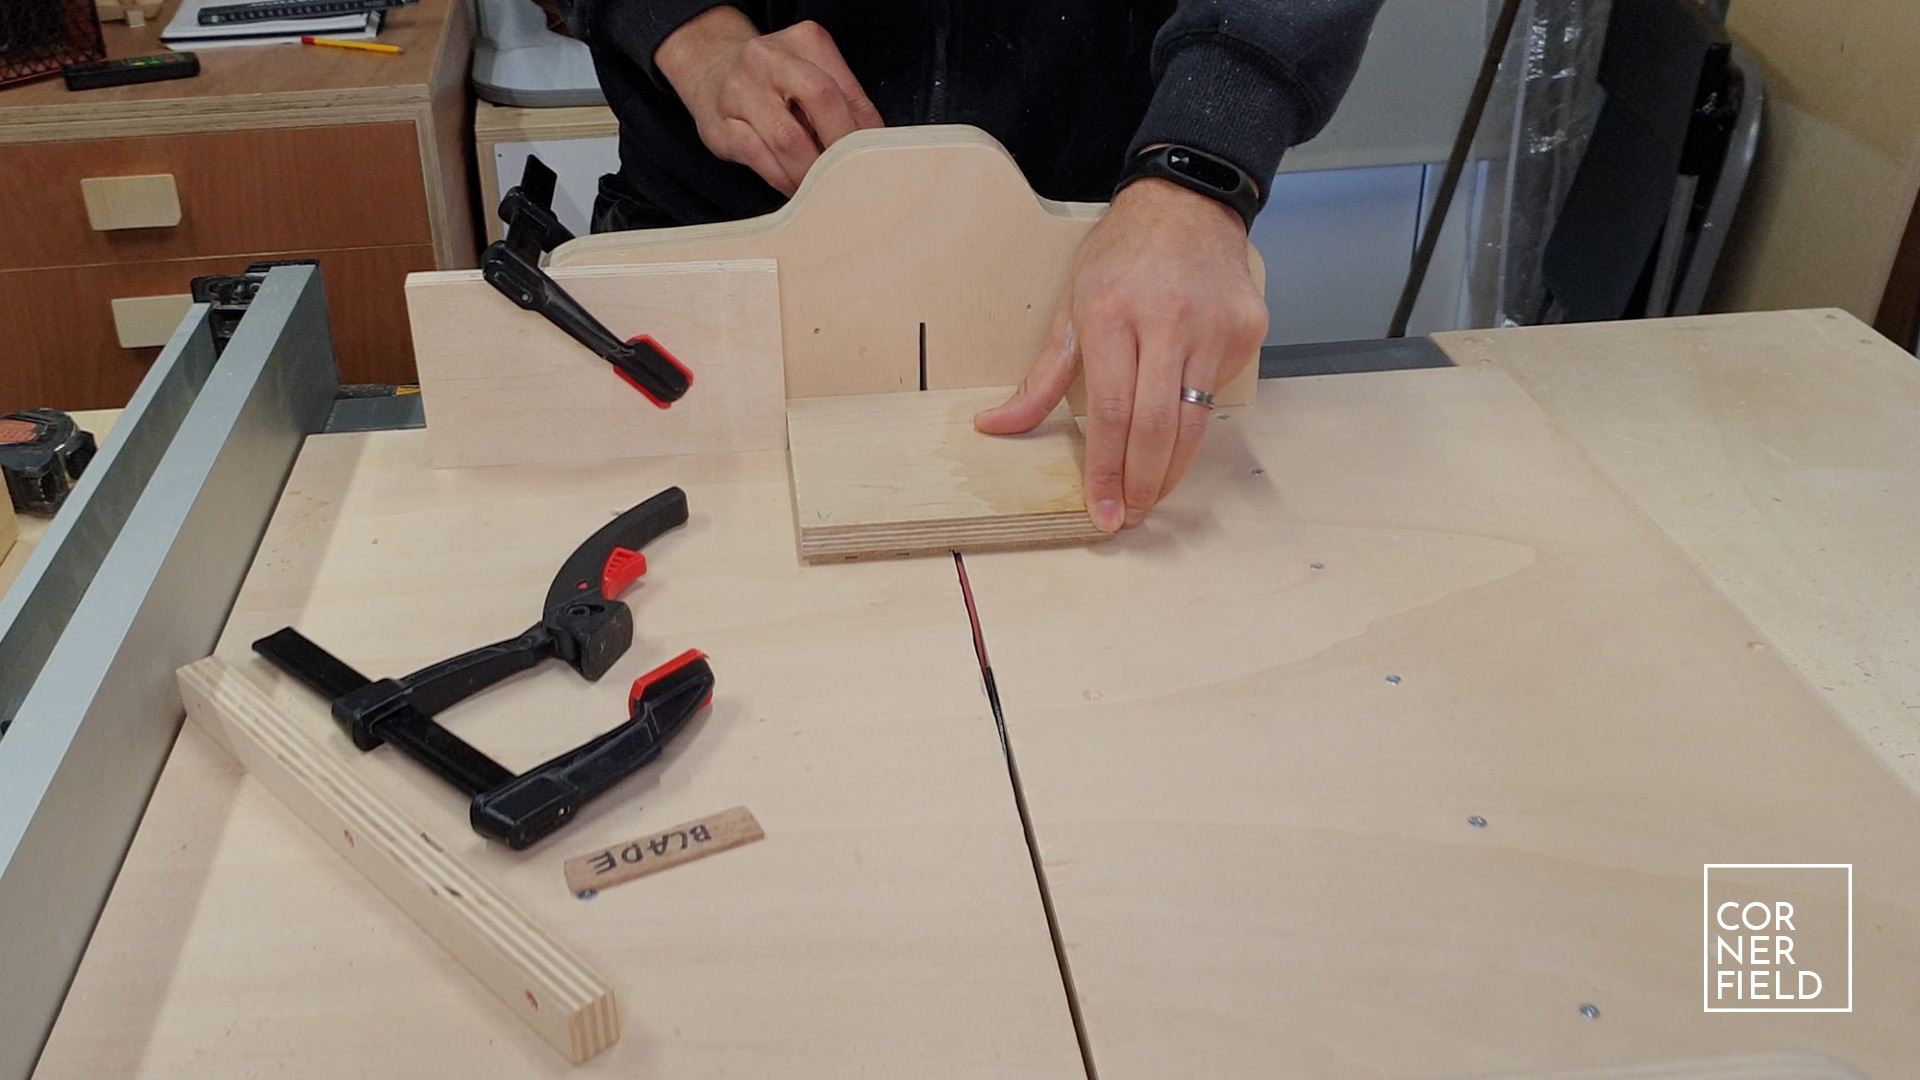
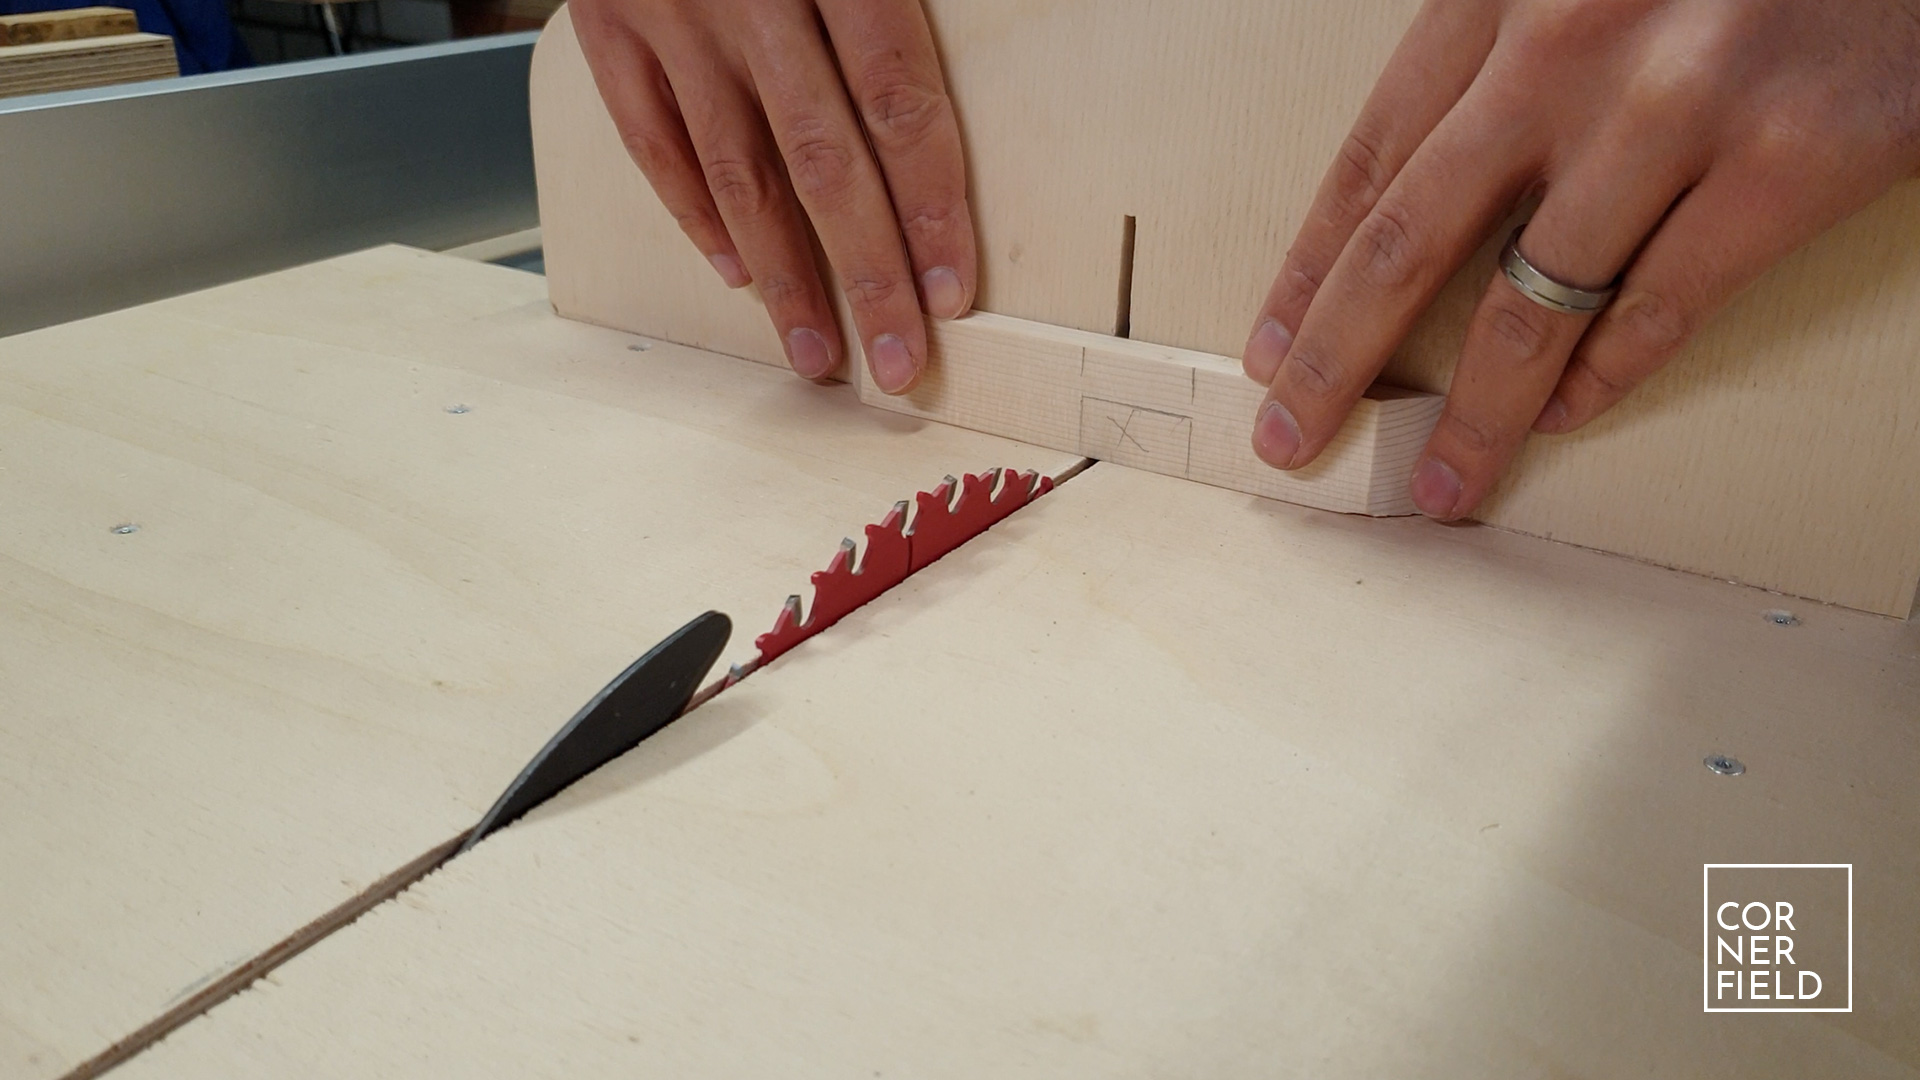
A crucial component for this puzzle is that the puzzle pieces slide in tracks so that they can only move in one direction. My first thought was to make individual blocks and glue them together to form the base. That idea was dropped because the chance of misalignment is too great. I ended up picking a piece of wood with enough thickness to cut the tracks into it. The piece I chose was some flooring made from French Oak glued on Burch plywood that was 15 by 15 cm. The technique I’m using relies on having a cross-cut sled and a table saw. If you don’t have a sled check out my video on that to build your own here.
It starts by making two spacers. One for your gap between the rows and one for the thickness of the part that should remain on the board. When you have those, first cut spacing from the edge. Then clamp your workpiece to your stop on the sled. Loosen your stop, add the spacer and clamp it down again. Make your cut and follow the same steps until you get to the end. This ended up working the best for me. With one direction finished, you can rotate the board 90 degrees and repeat the cuts to end up with a 6 by 6 grid.
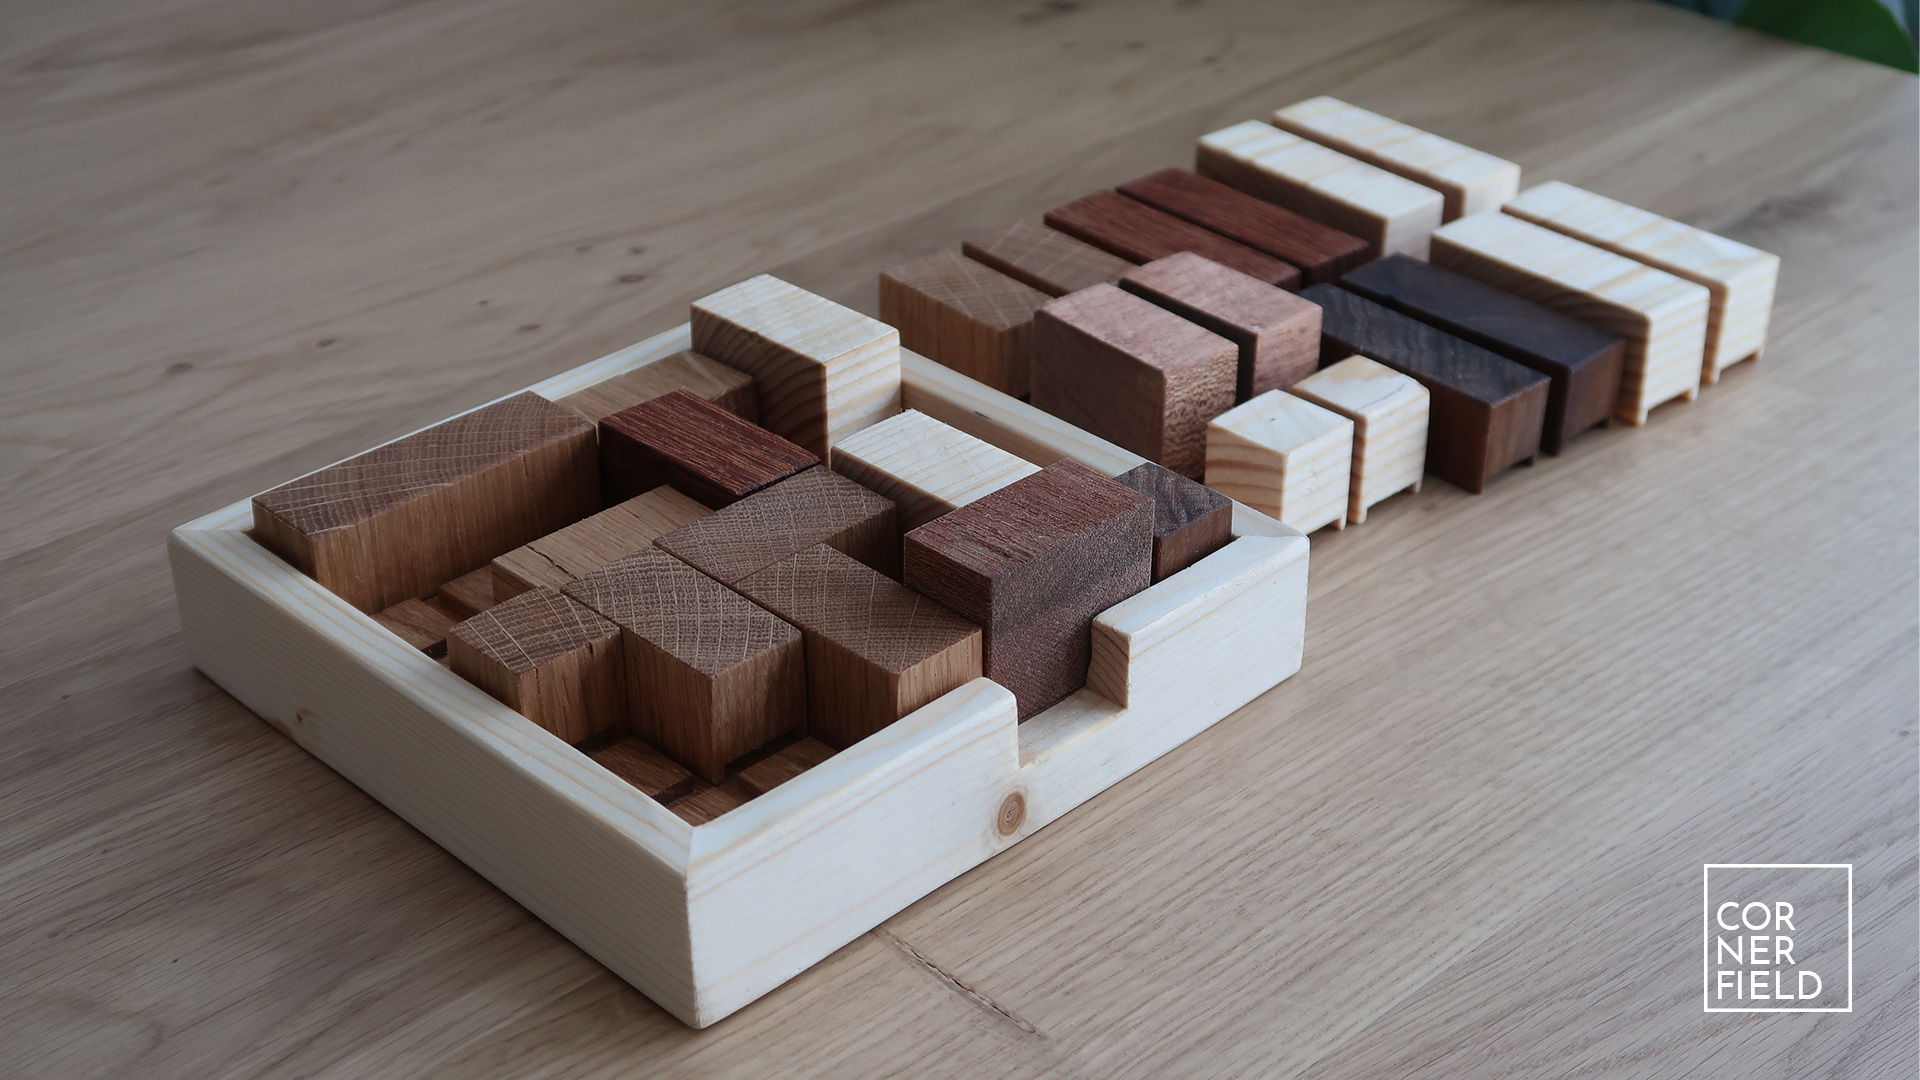
Pieces
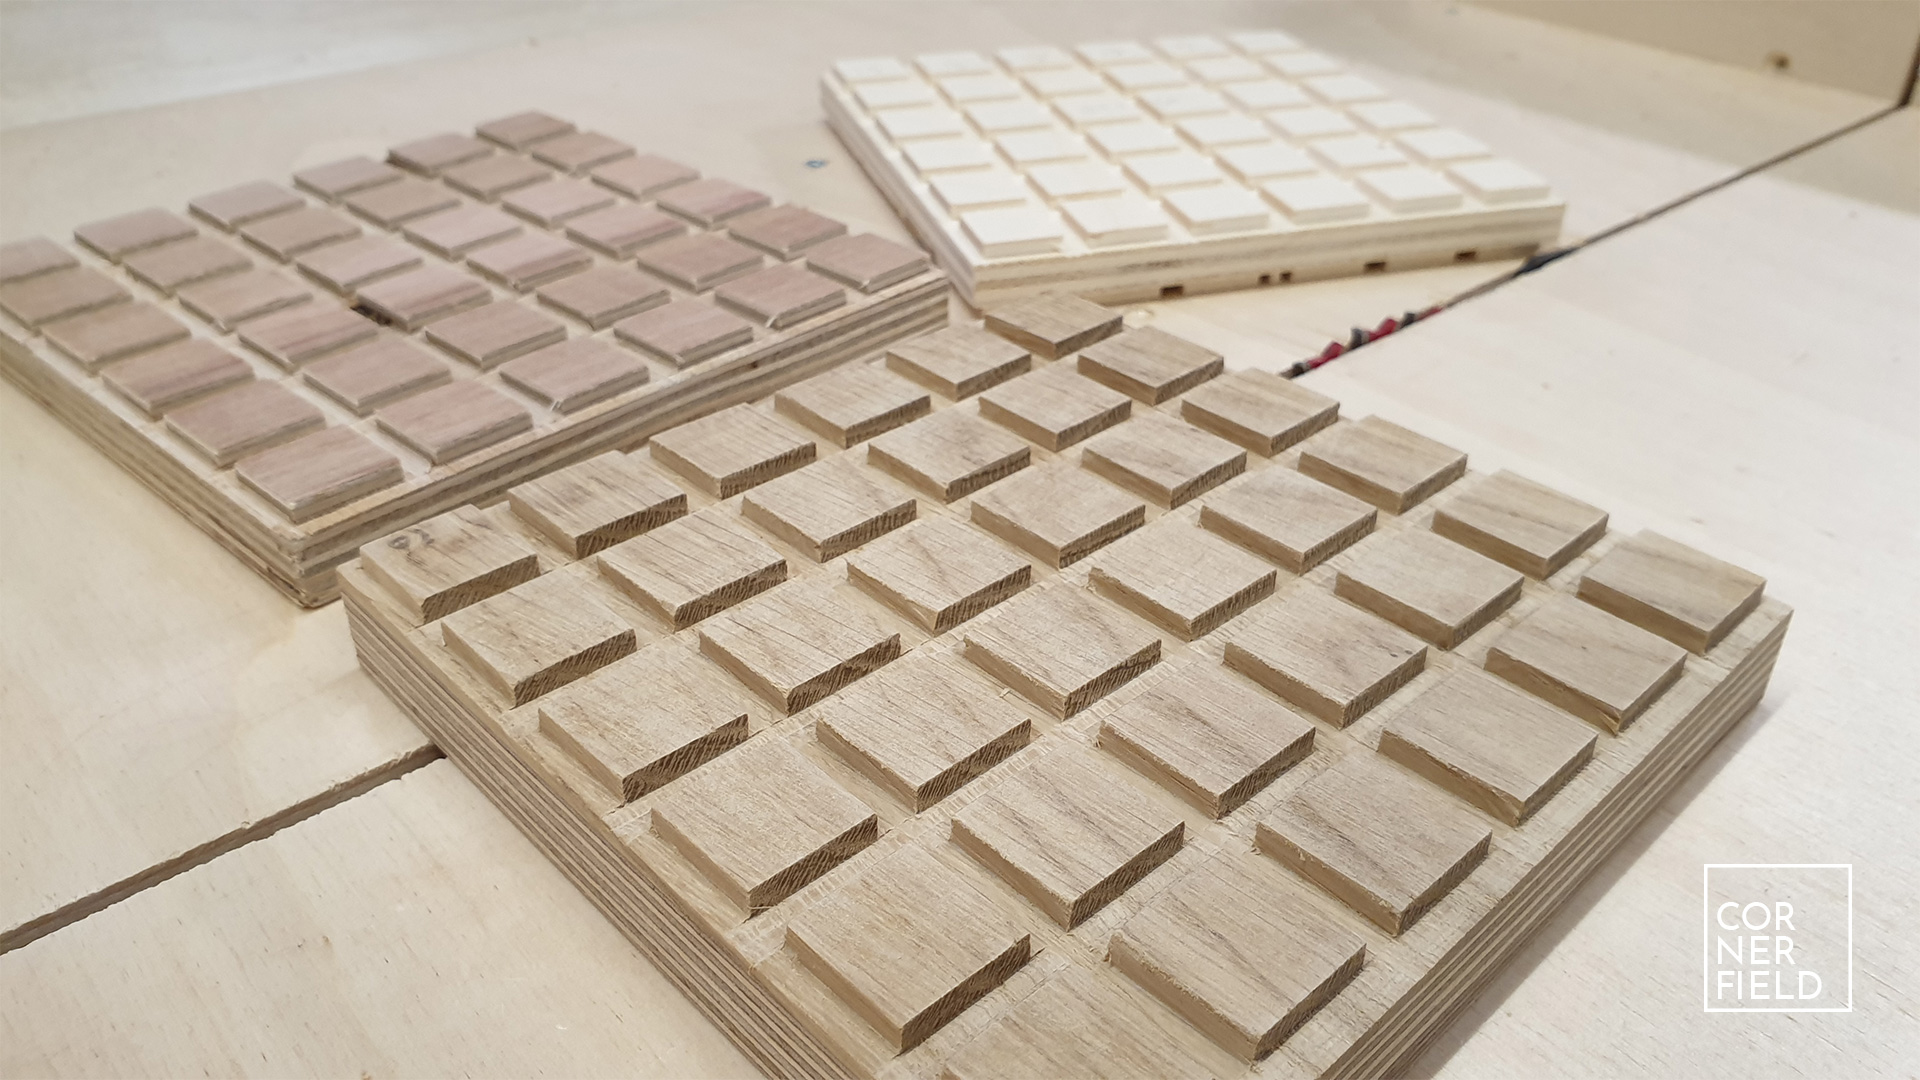
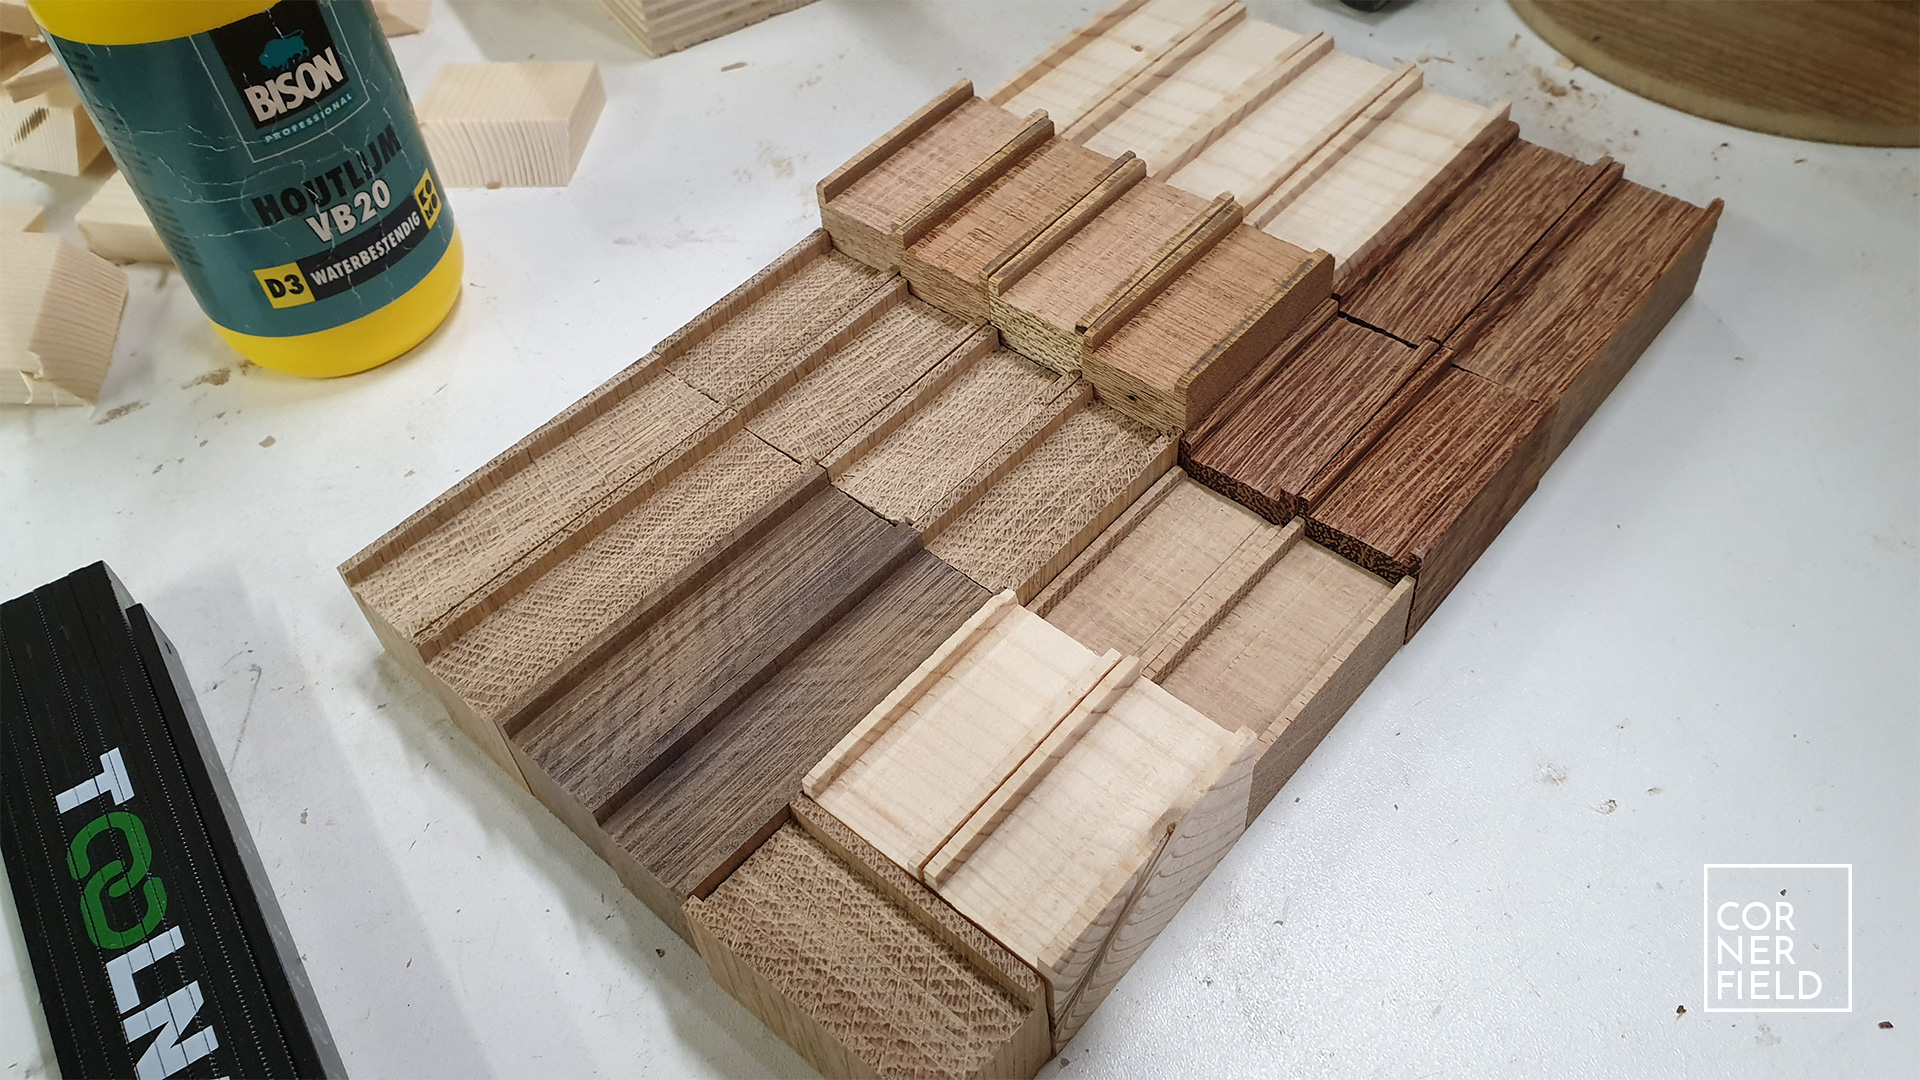
The pieces that go on the board are 2 and 3 squares in size. For my puzzle that meant they are about 50mm and 75mm long by 25mm wide. Don’t forget to subtract some wiggle room for the pieces like I did. This will mean your pieces can’t slide freely. Making the pieces is very straight forward. I first cut pieces from different types of wood (Spruce, Red Meranti, Oak, Azobe, and Mansonia) to rough length. Then using my cross-cut sled again I cut the slots for the bottom. I did this using a stop to first cut the sides. Later I removed the stop and cut away the rest. You could also use a router table if you have one.

Make sure to sand everything smooth after cutting it to ensure smooth travel of the pieces on the board.
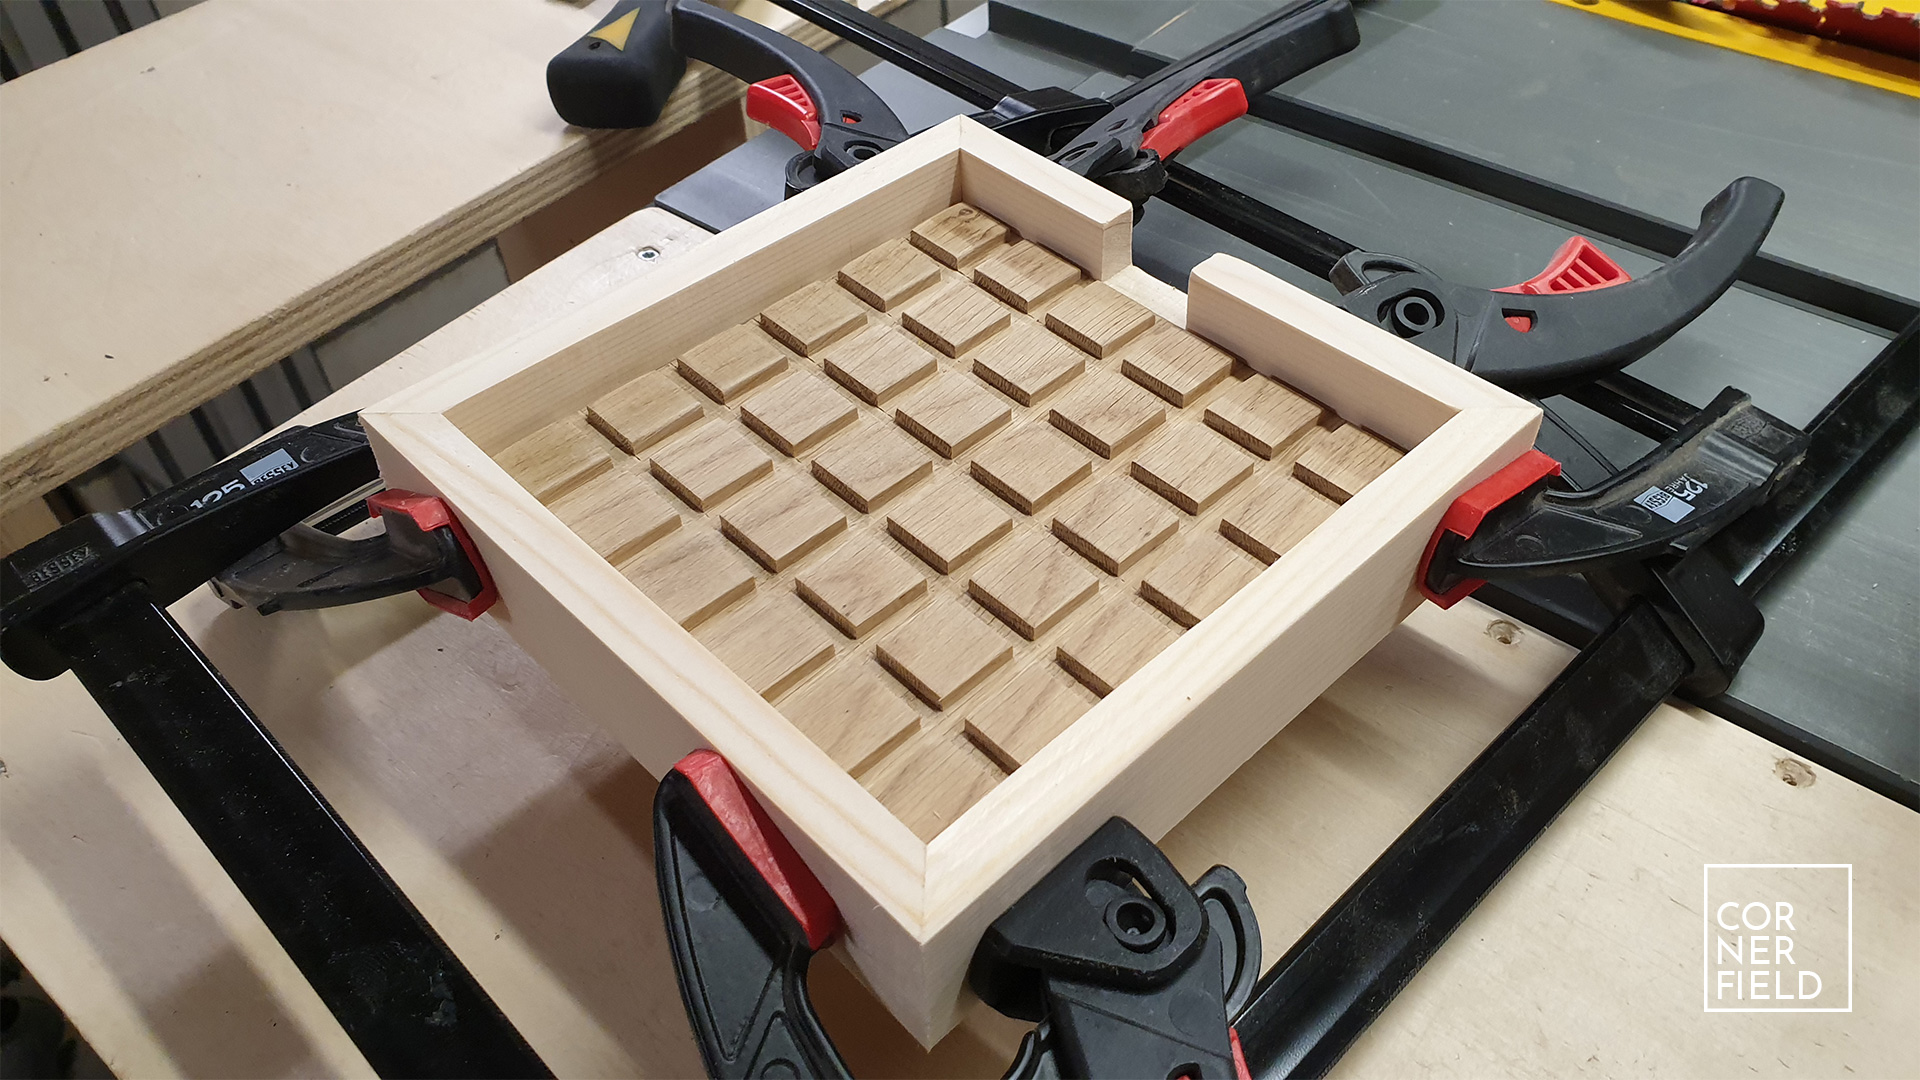
Walls
The last component for the puzzle are the walls that close the pieces in on the board. Make sure you cut the opening in one wall before gluing it together. It should give access to the third row from the top. My walls are made using mitered corners but since they are mostly decorative you can do anything you like here.
With the walls wrapping the board the last thing to do is to sand everything one last time and apply finish. I used some mineral oil and I recommend using an oil. This doesn’t add any thickness to your pieces plus it makes everything nice and slippery.
Result
The result of my build is a little disappointing. This is because of a few things I didn’t do very well. Firstly, I should have made the squares on the base smaller to leave more space for the pieces to slide on it. Secondly, I should have made the sides on the undersides of the cars wider. They are so narrow now that they are very fragile and break easily. Not good. And lastly, the width of the cars should be less than the available width in the ‘lane’ on the board. I made it with so little margin that my cars get stuck against each other when they are side by side.
The good thing is that all of these issues can easily be solved in a second attempt. These improvements are made in the 3D model but just as a heads-up, these are things to keep in mind. All in all, it was a very fun build and esthetically I’m pleased with the result.
Links & Download
If you want to build something similar I’ve linked my 3D model below as a download.
SketchUp 3D-model
Instagram 1 | 2 | 3 | 4
Puzzle generator
Hope this post has inspired you to make something!
And don’t forget to follow your excitement 
Add comment